Renderosity Forums / Blender
Welcome to the Blender Forum
Forum Moderators: Lobo3433 Forum Coordinators: bwsupport
Blender F.A.Q (Last Updated: 2026 Jun 30 5:17 pm)
Welcome to the Blender Forum!
Your place to learn about Blender, ask questions,
exchange ideas, and interact with the other Blender users!
Gallery | Freestuff | Tutorials
Visit the Renderosity MarketPlace. Your source for digital art content!


Subject: Toni's adventures in Blenderland


Looks great so far
______________________________________
My Store
My Free Models
My Video Tutorials
My CG Animations
Instagram: @luxxeon3d
Facebook: https://www.facebook.com/luxxeon

Looks good would interested in hearing how it progresses
Lobo3433
Blender Maya & 3D Forum Moderator
always good to see toni's latest adventures! like the freckles. wonder if your skin setup would translate to poser.
still lost in the wilderness
Poser 13 Superfly pretty much only these days

is there a P13 workaround for that node? (not to sidetrack the discussion but it wouldn't be a Toni thread without sidetracks)
still lost in the wilderness
Poser 13 Superfly pretty much only these days
Richard60 tried to construct mathematical nodes to emulate the Color Ramp node. You should be able to find them in the Freestuff section. I was too intimidated to try it out back then; I never bothered to dedicate the time.
Depending on how the ColorRamp node is incorporated into the shader, you might either eliminate the node entirely or substitute a math node. The primary function of the ColorRamp node is to modulate the intensity of a given map or alter the color gradient range. In Poser 13, there is partial functionality, depending on how the dark and light pointers are placed. Too close together, and the node would begin showing strange random color shifts. I rely on that node for ambient occlusion Superfly renders, and I'm glad I reported it in time to have it corrected in P14.
ok thanks! i have Richard60's node but have never figured out how to use it, may try now.
still lost in the wilderness
Poser 13 Superfly pretty much only these days
Well, I have a question that kind of goes in the opposite direction: how do I create materials programmatically in Blender? More specifically, where can I find some examples or tutorials that show how it's done? The docs for the Blender Python API look a bit sparse, but maybe I just haven't found the right link yet.
I've written a tiny Python library that creates a partial texturing network from formulas and then renders a preview or exports a Poser material file with a compound node in it. That's easy because those files are human-readable and figuring out the format is easier than sifting through cryptic API docs. Now I'd like to add Blender as an output option, which would enable me to get my existing textile materials working without having to recreate them by hand, because those are much more complicated than that simple skin material I showed.
The direct Blender equivalent would be to write out a .blend file, but I suspect calling a script from within Blender to generate the nodes and then saving the finished material to a .blend file makes more sense.
-- I'm not mad at you, just Westphalian.
I just noticed a small problem with the skin shader; three of the ColorRamp nodes are set to B-Spline, a setting that doesn't exist in the Poser version. Although Poser's Cycles emulates Blender, not all nodes share the same settings and features. Unless there is a different approach, translating shaders between the apps is going to be a stumbling block.
Nah, I made the original shader in Poser and loosely translated it into Blender by hand. No Blender to Poser translation necessary in this case. :-)
On the flip side, Poser does of course have a lot of nodes that aren't present in Blender, so I wouldn't try to do an automatic translation of an arbitrary shader network. The library I wrote supports a very limited set of nodes, mostly or exclusively math nodes if I recall. Those should map easily to most software that supports math nodes.
-- I'm not mad at you, just Westphalian.
So, looking at the Poser material again, I was reminded that I used the Spots node a lot for the skin variations, which I don't think Blender has. So, I tried to cobble something together based on the Voronoi texture node, but in retrospect I think maybe Gabor would have been a better choice.
-- I'm not mad at you, just Westphalian.

@hborre how is the color ramp in Poser 13 broken compared to Poser 14? During Beta testing of P14 we found that if you don't have flags/pointers at the 0 and 100% points then weird color artifacts would occur. But if you put in a start point at Zero that is the same color as next point up the scale say at 40% then the artifacts don't show up. Not quite the same as moving the bottom point up to 40% leaving the bottom open like you find in the Blender tutorials but it does work. However, the Poser color ramp is still very limited compared to Blender or my Expandable Color ramp. Other than the fact my color ramp does not do the spline curves it is better in that you can change the blend type between each pair of points on the ramp. The helper node is just a set of constant values to feed into the Blend type to choose how to make the ramp behave. The other difference is that you have to feed in the % point for each color point instead of clicking on the ramp and having it auto fill. One other advantage is that my ramp allows you to put in any other node (within reason) as the color to be filled, Blender has something similar.
Poser 5, 6, 7, 8, Poser Pro 9 (2012), 10 (2014), 11, 12, 13, 14
My ramp has all the extra Blender types of HSV colors which is different than the RGB mode. RGB is a linear change so that Red 255,0,0 goes to Green 0,255,0 but in RGB mode at the 50% point it is a muted yellow color 128,128,0, whereas in HSV it is Red 0/240 Hue and Green 80 then Yellow would be 40 but at the same saturation so remain vivid instead of muted. Really depends on what you are trying to do.
Poser 5, 6, 7, 8, Poser Pro 9 (2012), 10 (2014), 11, 12, 13, 14
Your description of the beta testing of the P14 Colorramp is exactly what I saw with P13. When I get an opportunity, I will revisit P13 and run the node through its paces.@hborre how is the color ramp in Poser 13 broken compared to Poser 14? During Beta testing of P14 we found that if you don't have flags/pointers at the 0 and 100% points then weird color artifacts would occur. But if you put in a start point at Zero that is the same color as next point up the scale say at 40% then the artifacts don't show up. Not quite the same as moving the bottom point up to 40% leaving the bottom open like you find in the Blender tutorials but it does work. However, the Poser color ramp is still very limited compared to Blender or my Expandable Color ramp. Other than the fact my color ramp does not do the spline curves it is better in that you can change the blend type between each pair of points on the ramp. The helper node is just a set of constant values to feed into the Blend type to choose how to make the ramp behave. The other difference is that you have to feed in the % point for each color point instead of clicking on the ramp and having it auto fill. One other advantage is that my ramp allows you to put in any other node (within reason) as the color to be filled, Blender has something similar.
Content Advisory! This message contains nudity
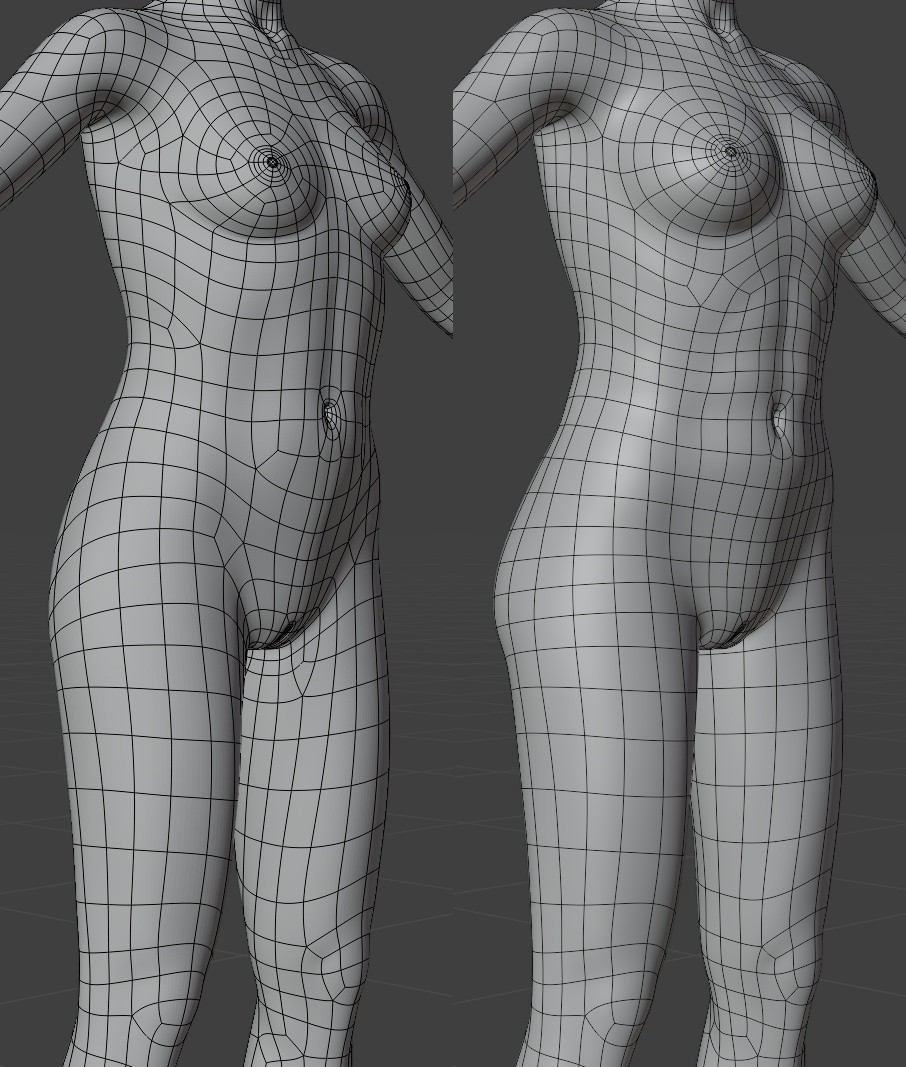
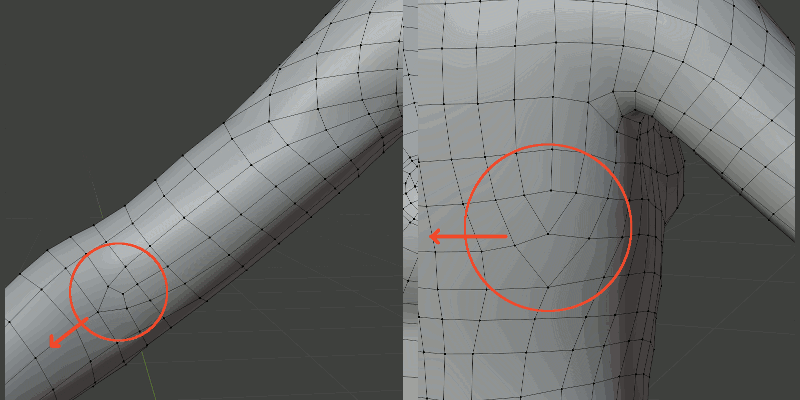
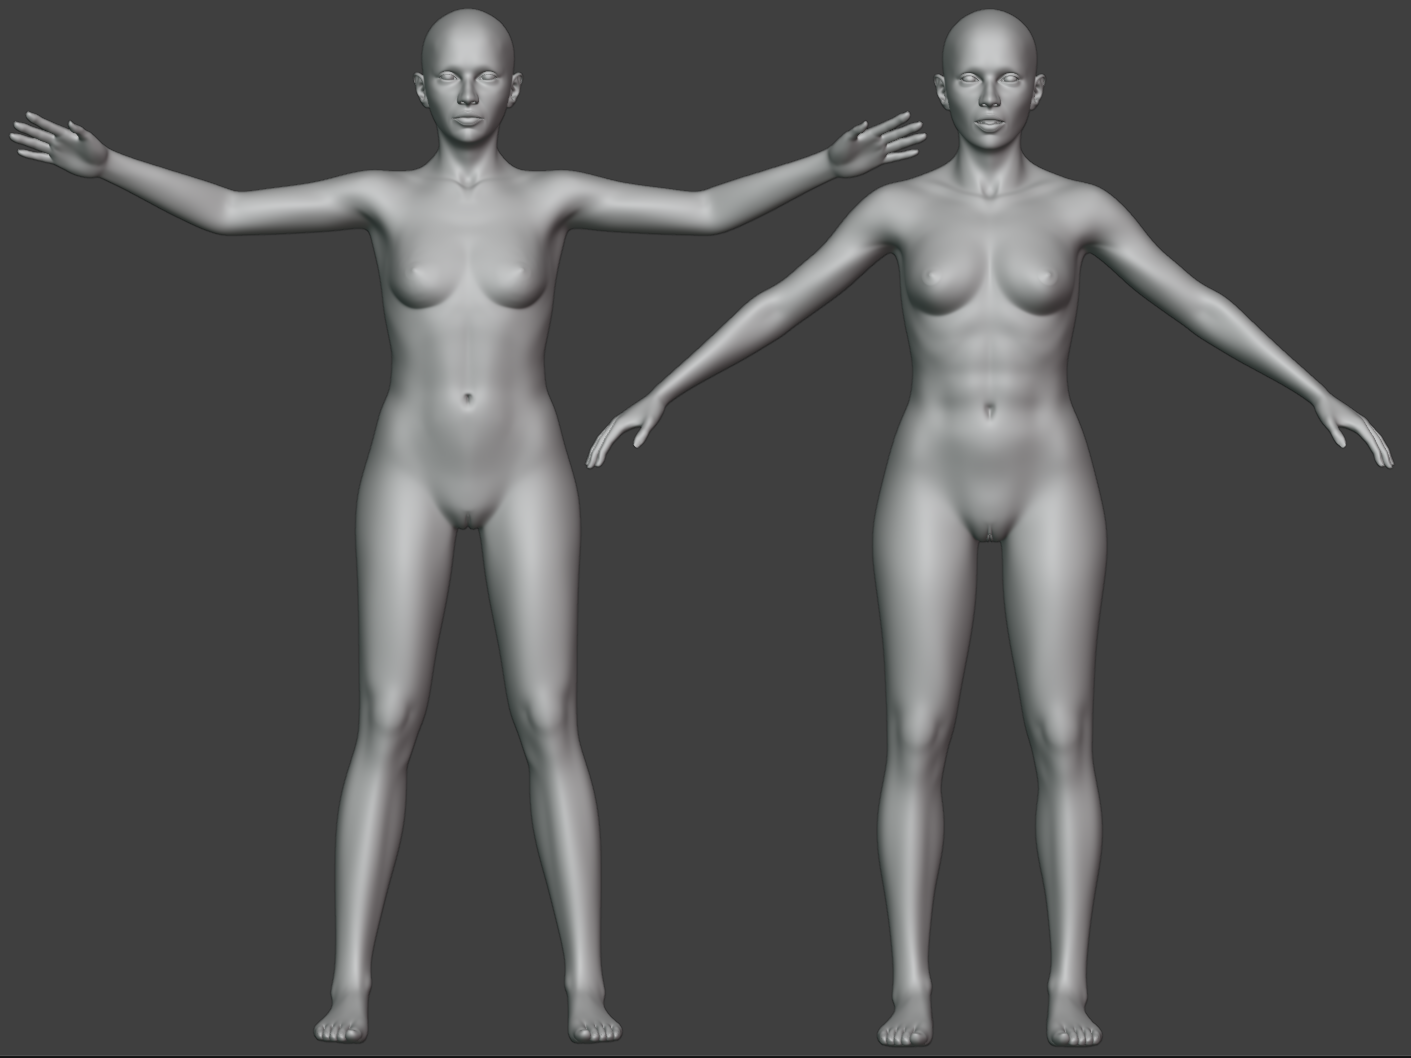
My current mission is to clean up her wires and do some small shape refinements in the process. Maybe not strictly necessary, but the strange edge flow and excessive poles have been bugging me for some time. Torso and thighs are looking alright now, I think, the biggest offenders at this point remaining the shoulders. I imagine I do a first pass, then when I'm happy put a simple temporary rig on her and see how she bends. Anyway, the original wires are shown on the left here.
-- I'm not mad at you, just Westphalian.

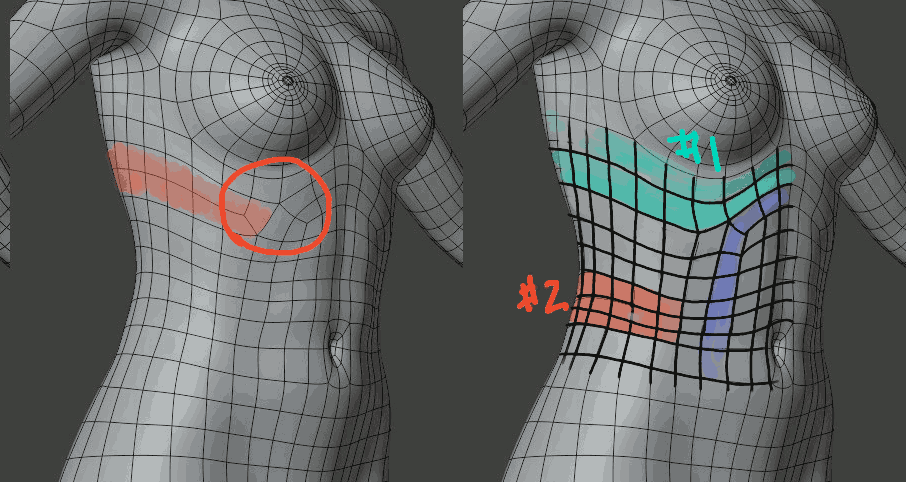
Looking pretty good. I think I'd make a couple tweaks around those poles in rig cage.
You're going to have poles there no matter what, that's just the nature of that area, but I think you can tweak the flow a bit to get more natural deformations.
#1 I'd tweak it so you have a second loop [green-ish highlight on the right], better defining that lower edge of the rib cage, Its a pretty rigid structure, so you don't need quite as much geometry as you've got now, particularly the two bands [on the left below, highlighted in orange] feeding in to that pole.
#2 Denser geometry down here can can be used to form the natural crease when bending toward that side, its also an area that's going to stretch a lot when bending to the opposite side, so a little more geometry is probably beneficial here.
I think one loop [blue] to define the abdomen should be sufficient. The two loops you have now, looks like it might be rolling the start of the obliques into the abs [tho, its a little tough to tell from a single static image], when the obliques should be a more north/south muscle group.
Otherwise, looking good. Shoulders? UGH! Have fun with that!
Core i7 950@3.02GHz | 12GB Corsair Dominator Ram@1600mHz | 2GB Geforce GTX 660
Lightwave | Blender | Marmoset | GIMP | Krita
Content Advisory! This message contains nudity
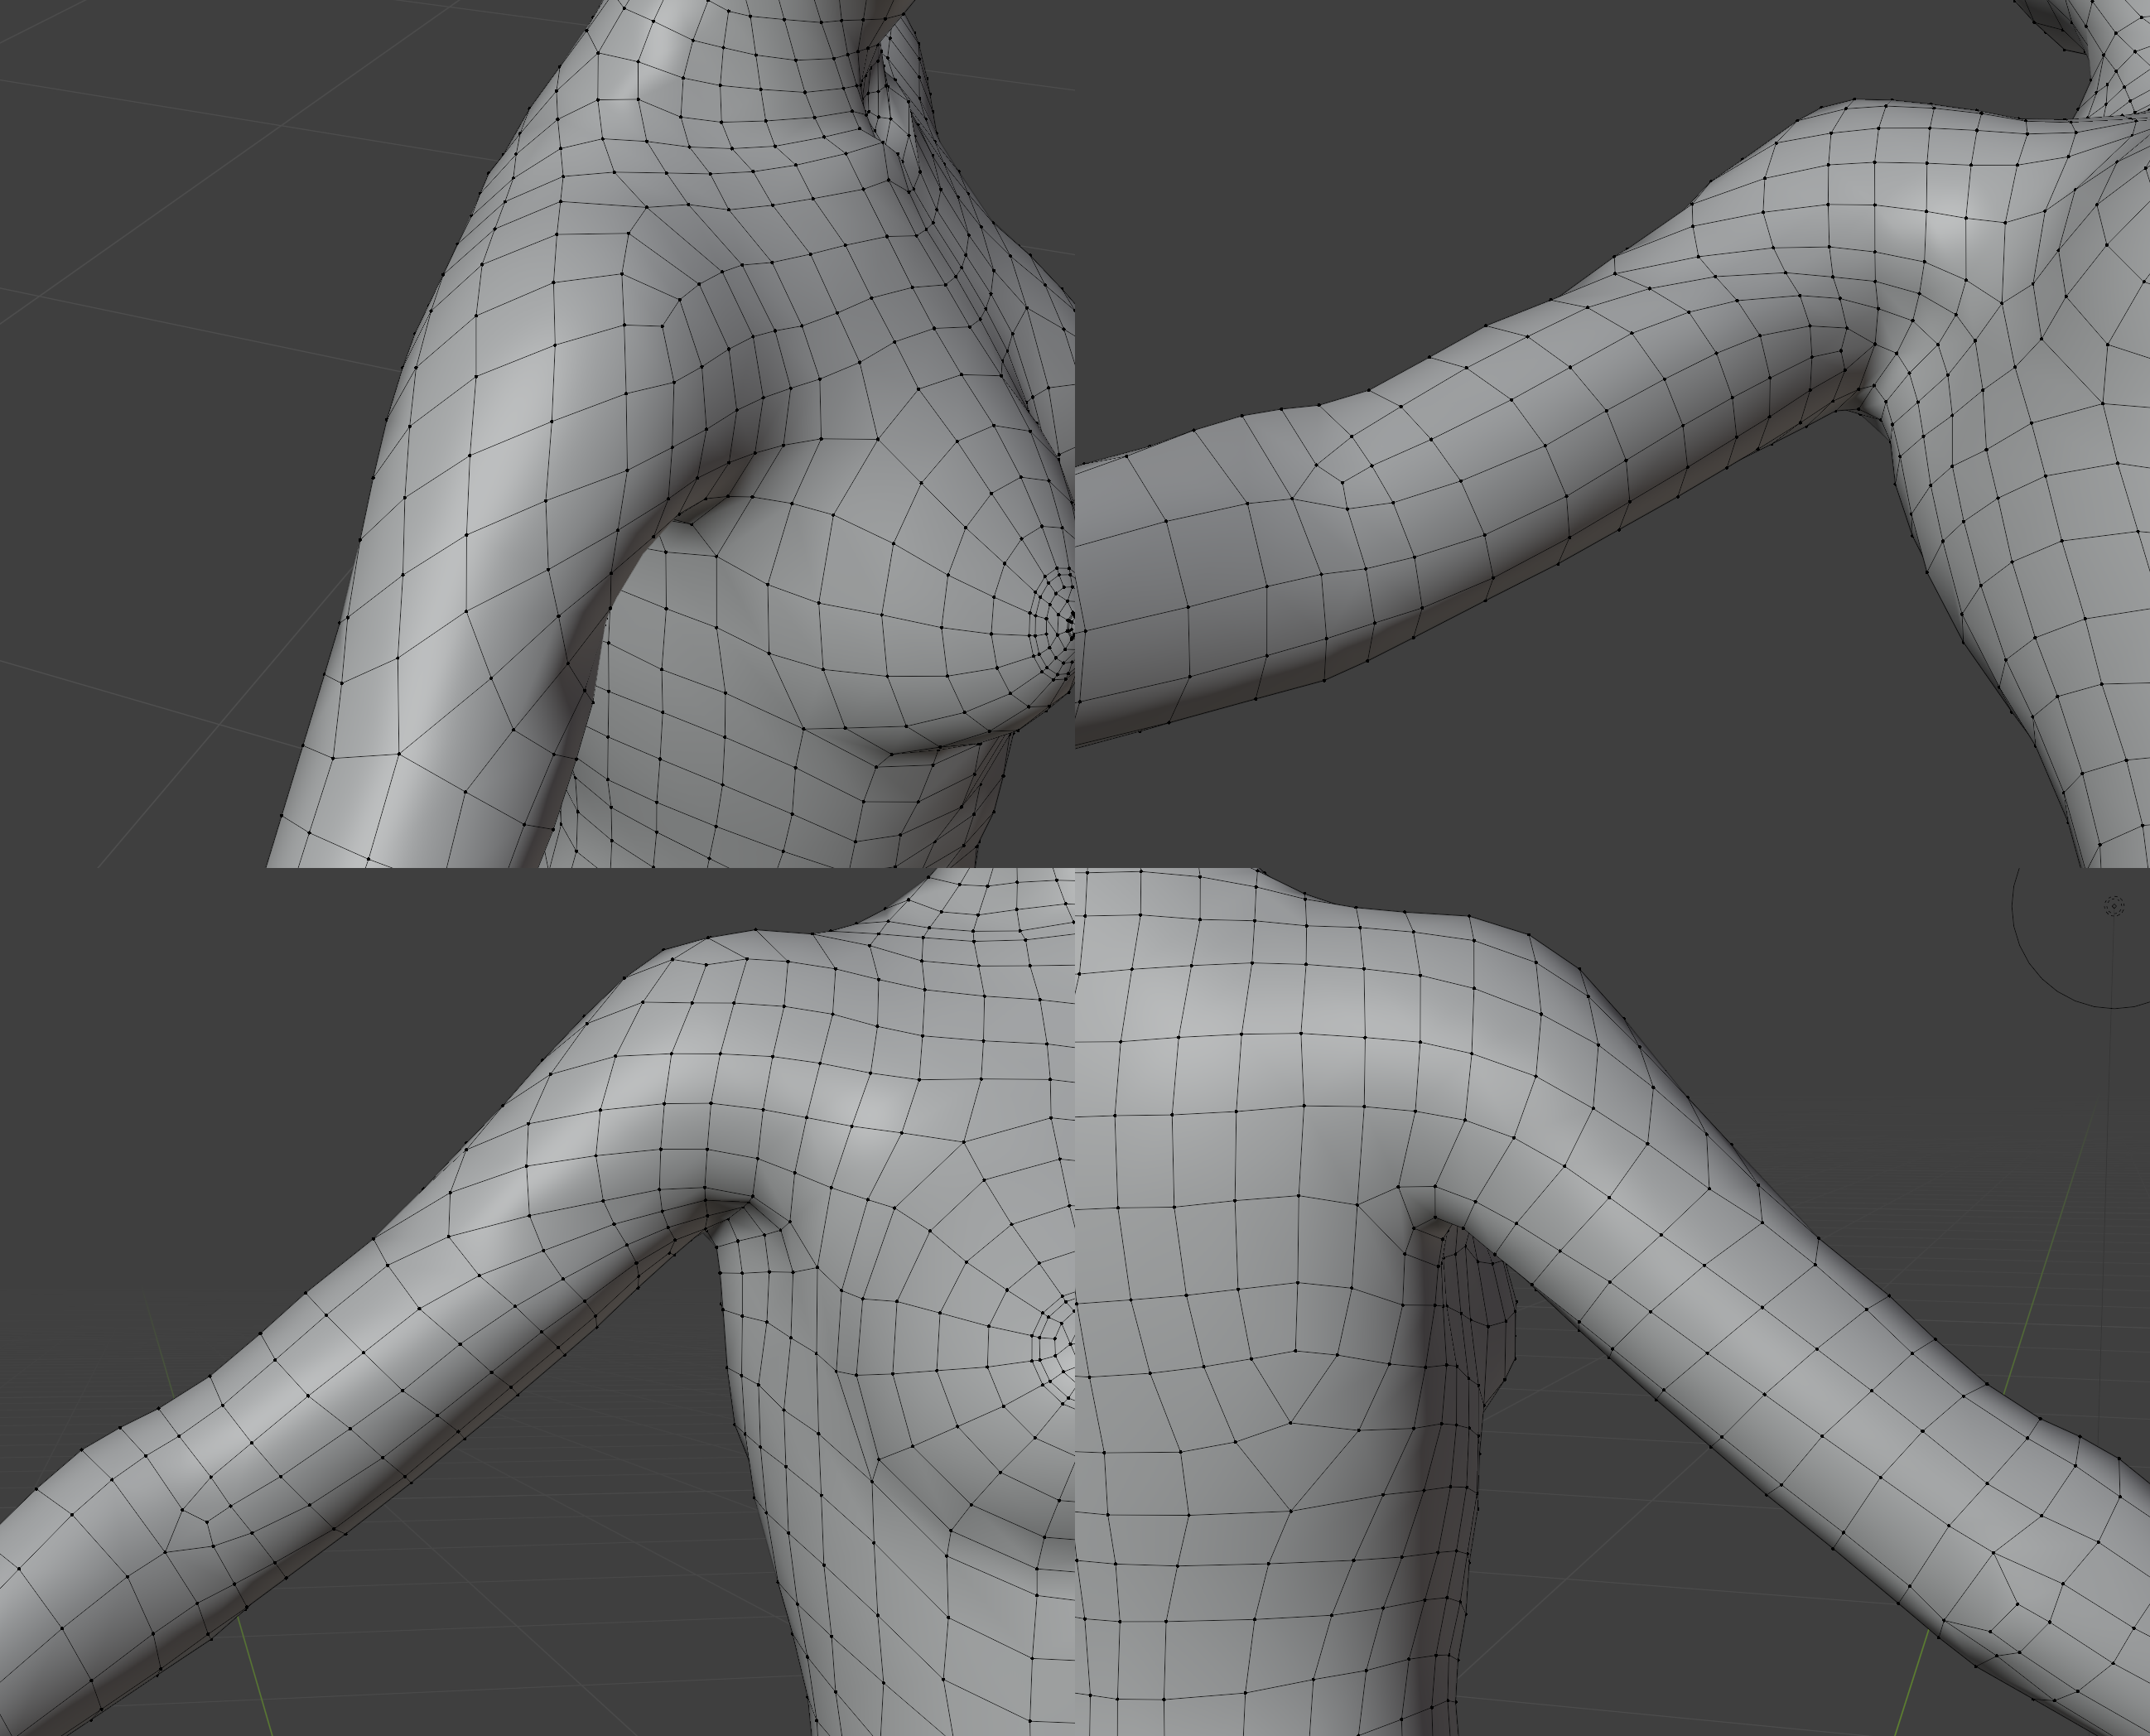
The reworked shoulder wires. Funny how I made so many messes that I struggled to fix, only to arrive at something not that much different from Toni's original topology in this area. I think the poles are placed a bit better, and I have at least a few nice edge loops and generally a bit more density in the area. Not being super-obsessed anymore with keeping the poly-count as low as possible even if it means creating otherwise unnecessary poles all over the place helps. 
-- I'm not mad at you, just Westphalian.
Shoulder looks pretty good, I don't see anything there that would concern me.
Couple really minor things, not issues/problems really, just a couple personal preference nitpicks.
I would probably shift the poles on the back in a row or two, keep the same flow, still the same number of columns and what not, just shift them to the left a column or two. That gets them a little further away from the bulk of the deformation/stretching, but they're also a good shape/flow to help define the muscle/bone of the shoulder blade area a bit if you wanted.
I'd also maybe move that pole in the elbow down a couple rows away from the joint. I know where it is know, it does a good job of creating that indent where the head of the bicep comes into the elbow, but there's some potential for it to get wonky when bending the elbow, and you can use that extra geometry a little further down the forearm to get some definition where the muscle comes over the radius bone.
Core i7 950@3.02GHz | 12GB Corsair Dominator Ram@1600mHz | 2GB Geforce GTX 660
Lightwave | Blender | Marmoset | GIMP | Krita
Content Advisory! This message contains nudity
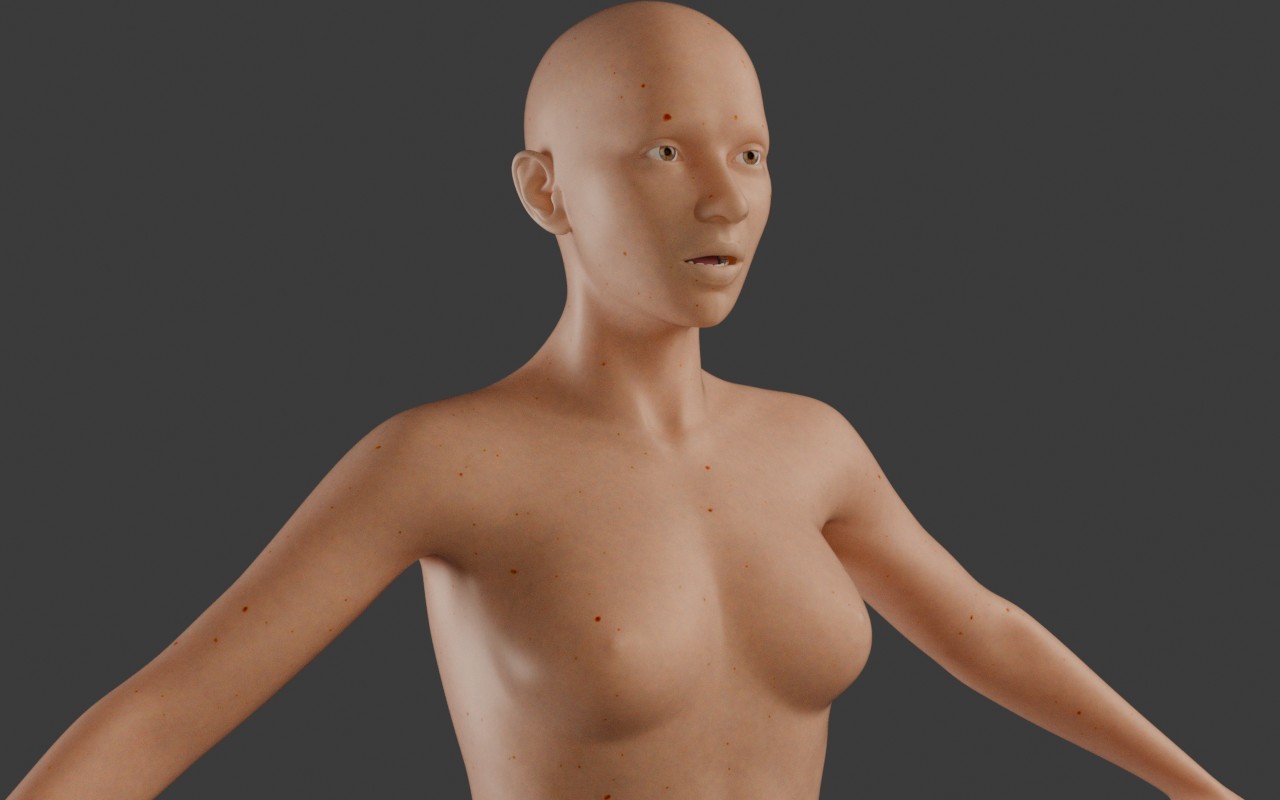
Here's a Cycles test render with eyes, teeth, tongue and nicer lights. I'm still going through the various parts of the mesh and tweaking things that have been bothering me over the years and things I've never noticed but are bothering me now. The weird shape her clavicles making there in the center being an example of the former category ...

-- I'm not mad at you, just Westphalian.
Content Advisory! This message contains nudity
Another test render with better lighting. It made me see and fix some small problem with the torso shaping.
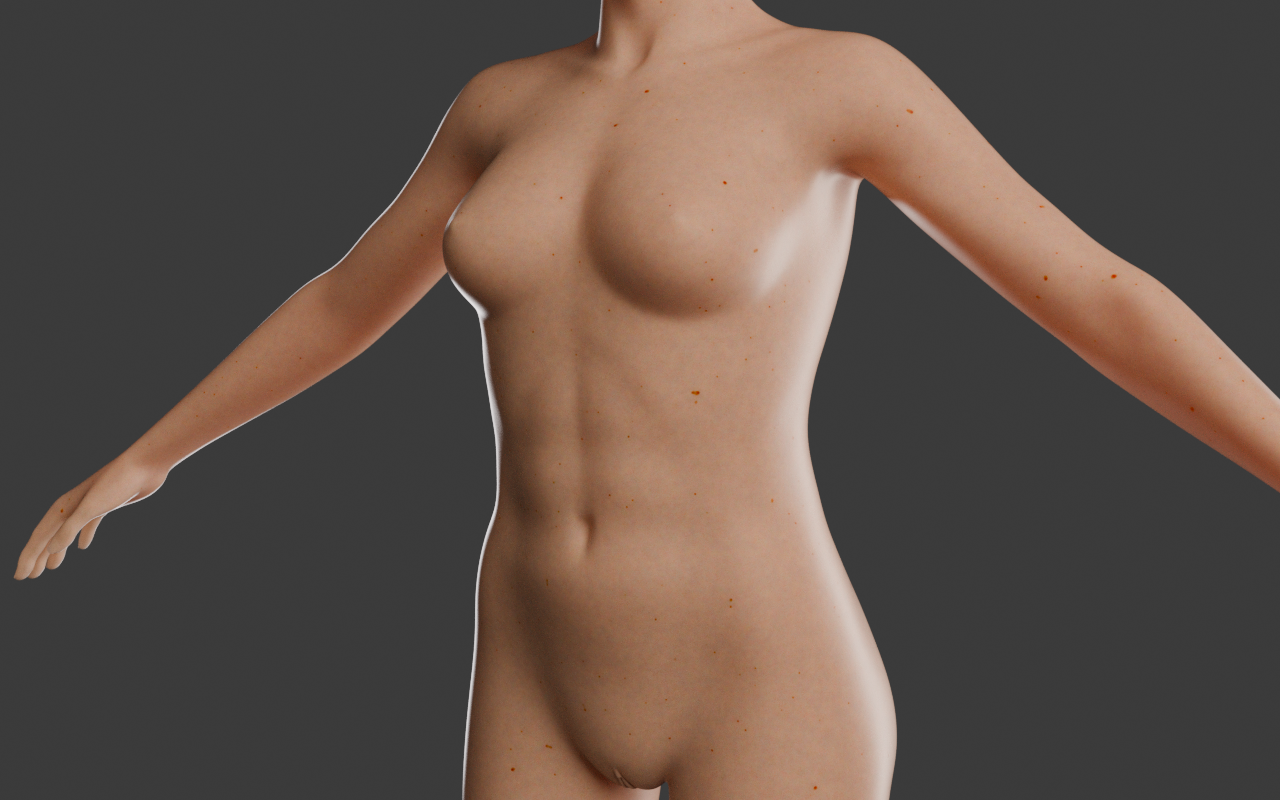
-- I'm not mad at you, just Westphalian.
Content Advisory! This message contains nudity
LOL, I was annoyed about the long render times for Cycles even after selecting GPU rendering, until I realized I also had to enable OptiX in the preferences. Down from something like 6 minutes to 15 seconds now, which is more like it.
-- I'm not mad at you, just Westphalian.
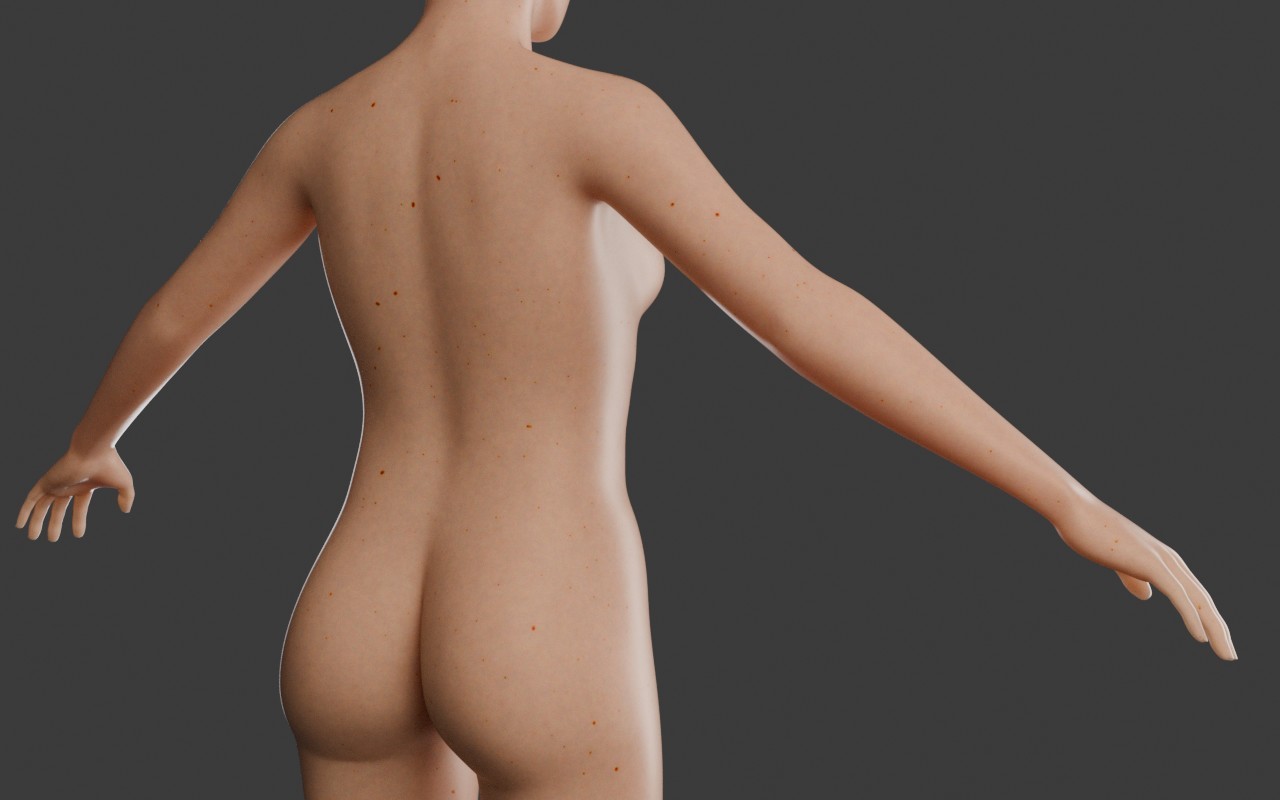
Honestly, it amazes me how much these test renders help me detect issues with the shapes. The semi-realistic skin and lighting seem to be triggering the uncanny valley function in my brain. Smooth untextured is great for finding and fixing lumps, but the subtle "not quite human-looking“ issues I sometimes miss. Oh, and by the way, I did more shape-tweaking since making these renders. The back looks much better now and I also fixed some problems in the lower belly and armpits.
-- I'm not mad at you, just Westphalian.
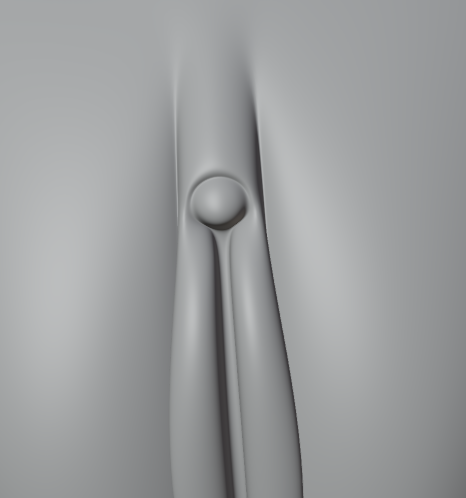
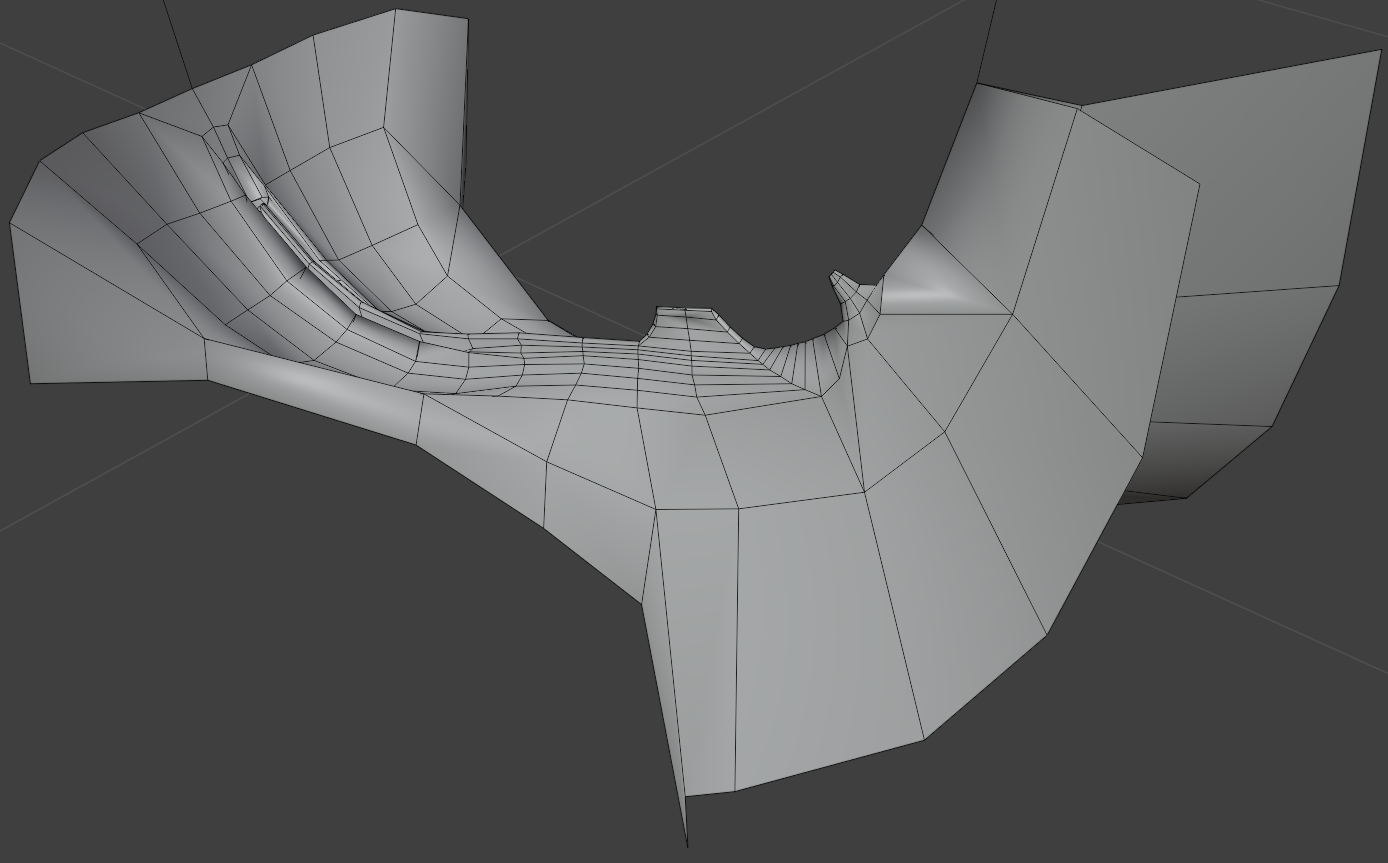
Whoooa, buddy, I'm gonna have to call "shenanigans"! That is neither abstract nor was it coincidental. If you're sticking to that story, Sigmund Freud would like a word.A small detail of my abstract sculpture. Any similarity with existing shapes would be purely coincidental.
Core i7 950@3.02GHz | 12GB Corsair Dominator Ram@1600mHz | 2GB Geforce GTX 660
Lightwave | Blender | Marmoset | GIMP | Krita
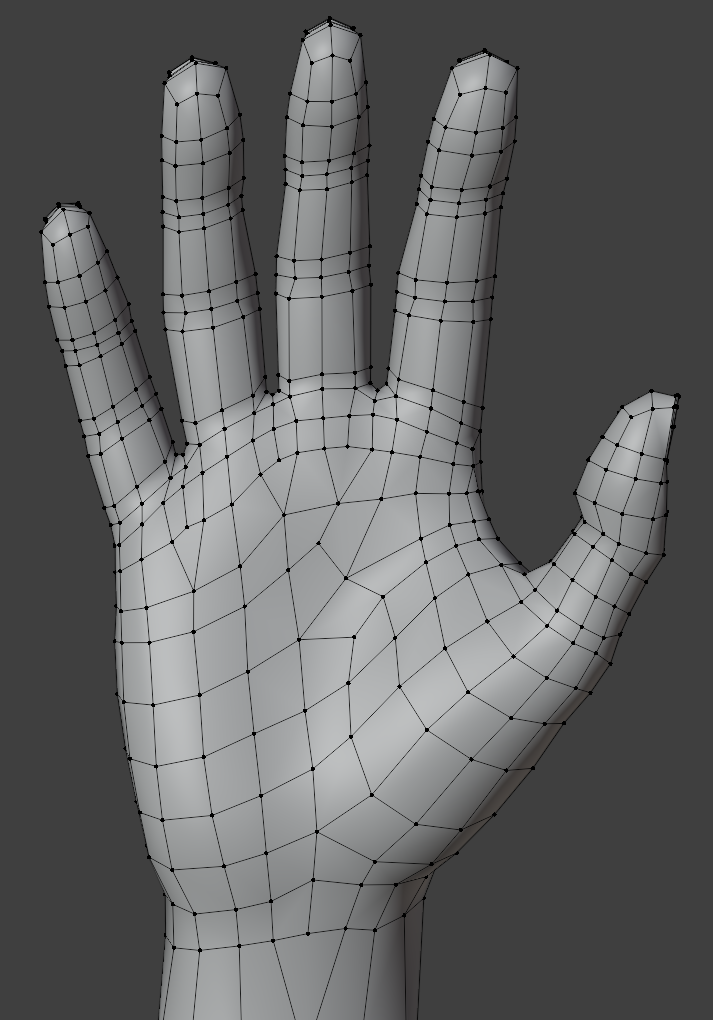
Toni's hands after some tweaking and mild reshaping. The back looks messy and my first reaction was "what was I thinking", but the wires follow the directions of the tendons, which might be somewhat useful and probably won't hurt. As for the palms, I wonder if I should introduce some fortuneteller-friendly edge loops to make the posing of the thumb in particular easier.

-- I'm not mad at you, just Westphalian.
Sure, but do they need to be present in the wires, or would displacement maps be sufficient? I'm tending towards the former, to be honest, but I'm also a teensy but worried about overdoing things.Without the fortune-teller lines it will never look real. That is one area that will always stand out as being off. Just look at your own hand and let it relax and watch the folds.
-- I'm not mad at you, just Westphalian.
Richard60 posted at 5:19 PM Sun, 28 December 2025 - #4502617Displacement will need subdivision, so you will have to test both methods for the best accuracy.Sure, but do they need to be present in the wires, or would displacement maps be sufficient? I'm tending towards the former, to be honest, but I'm also a teensy but worried about overdoing things.Without the fortune-teller lines it will never look real. That is one area that will always stand out as being off. Just look at your own hand and let it relax and watch the folds.
hborre posted at 7:38 PM Sun, 28 December 2025 - #4502623
Displacement will need subdivision, so you will have to test both methods for the best accuracy.Speaking of which, I hear Blender 5.0 Cycles now has adaptive subdivision. I haven't tested it yet or heard much about it except for the announcement, but its sounds exciting.
I've started rewiring the palms, which does wonders for defining the big bulges, so I'll definitely keep going. Huge mess in the middle, though, right now, so I'm not going to show anything yet. Getting the middle line of the "M" shape will be a bit of a challenge.
-- I'm not mad at you, just Westphalian.
Content Advisory! This message contains nudity
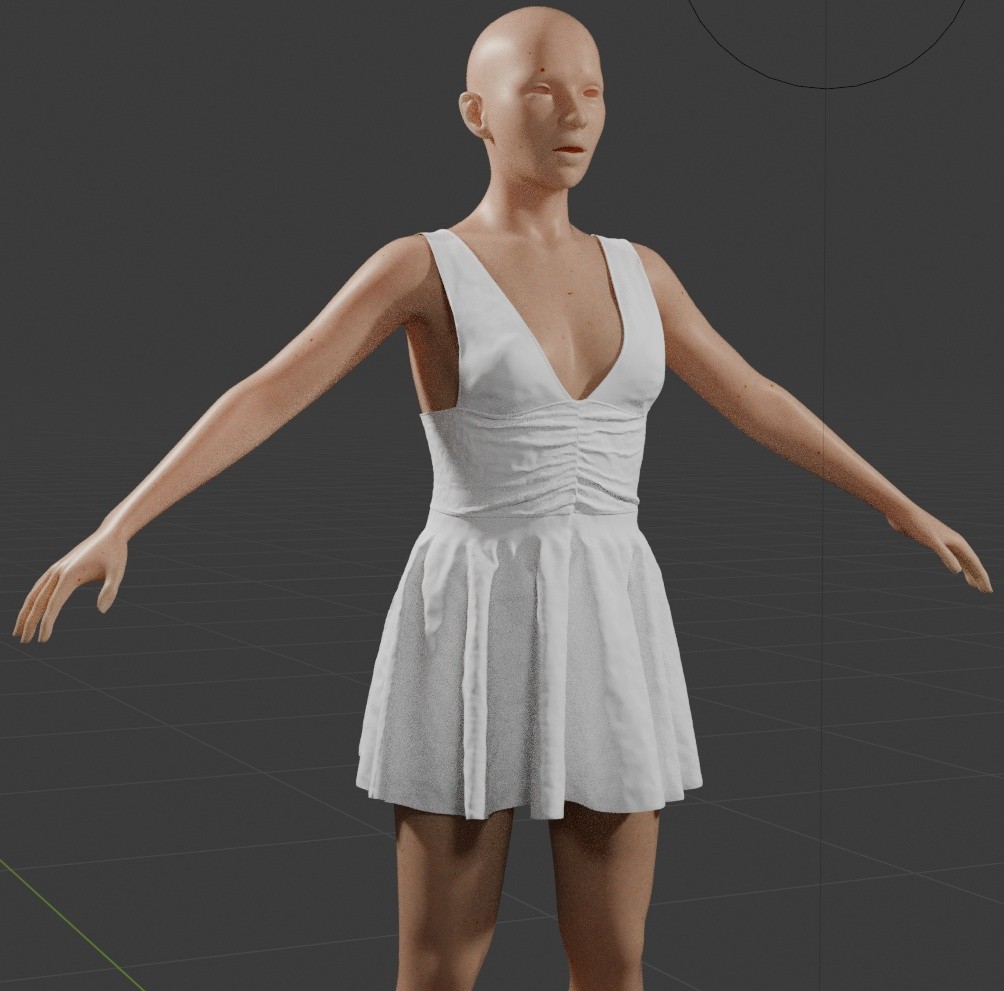
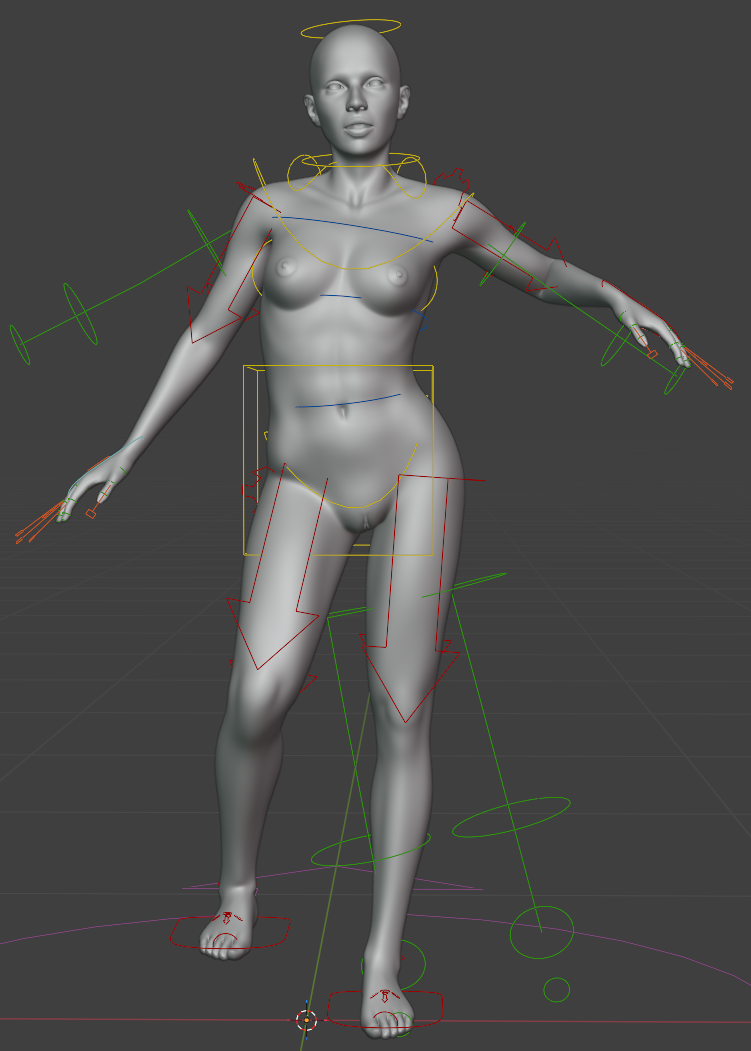
Toni's (and my) first Blender rig. Rigify full human with the awful face bones ripped out. I'll give her some Osipa-style shape keys later like the Poser version of Antonia has them. Next up, play with poses to familiarize myself with the rig, check the pivot points and bone rolls, then once that looks alright start weight painting.
-- I'm not mad at you, just Westphalian.
Privacy Notice
This site uses cookies to deliver the best experience. Our own cookies make user accounts and other features possible. Third-party cookies are used to display relevant ads and to analyze how Renderosity is used. By using our site, you acknowledge that you have read and understood our Terms of Service, including our Cookie Policy and our Privacy Policy.
Content Advisory! This message contains nudity
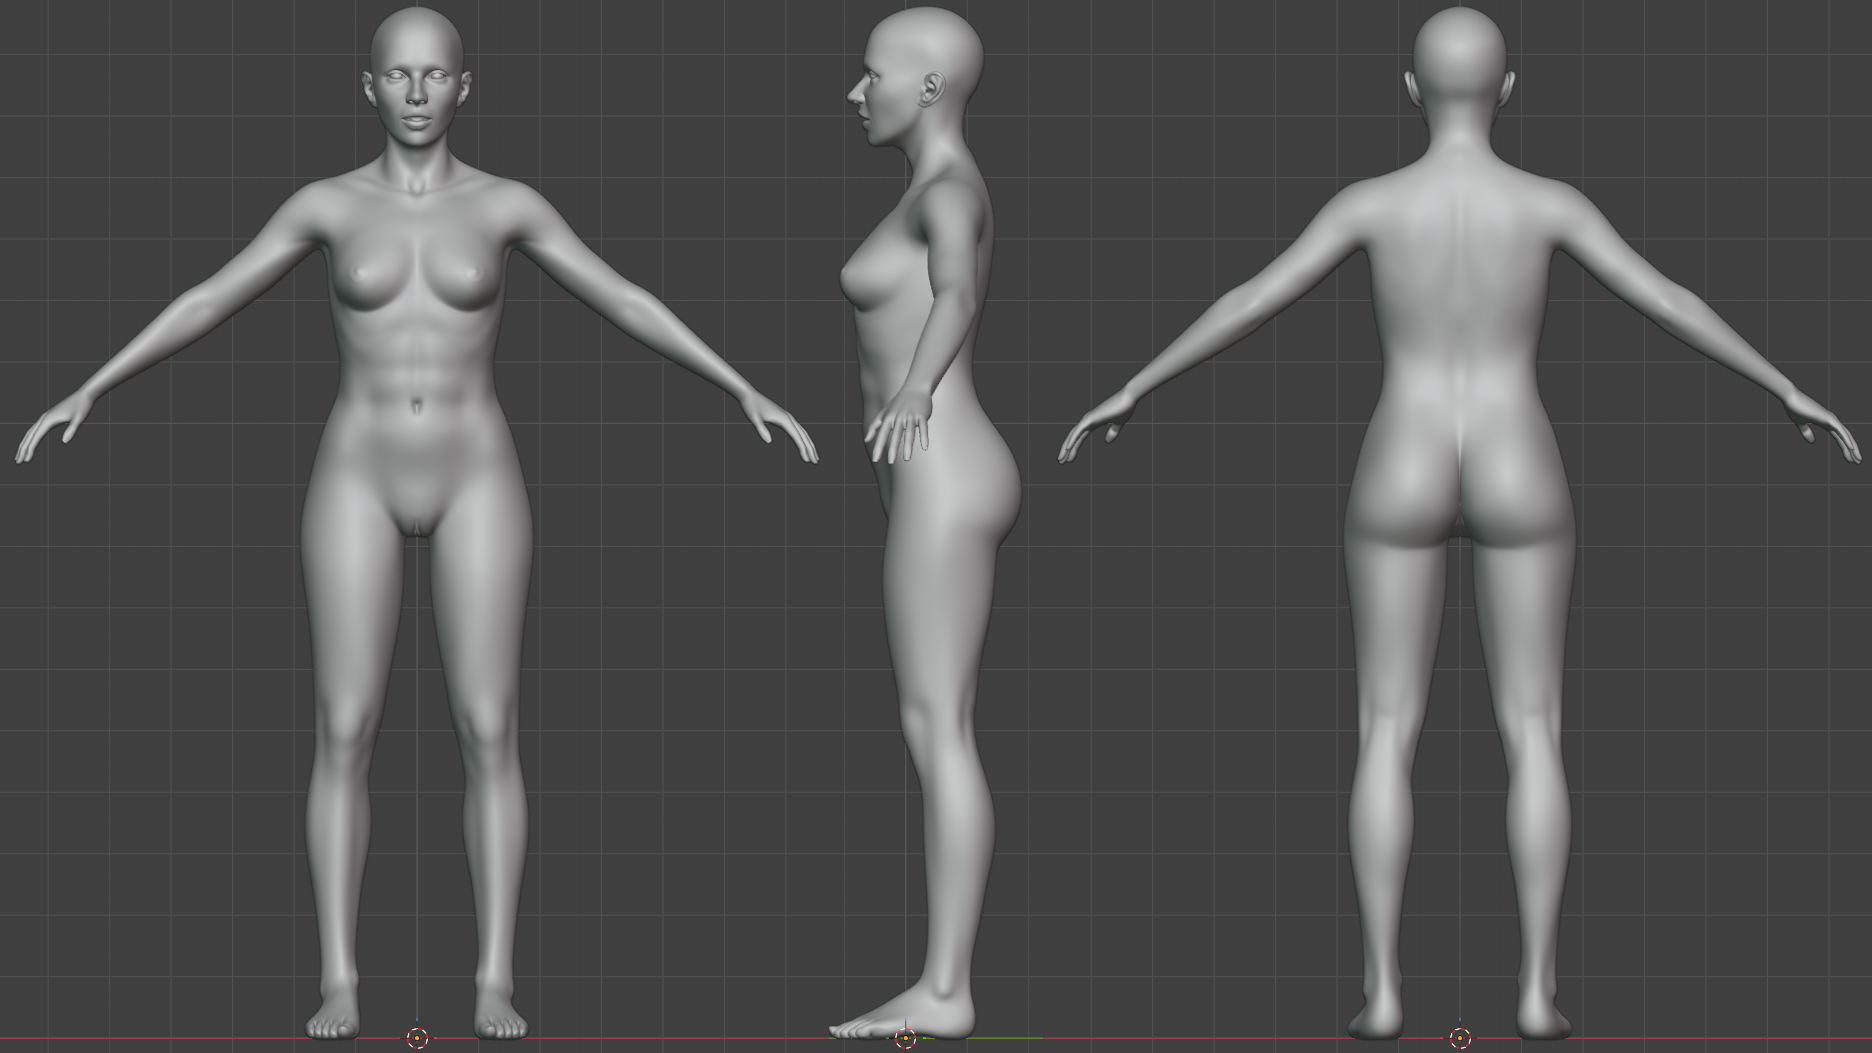
So, I've decided to take an extended break from Poser and focus on acquiring some semi-serious Blender skills. Since I'm still most interested in figurative art, I'm taking a mesh I prepared earlier - some may know her as Antonia 1.2 lo-res - rework it a bit (not my original plan, but I couldn't help myself), create new UVs and materials, rig her, make hair, etc. Seeing as I'm still working full time and have other hobbies, as well, all of this should keep me busy for a while.
Anyway, I don't know who here would even be interested in some irregular, unreliable progress reports from me about this process, so if you are, please give me a shout.
As a teaser, here's a screenshot of a procedural base skin I'm working on. I'm planning to add a bit of relatively coarse hand-painting once I'm happy with that and add more refinements later whenever I feel like it.
-- I'm not mad at you, just Westphalian.