
odf opened this issue on Dec 09, 2025 · 107 posts
odf posted Tue, 09 December 2025 at 12:21 AM
So, I've decided to take an extended break from Poser and focus on acquiring some semi-serious Blender skills. Since I'm still most interested in figurative art, I'm taking a mesh I prepared earlier - some may know her as Antonia 1.2 lo-res - rework it a bit (not my original plan, but I couldn't help myself), create new UVs and materials, rig her, make hair, etc. Seeing as I'm still working full time and have other hobbies, as well, all of this should keep me busy for a while.
Anyway, I don't know who here would even be interested in some irregular, unreliable progress reports from me about this process, so if you are, please give me a shout.
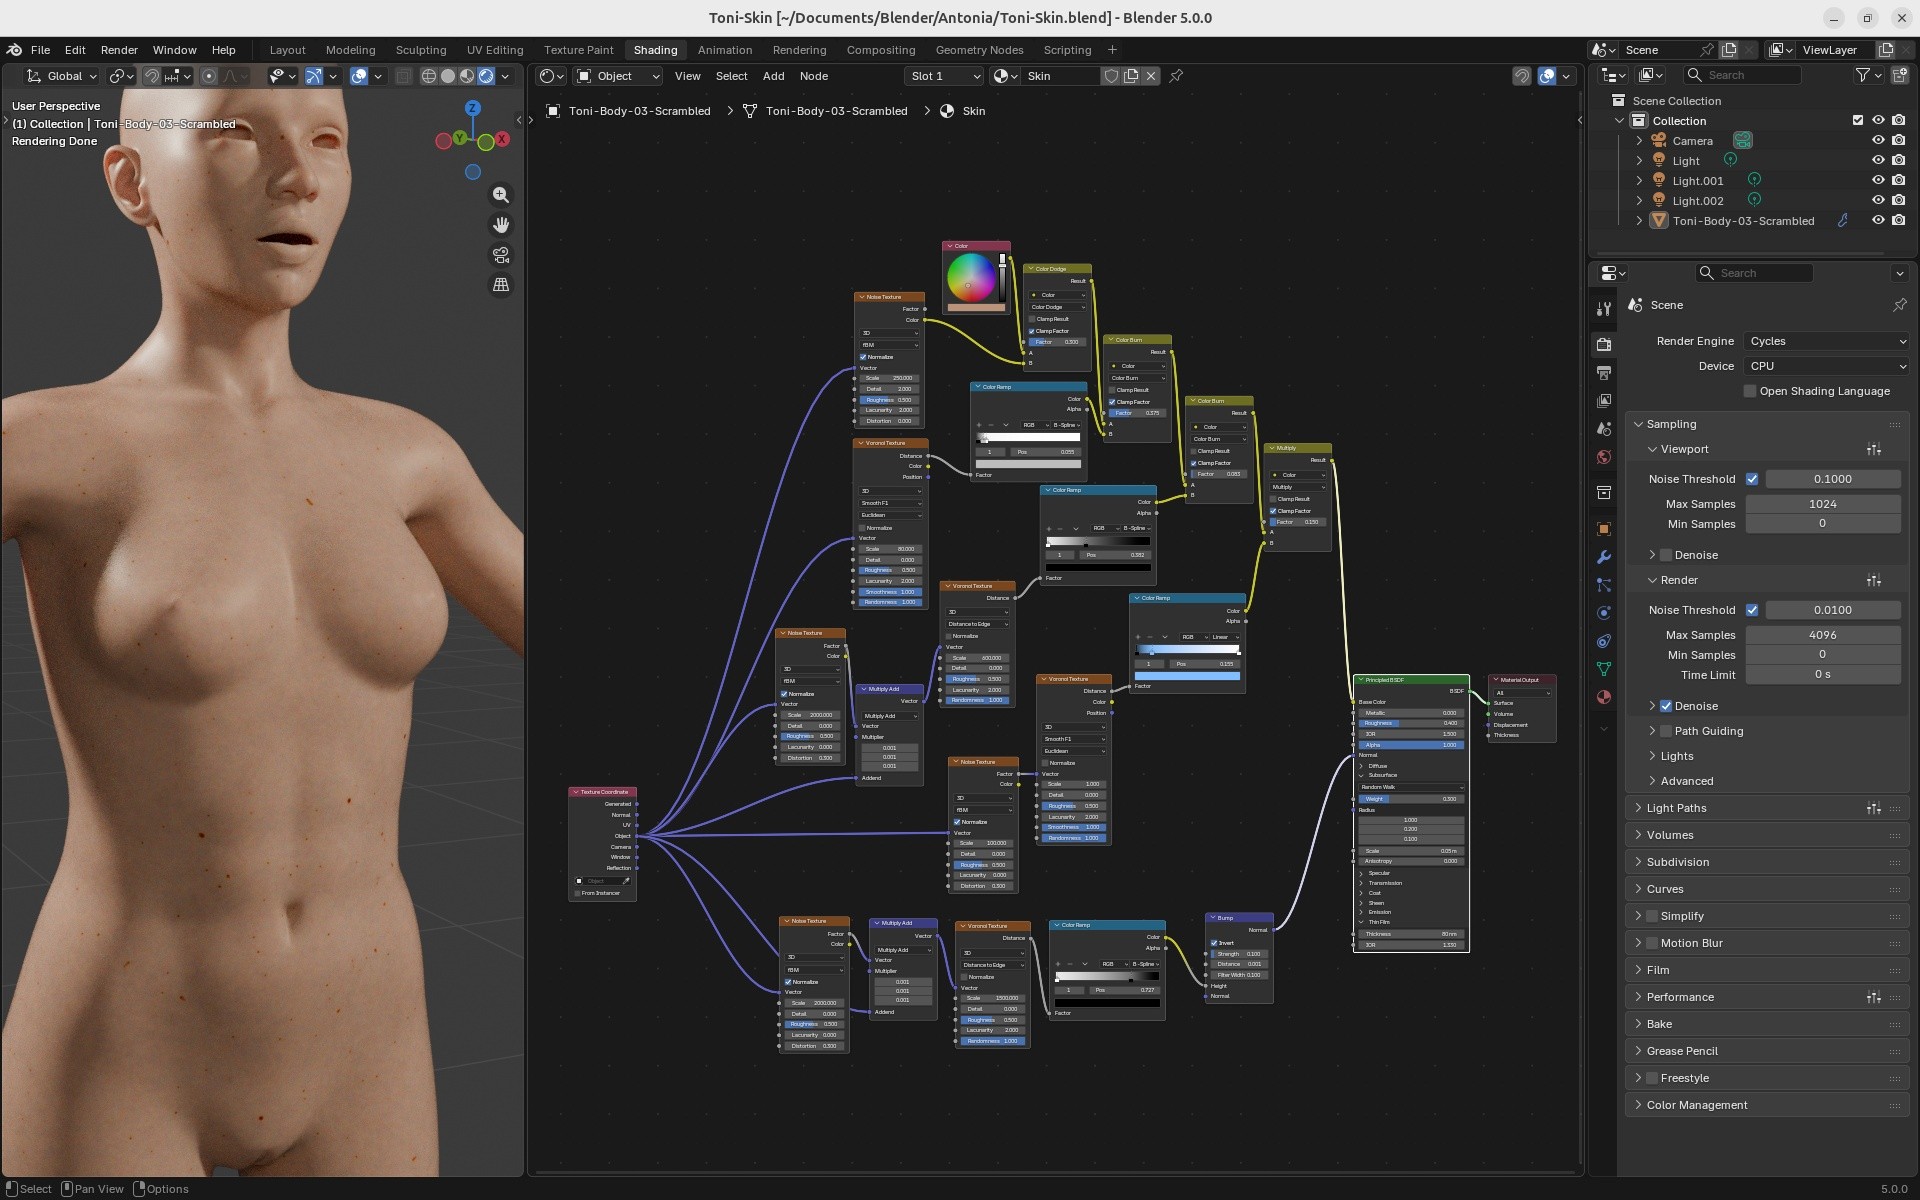
As a teaser, here's a screenshot of a procedural base skin I'm working on. I'm planning to add a bit of relatively coarse hand-painting once I'm happy with that and add more refinements later whenever I feel like it.
-- I'm not mad at you, just Westphalian.

LuxXeon posted Tue, 09 December 2025 at 4:58 AM
Looks great so far
______________________________________
My Store
My Free Models
My Video Tutorials
My CG Animations
Instagram: @luxxeon3d
Facebook: https://www.facebook.com/luxxeon

Lobo3433 posted Tue, 09 December 2025 at 7:51 AM Forum Moderator
Looks good would interested in hearing how it progresses
Lobo3433
Blender Maya & 3D Forum Moderator
odf posted Tue, 09 December 2025 at 6:19 PM
Thanks both! I'll keep posting then.
-- I'm not mad at you, just Westphalian.
Lobo3433 posted Wed, 10 December 2025 at 8:00 AM Forum Moderator

jancory posted Wed, 10 December 2025 at 8:45 AM
always good to see toni's latest adventures! like the freckles. wonder if your skin setup would translate to poser.
still lost in the wilderness
Poser 13 Superfly pretty much only these days

hborre posted Wed, 10 December 2025 at 9:05 AM
Those Blender nodes will translate to the latest iteration of Poser. However, the Color Ramp node in Poser 13 is broken but has been corrected in Poser 14. I originally reported the problem.
jancory posted Wed, 10 December 2025 at 9:20 AM
is there a P13 workaround for that node? (not to sidetrack the discussion but it wouldn't be a Toni thread without sidetracks)
still lost in the wilderness
Poser 13 Superfly pretty much only these days
hborre posted Wed, 10 December 2025 at 9:51 AM
Richard60 tried to construct mathematical nodes to emulate the Color Ramp node. You should be able to find them in the Freestuff section. I was too intimidated to try it out back then; I never bothered to dedicate the time.
Depending on how the ColorRamp node is incorporated into the shader, you might either eliminate the node entirely or substitute a math node. The primary function of the ColorRamp node is to modulate the intensity of a given map or alter the color gradient range. In Poser 13, there is partial functionality, depending on how the dark and light pointers are placed. Too close together, and the node would begin showing strange random color shifts. I rely on that node for ambient occlusion Superfly renders, and I'm glad I reported it in time to have it corrected in P14.
jancory posted Wed, 10 December 2025 at 10:12 AM
ok thanks! i have Richard60's node but have never figured out how to use it, may try now.
still lost in the wilderness
Poser 13 Superfly pretty much only these days
odf posted Wed, 10 December 2025 at 5:21 PM
Well, I have a question that kind of goes in the opposite direction: how do I create materials programmatically in Blender? More specifically, where can I find some examples or tutorials that show how it's done? The docs for the Blender Python API look a bit sparse, but maybe I just haven't found the right link yet.
I've written a tiny Python library that creates a partial texturing network from formulas and then renders a preview or exports a Poser material file with a compound node in it. That's easy because those files are human-readable and figuring out the format is easier than sifting through cryptic API docs. Now I'd like to add Blender as an output option, which would enable me to get my existing textile materials working without having to recreate them by hand, because those are much more complicated than that simple skin material I showed.
The direct Blender equivalent would be to write out a .blend file, but I suspect calling a script from within Blender to generate the nodes and then saving the finished material to a .blend file makes more sense.
-- I'm not mad at you, just Westphalian.
odf posted Wed, 10 December 2025 at 5:26 PM
Oh, and I have a similar skin material for Poser that seems to work quite well with existing texture maps. If you want it, hit me up in the Poser thread so that we don't clog this one with non-Blender things.
-- I'm not mad at you, just Westphalian.
jancory posted Wed, 10 December 2025 at 5:46 PM
hborre posted Wed, 10 December 2025 at 6:21 PM
I just noticed a small problem with the skin shader; three of the ColorRamp nodes are set to B-Spline, a setting that doesn't exist in the Poser version. Although Poser's Cycles emulates Blender, not all nodes share the same settings and features. Unless there is a different approach, translating shaders between the apps is going to be a stumbling block.
odf posted Wed, 10 December 2025 at 6:38 PM
Nah, I made the original shader in Poser and loosely translated it into Blender by hand. No Blender to Poser translation necessary in this case. :-)
On the flip side, Poser does of course have a lot of nodes that aren't present in Blender, so I wouldn't try to do an automatic translation of an arbitrary shader network. The library I wrote supports a very limited set of nodes, mostly or exclusively math nodes if I recall. Those should map easily to most software that supports math nodes.
-- I'm not mad at you, just Westphalian.
hborre posted Wed, 10 December 2025 at 6:47 PM
Okay, I will need to revisit that shader and note where updates will be needed for Poser 14. Thanks.
odf posted Thu, 11 December 2025 at 2:52 AM
So, looking at the Poser material again, I was reminded that I used the Spots node a lot for the skin variations, which I don't think Blender has. So, I tried to cobble something together based on the Voronoi texture node, but in retrospect I think maybe Gabor would have been a better choice.
-- I'm not mad at you, just Westphalian.

Richard60 posted Thu, 11 December 2025 at 3:42 PM
@hborre how is the color ramp in Poser 13 broken compared to Poser 14? During Beta testing of P14 we found that if you don't have flags/pointers at the 0 and 100% points then weird color artifacts would occur. But if you put in a start point at Zero that is the same color as next point up the scale say at 40% then the artifacts don't show up. Not quite the same as moving the bottom point up to 40% leaving the bottom open like you find in the Blender tutorials but it does work. However, the Poser color ramp is still very limited compared to Blender or my Expandable Color ramp. Other than the fact my color ramp does not do the spline curves it is better in that you can change the blend type between each pair of points on the ramp. The helper node is just a set of constant values to feed into the Blend type to choose how to make the ramp behave. The other difference is that you have to feed in the % point for each color point instead of clicking on the ramp and having it auto fill. One other advantage is that my ramp allows you to put in any other node (within reason) as the color to be filled, Blender has something similar.
Poser 5, 6, 7, 8, Poser Pro 9 (2012), 10 (2014), 11, 12, 13, 14
Richard60 posted Thu, 11 December 2025 at 3:48 PM
My ramp has all the extra Blender types of HSV colors which is different than the RGB mode. RGB is a linear change so that Red 255,0,0 goes to Green 0,255,0 but in RGB mode at the 50% point it is a muted yellow color 128,128,0, whereas in HSV it is Red 0/240 Hue and Green 80 then Yellow would be 40 but at the same saturation so remain vivid instead of muted. Really depends on what you are trying to do.
Poser 5, 6, 7, 8, Poser Pro 9 (2012), 10 (2014), 11, 12, 13, 14
hborre posted Thu, 11 December 2025 at 4:09 PM
Your description of the beta testing of the P14 Colorramp is exactly what I saw with P13. When I get an opportunity, I will revisit P13 and run the node through its paces.@hborre how is the color ramp in Poser 13 broken compared to Poser 14? During Beta testing of P14 we found that if you don't have flags/pointers at the 0 and 100% points then weird color artifacts would occur. But if you put in a start point at Zero that is the same color as next point up the scale say at 40% then the artifacts don't show up. Not quite the same as moving the bottom point up to 40% leaving the bottom open like you find in the Blender tutorials but it does work. However, the Poser color ramp is still very limited compared to Blender or my Expandable Color ramp. Other than the fact my color ramp does not do the spline curves it is better in that you can change the blend type between each pair of points on the ramp. The helper node is just a set of constant values to feed into the Blend type to choose how to make the ramp behave. The other difference is that you have to feed in the % point for each color point instead of clicking on the ramp and having it auto fill. One other advantage is that my ramp allows you to put in any other node (within reason) as the color to be filled, Blender has something similar.
odf posted Fri, 12 December 2025 at 9:14 PM
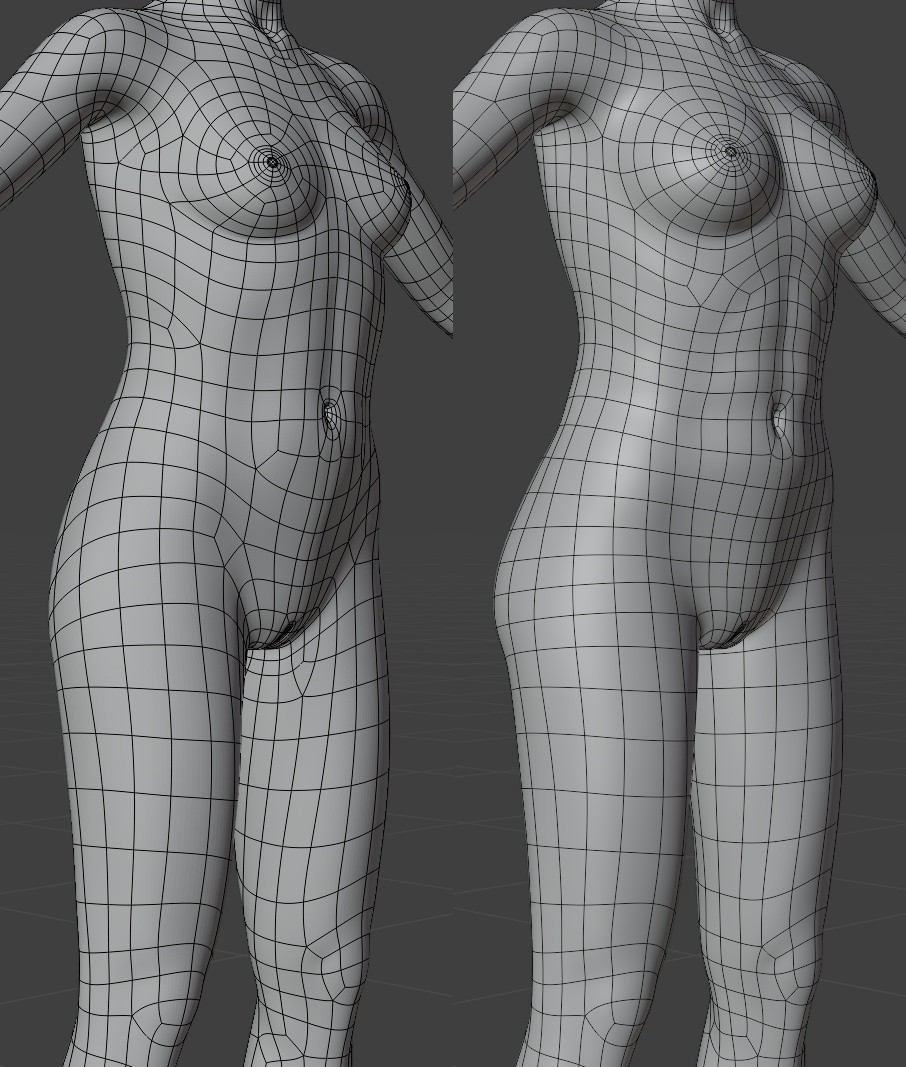
My current mission is to clean up her wires and do some small shape refinements in the process. Maybe not strictly necessary, but the strange edge flow and excessive poles have been bugging me for some time. Torso and thighs are looking alright now, I think, the biggest offenders at this point remaining the shoulders. I imagine I do a first pass, then when I'm happy put a simple temporary rig on her and see how she bends. Anyway, the original wires are shown on the left here.
-- I'm not mad at you, just Westphalian.

Warlock279 posted Sat, 13 December 2025 at 2:50 PM
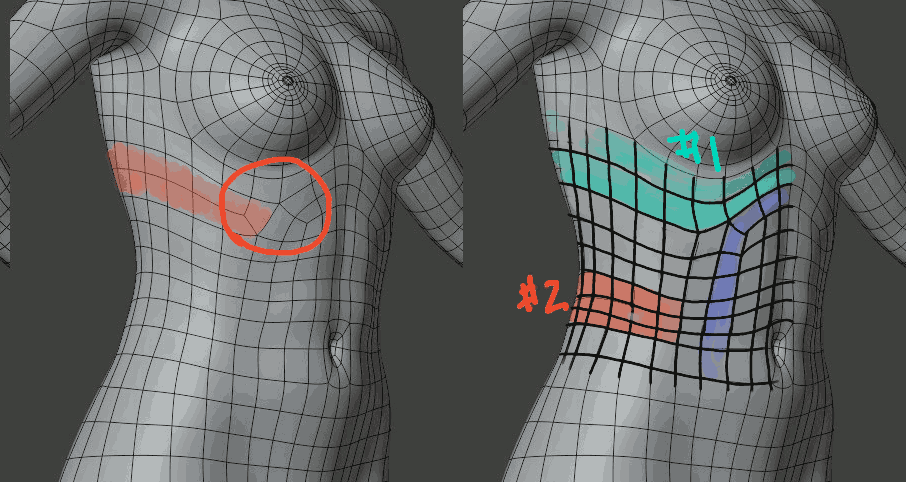
Looking pretty good. I think I'd make a couple tweaks around those poles in rig cage.
You're going to have poles there no matter what, that's just the nature of that area, but I think you can tweak the flow a bit to get more natural deformations.
#1 I'd tweak it so you have a second loop [green-ish highlight on the right], better defining that lower edge of the rib cage, Its a pretty rigid structure, so you don't need quite as much geometry as you've got now, particularly the two bands [on the left below, highlighted in orange] feeding in to that pole.
#2 Denser geometry down here can can be used to form the natural crease when bending toward that side, its also an area that's going to stretch a lot when bending to the opposite side, so a little more geometry is probably beneficial here.
I think one loop [blue] to define the abdomen should be sufficient. The two loops you have now, looks like it might be rolling the start of the obliques into the abs [tho, its a little tough to tell from a single static image], when the obliques should be a more north/south muscle group.
Otherwise, looking good. Shoulders? UGH! Have fun with that!
Core i7 950@3.02GHz | 12GB Corsair Dominator Ram@1600mHz | 2GB Geforce GTX 660
Lightwave | Blender | Marmoset | GIMP | Krita
odf posted Sat, 13 December 2025 at 4:37 PM
Thanks Warlock279! That makes sense. I'll give it a try.
I think I've made some progress with the shoulders. Will show wires when I'm happy with them or give up, whichever comes first :grin:.
-- I'm not mad at you, just Westphalian.
odf posted Wed, 17 December 2025 at 12:34 AM
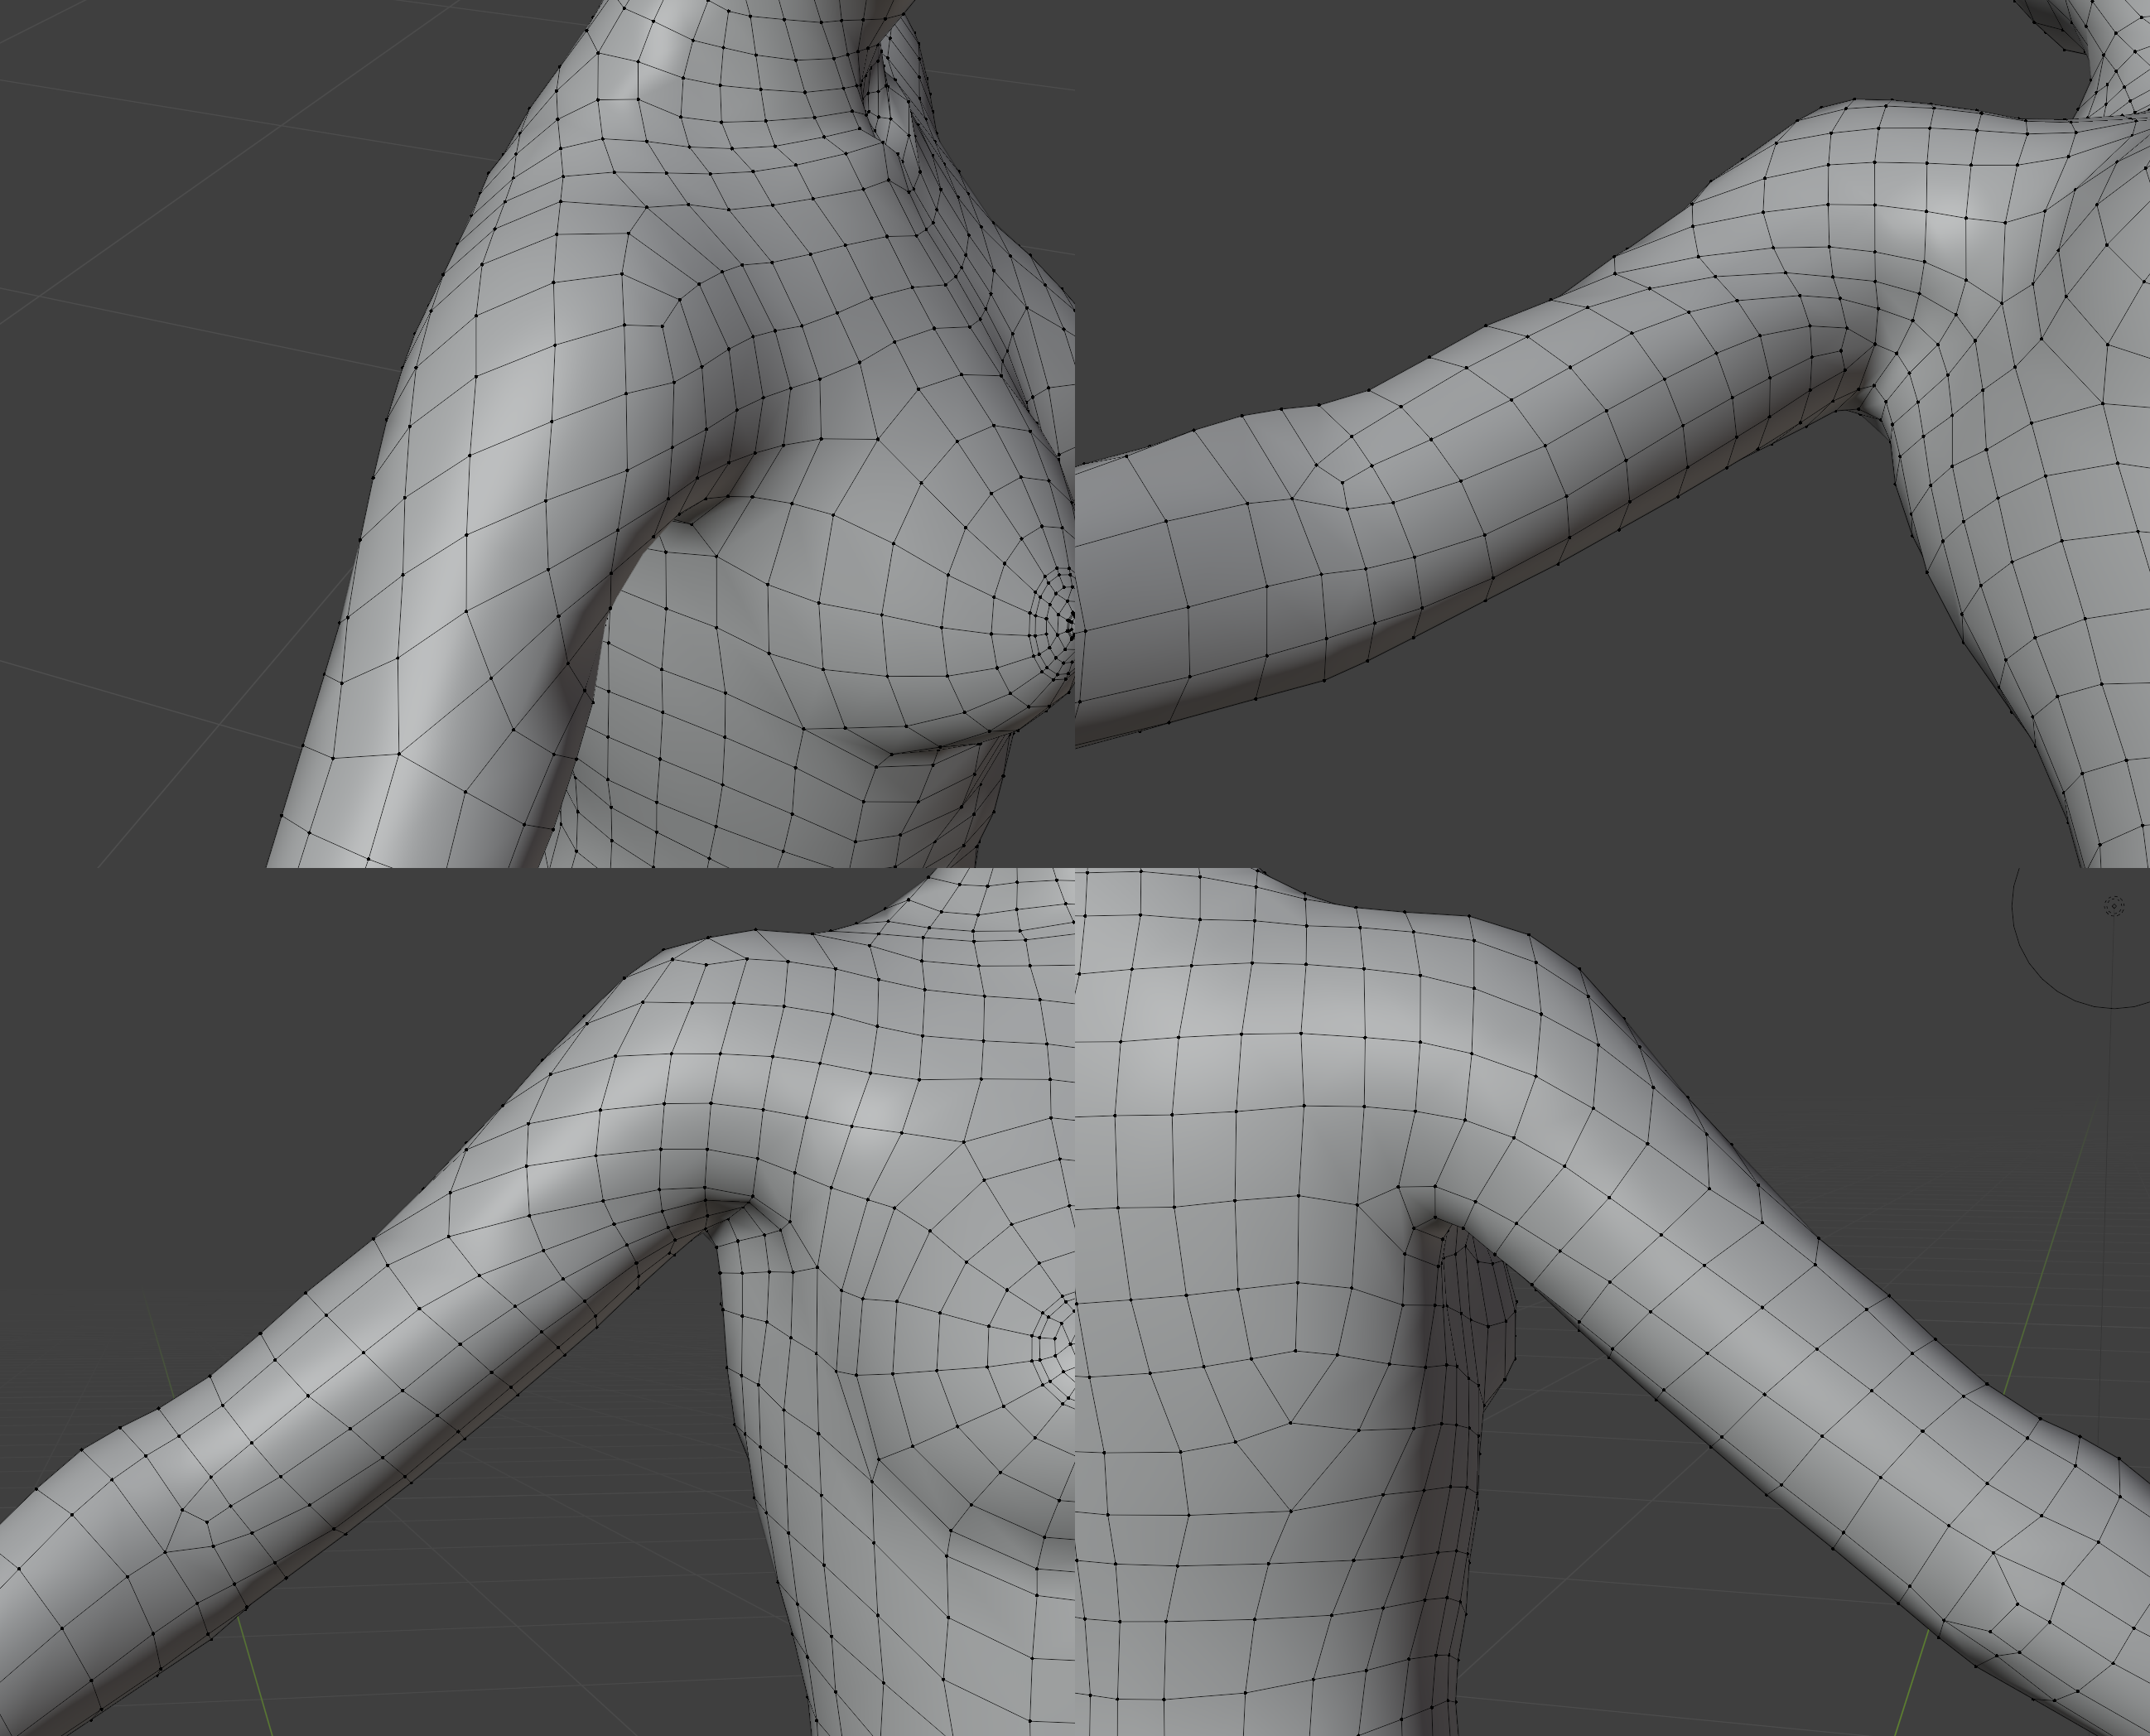
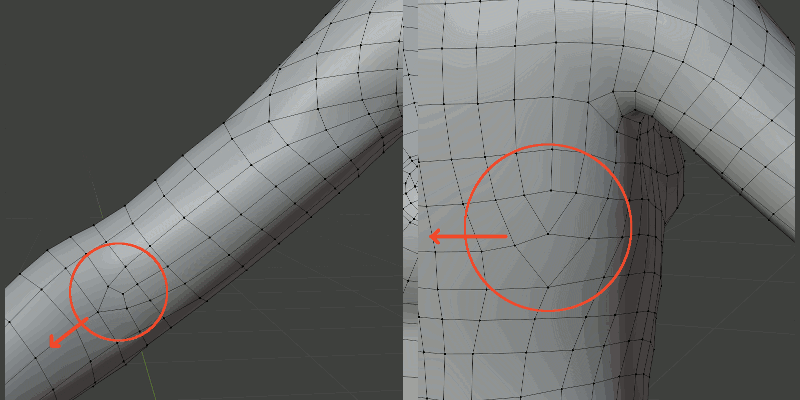
The reworked shoulder wires. Funny how I made so many messes that I struggled to fix, only to arrive at something not that much different from Toni's original topology in this area. I think the poles are placed a bit better, and I have at least a few nice edge loops and generally a bit more density in the area. Not being super-obsessed anymore with keeping the poly-count as low as possible even if it means creating otherwise unnecessary poles all over the place helps. :grin:
-- I'm not mad at you, just Westphalian.
Warlock279 posted Wed, 17 December 2025 at 3:00 PM
Shoulder looks pretty good, I don't see anything there that would concern me.
Couple really minor things, not issues/problems really, just a couple personal preference nitpicks.
I would probably shift the poles on the back in a row or two, keep the same flow, still the same number of columns and what not, just shift them to the left a column or two. That gets them a little further away from the bulk of the deformation/stretching, but they're also a good shape/flow to help define the muscle/bone of the shoulder blade area a bit if you wanted.
I'd also maybe move that pole in the elbow down a couple rows away from the joint. I know where it is know, it does a good job of creating that indent where the head of the bicep comes into the elbow, but there's some potential for it to get wonky when bending the elbow, and you can use that extra geometry a little further down the forearm to get some definition where the muscle comes over the radius bone.
Core i7 950@3.02GHz | 12GB Corsair Dominator Ram@1600mHz | 2GB Geforce GTX 660
Lightwave | Blender | Marmoset | GIMP | Krita
odf posted Wed, 17 December 2025 at 4:35 PM
Neat! Thanks again, Warlock279!
-- I'm not mad at you, just Westphalian.
odf posted Fri, 19 December 2025 at 12:32 AM
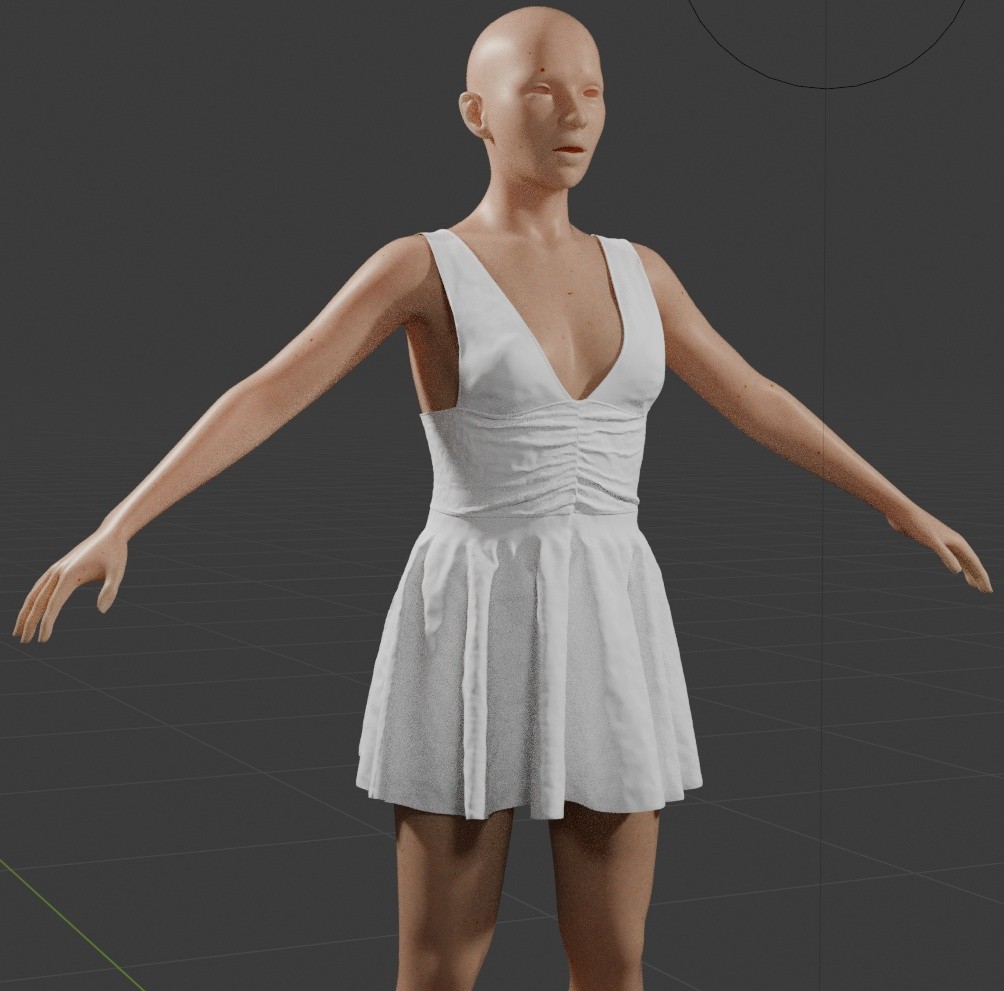
Current status: learning how to wear a dress in Blenderland without having it explode as soon as one pulls it out of the cupboard.
-- I'm not mad at you, just Westphalian.
odf posted Fri, 19 December 2025 at 11:06 PM
I don't think we can attach videos here, so I've put a quick, stupid turntable of what Toni currently looks like in my gallery.
-- I'm not mad at you, just Westphalian.
odf posted Sun, 21 December 2025 at 12:46 AM
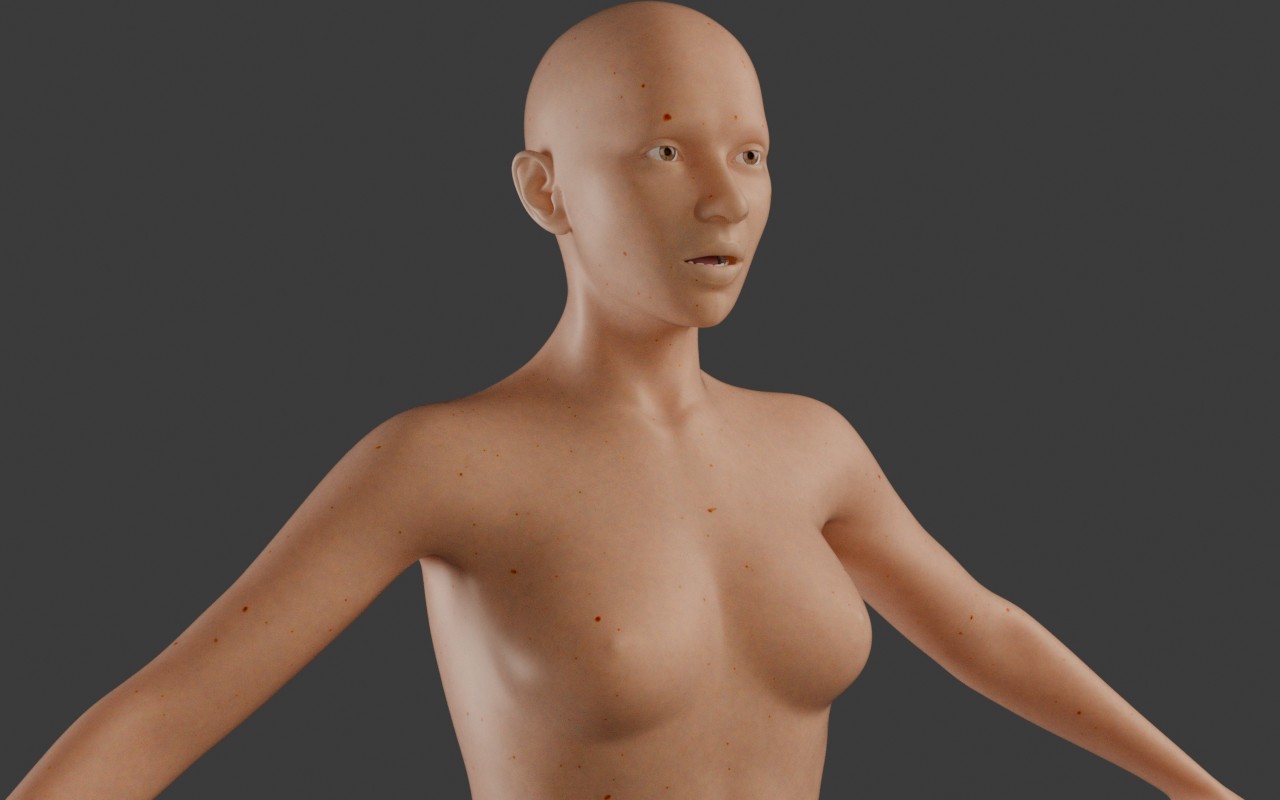
Here's a Cycles test render with eyes, teeth, tongue and nicer lights. I'm still going through the various parts of the mesh and tweaking things that have been bothering me over the years and things I've never noticed but are bothering me now. :grin: The weird shape her clavicles making there in the center being an example of the former category ...
-- I'm not mad at you, just Westphalian.
odf posted Mon, 22 December 2025 at 12:34 AM
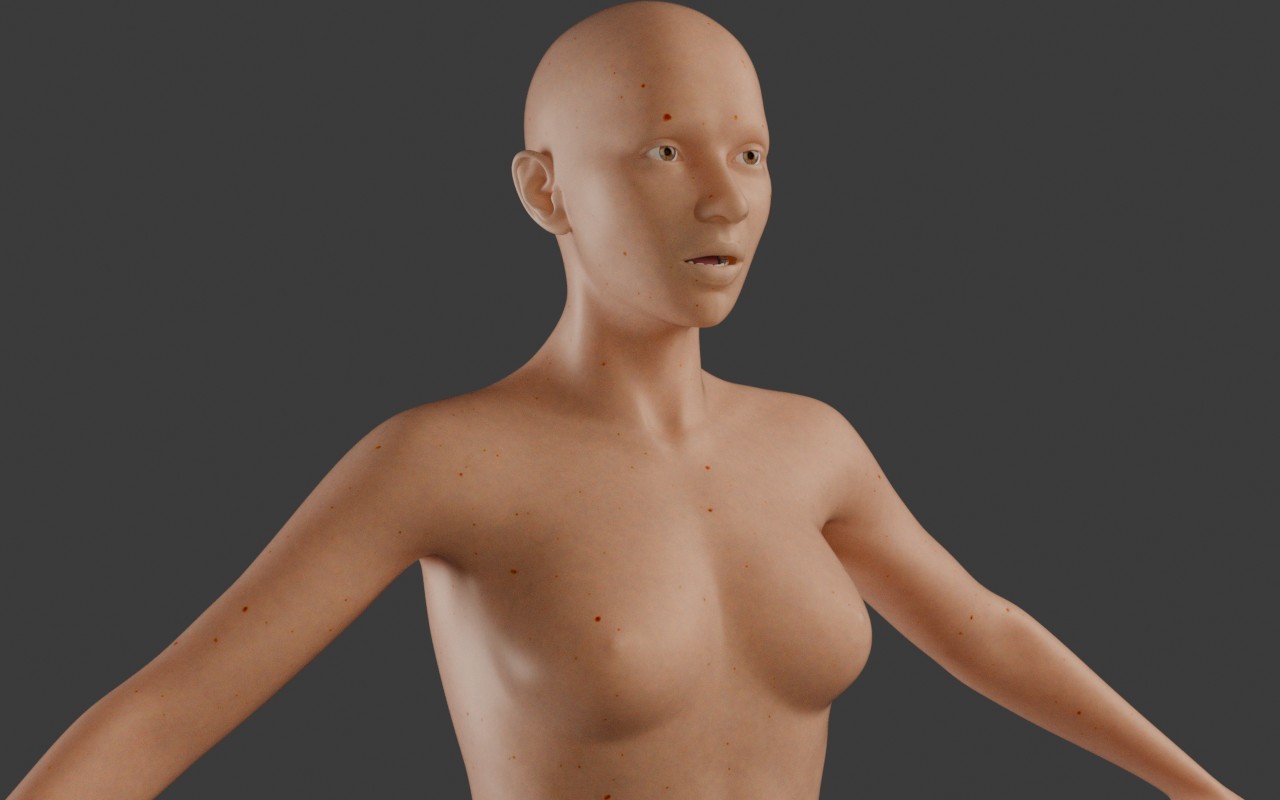
Here's what I got after revising the clavicles and surrounding areas:
-- I'm not mad at you, just Westphalian.
odf posted Wed, 24 December 2025 at 12:44 AM
Taking a short break to work on my abstract sculpture Monument Valley for a spot ...
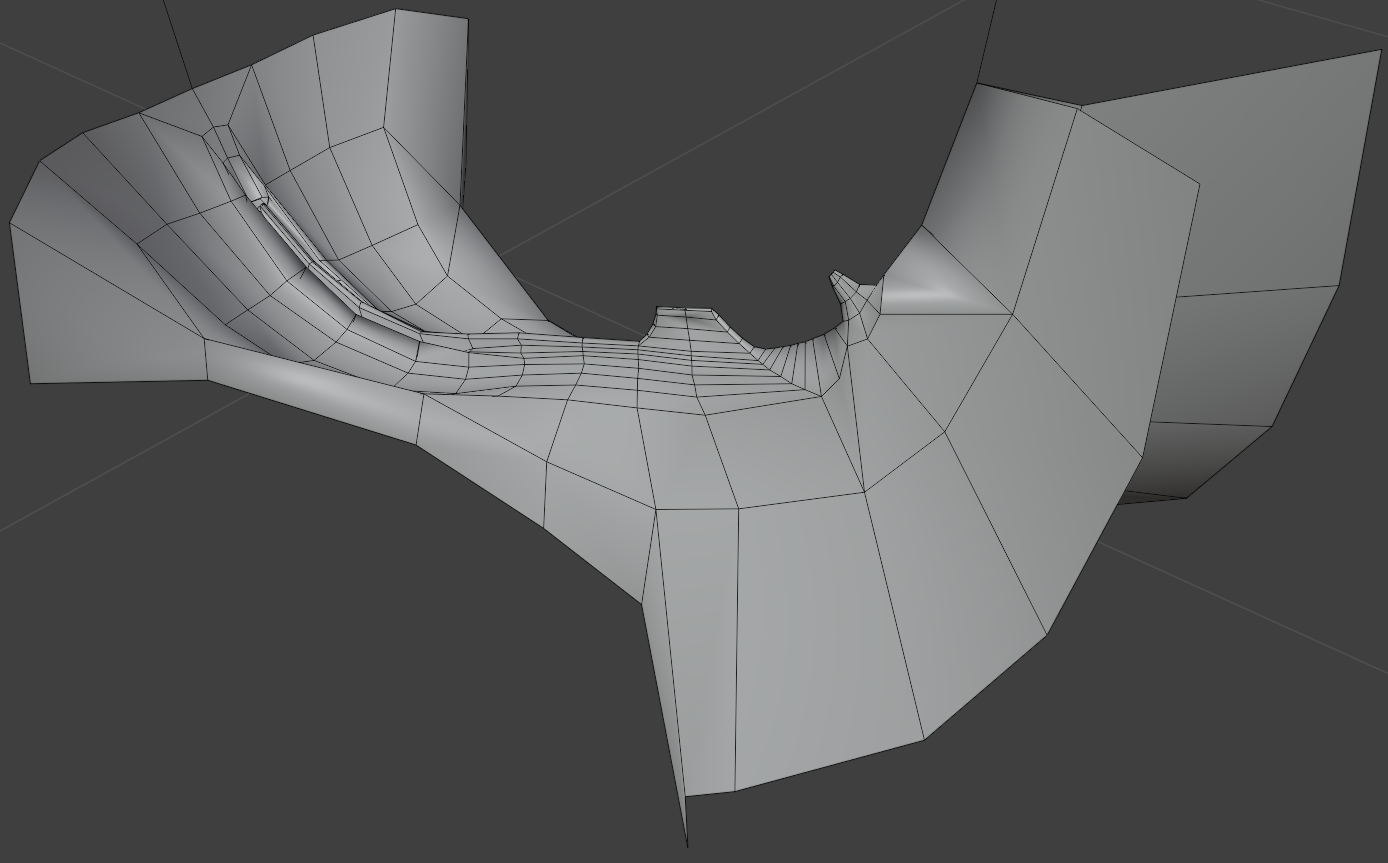
-- I'm not mad at you, just Westphalian.
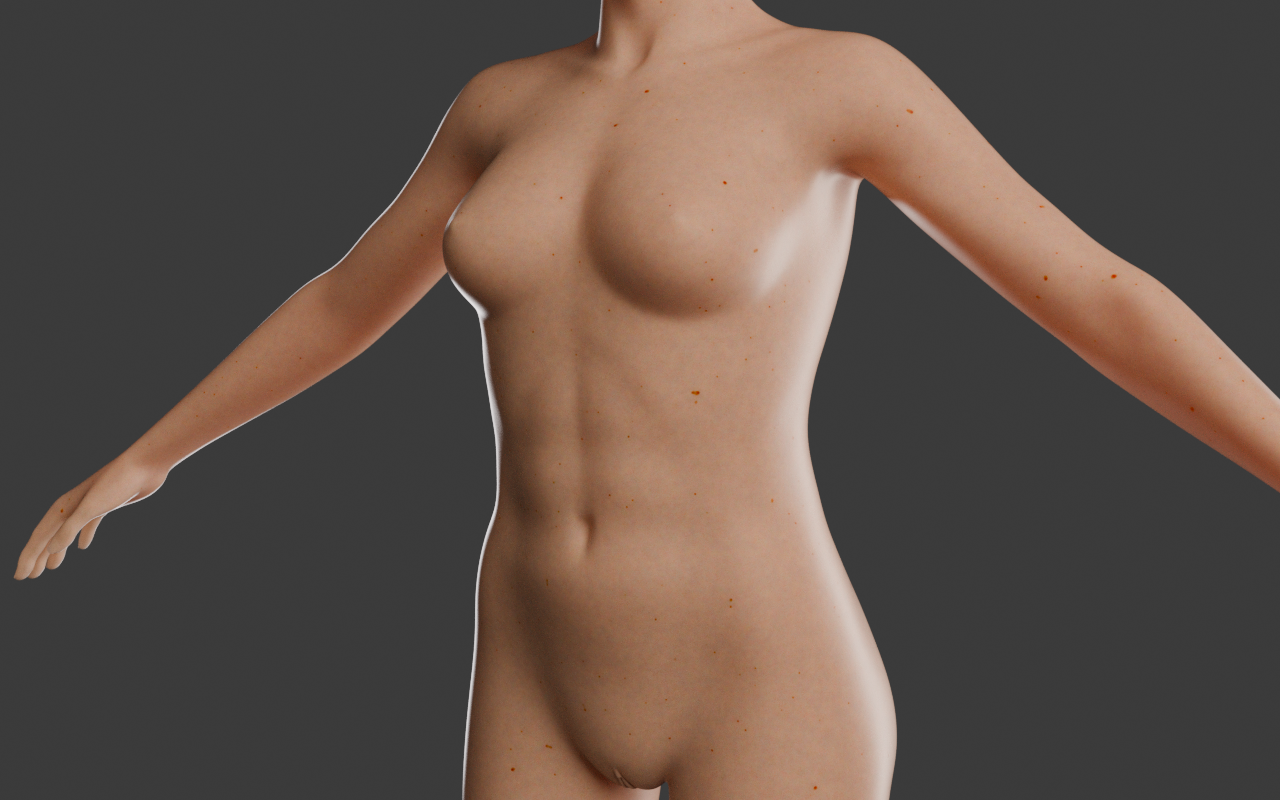
odf posted Wed, 24 December 2025 at 2:33 AM
Another test render with better lighting. It made me see and fix some small problem with the torso shaping.
-- I'm not mad at you, just Westphalian.
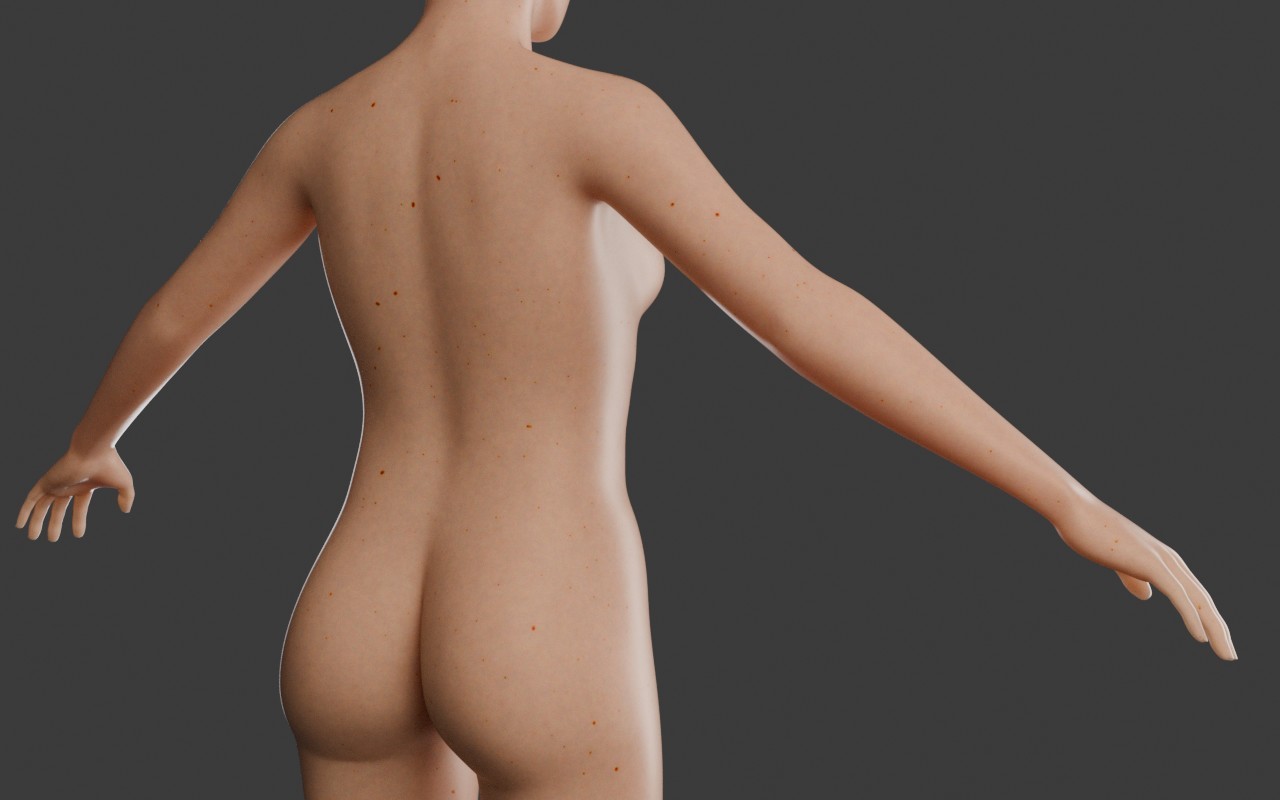
odf posted Wed, 24 December 2025 at 9:37 PM
LOL, I was annoyed about the long render times for Cycles even after selecting GPU rendering, until I realized I also had to enable OptiX in the preferences. Down from something like 6 minutes to 15 seconds now, which is more like it. :grin:
-- I'm not mad at you, just Westphalian.
odf posted Thu, 25 December 2025 at 12:41 AM
Honestly, it amazes me how much these test renders help me detect issues with the shapes. The semi-realistic skin and lighting seem to be triggering the uncanny valley function in my brain. Smooth untextured is great for finding and fixing lumps, but the subtle "not quite human-looking“ issues I sometimes miss. Oh, and by the way, I did more shape-tweaking since making these renders. The back looks much better now and I also fixed some problems in the lower belly and armpits.
-- I'm not mad at you, just Westphalian.
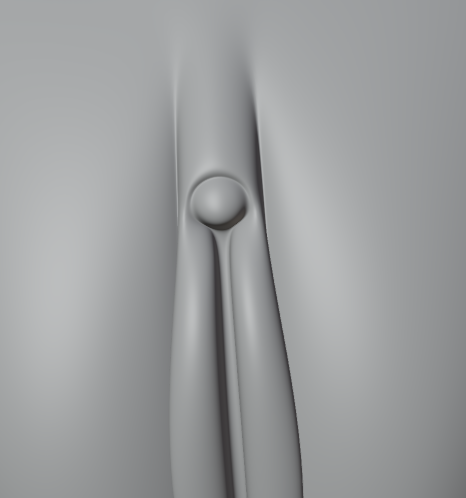
odf posted Thu, 25 December 2025 at 7:32 PM
A small detail of my abstract sculpture. Any similarity with existing shapes would be purely coincidental.
-- I'm not mad at you, just Westphalian.
Warlock279 posted Fri, 26 December 2025 at 6:26 PM
Whoooa, buddy, I'm gonna have to call "shenanigans"! That is neither abstract nor was it coincidental. If you're sticking to that story, Sigmund Freud would like a word.A small detail of my abstract sculpture. Any similarity with existing shapes would be purely coincidental.
Core i7 950@3.02GHz | 12GB Corsair Dominator Ram@1600mHz | 2GB Geforce GTX 660
Lightwave | Blender | Marmoset | GIMP | Krita
odf posted Fri, 26 December 2025 at 7:14 PM
Psst! Just trying not to get caught on TOS technicalities here. :grin:
-- I'm not mad at you, just Westphalian.
odf posted Sat, 27 December 2025 at 11:10 PM
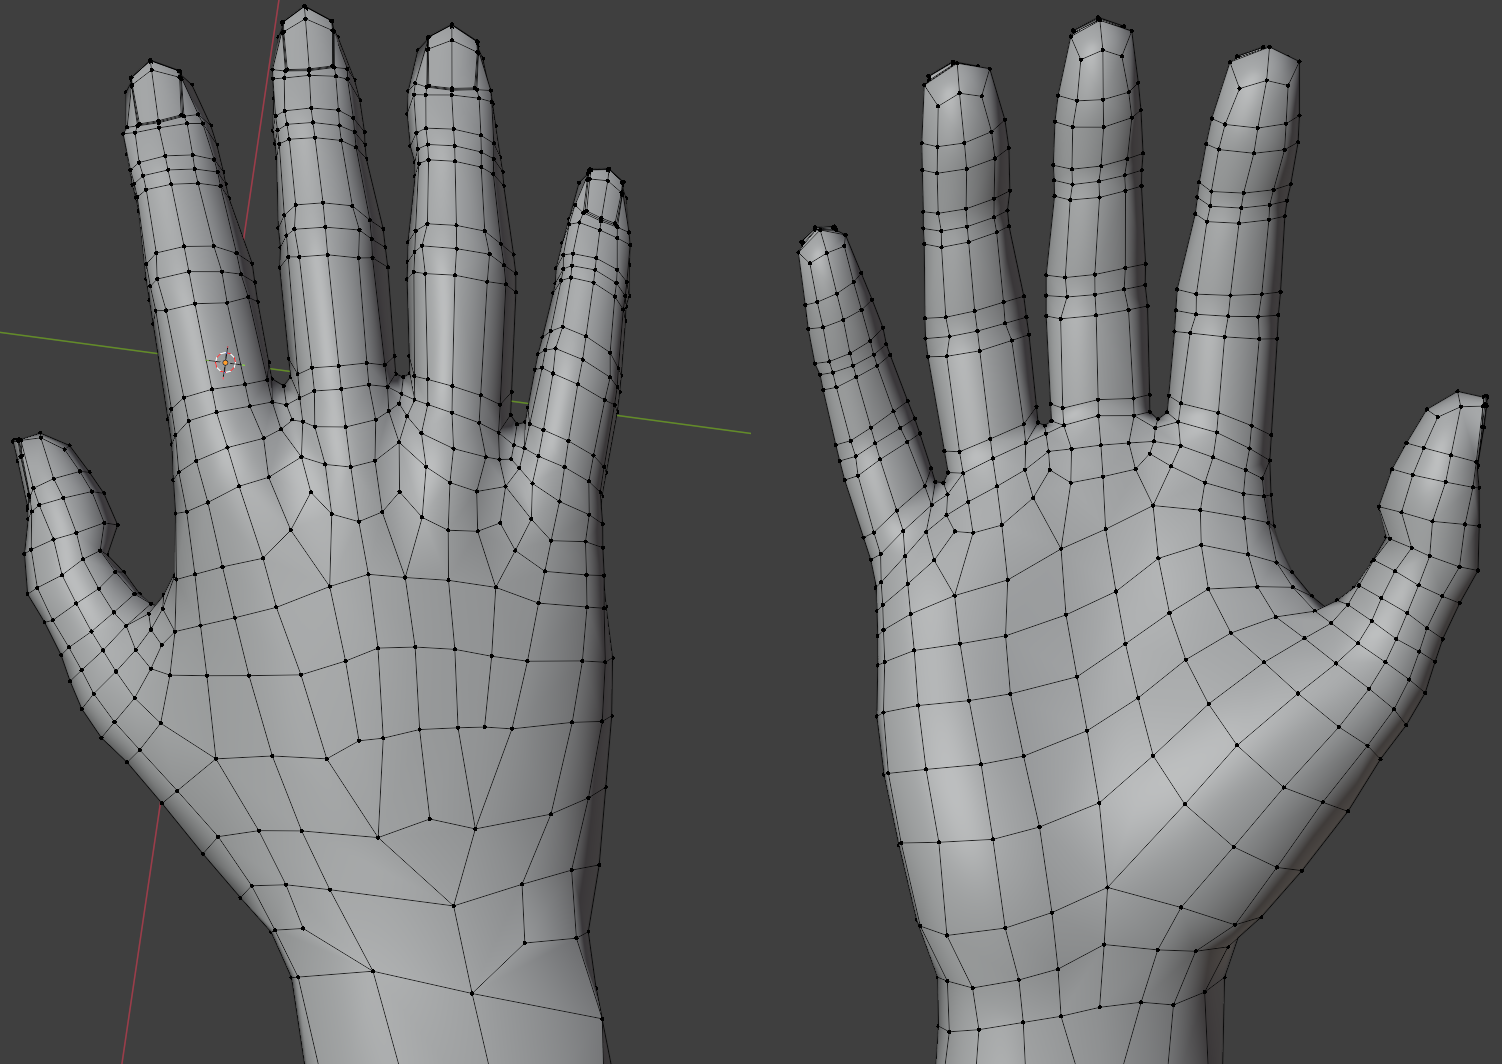
Toni's hands after some tweaking and mild reshaping. The back looks messy and my first reaction was "what was I thinking", but the wires follow the directions of the tendons, which might be somewhat useful and probably won't hurt. As for the palms, I wonder if I should introduce some fortuneteller-friendly edge loops to make the posing of the thumb in particular easier.
-- I'm not mad at you, just Westphalian.
Richard60 posted Sun, 28 December 2025 at 5:19 PM
Without the fortune-teller lines it will never look real. That is one area that will always stand out as being off. Just look at your own hand and let it relax and watch the folds.
Poser 5, 6, 7, 8, Poser Pro 9 (2012), 10 (2014), 11, 12, 13, 14
odf posted Sun, 28 December 2025 at 6:37 PM
Sure, but do they need to be present in the wires, or would displacement maps be sufficient? I'm tending towards the former, to be honest, but I'm also a teensy but worried about overdoing things.Without the fortune-teller lines it will never look real. That is one area that will always stand out as being off. Just look at your own hand and let it relax and watch the folds.
-- I'm not mad at you, just Westphalian.
odf posted Sun, 28 December 2025 at 6:43 PM
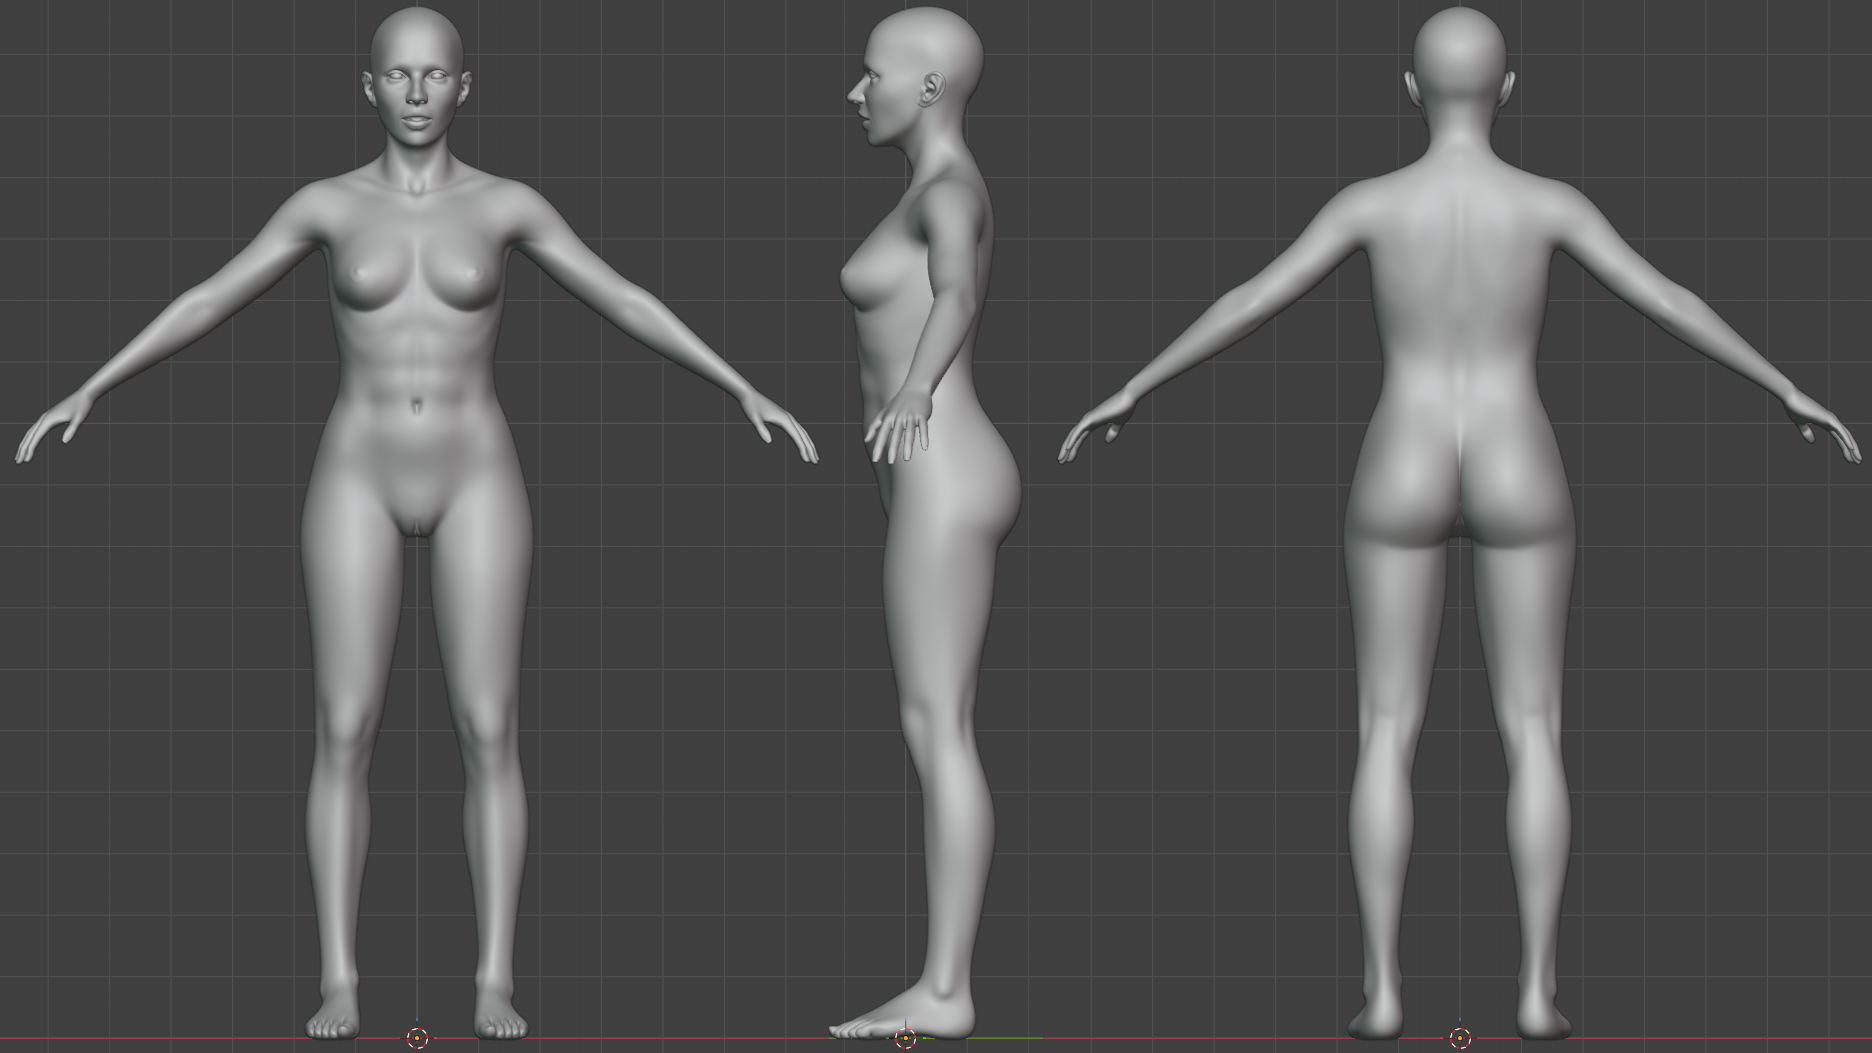
Anyhow, here's an orthographic full-body MatCap of Toni's shape after the latest round of sculpting and tweaking:
-- I'm not mad at you, just Westphalian.
hborre posted Sun, 28 December 2025 at 7:38 PM
Richard60 posted at 5:19 PM Sun, 28 December 2025 - #4502617Displacement will need subdivision, so you will have to test both methods for the best accuracy.Sure, but do they need to be present in the wires, or would displacement maps be sufficient? I'm tending towards the former, to be honest, but I'm also a teensy but worried about overdoing things.Without the fortune-teller lines it will never look real. That is one area that will always stand out as being off. Just look at your own hand and let it relax and watch the folds.
odf posted Sun, 28 December 2025 at 8:26 PM
hborre posted at 7:38 PM Sun, 28 December 2025 - #4502623
Displacement will need subdivision, so you will have to test both methods for the best accuracy.Speaking of which, I hear Blender 5.0 Cycles now has adaptive subdivision. I haven't tested it yet or heard much about it except for the announcement, but its sounds exciting.
I've started rewiring the palms, which does wonders for defining the big bulges, so I'll definitely keep going. Huge mess in the middle, though, right now, so I'm not going to show anything yet. Getting the middle line of the "M" shape will be a bit of a challenge.
-- I'm not mad at you, just Westphalian.
odf posted Sun, 28 December 2025 at 9:30 PM
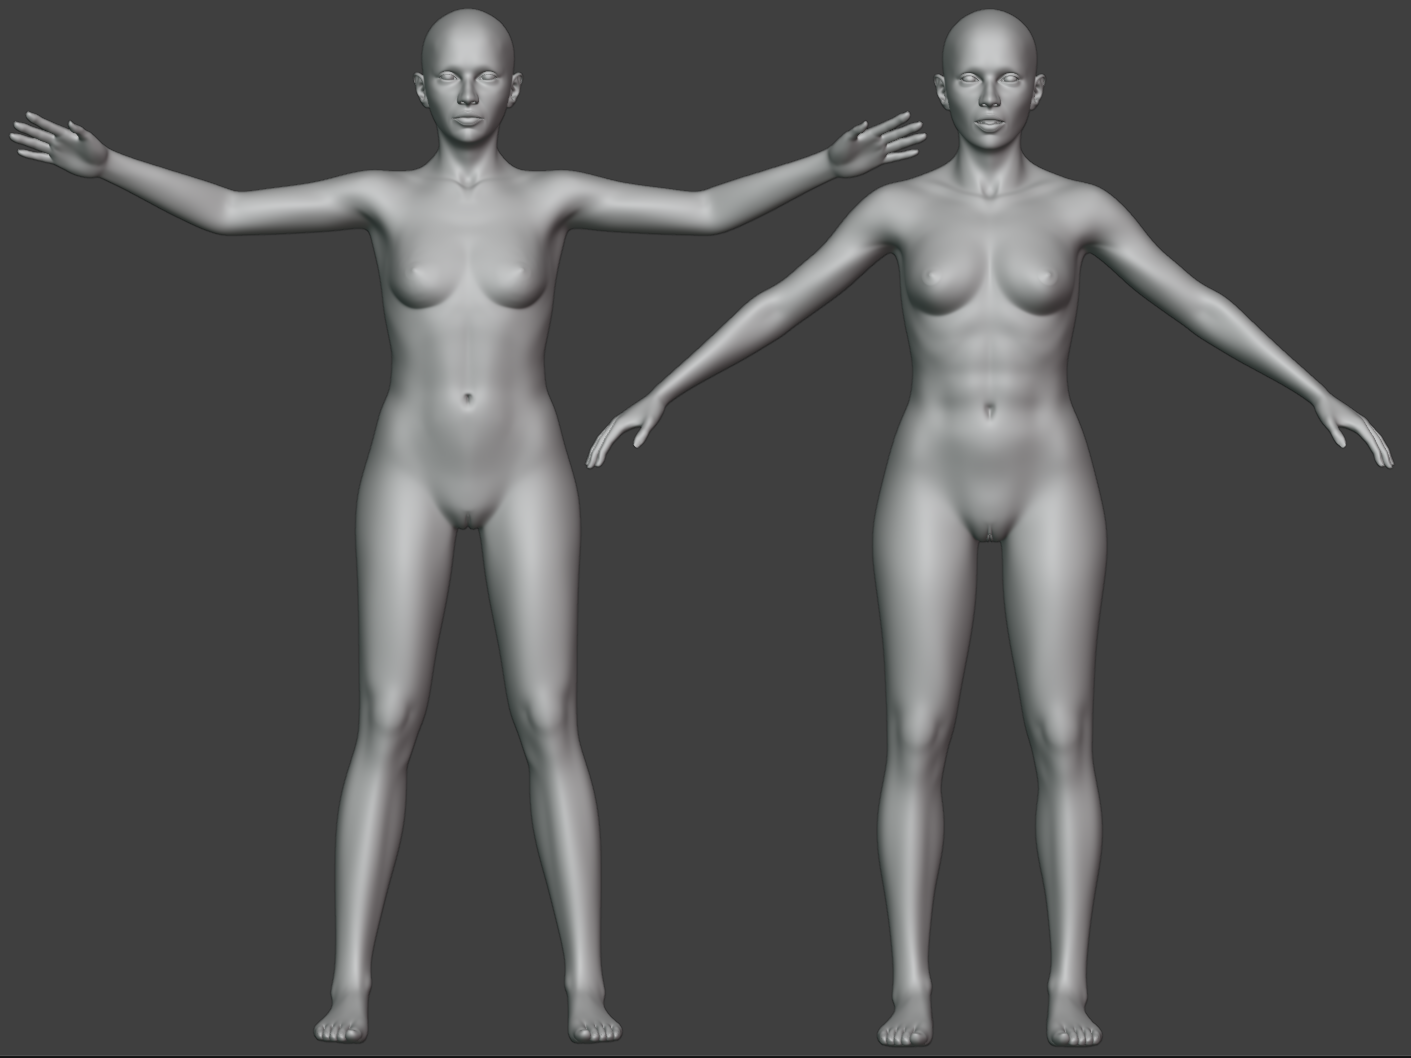
It occurred to me that a little before-after might be interesting, so here's Antonia-1.3 on the left representing the "before".
-- I'm not mad at you, just Westphalian.
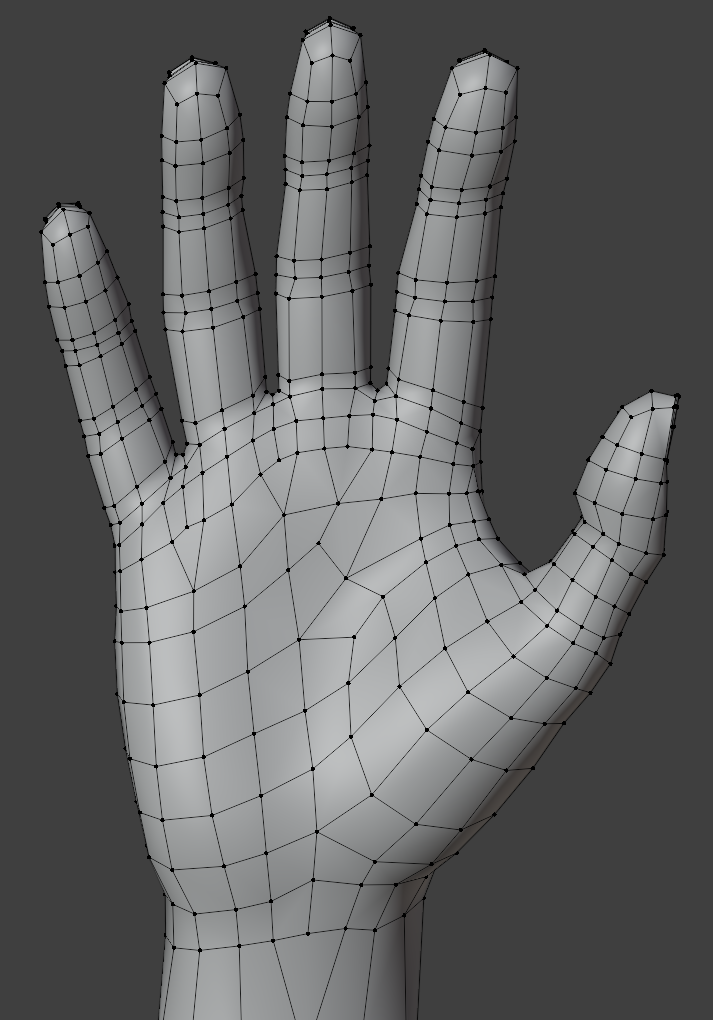
odf posted Mon, 29 December 2025 at 12:01 AM
The rewired palm! I think I'll probably leave it like that until I see how it deforms with a preliminary rig.
-- I'm not mad at you, just Westphalian.
odf posted Tue, 30 December 2025 at 4:44 PM
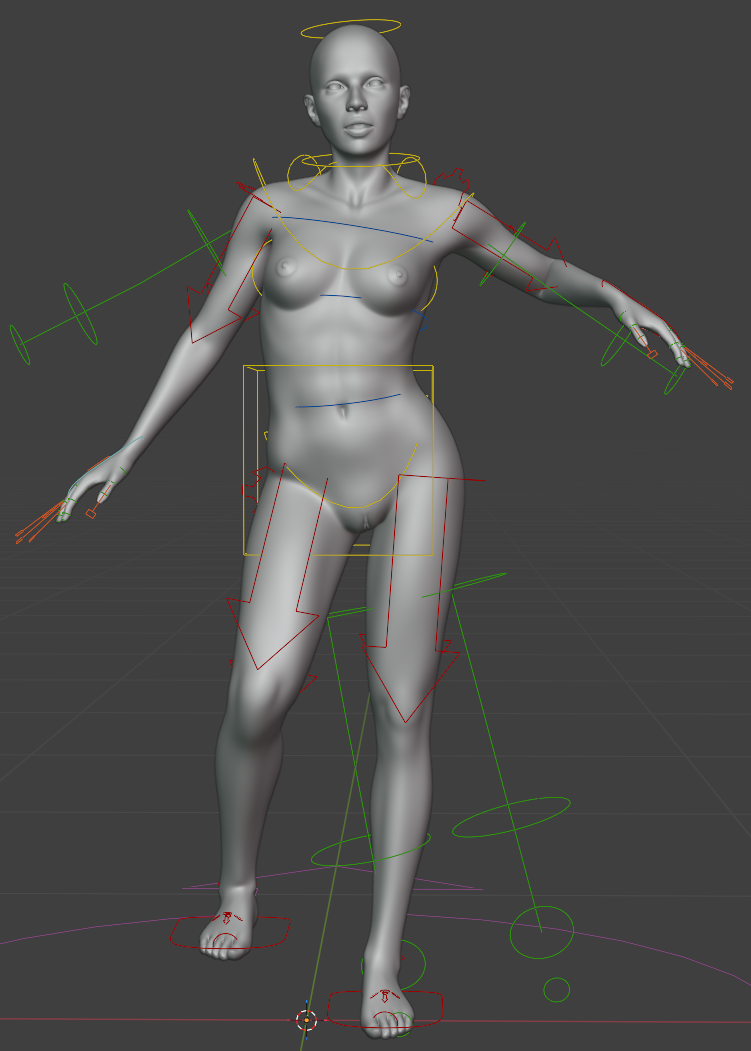
Toni's (and my) first Blender rig. Rigify full human with the awful face bones ripped out. I'll give her some Osipa-style shape keys later like the Poser version of Antonia has them. Next up, play with poses to familiarize myself with the rig, check the pivot points and bone rolls, then once that looks alright start weight painting.
-- I'm not mad at you, just Westphalian.
hborre posted Tue, 30 December 2025 at 4:51 PM
The ankle bones look very asymmetrical to me. Shouldn't the outer bone be higher and almost aligned with the inner bone?
odf posted Tue, 30 December 2025 at 5:04 PM
No, the inner one is higher and more forward.The ankle bones look very asymmetrical to me. Shouldn't the outer bone be higher and almost aligned with the inner bone?
-- I'm not mad at you, just Westphalian.
hborre posted Tue, 30 December 2025 at 5:30 PM
Okay, I just referenced a front T-pose image, and you're right. It just looked awkward to me. Carry on.
odf posted Tue, 30 December 2025 at 5:48 PM
Humans look awkward sometimes. I don't know what evolution was thinking. :grin:
-- I'm not mad at you, just Westphalian.
hborre posted Tue, 30 December 2025 at 6:01 PM
Just call it a work in progress.
odf posted Fri, 02 January 2026 at 2:55 AM
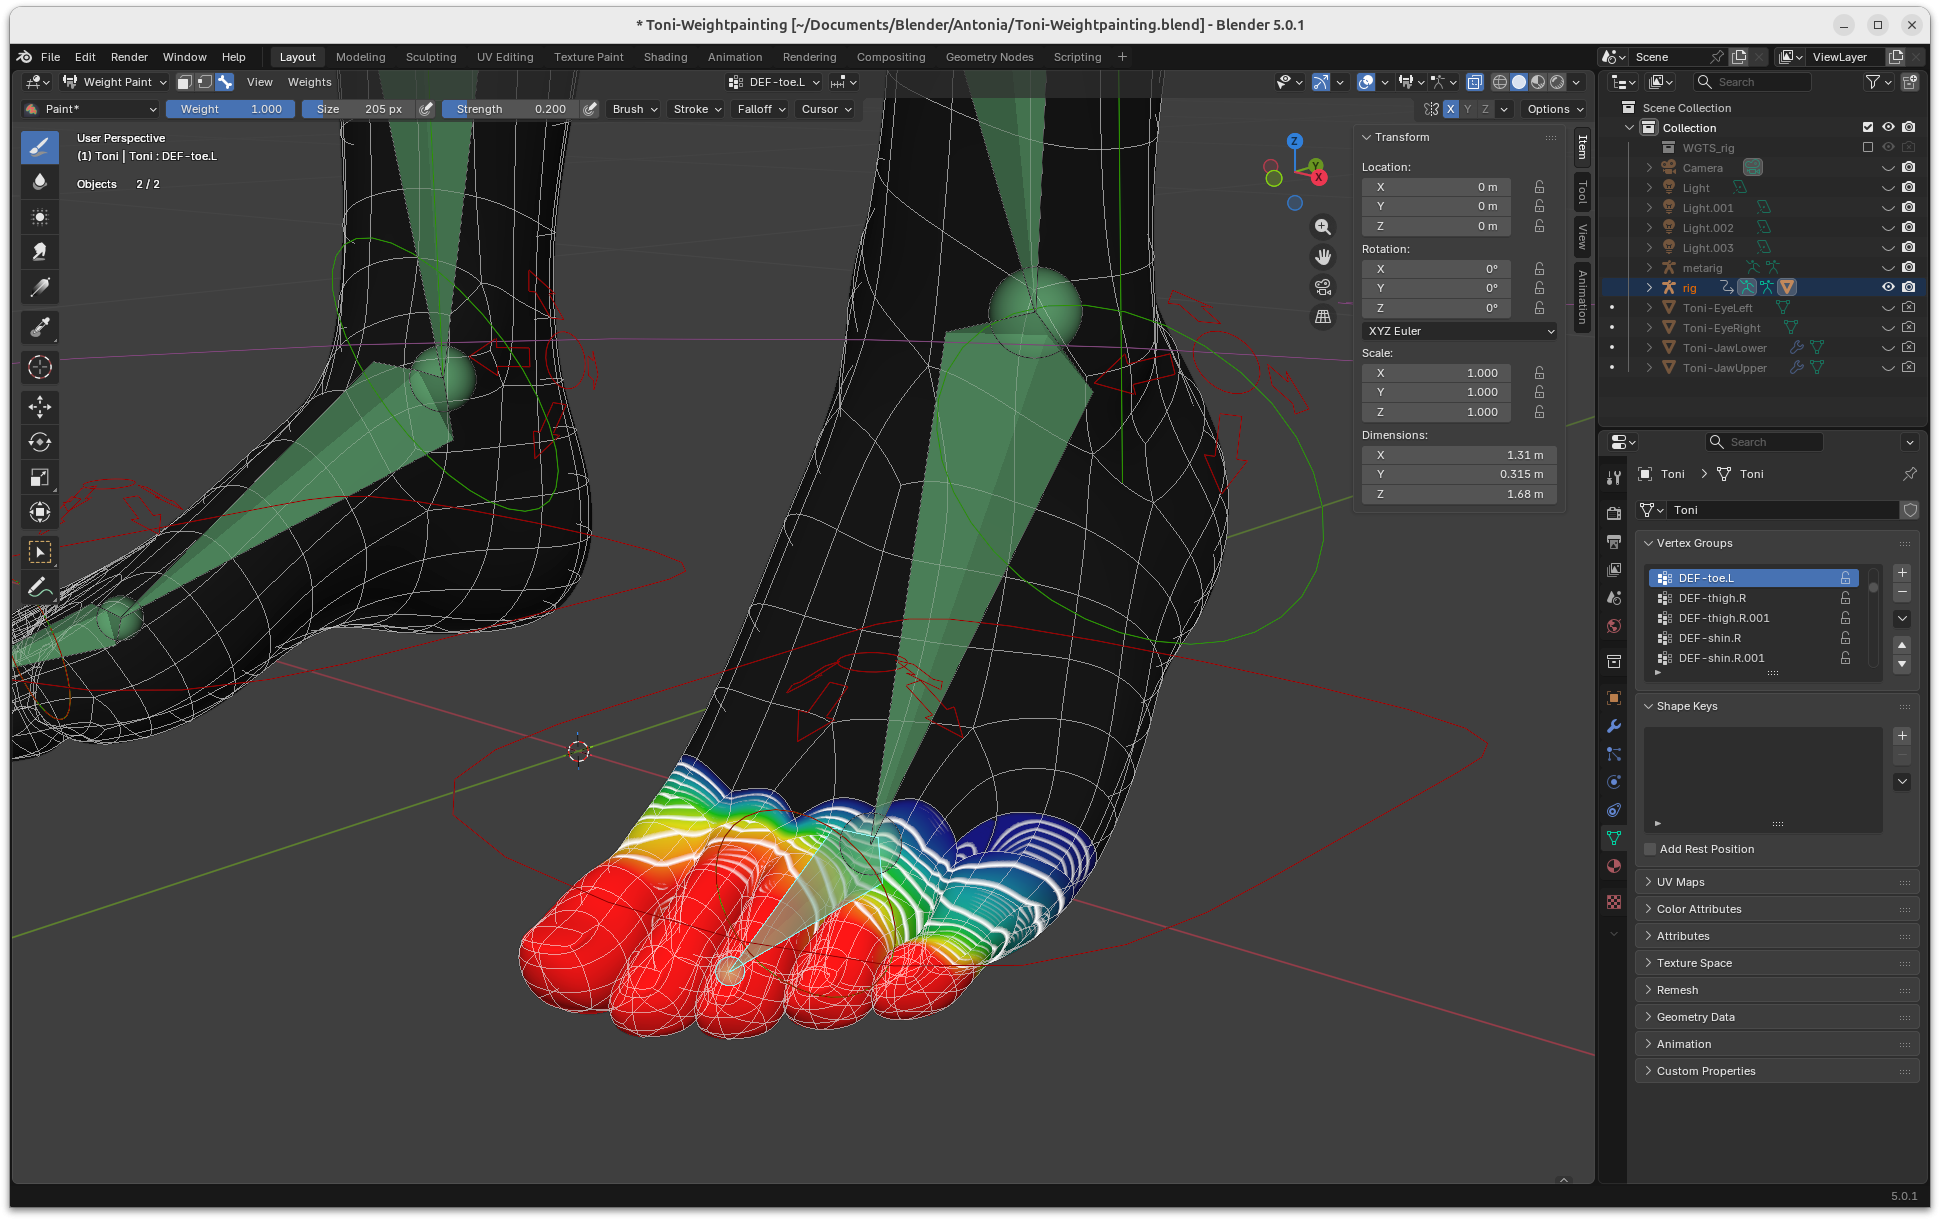
Weight painting is now officially in progress after I had to watch the tutorial videos several times to pick up all the settings and tricks and experimented a while to figure out what kind of process works best for me. I took the snapshot when I started with the toes earlier today, but have worked my way up to the thigh/hip joint in the meantime.
-- I'm not mad at you, just Westphalian.
odf posted Fri, 02 January 2026 at 10:33 PM
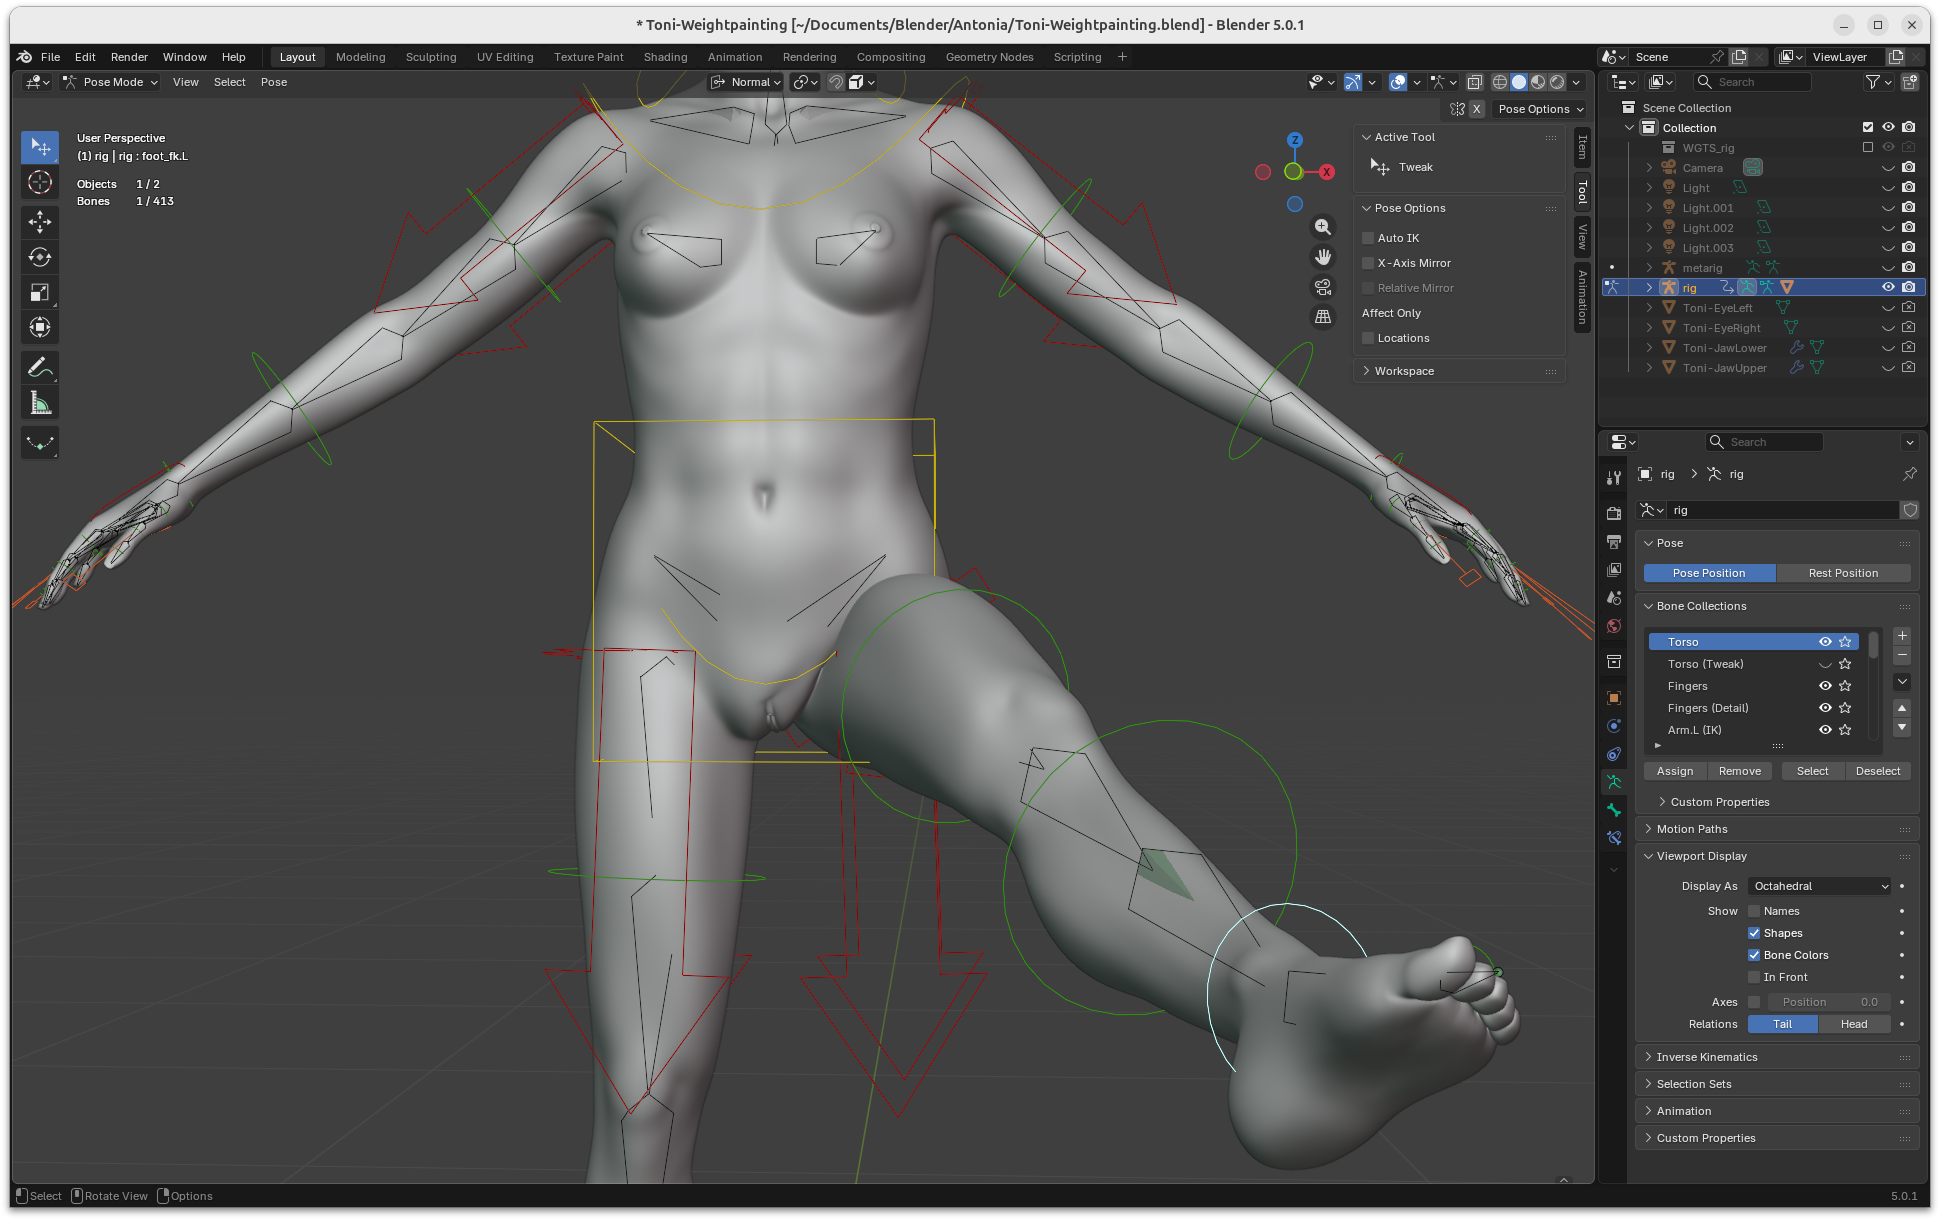
In the middle of weight painting Toni's crotch, as one does ...
-- I'm not mad at you, just Westphalian.
odf posted Fri, 02 January 2026 at 11:03 PM
I actually just decided to abandon that attempt and regenerate the Rigify rig with the pelvic helper bones removed, as they're getting in the way of weight painting. I think I'll restart from the toes again, because there's a bending problem there that might require some extra edge loops. No biggie, I'm effectively learning (or relearning) weight painting while at the same time testing the appropriate construction of my mesh, so I never expected it go smoothly from beginning to end.
-- I'm not mad at you, just Westphalian.
odf posted Sat, 03 January 2026 at 7:10 PM
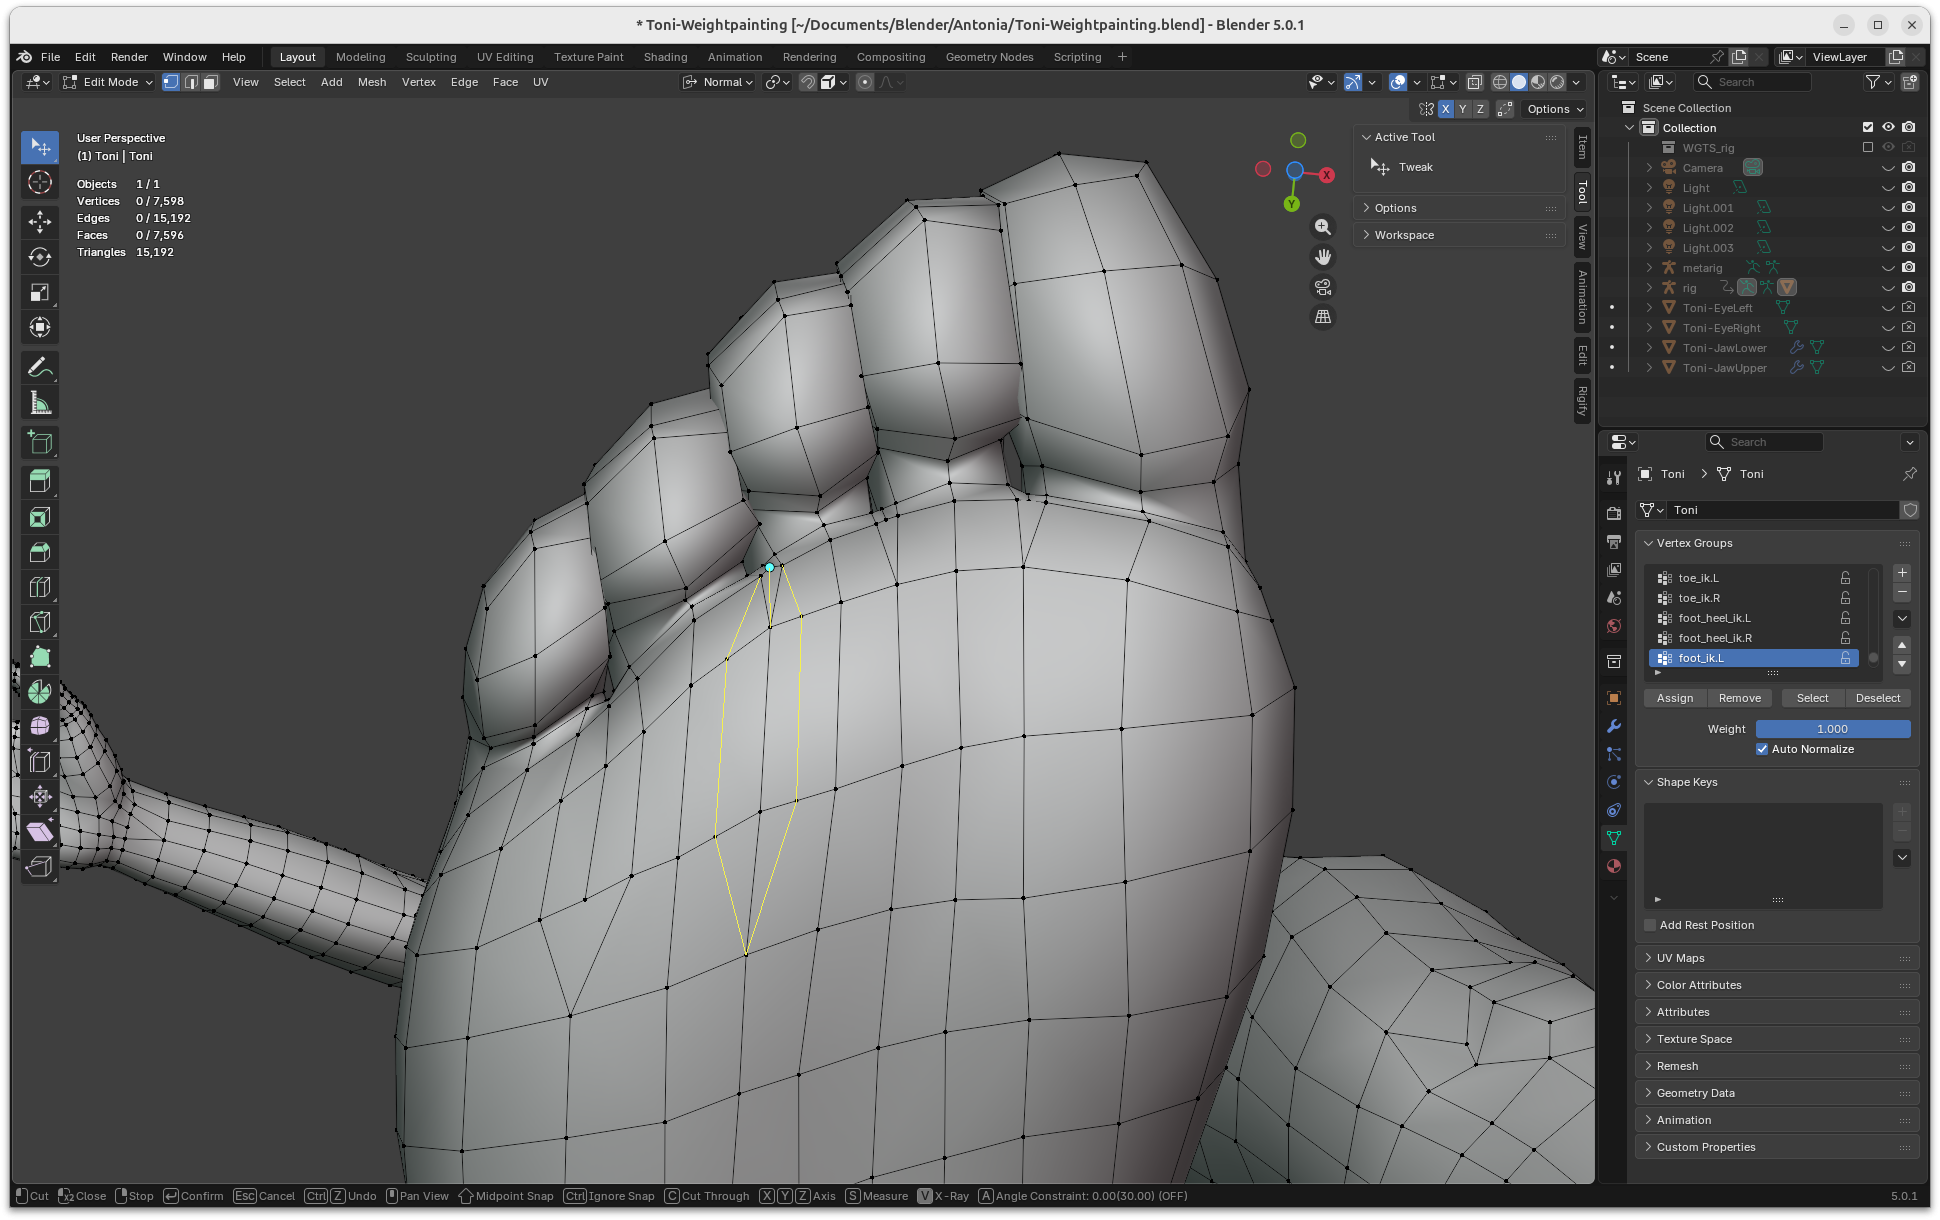
So, change of plans: originally, I meant to go with Rigify's standard single toe policy and add individual toes later. But for bare feet a single toe bone simply can't bend right. I kinda had an inkling of how to add proper toes with Rigify (basically like one does fingers) although I wasn't feeling very confident yet about tweaking the metarig on my own. Fortunately, there's a cgdive course that covers it (for an actual skeleton figure, but that's close enough) which means I'll have my guard wheels. Then I realized that it's probably best to add a little bit more detail to the foot mesh anyway in order to support individual toes, so it's a good thing I'm thinking about this now. Apart from needing a couple more edge loops per toe, I noticed some ugly artifacts with the single toe bending due to badly placed poles, so I'm fixing that, too.
-- I'm not mad at you, just Westphalian.
Warlock279 posted Sat, 03 January 2026 at 8:54 PM
You could probable slim down that heel some while you're down there, its looking a bit ... thick.
Core i7 950@3.02GHz | 12GB Corsair Dominator Ram@1600mHz | 2GB Geforce GTX 660
Lightwave | Blender | Marmoset | GIMP | Krita
odf posted Sat, 03 January 2026 at 9:46 PM
Good catch! Something's been bothering me about this particular part of the foot for a long time, but I never quite understood it. I think what I'm probably missing is the thinning in the upper part of the heel bone, before it meets the main foot bones, whatever they're called.You could probable slim down that heel some while you're down there, its looking a bit ... thick.
-- I'm not mad at you, just Westphalian.
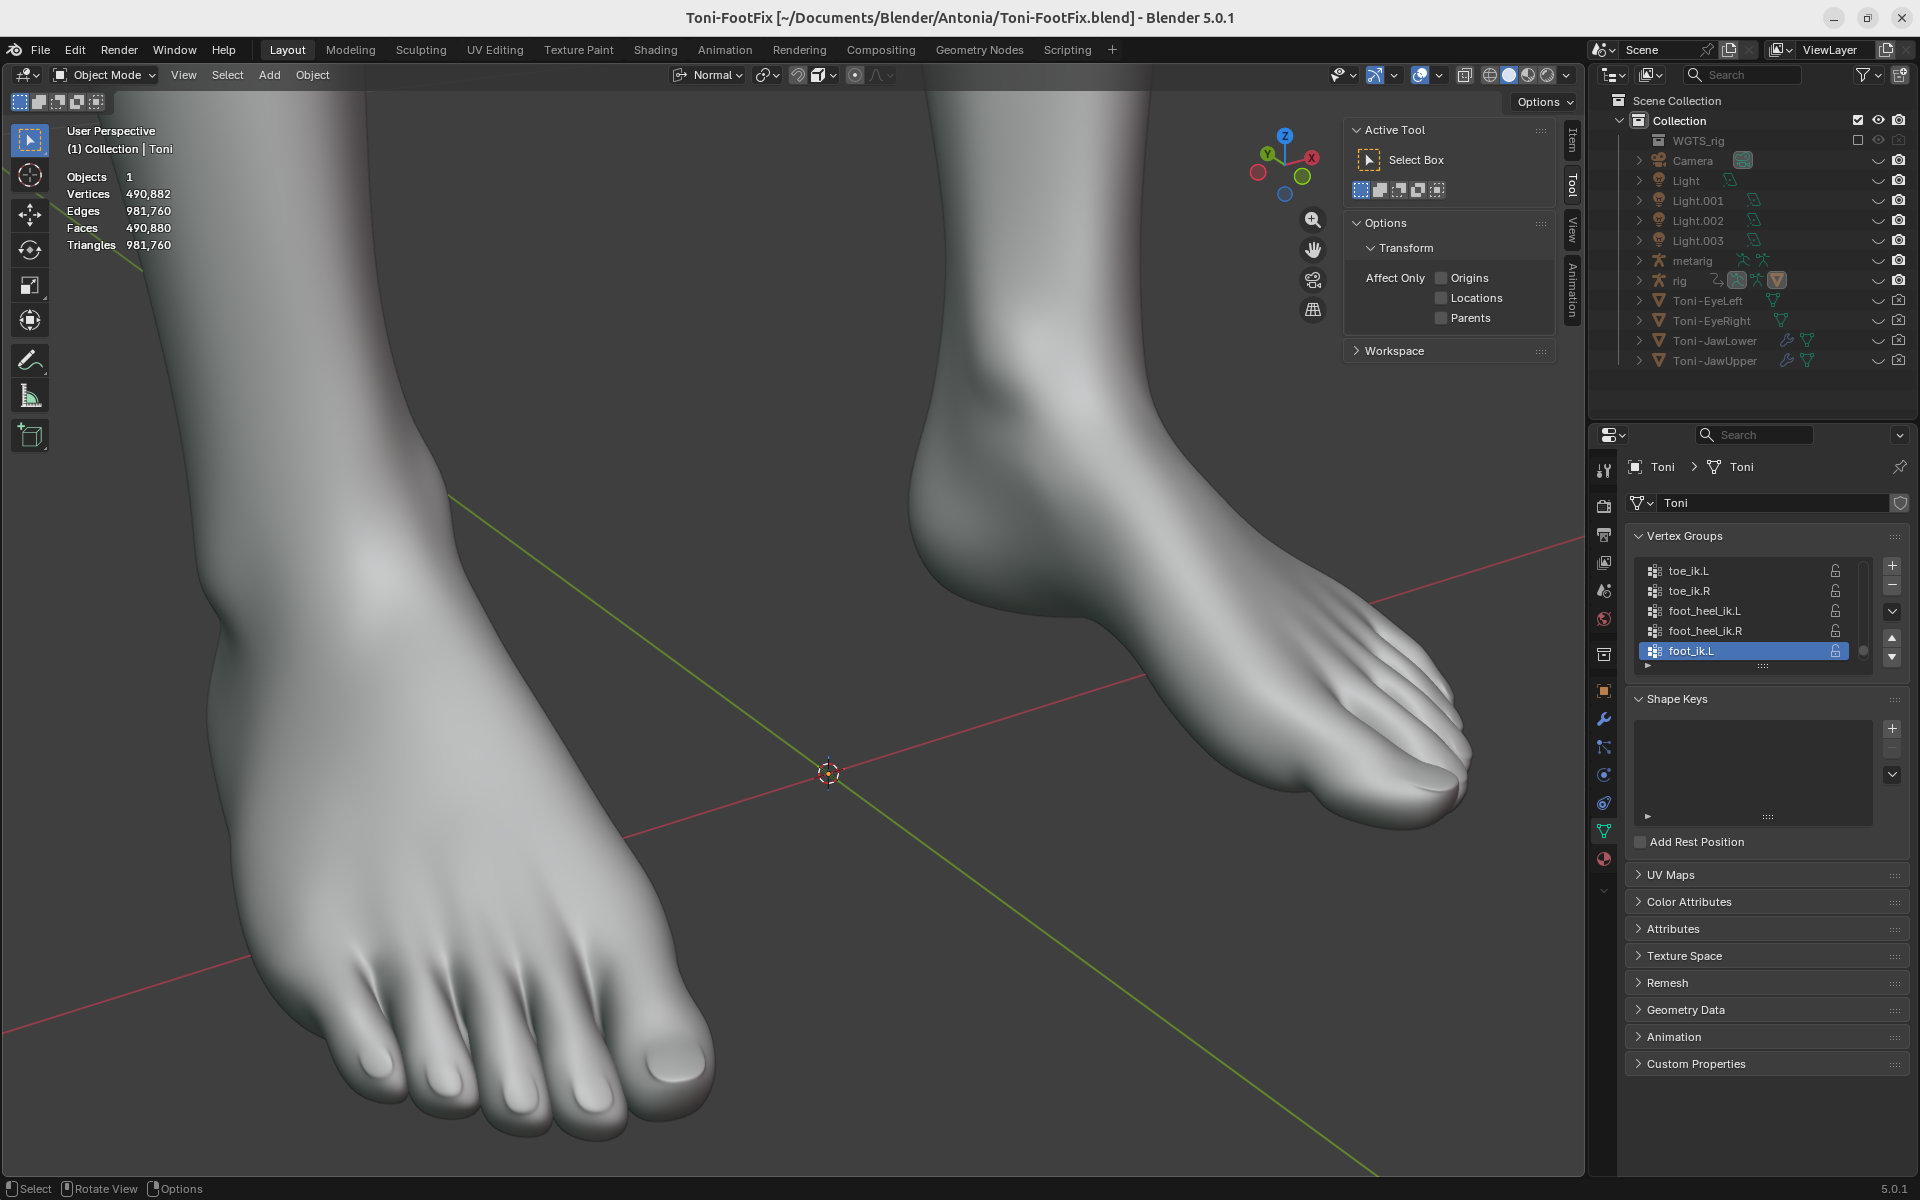
odf posted Sat, 03 January 2026 at 10:12 PM
Now that the feet are starting to look better, I think it's high time I fixed those weird toenails, as well.
-- I'm not mad at you, just Westphalian.
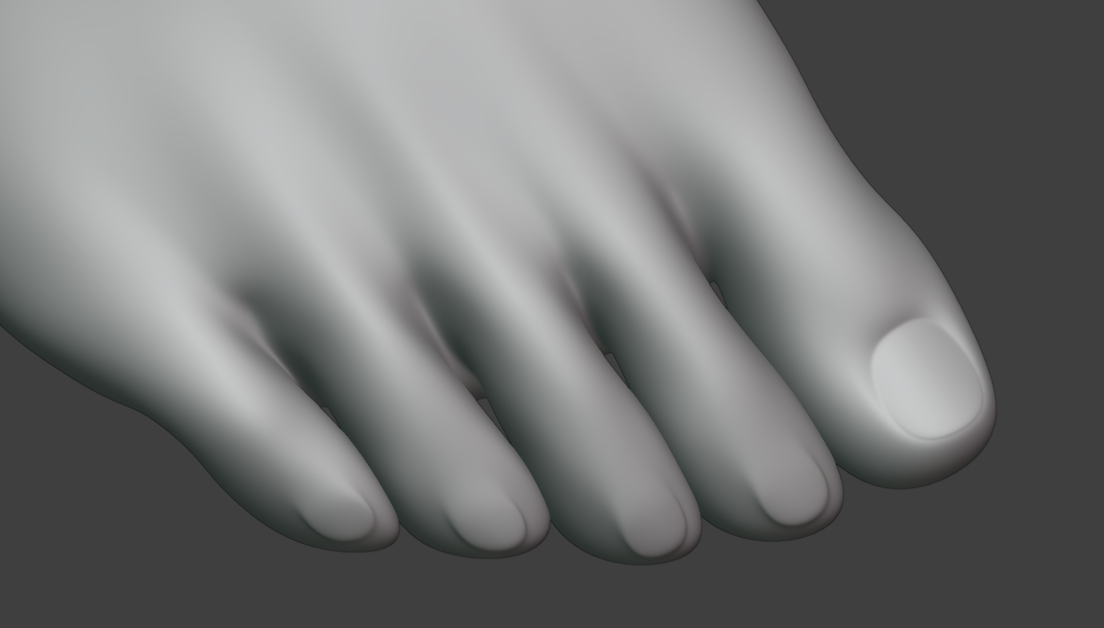
odf posted Sat, 03 January 2026 at 11:03 PM
One down, four to go ...
-- I'm not mad at you, just Westphalian.
odf posted Tue, 06 January 2026 at 2:23 AM
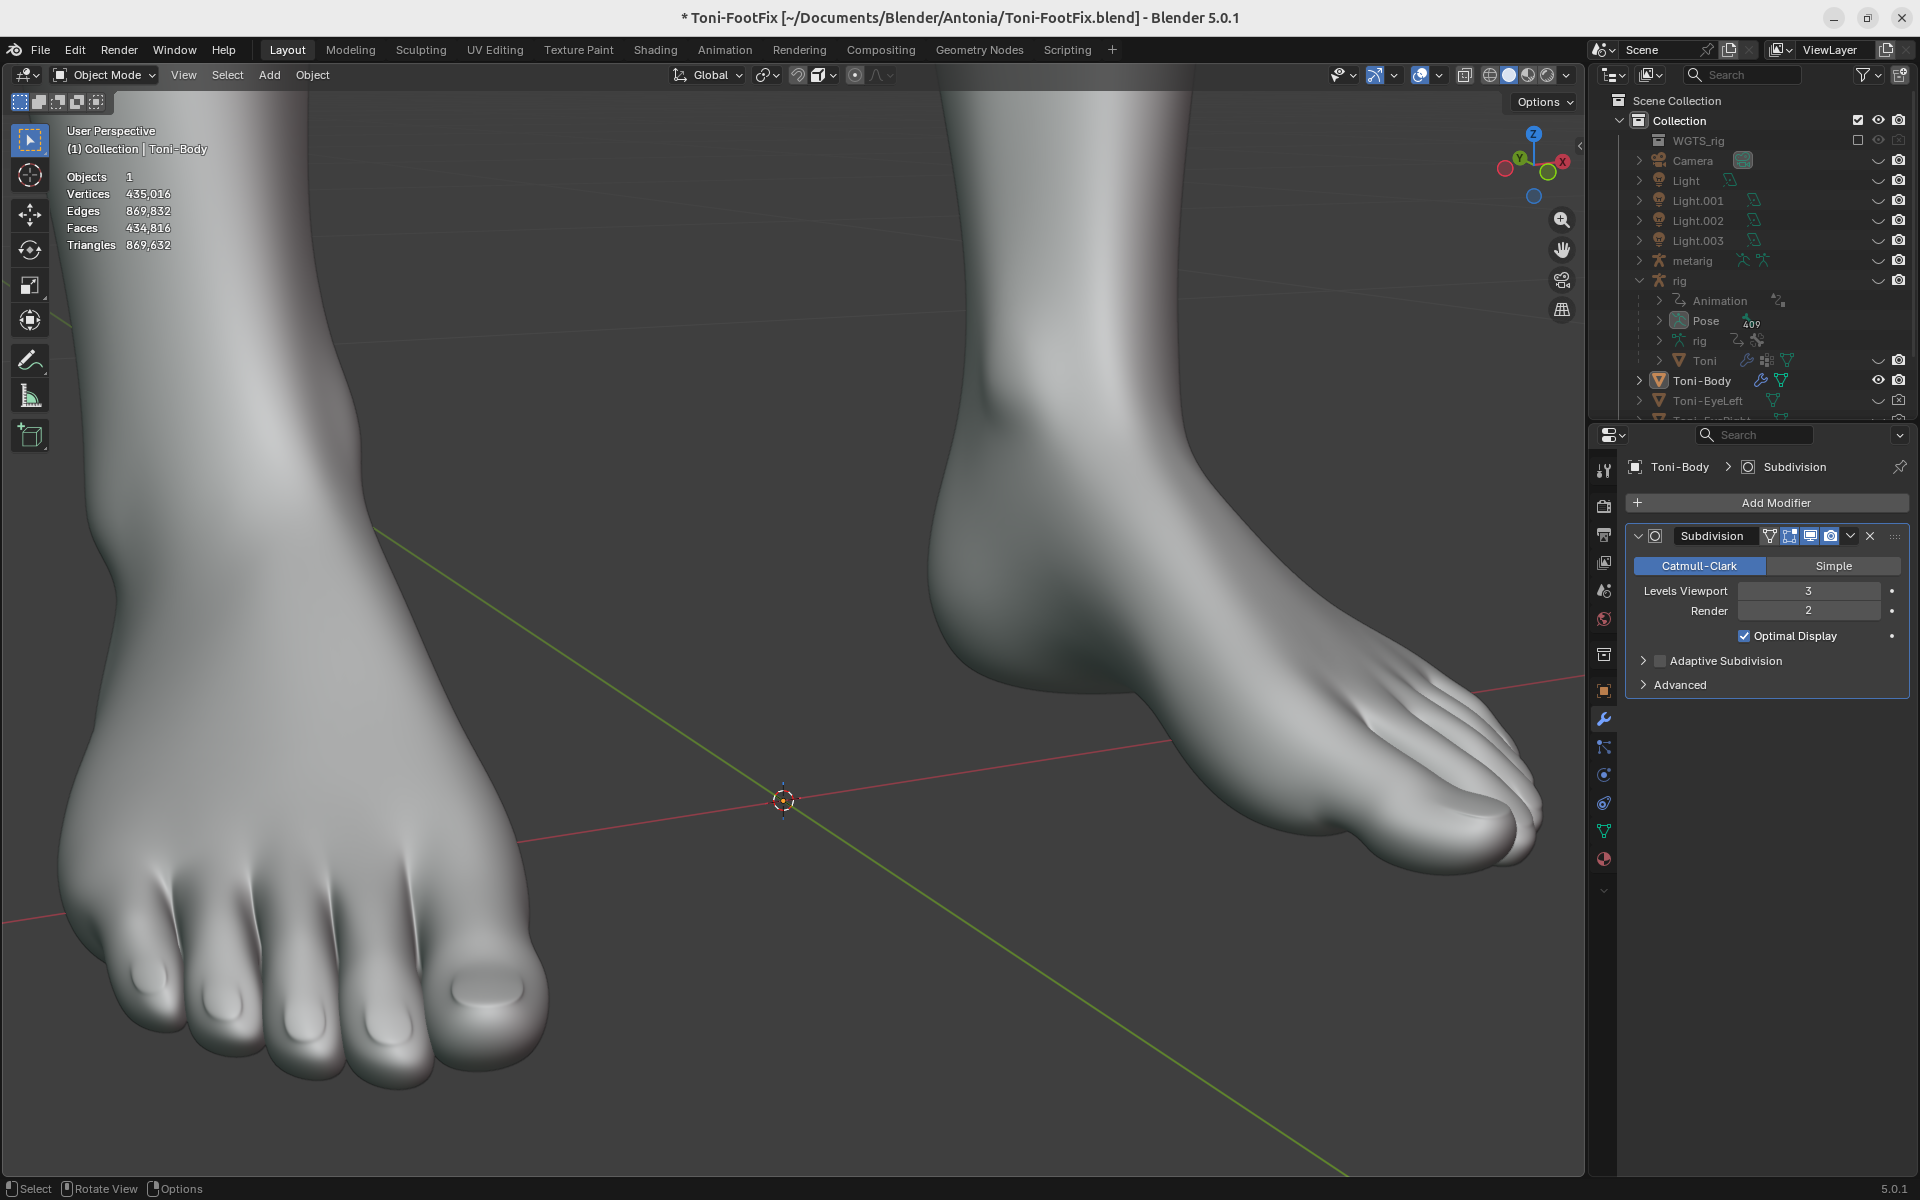
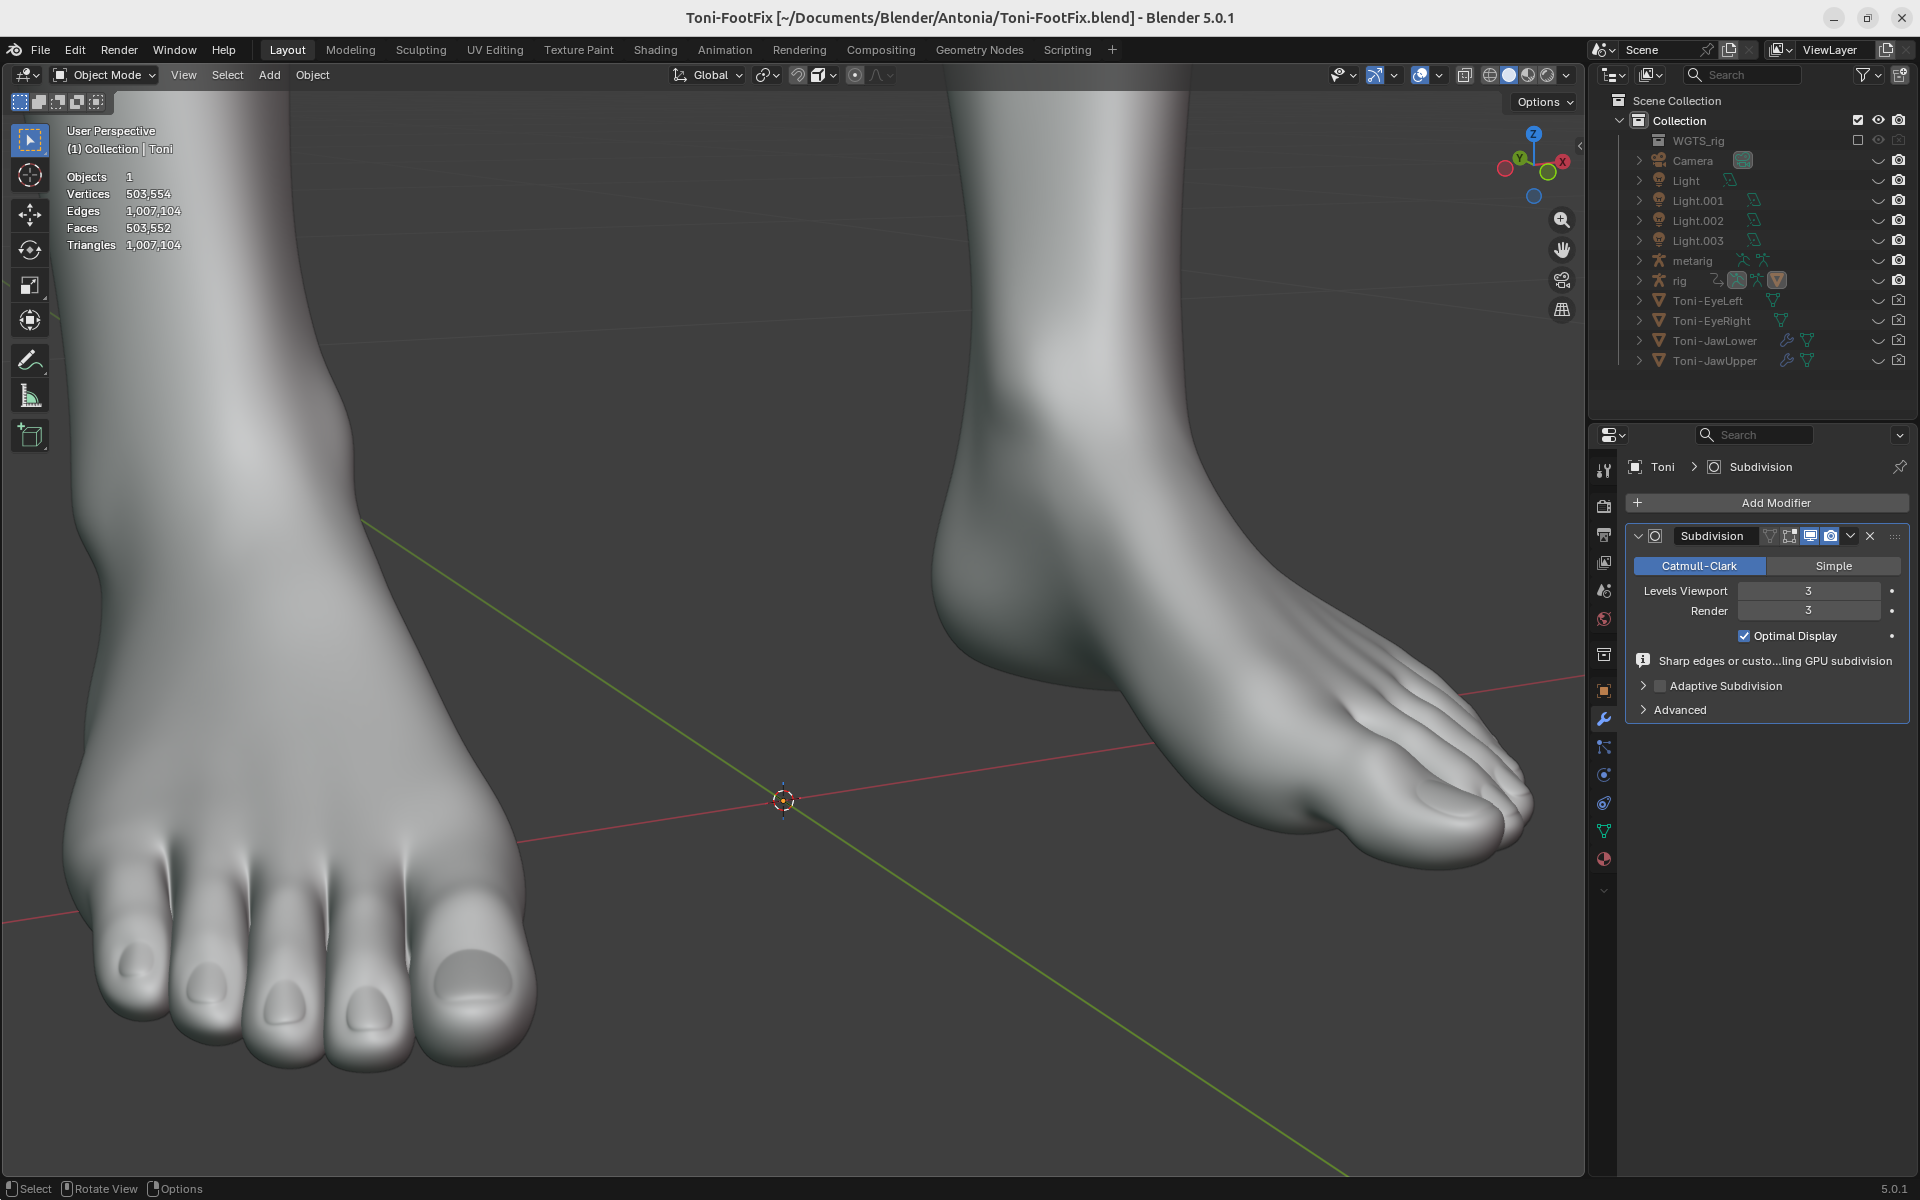
Well, I think I'm finally done fixing things "down there" and ready to do the toe rigging.
Here's what it used to look like:
And here's what I have now:
-- I'm not mad at you, just Westphalian.
hborre posted Tue, 06 January 2026 at 8:42 AM
If we are looking at realism, the first and second piggies should have more separation as the model stands. However, that might interfere with shoes.
odf posted Tue, 06 January 2026 at 5:58 PM
hborre posted at 8:42 AM Tue, 6 January 2026 - #4502848
Hmm, I just googled up a bunch of images, and can see the extra separation in a few, but certainly not most of them. But I did have a bit too much visual separation between all of the toes for a while there and struggled to fix it, so in end I may have overcompensated.If we are looking at realism, the first and second piggies should have more separation as the model stands. However, that might interfere with shoes.
Feet are somewhat tricky. Do I use a standing, neutral or in-shoe shape as the default? I went for more or less neutral with Antonia, so that they look right when she lifts them up from the ground, unlike the completely flattened soles I've seen in some older Poser figures (probably designed to have shoes put on them). But since with this new version the toes as well as the metatarsals will be fully rigged, it should be relatively easy to both spread and flatten them out a bit for a fully realistic barefoot standing pose as well as squeeze them into shoes. That said, if I ever decide I need to render her from below while walking barefoot on a thick glass pane, I may still need to create a shape-key to get the pads and balls shaped just right.
-- I'm not mad at you, just Westphalian.
odf posted Wed, 07 January 2026 at 11:14 PM
Showing off my progress on Toni's slightly advanced foot rig. This is mostly just following a cgdive tutorial, but I did do the (effectively quite easy) linking together of the metatarsal rotations myself because the analogous function Rigify has for the palm does not work for the foot, and cgdive didn't think it was very useful. This is not weight-painted yet and I haven't been able to turn the automatic weighting of the original toe bone off, which explains the distortion of both the middle toes in this image.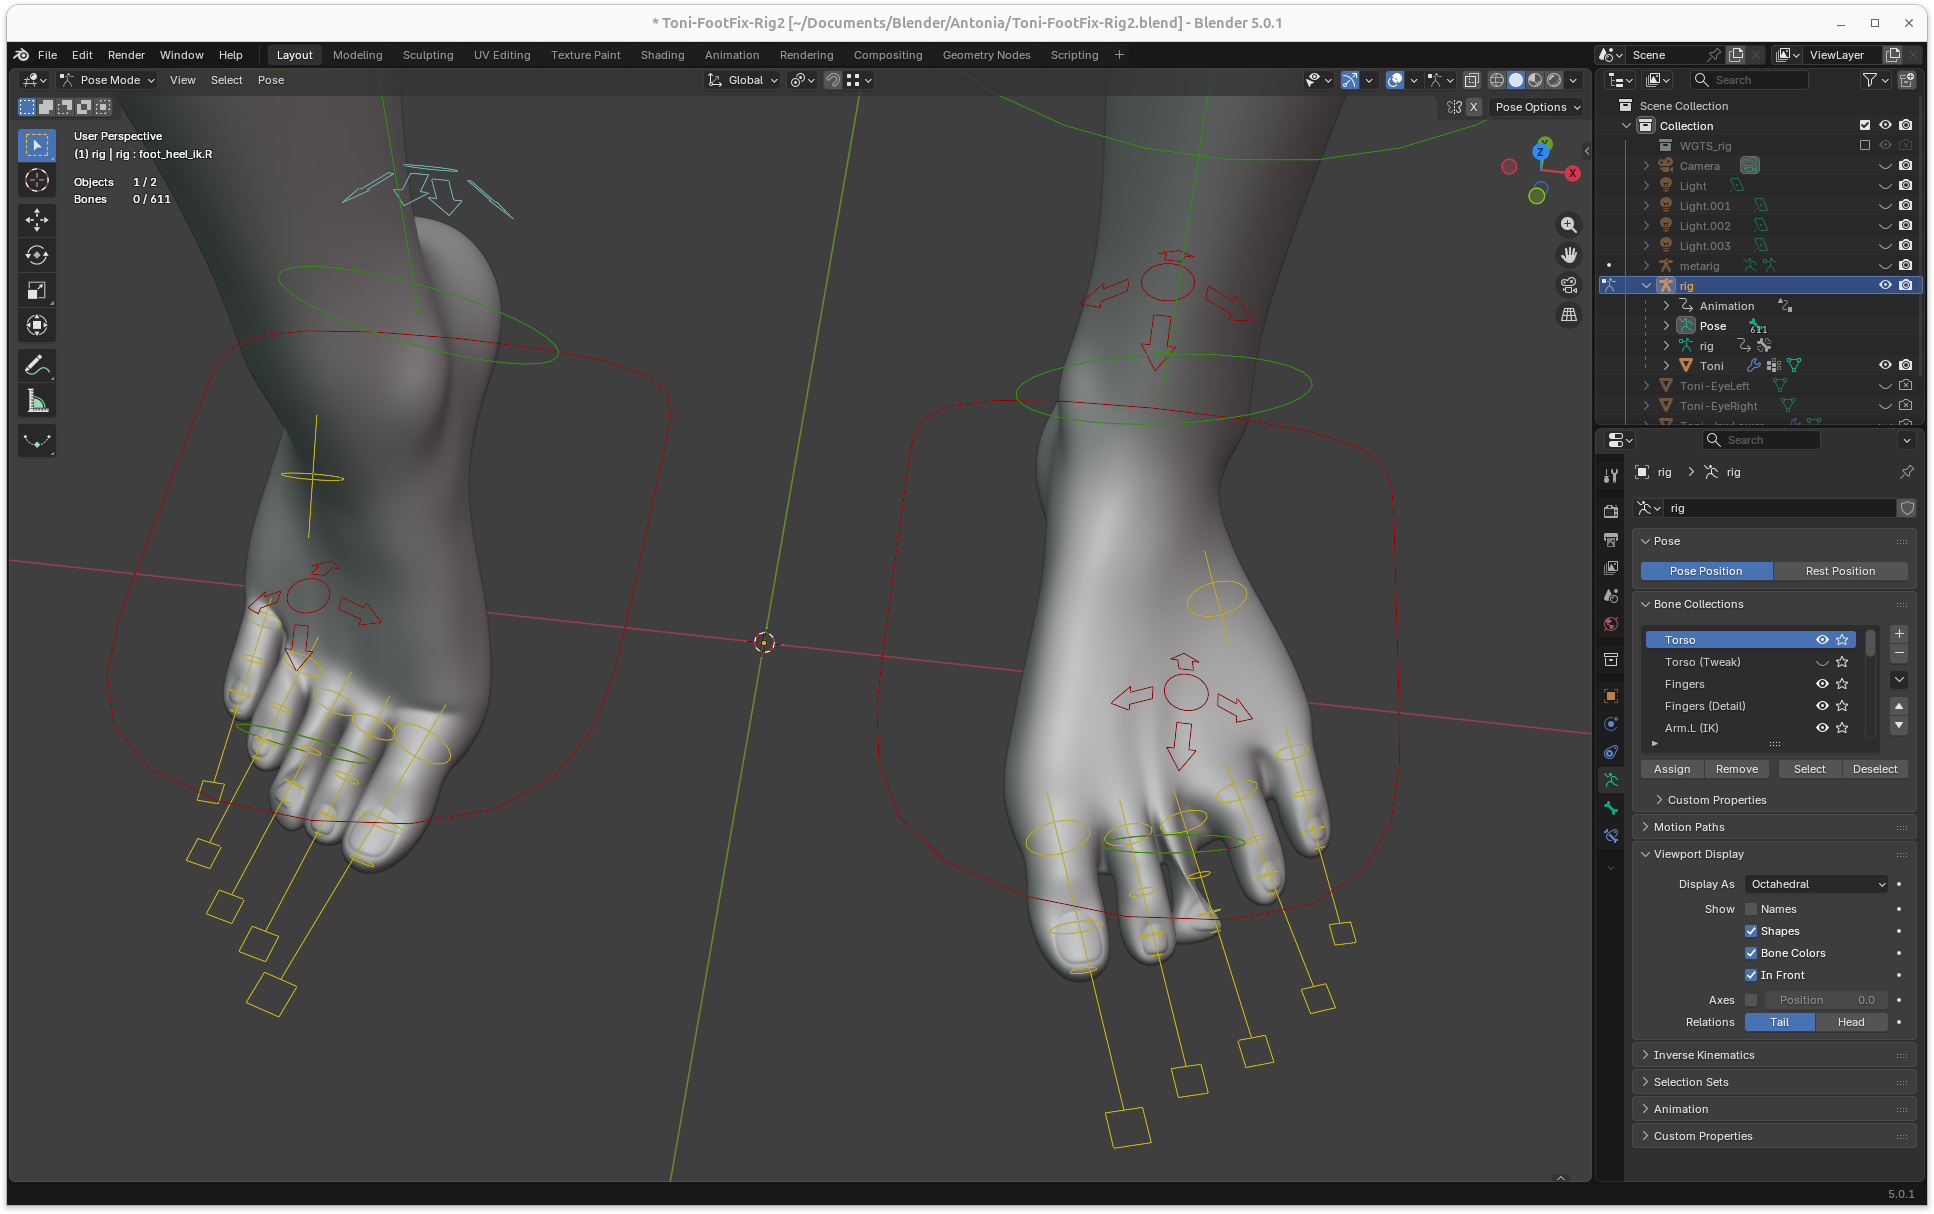
-- I'm not mad at you, just Westphalian.
odf posted Thu, 08 January 2026 at 1:44 AM
Ah, so a trick for improving the automatic weights is to generate the rig, then make the generated deforming toe bones non-deforming before computing the weights. That seems reasonably practical given that AFAIK the weights only have to be recomputed if bones are added, removed, or renamed.
-- I'm not mad at you, just Westphalian.
odf posted Fri, 09 January 2026 at 11:43 PM
So, getting serious about weight-painting, and after some headaches I decided to give the breast bones zero weights for now. Hopefully, that will keep them completely out of any painting I do in that area so that I can get the chest and shoulders to work right before adding an extra complication. Due to the magic of "auto normalize", it may not, though, so I'll just have to see. Technically speaking, I don't really need breast bones, it just seems that they might be nice to have.
Giving zero weights to a deforming (DEF-) bone is easy. Select the mesh, go into edit mode, select all vertices, find the vertex group corresponding to the bone in the data section, select it and click "remove". That's also a way to take care of the main toe bones being deforming by default, which I don't want for my particular tweak on the foot rig.
Interesting to note that Poser does not have this issue as such because the bones that can influence a given mesh vertex are strictly limited by the actor hierarchy - or at least that was my experience when I last tried to weight-paint a figure a few years back. Which of course can create problems of its own and is a less flexible system in general.
-- I'm not mad at you, just Westphalian.
odf posted Fri, 09 January 2026 at 11:56 PM
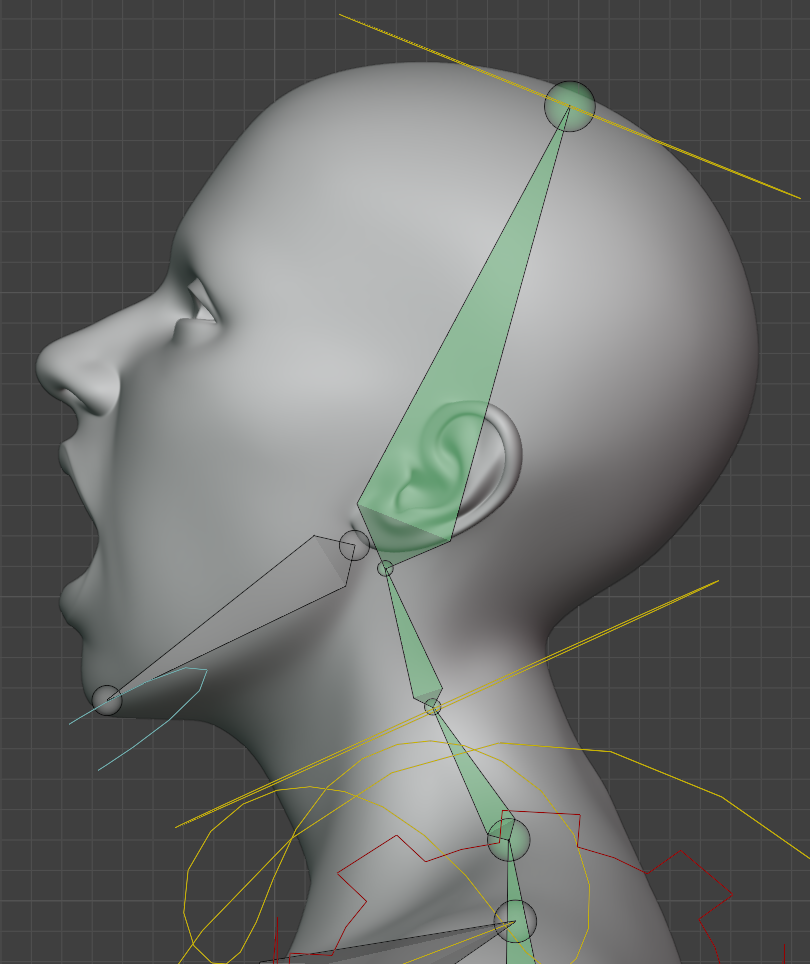
In more positive news, I think I did a decent job on the head and jaw, as demonstrated by Toni's "invisible banana" pose here. And before you say it, yes, the lips could still use some fine-tuning, but one can always do another pass for little tweaks and corrections later.
-- I'm not mad at you, just Westphalian.
odf posted Sat, 10 January 2026 at 1:19 AM
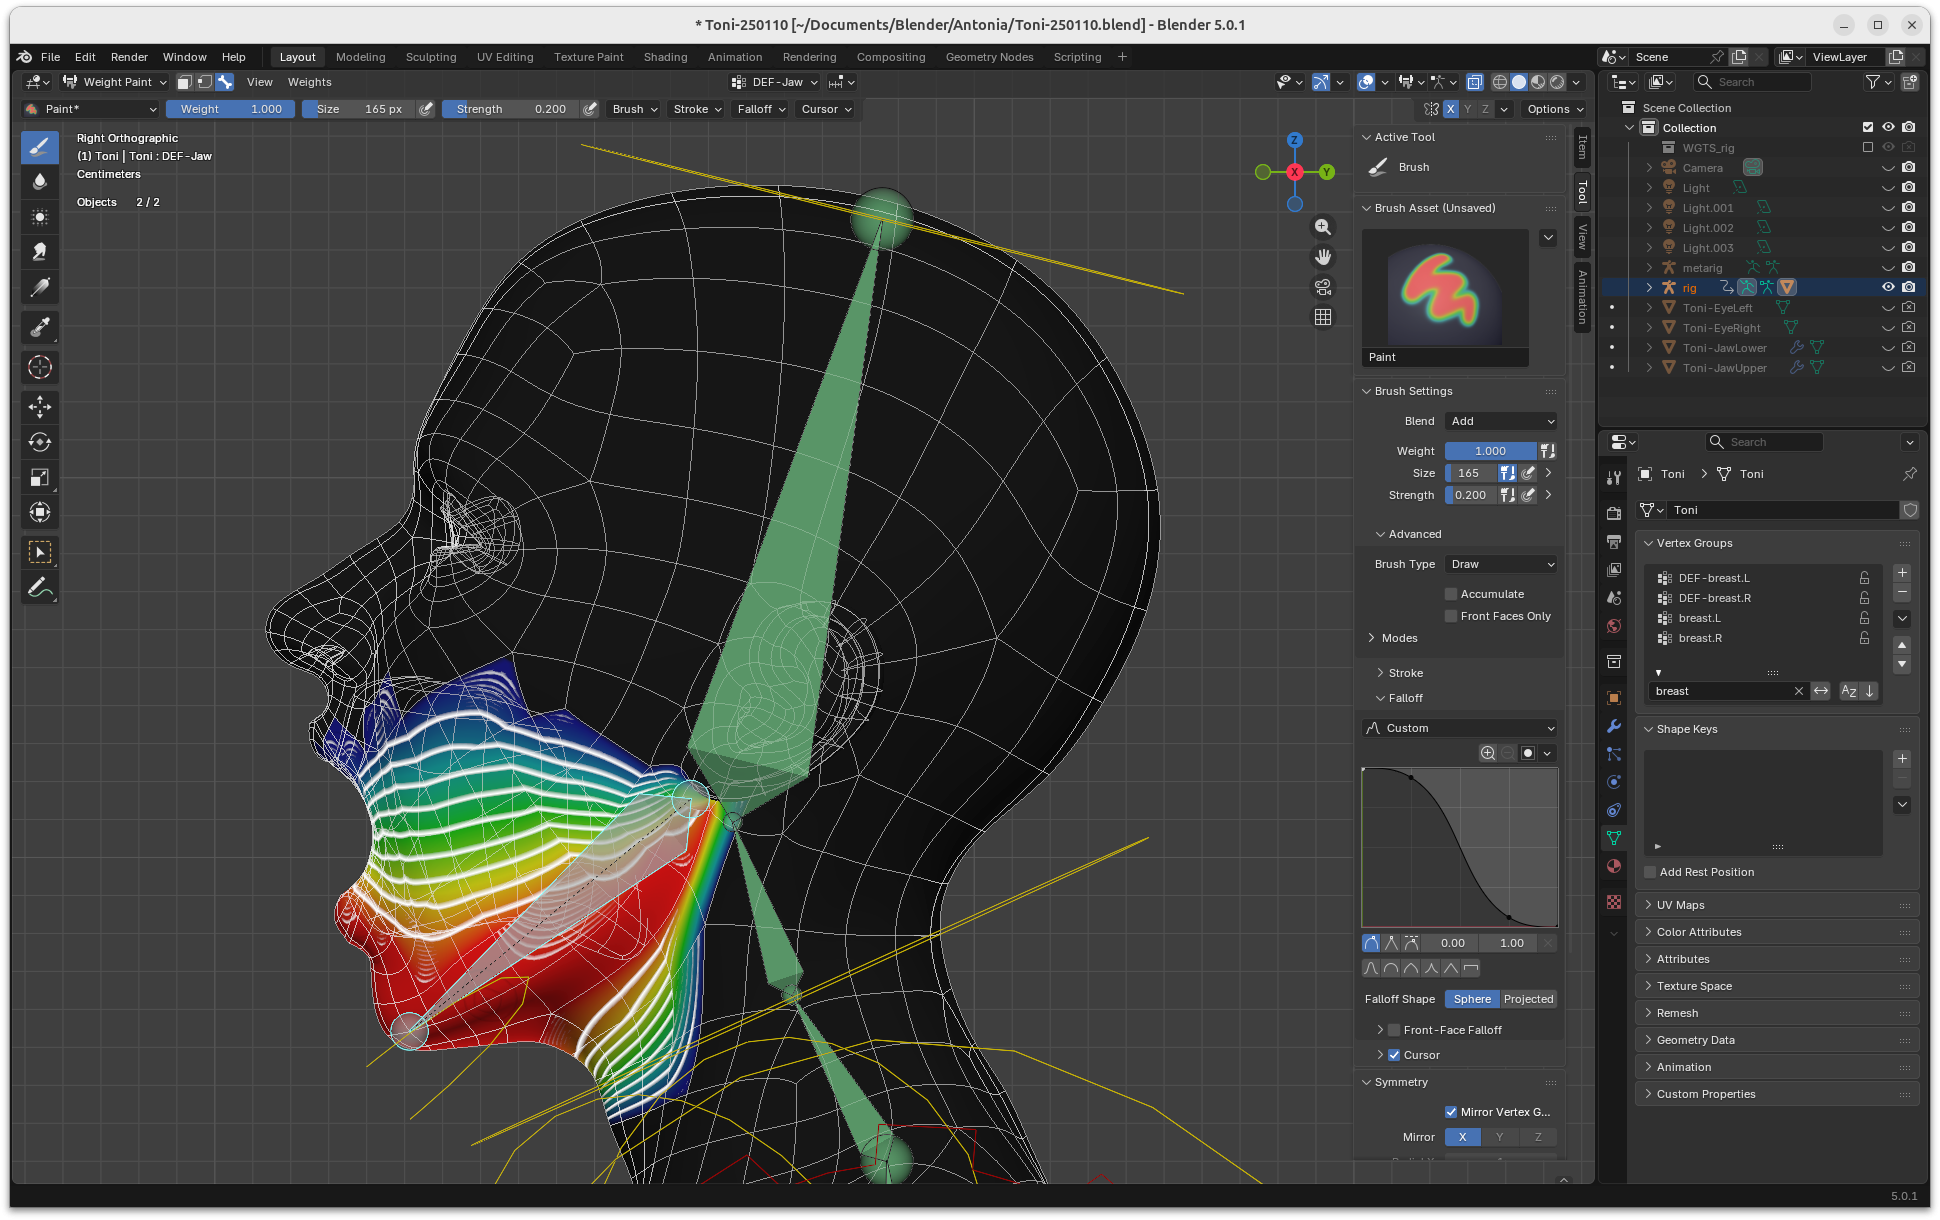
A did a bit of tweaking on the mouth weighting, after all, since I need to practice fine-tuning stuff, anyway.
-- I'm not mad at you, just Westphalian.
odf posted Mon, 12 January 2026 at 1:40 AM
So, does anyone know a good tutorial on weight painting in Blender? I've been following the cgdive tutorials on rigging, which in general I found very useful, but when it comes to weight painting, his setup just does not work for me. Automatic weights plus auto-normalizing are just a total mess for any areas where a bunch of bones come together. I'm starting to think maybe it's better to start with zero weights everywhere and lock all the vertex groups except two or three at a time.
Honestly, at this point I'd almost prefer to get back to weight painting in Poser, if it weren't for the wonky navigation.
-- I'm not mad at you, just Westphalian.
odf posted Mon, 12 January 2026 at 2:35 AM
LOL, I searched for "Blender 5 weight paint" on YouTube, and the first or second hit does exactly that. Not sure I really want to start from zero for a full figure with lots of deforming bones, but locking things to keep auto-normalize from wreaking havoc is definitely a go.I'm starting to think maybe it's better to start with zero weights everywhere and lock all the vertex groups except two or three at a time.
-- I'm not mad at you, just Westphalian.
odf posted Mon, 12 January 2026 at 2:42 AM
Auto-generated weight would be much better as a starting point if I could reduce the spread of influence for each individual bone. One would expect there to be a parameter that controls that, so maybe I need to seriously go looking ...
-- I'm not mad at you, just Westphalian.

vince5 posted Mon, 12 January 2026 at 12:37 PM
I love following your progress with Antonia, but with Poser, if I want to learn, where would you recommend I start?
odf posted Mon, 12 January 2026 at 7:21 PM
When I want to learn something new, I like to find a book or a series of video tutorials that teach it. For Poser, the Poser Pro 11 tutorial by Renderosity looks like a good way to start: "Poser Pro 11 Tutorial: Introduction to the series"
Of course that's just covering the mechanics. There's a lot more to learn that's not Poser-specific: posing, composition, camera use, lighting, colors, etc.
-- I'm not mad at you, just Westphalian.
odf posted Mon, 12 January 2026 at 9:25 PM
So, the plot thickens: when I lock some vertex/weight groups, things get even stranger. Drawing with the subtract brush on an area where only one group is unlocked, but has no (zero) weights there, a little weight is actually added. This stops happening when I check the option that restricts drawing to vertices already in the group. What that seems to indicate is that drawing in that area adds vertices to the group and gives them some default positive value. I can work with that, especially if the clean operation for weights not only sets weights under a certain limit to zero, but also remove the corresponding vertices from the group. So, most of the time, I would have the restrict option on, except when I actually want to extend the area of influence of a specific bone, not just adjust its weights.
LOL, not sure if that makes any sense to anyone. I'm basically mumbling stuff to myself, but unless you have at least some vague idea what I'm on about, it's probably not relevant for you anyway.
-- I'm not mad at you, just Westphalian.
odf posted Mon, 12 January 2026 at 9:50 PM
Okay, so it looks like the weight cleaning operation only removes vertices from groups when it's done in object mode. In weight painting mode, the weight is set to zero, but the vertex remains in the group.
So, a potential workflow for me might looks something like this: parent the mesh to the armature with automatic weights, do a weight clean-up in object mode to reduce the influence zone of each bone to something more sensible (using 0.2 as the minimum preserved weight looks reasonable here), go through the bones and remove more areas of influence I'm sure the bone should not have, with an additional individual clean-up after doing each bone, then start fine-tuning the weights with "restrict" on. If I cut off too much of a bone's area of influence, I can always carefully add it back later with the "restrict" option temporarily off.
We'll see how it goes. I might still have to make further adjustments, but I'm glad I'm starting to get an idea of how to deal with some of this weird behaviour.
-- I'm not mad at you, just Westphalian.
odf posted Mon, 12 January 2026 at 9:54 PM
I should point out that the cgdive tutorials I mentioned are quite old when measured in Blender time, so it's entirely possible that there have been some changes in the meantime and the workflow and setup they suggested was perfectly adequate for the version they used at the time.
-- I'm not mad at you, just Westphalian.
odf posted Tue, 13 January 2026 at 12:23 AM
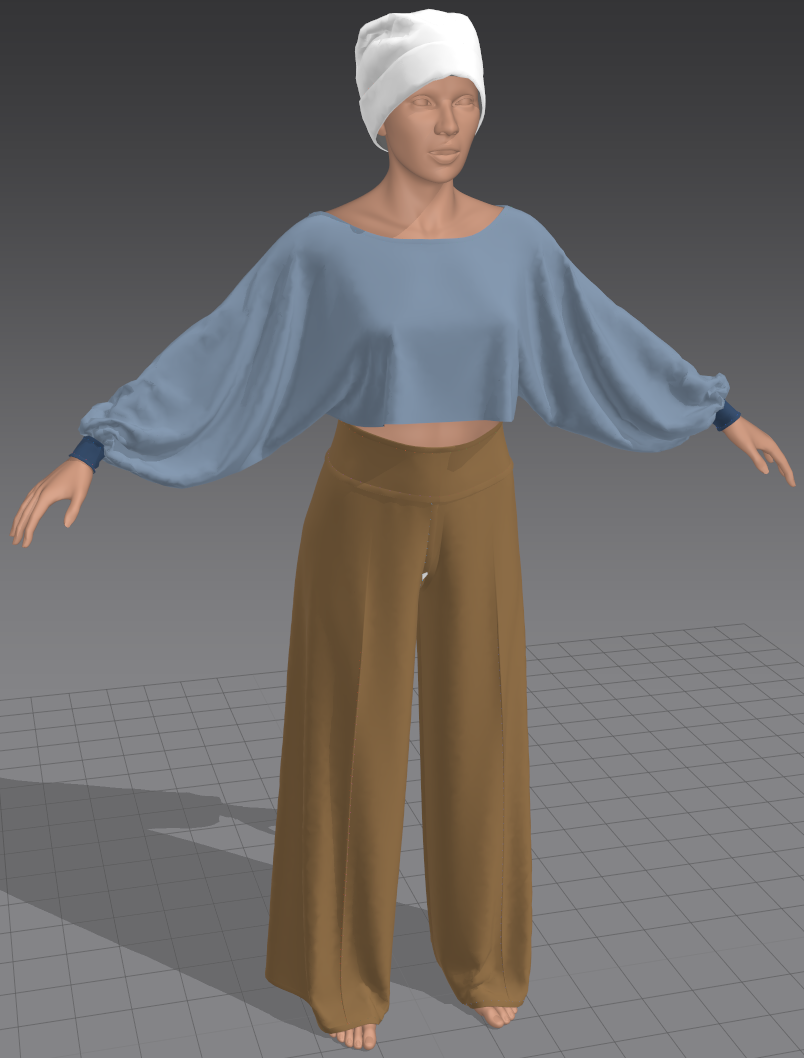
Toni visiting Marvelousdesignerland to try on some LaFemme2 clothes I made a while ago. In general, these will need to be scaled down quite a bit to fit her, but in this case the style works quite well oversized. If I decided to convert a bunch of LF2 clothes, I could of course scale up the avatar to match LF2 better and then scale down the exported clothes later. I'd have to adjust her A-pose a bit to match LF2's, anyway.
I can run MarvelousDesigner under Linux via Wine, but unfortunately it tends to crash on me whenever I try to interact while another operation is still running, so in practice that's a no-go. I'll try it on my private Windows laptop next. It's only a Surface, but hopefully it will be able to deal. There is now a Linux version of MD, but it's only available to enterprise clients (i.e. studios) at the moment. With some luck, that's going to change in the future.
-- I'm not mad at you, just Westphalian.
odf posted Wed, 14 January 2026 at 12:01 AM
Hmm, it looks like MD just likes to crash every now and then under Wine when it's asked to change the pattern in any way. If I get ambitious, I might have a look at the stack traces and see if there's any discernible hint in there regarding what went wrong.
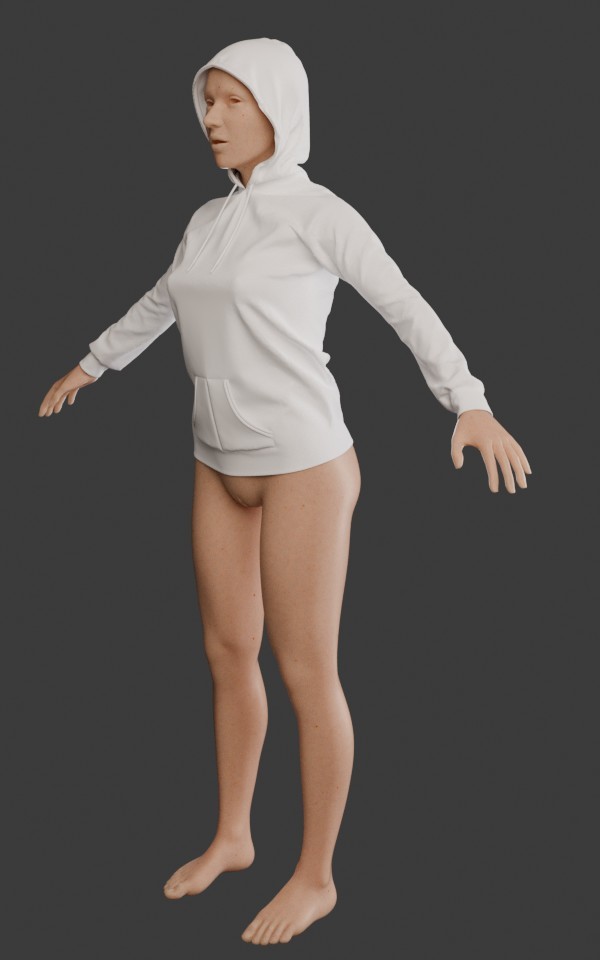
Anyway, since I've got six days left on my subscription, I decided to go through all my saved garments and save the ones that I still like and can make to fit this iteration of Toni as .obj files for Blender. Such as this old hoodie that never got published for Poser.
-- I'm not mad at you, just Westphalian.
odf posted Wed, 14 January 2026 at 2:01 PM
It seems that the MD crashes were due to a missing function in a DLL, and this appears to have been fixed in a more recent version of Wine. I’m not going to chase this up right now, but once I feel ready to make some new clothes a few months forward, I’ll grab the latest MD version at that point for a free trial and check again if I can get it to work reliably under Linux.
Using my Surface instead is an option despite the limitations of the graphics card, but I don’t love the tiny screen for this kind of thing. Can a surface drive an external monitor via USB? No idea how computers work these days, LOL.
-- I'm not mad at you, just Westphalian.

Cage posted Sun, 18 January 2026 at 9:38 AM
There was always a lot of concern about the quality of Antonia's knee bends, in Poser. I'm curious about how well that works in Blender.
===========================sigline======================================================
Cage can be an opinionated jerk who posts without thinking. He apologizes for this. He's honestly not trying to be a turkeyhead.
Cage had some freebies, compatible with Poser 11 and below. His Python scripts were saved at archive.org, along with the rest of the Morphography site, where they were hosted.
odf posted Sun, 18 January 2026 at 5:20 PM
I weight-painted the knees - and elbows, I think - early on with pretty good results. But then I threw that away because I needed to make some fundamental changes before I could work on the more difficult regions, so I can't show anything right now.
Blender appears to use some magic to make joints look better even without any manual tweaking, but I don't know any details. For the knees, the main issue was making the knee cap keep its shape and move to the correct position, and then there was a little bit of tweaking in the back to get a nice fold. I did some work to improve the topology beforehand, so that may have helped, too.
I'll probably still add a corrective shapekey - what's called a JCM in Poserland - at some point because I'm a perfectionist. :grin:
-- I'm not mad at you, just Westphalian.
odf posted Mon, 19 January 2026 at 5:18 PM
PSA: I don't think I can post videos here, so test-animations I do during rigging and weight painting will appear in my gallery. So far, I've got one chest and one hip gyration in there. :grin:
-- I'm not mad at you, just Westphalian.
Cage posted Tue, 20 January 2026 at 9:29 AM
How much can Blender actually change the way its joints handle, given its widespread use as a development tool for game assets and such? I wonder. They need to at least keep an option in place for joints to handle in Blender as they will once exported as fbx or whatever. Yet I could imagine that they might introduce better-quality joint handling, for use with Blender's prestige animation projects.
I'm just pretty curious, but not enough so to re-learn Blender again. Every time I learn some things, They break everything, to versions later. Umm. If you have knees and other tricky joint spots to show off, I'll be interested, is the thing.
===========================sigline======================================================
Cage can be an opinionated jerk who posts without thinking. He apologizes for this. He's honestly not trying to be a turkeyhead.
Cage had some freebies, compatible with Poser 11 and below. His Python scripts were saved at archive.org, along with the rest of the Morphography site, where they were hosted.
Warlock279 posted Tue, 20 January 2026 at 12:57 PM
Cage posted at 9:29 AM Tue, 20 January 2026 - #4503291
Blender can handle joints however you want it to. From half-baked if you slap a basic-generic rig into it, to passable with some weighting and a little experience, to near-perfect complete with skin flexion if you're willing to put the work [and computational power] in to it. It is very much a system that you will get out equal to what you put in.How much can Blender actually change the way its joints handle, given its widespread use as a development tool for game assets and such? I wonder. They need to at least keep an option in place for joints to handle in Blender as they will once exported as fbx or whatever. Yet I could imagine that they might introduce better-quality joint handling, for use with Blender's prestige animation projects.
I'm just pretty curious, but not enough so to re-learn Blender again. Every time I learn some things, They break everything, to versions later. Umm. If you have knees and other tricky joint spots to show off, I'll be interested, is the thing.
@odf Weighting looks pretty good in the torso.
Core i7 950@3.02GHz | 12GB Corsair Dominator Ram@1600mHz | 2GB Geforce GTX 660
Lightwave | Blender | Marmoset | GIMP | Krita
odf posted Sat, 24 January 2026 at 2:44 AM
I had an issue with a vertex in the foot having a spurious positive weight in some unknown group that it had no business being in, and while I need to eventually learn how to debug this kind of thing, I decided to for now just restart my weight-painting from scratch because realistically, there weren't any great results in there that would have needed preserving.
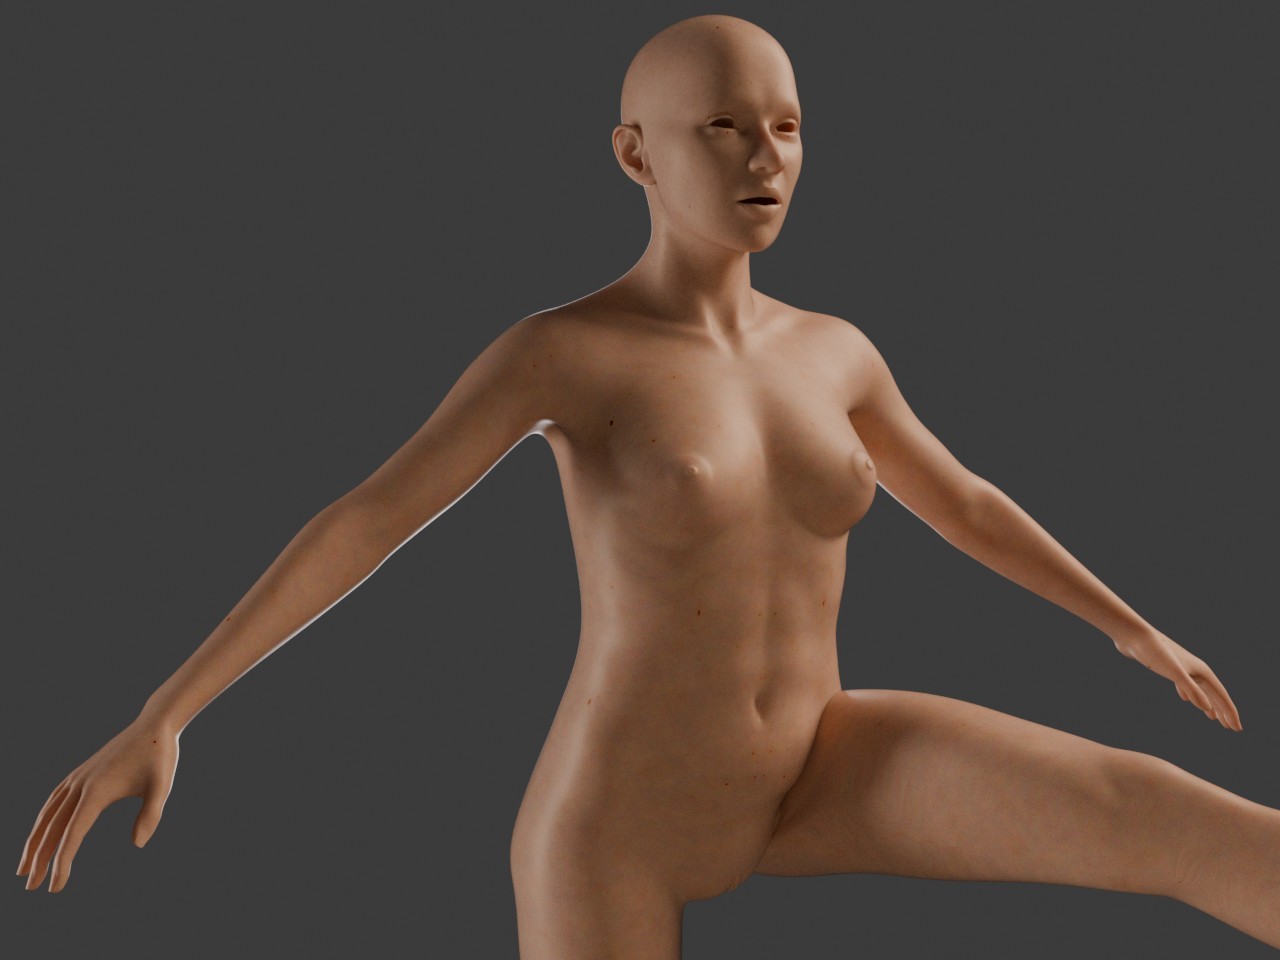
So this time around, I started with the hip, which is always challenging. There's a big range of motion to consider and the question of how the crotch and underbelly should deform with the thigh movements. The easy way out would be to just have it stay put and ignore the thighs completely, but then if the figure goes in a crouch or squat, it's going to stick out like a sore ... umm ... thing that sticks out when it's sore. If, on the other hand, I let the thighs influence the crotch and underbelly, I have to mix the weights for both thighs very carefully so that the labia and other parts don't explode on me. So, that's where I'm at right now, and I haven't even mentioned potential complications with the butt and hip bone.
Here's a quick render of what things look like at the moment. Incidentally, I reduced the SSS scale from Blender's default value of 5 cm (2 inches) down to 1 cm, so I think her skin looks more skin-like and less waxy now.
-- I'm not mad at you, just Westphalian.
odf posted Sat, 24 January 2026 at 3:10 AM
Oh, I almost forgot: I'm also doing a bunch of little mesh and shape refinements while I'm at it, because weight-painting is great for finding out when things like that just don't work right. :grin:
-- I'm not mad at you, just Westphalian.
odf posted Sat, 24 January 2026 at 8:26 PM
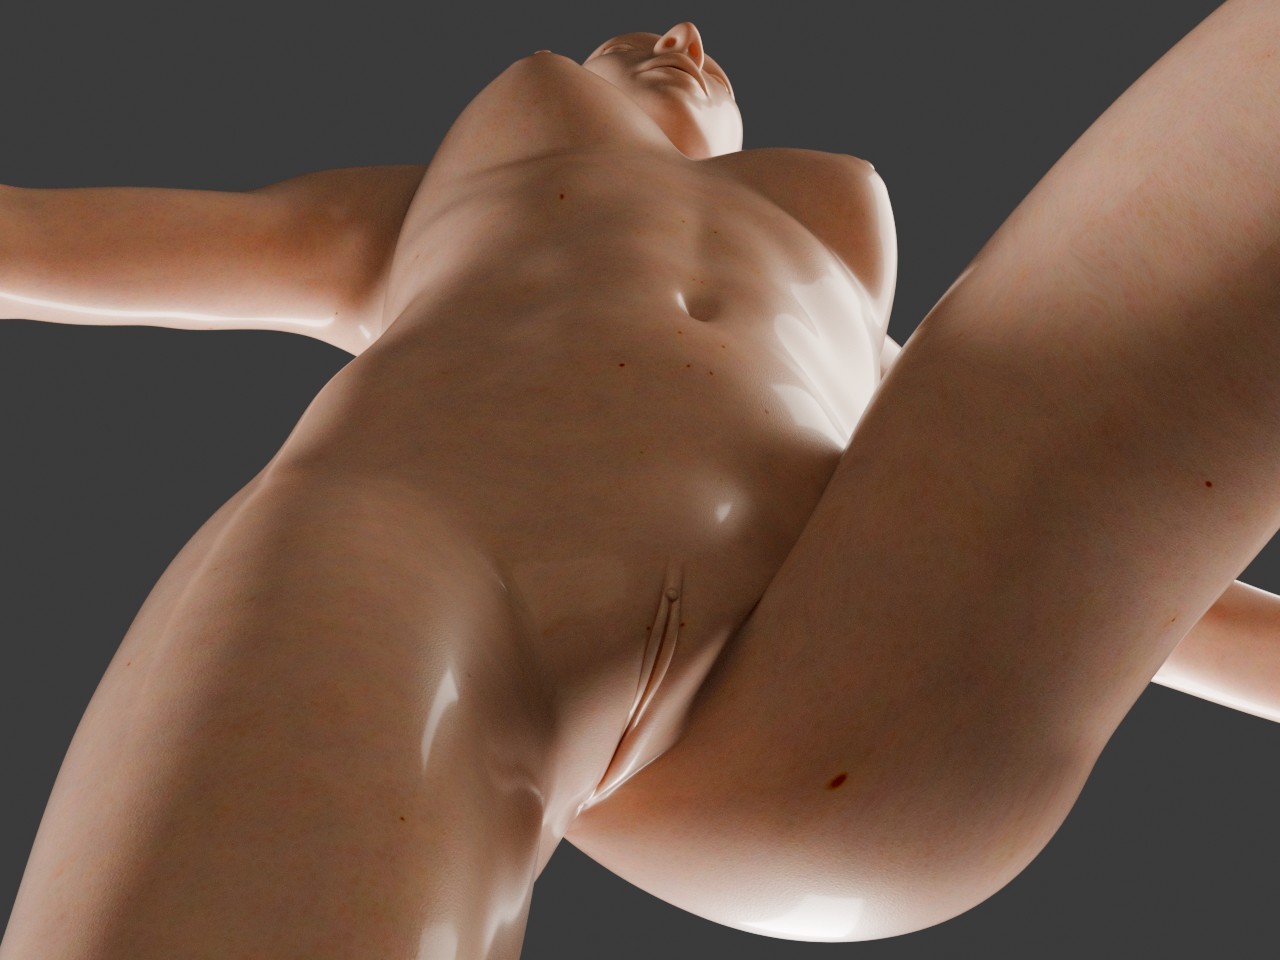
Here's the same pose from a different angle to get a better idea of what the deformation looks like at the moment. I also played a bit with the lights and materials - the later not strictly necessary but I've been curious about the P-BSDF coat settings for some time now.
I hope this gets a pass on a account of being a technical post without me censoring any ... fine details, ahem. How does the saying go, better to ask for forgiveness than permission.
-- I'm not mad at you, just Westphalian.
odf posted Sun, 01 February 2026 at 1:54 AM
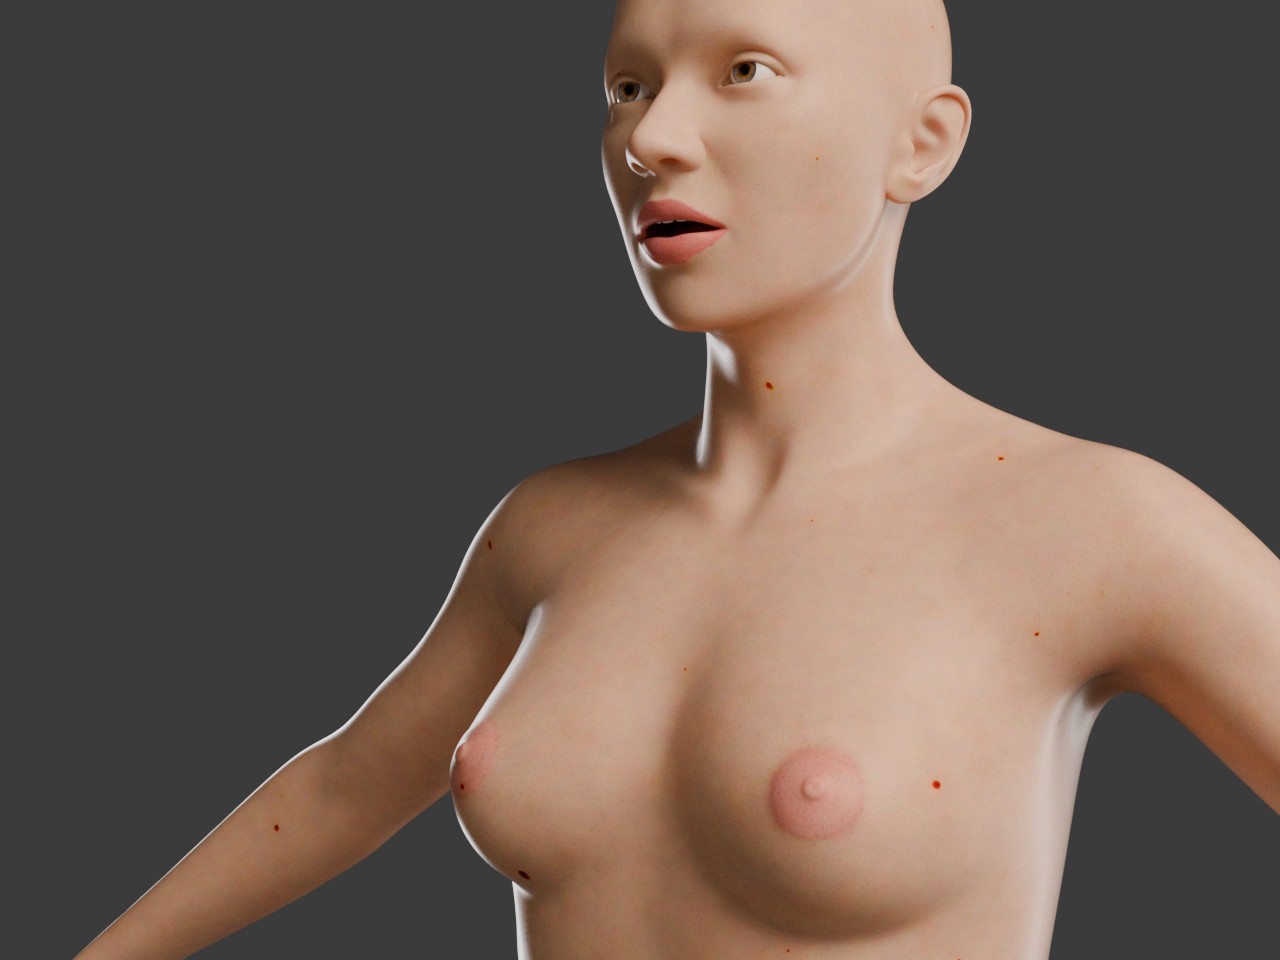
Weight-painting and corrective shape keys will occupy me for a while, so I decided to break it up a little by UV-mapping her and making the first feeble attempts at texture painting. Just the lips and areolae for now, the moles and other irregularities are still procedural.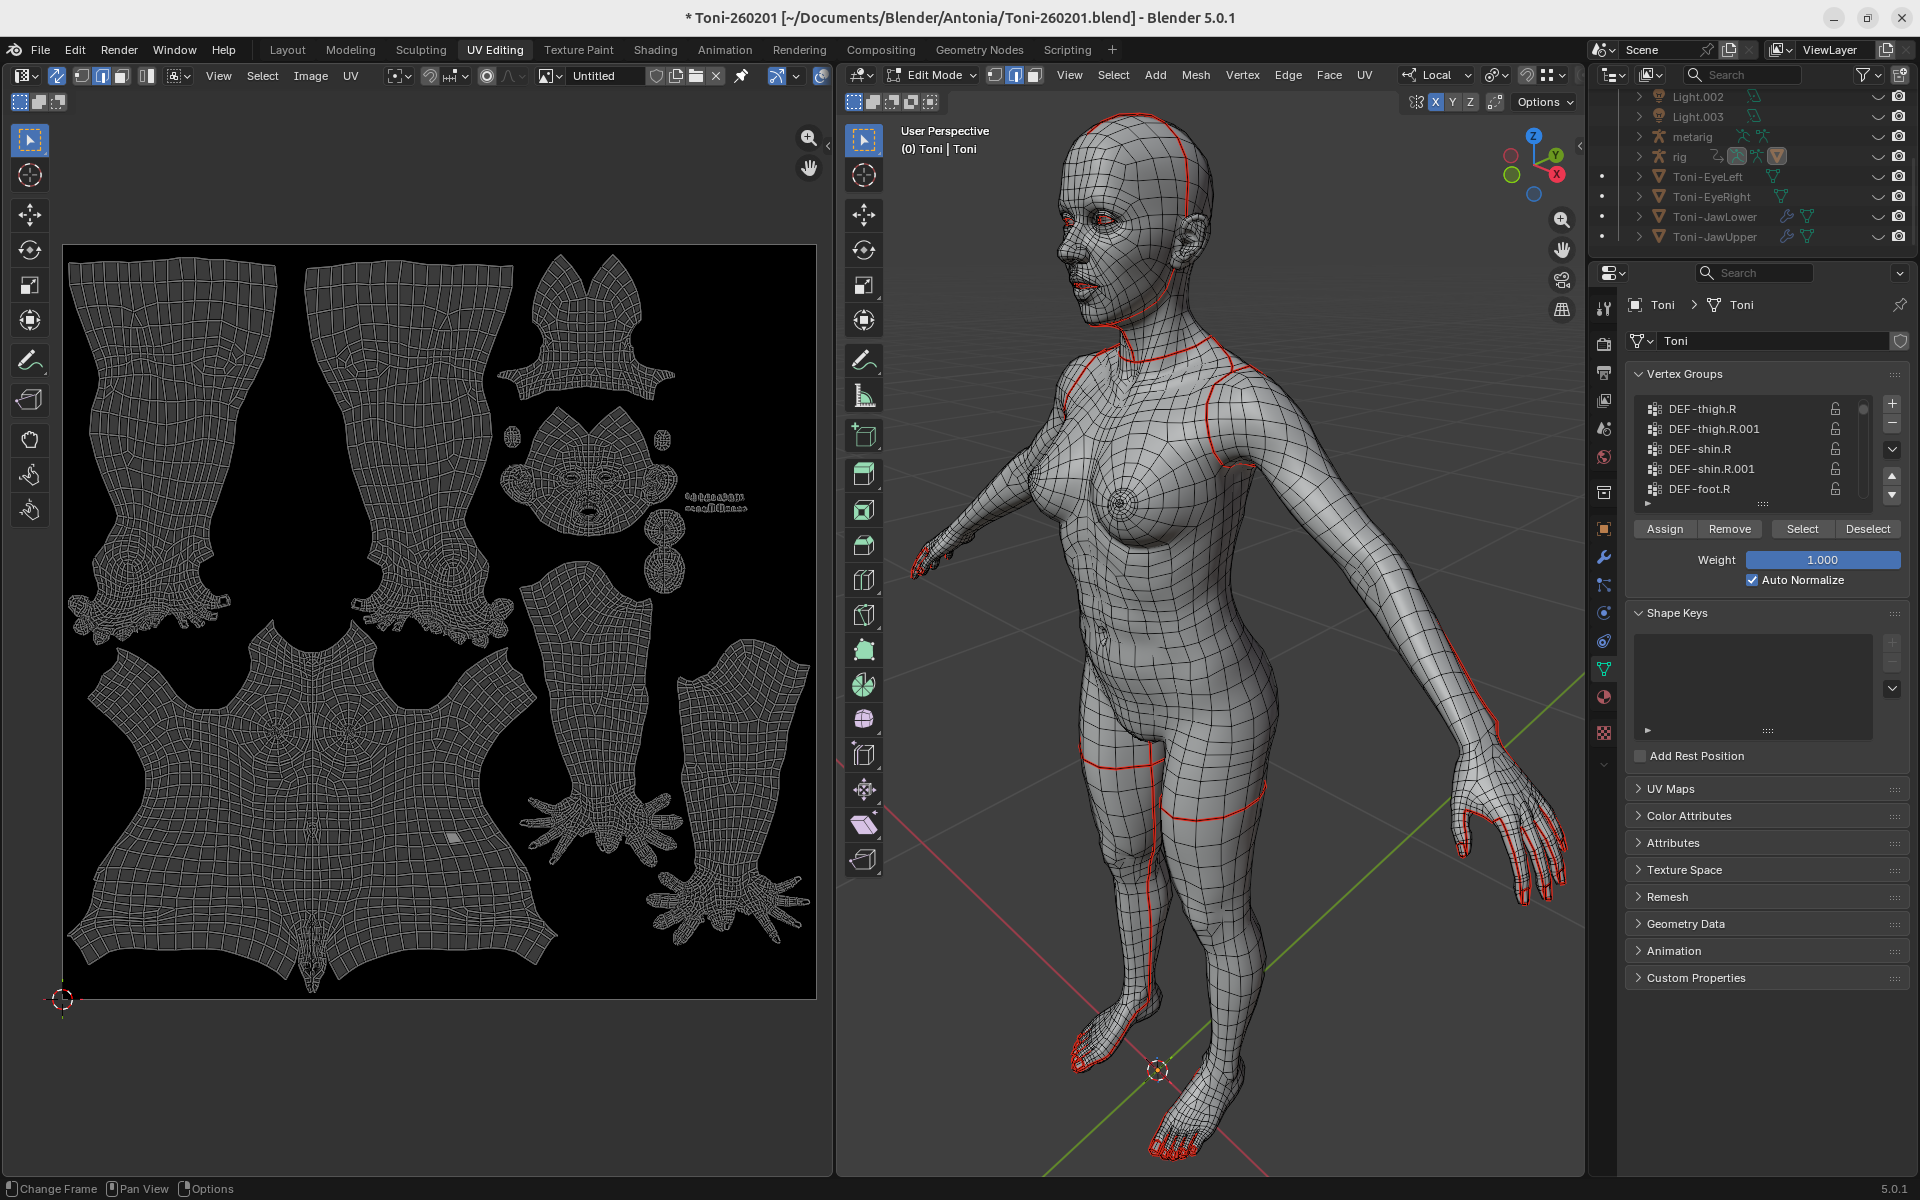
-- I'm not mad at you, just Westphalian.
odf posted Fri, 06 February 2026 at 1:58 AM
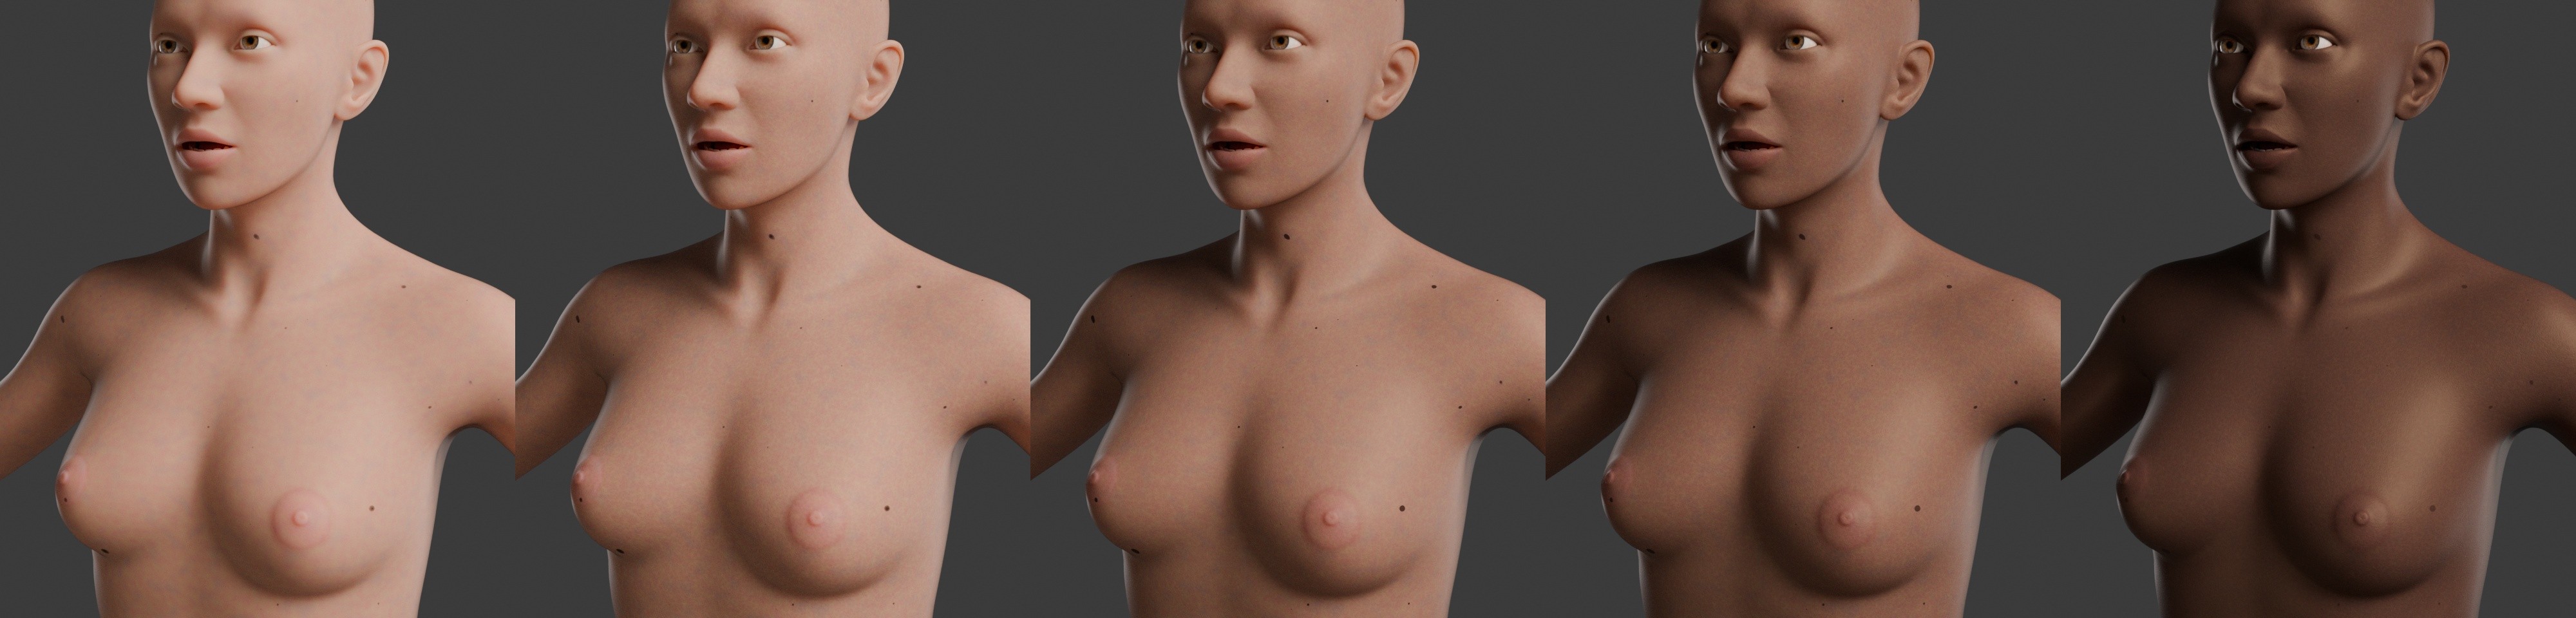
Some skin tone experiments.
-- I'm not mad at you, just Westphalian.
odf posted Fri, 06 February 2026 at 8:32 PM
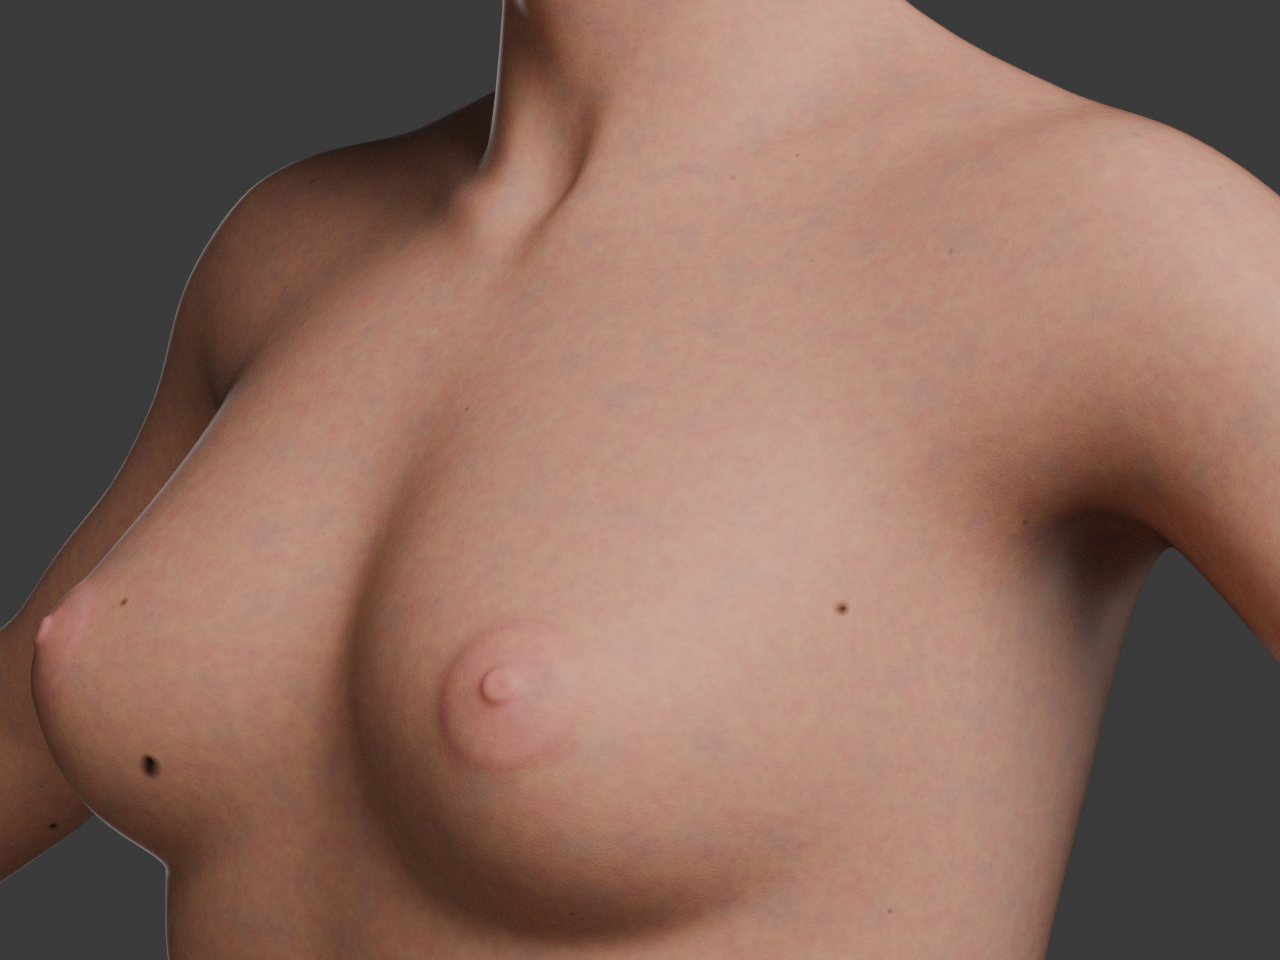
A closeup of today's "state of the skin". Today's learning: using object coordinates for generated textures means the texture stays stationary when the figure moves, say, an arm, which is particularly obvious with moles. So, that's definitely no good unless I bake the textures later. UV coordinates with generated 2d textures can produce very visible seams and texture stretches. UV with generated 3d textures seems to effectively avoid both problems, but I'm not entirely sure how that works. Anyway, that's what I'm using for now, until such time as I find some reason not to. :grin:
-- I'm not mad at you, just Westphalian.
odf posted Fri, 20 February 2026 at 2:06 AM
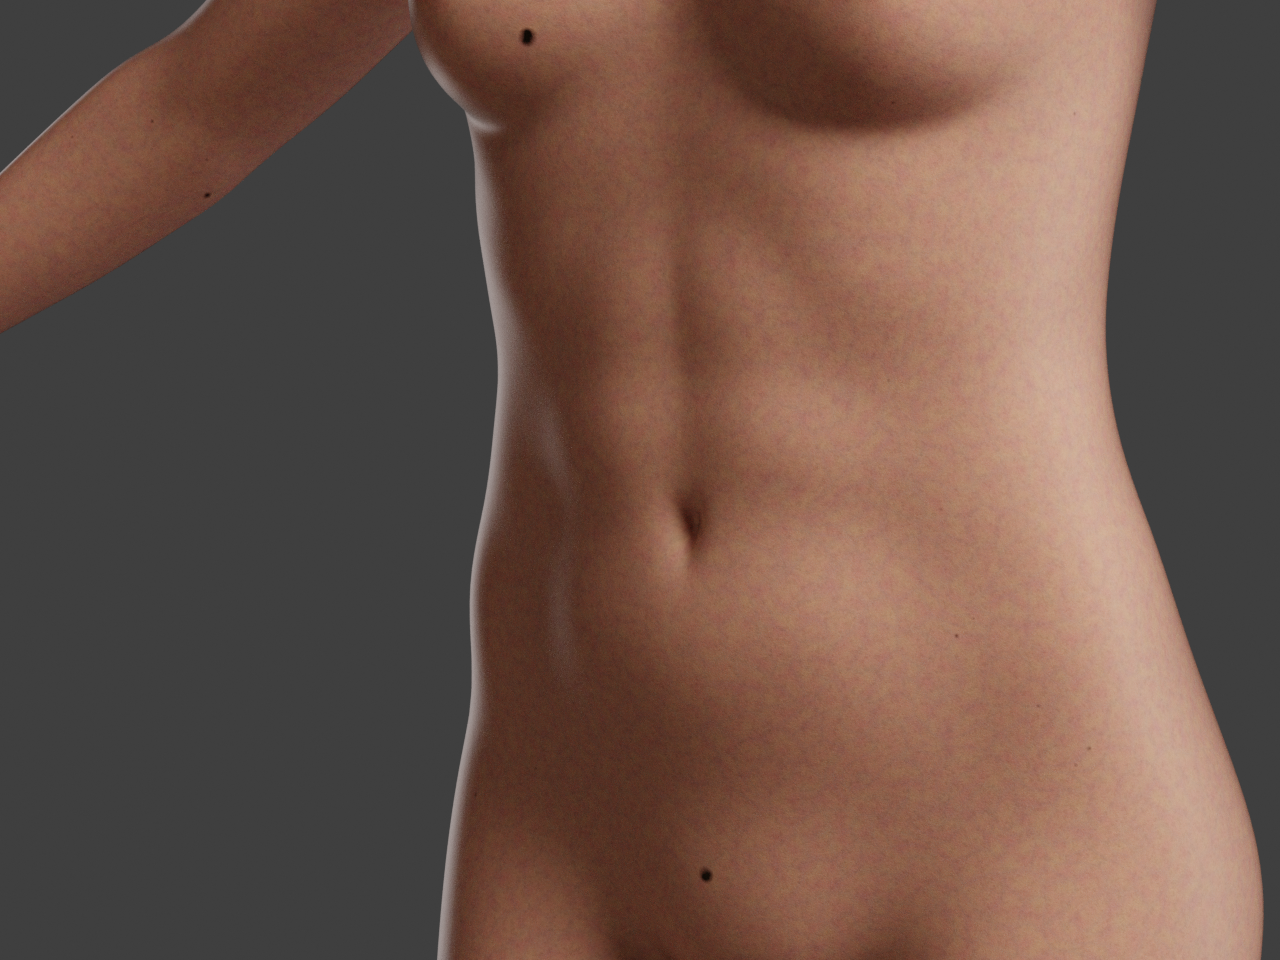
Huh, progress is slow with many distraction, but I do think that by and by I'm learning my way around Blender. Here's my latest procedural skin:
-- I'm not mad at you, just Westphalian.
odf posted Fri, 20 February 2026 at 8:50 PM
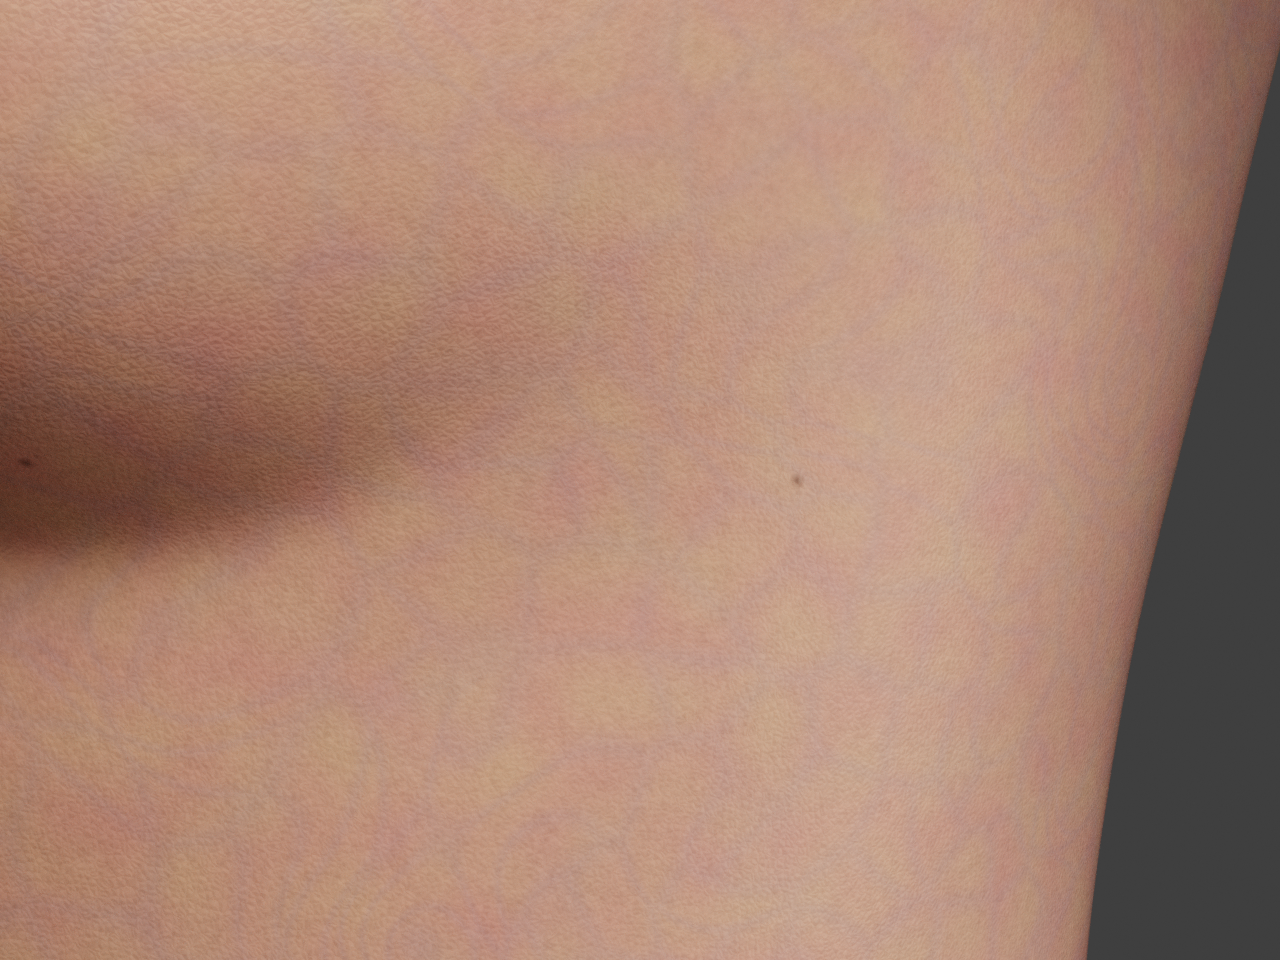
And today's update with a bunch of tweaks and added features:
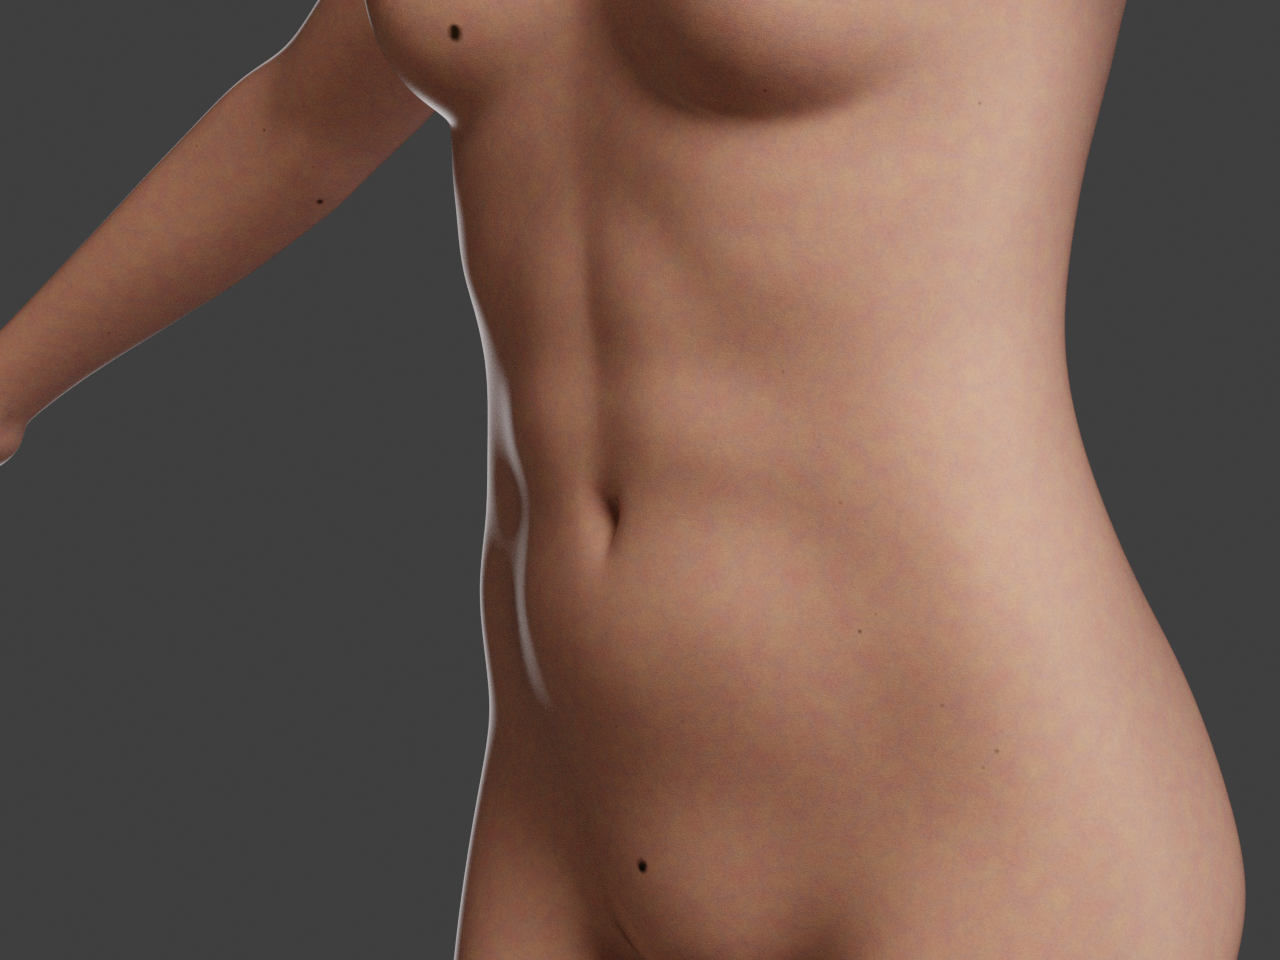
Here's a closeup:
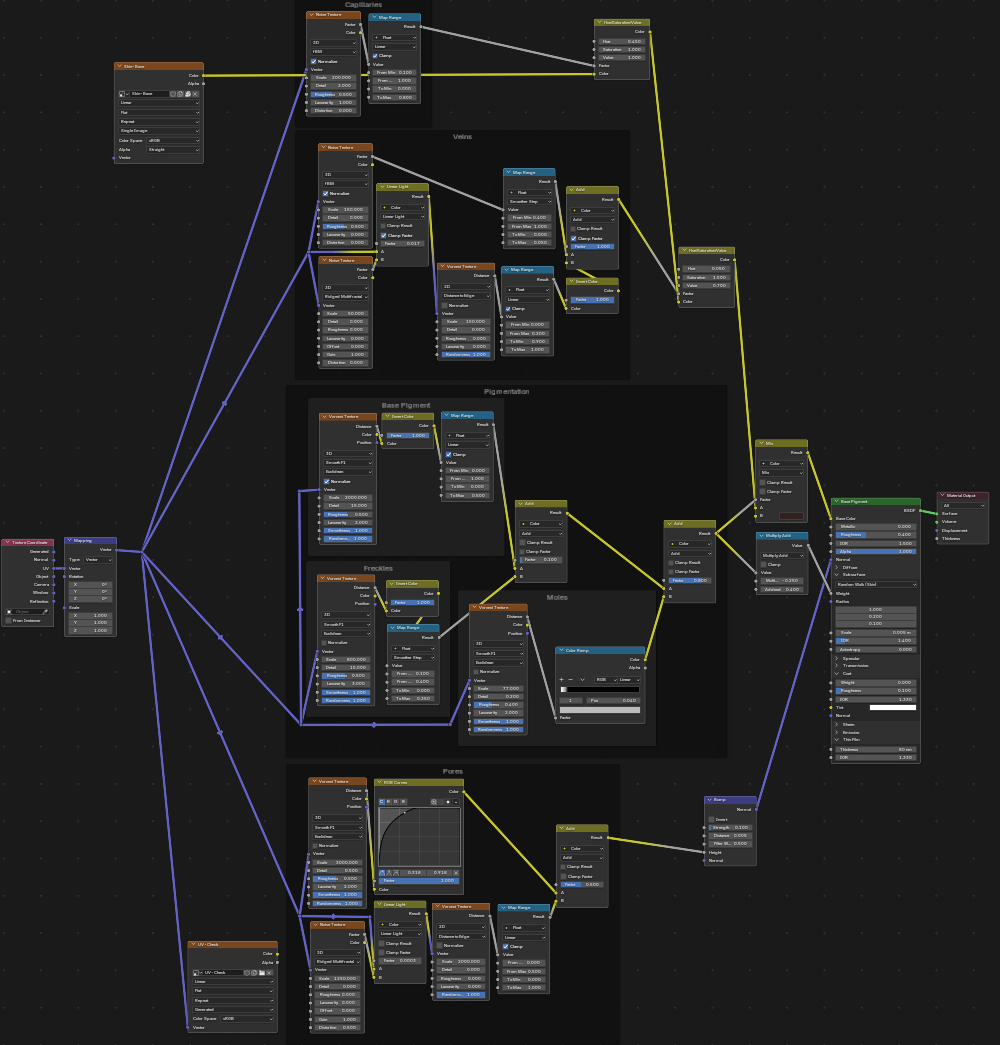
The shader tree has grown quite a bit, so if anyone knows a good tutorial on organizing complex Blender materials, please throw me a hint/link!
-- I'm not mad at you, just Westphalian.
odf posted Fri, 20 February 2026 at 11:33 PM
I've got a new and improved freckle setup, as well, but here's where one would really want a pigmentation map to limit the freckles to areas that have had some sun exposure. 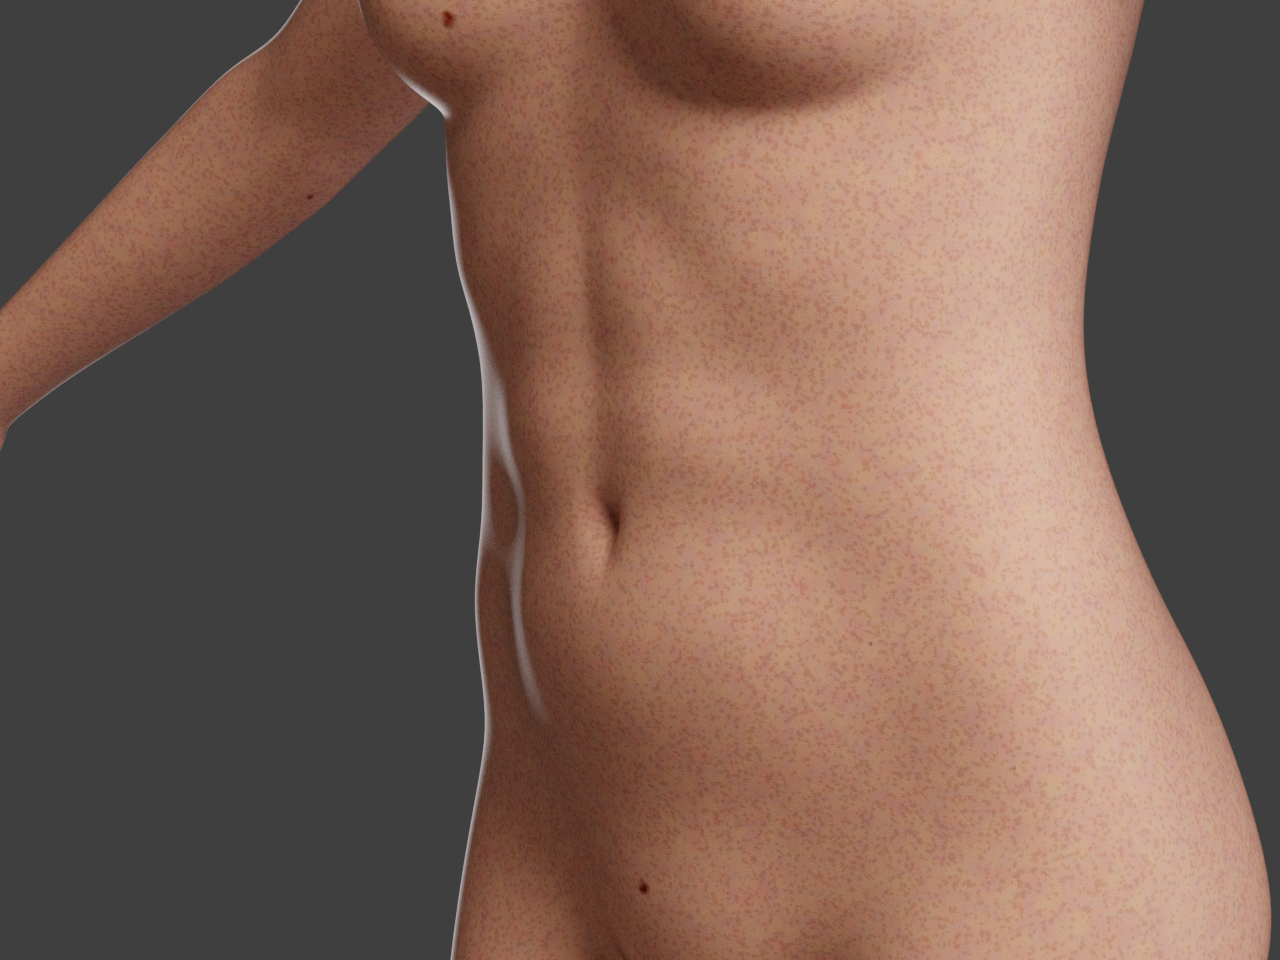
-- I'm not mad at you, just Westphalian.
odf posted Sun, 22 March 2026 at 5:52 PM
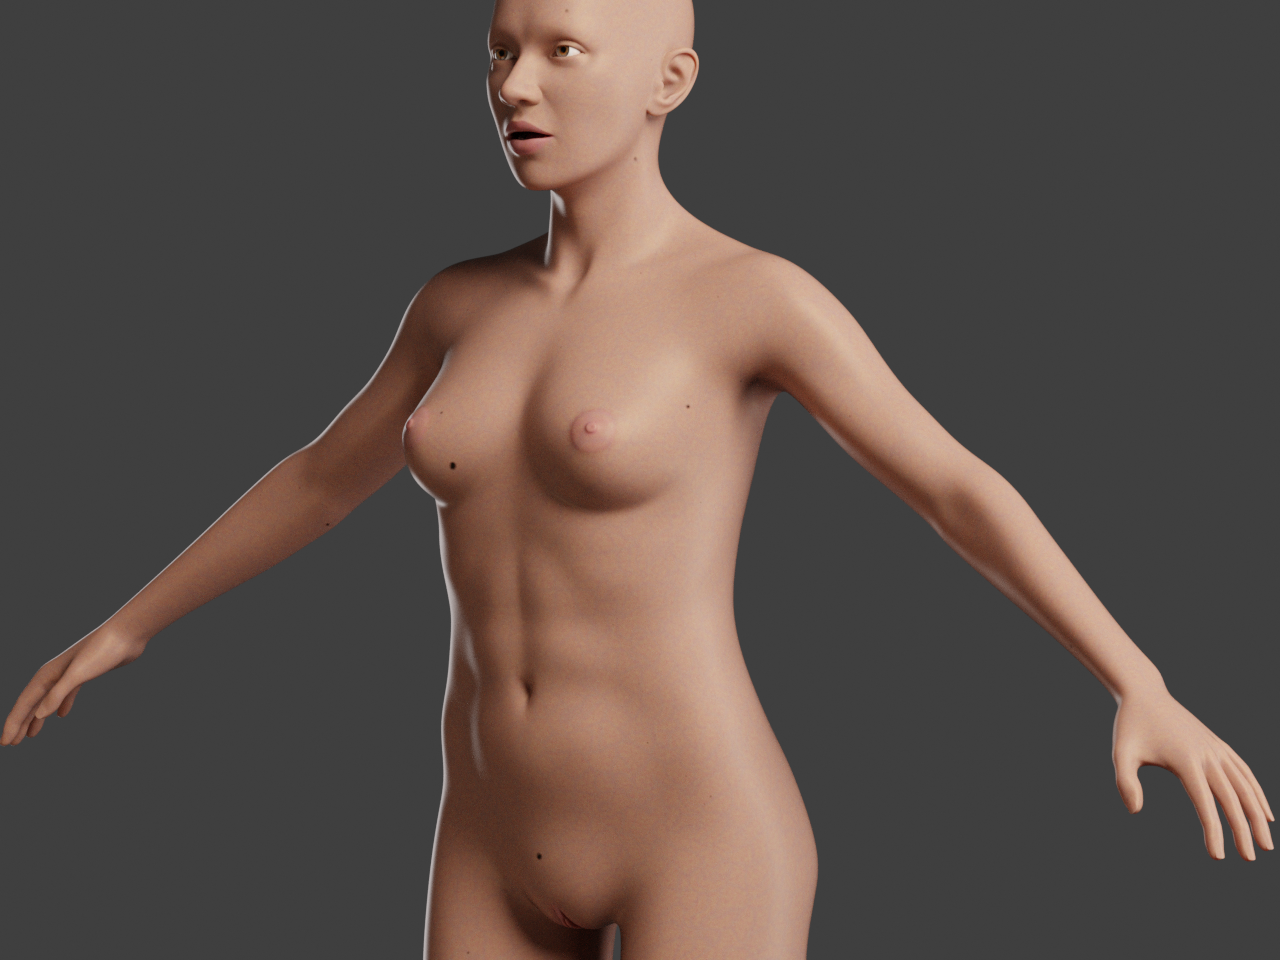
I took a break from Blender for a few weeks. Opened it up again last night and tweaked some parameters on the procedural skin. Scaling seems quite important for achieving a plausible look, as well keeping the various effects subtle.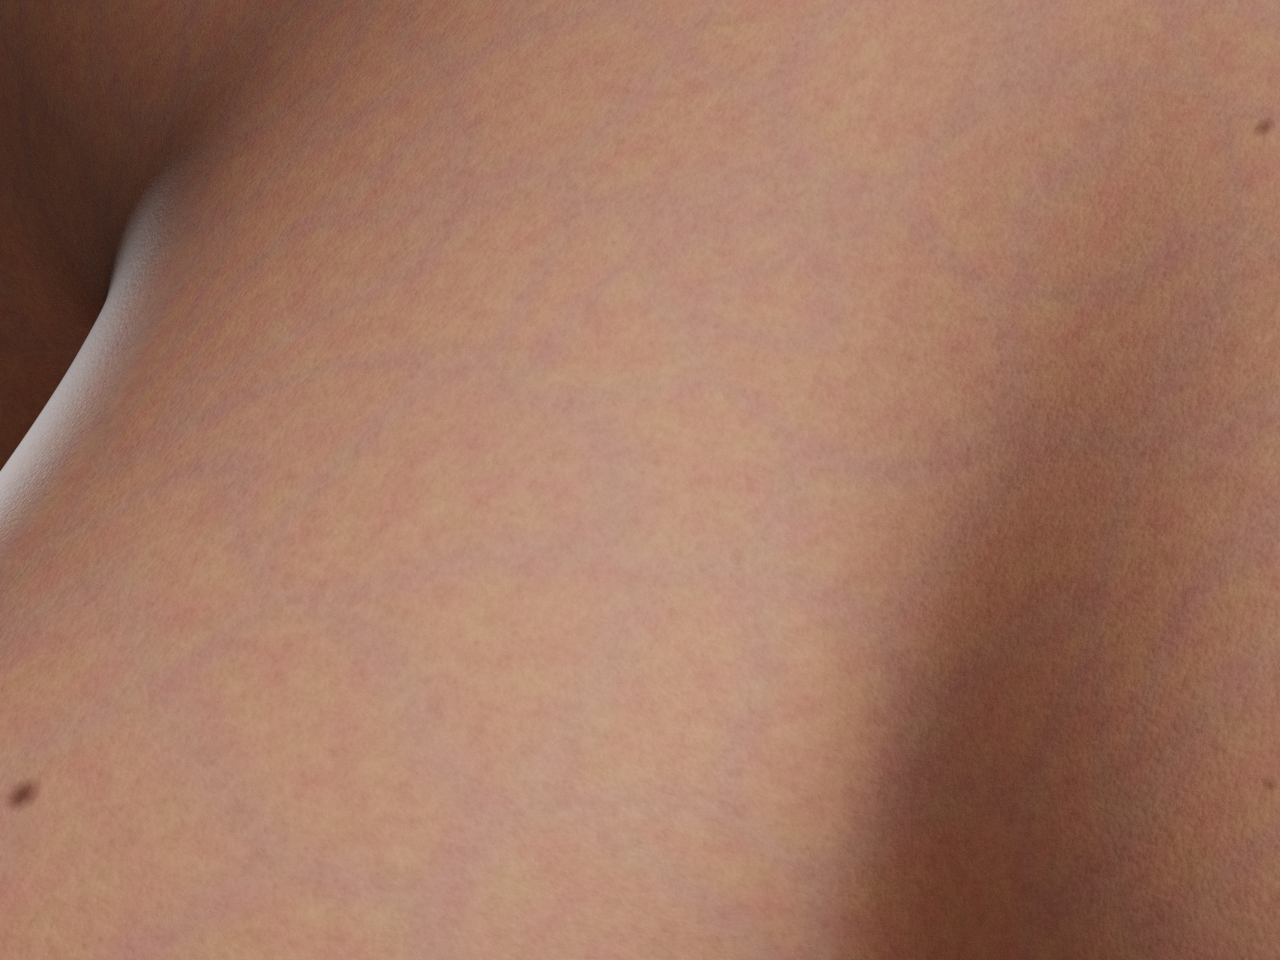
-- I'm not mad at you, just Westphalian.
Cage posted Sun, 22 March 2026 at 8:34 PM
That is looking nice. Is this the low-res mesh that you're showing us?
===========================sigline======================================================
Cage can be an opinionated jerk who posts without thinking. He apologizes for this. He's honestly not trying to be a turkeyhead.
Cage had some freebies, compatible with Poser 11 and below. His Python scripts were saved at archive.org, along with the rest of the Morphography site, where they were hosted.
odf posted Mon, 23 March 2026 at 1:33 AM
Yes, it's based on the Antonia-1.2-lo mesh, but I made quite a few edits, both shape-wise and topology-wise. Currently at about 7900 vertices without the eyes, teeth, gums and tongue. The render is of course done with 3 levels of subdivision.
-- I'm not mad at you, just Westphalian.
odf posted Mon, 23 March 2026 at 6:01 PM
I should also maybe point out again that by no means am I planning to give her a purely procedural material. I just thought the procedural part would be a good starting point. I'm already using hand-painted lips and areolae here, but in addition to just adding details like that, I would also like to experiment with painted maps that drive some of the procedural parameters, for example pore size, pigmentation strength, sub-surface scattering depth and oiliness. When I'm happy with the outcomes, I'll probably start baking them down for faster rendering.
-- I'm not mad at you, just Westphalian.
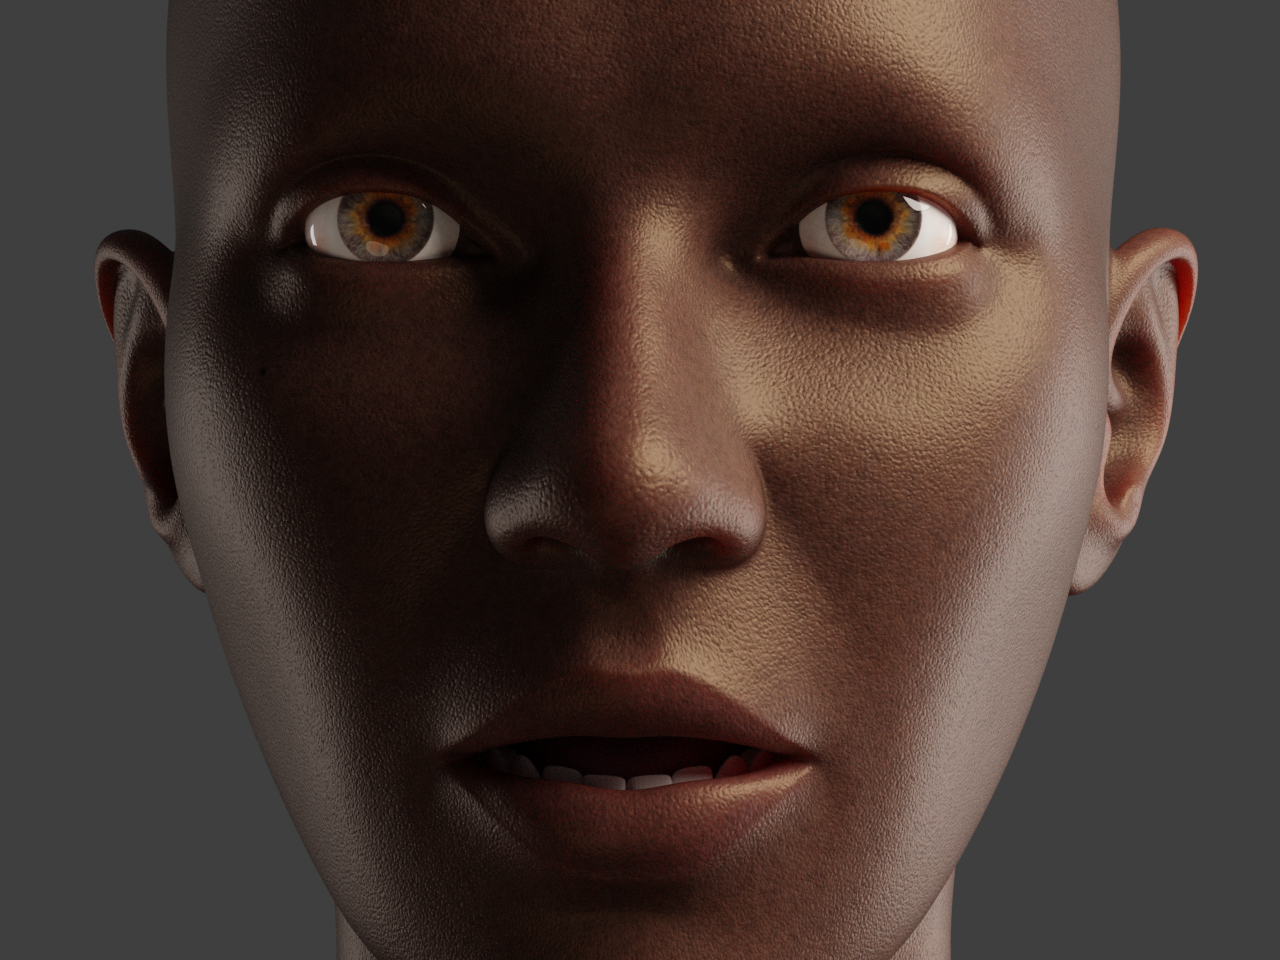
odf posted Sun, 29 March 2026 at 12:02 AM
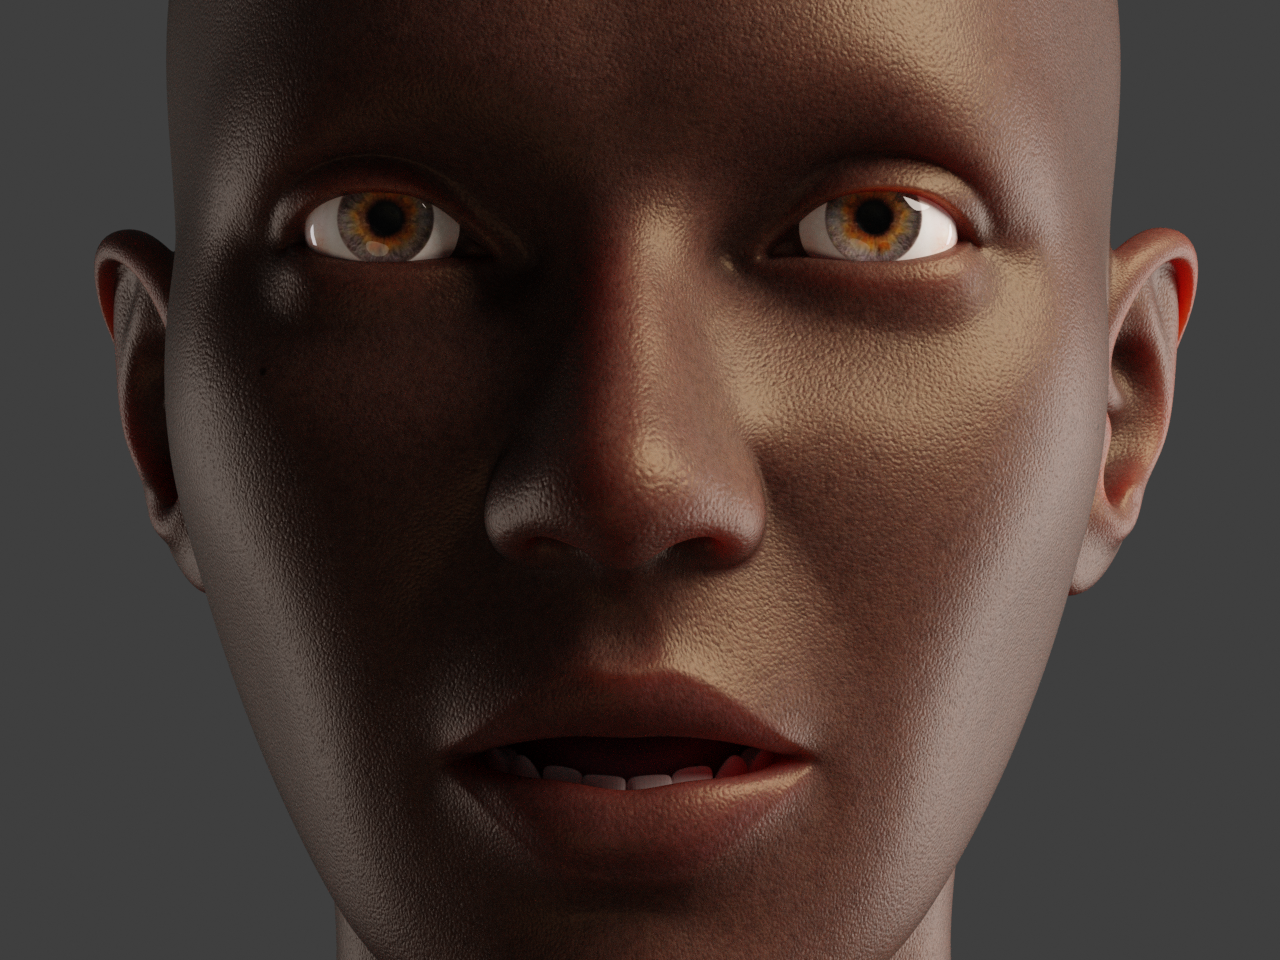
Is this too much subsurface scattering for a melanin-rich complexion? Asking for a friend ...
-- I'm not mad at you, just Westphalian.
odf posted Sun, 29 March 2026 at 12:09 AM
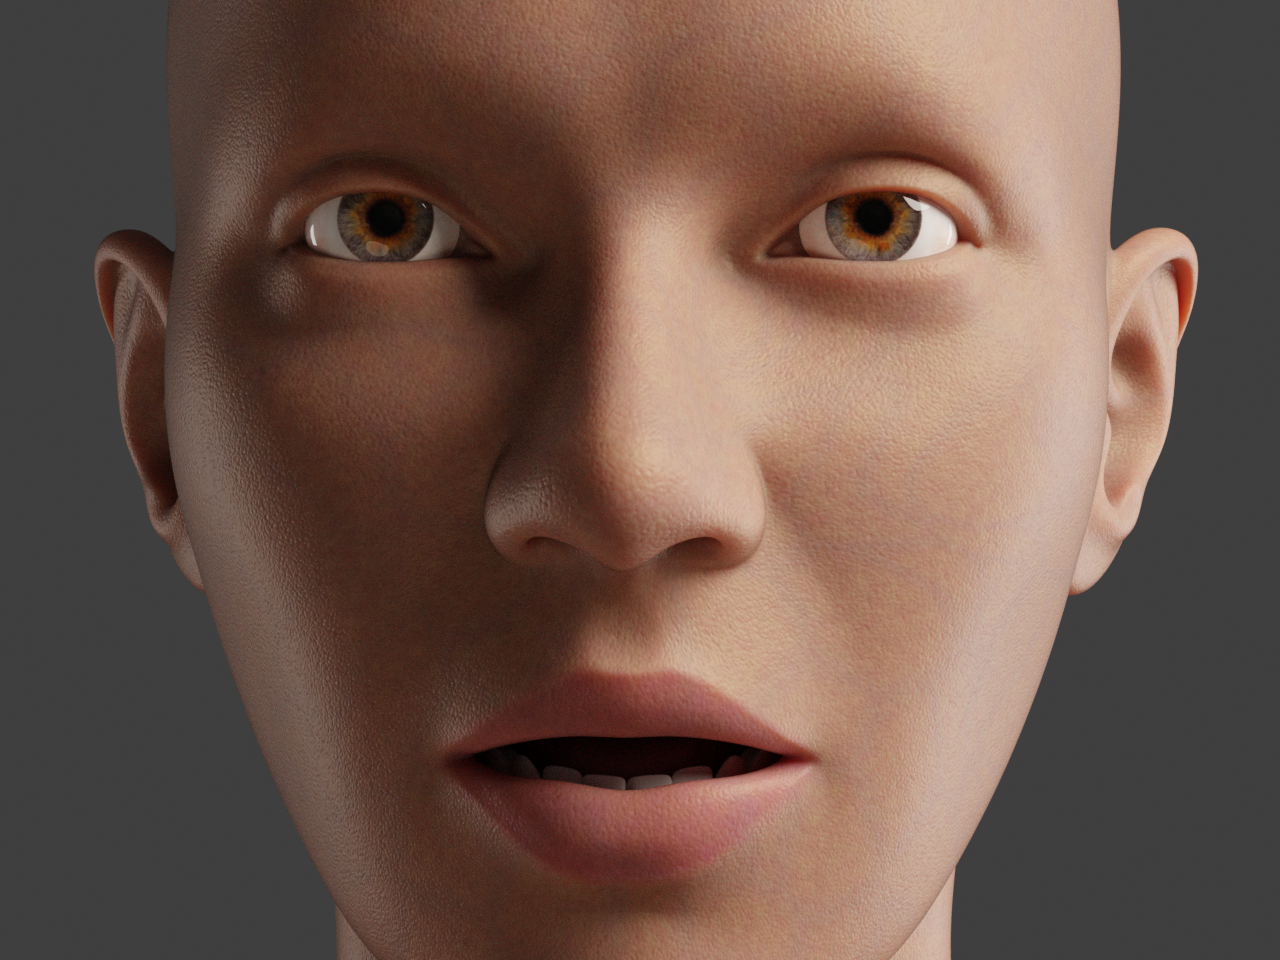
Here's the low-melanin version for reference. I'm reducing the SSS strength proportionally to the melanin-concentration at a specific point in the skin, with maximum melanin getting half the SSS of minimum melanin at the moment.
-- I'm not mad at you, just Westphalian.
hborre posted Sun, 29 March 2026 at 5:21 AM
Yes, high melanin concentration will require a lower SSS setting.
odf posted Sun, 29 March 2026 at 6:15 AM
Yeah, I'm just wondering if I've reduced it enough already or need to go a bit lower still. My feeling is that it's the latter, but I'm not entirely sure.
-- I'm not mad at you, just Westphalian.
odf posted Sun, 29 March 2026 at 5:51 PM
Better, I think:
-- I'm not mad at you, just Westphalian.
hborre posted Sun, 29 March 2026 at 7:56 PM
Hard to tell, but it does look a little better. Have you tried applying ambient occlusion yet to the skin texture?
odf posted Sun, 29 March 2026 at 8:26 PM
No, it seems like a "later" thing to me. :-)
-- I'm not mad at you, just Westphalian.
odf posted Fri, 19 June 2026 at 2:26 AM
Oh hi, long time no post. Here's what Toni looks like today.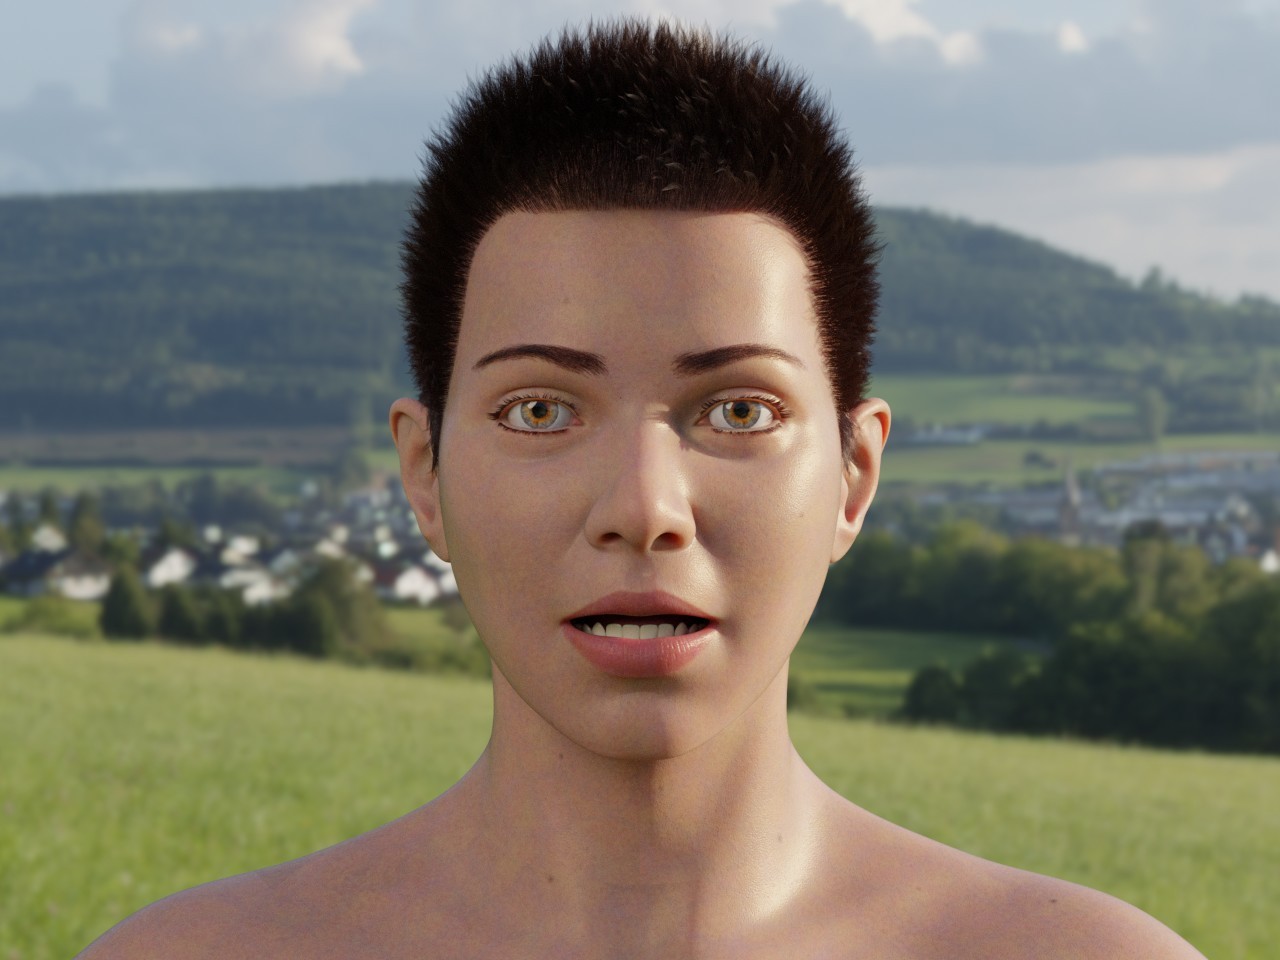
-- I'm not mad at you, just Westphalian.
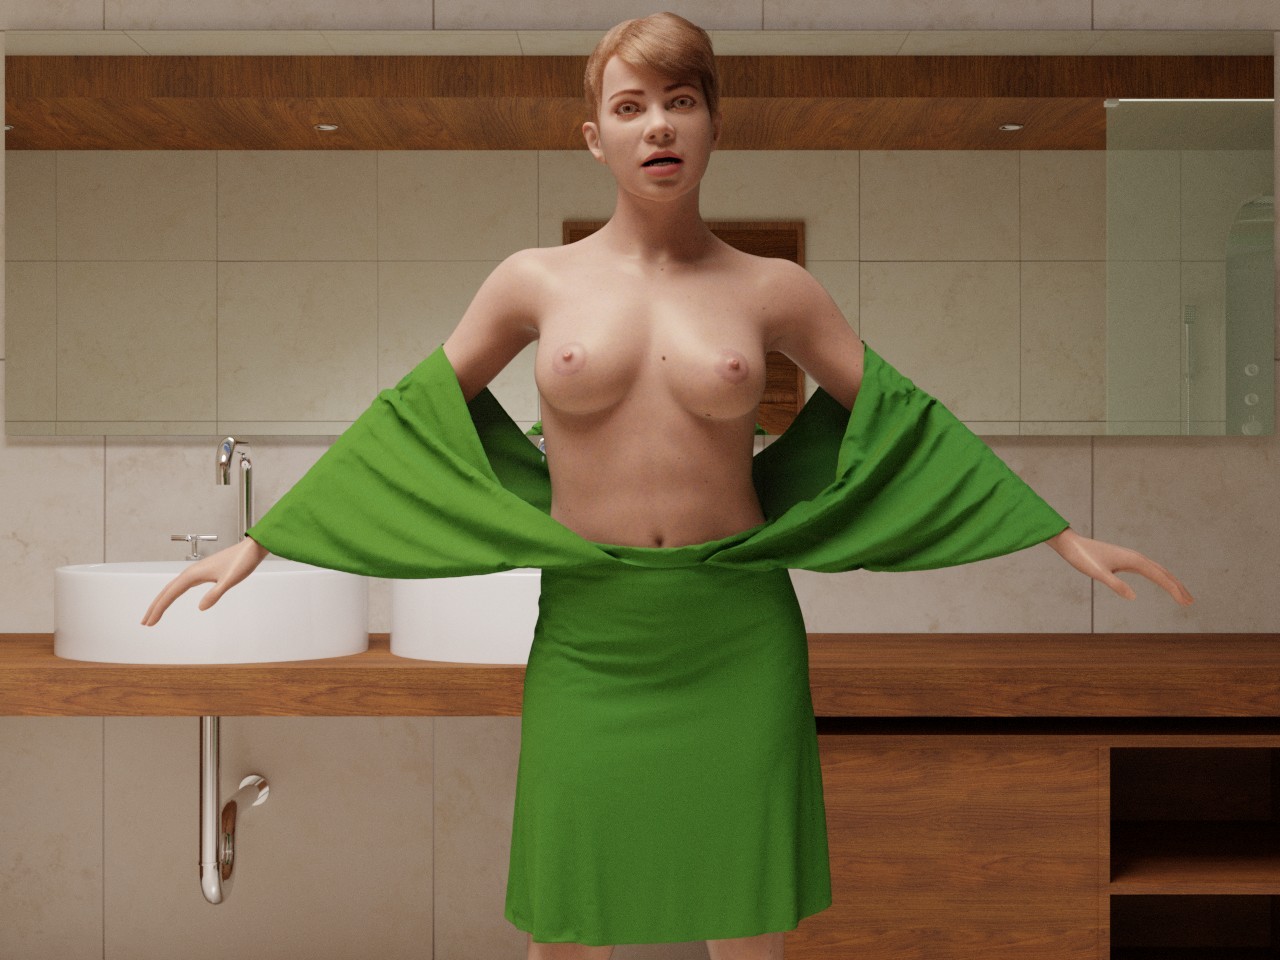
odf posted Tue, 30 June 2026 at 5:17 PM
Now I got her to stand in an actual scene and wear clothes - sort of. She's also posing just a little bit. For more I'd have to do some weight painting.
-- I'm not mad at you, just Westphalian.

TheRook posted Tue, 21 July 2026 at 1:37 PM
Looking good in both! Liking the way the skin is looking each of these, especially the inside scene. I'm guessing it's the procedural shader you've been fine tuning? Also, is that just a standard Blender cloth sim with her outfit?
odf posted Tue, 21 July 2026 at 7:08 PM
TheRook posted at 1:37 PM Tue, 21 July 2026 - #4508523
Thanks, glad you like it. Yes, it's my procedural shader plus a bit of hand-painting on her lips, nipples/areolae and genitals (not shown, lol). I plan to add more hand-painting over time for details and masks.Looking good in both! Liking the way the skin is looking each of these, especially the inside scene. I'm guessing it's the procedural shader you've been fine tuning? Also, is that just a standard Blender cloth sim with her outfit?
The dress was made in MarvelousDesigner, exported as .obj, and simulated via standard Blender cloth sim. I haven't looked at the new cloth simulation in 5.2 yet.
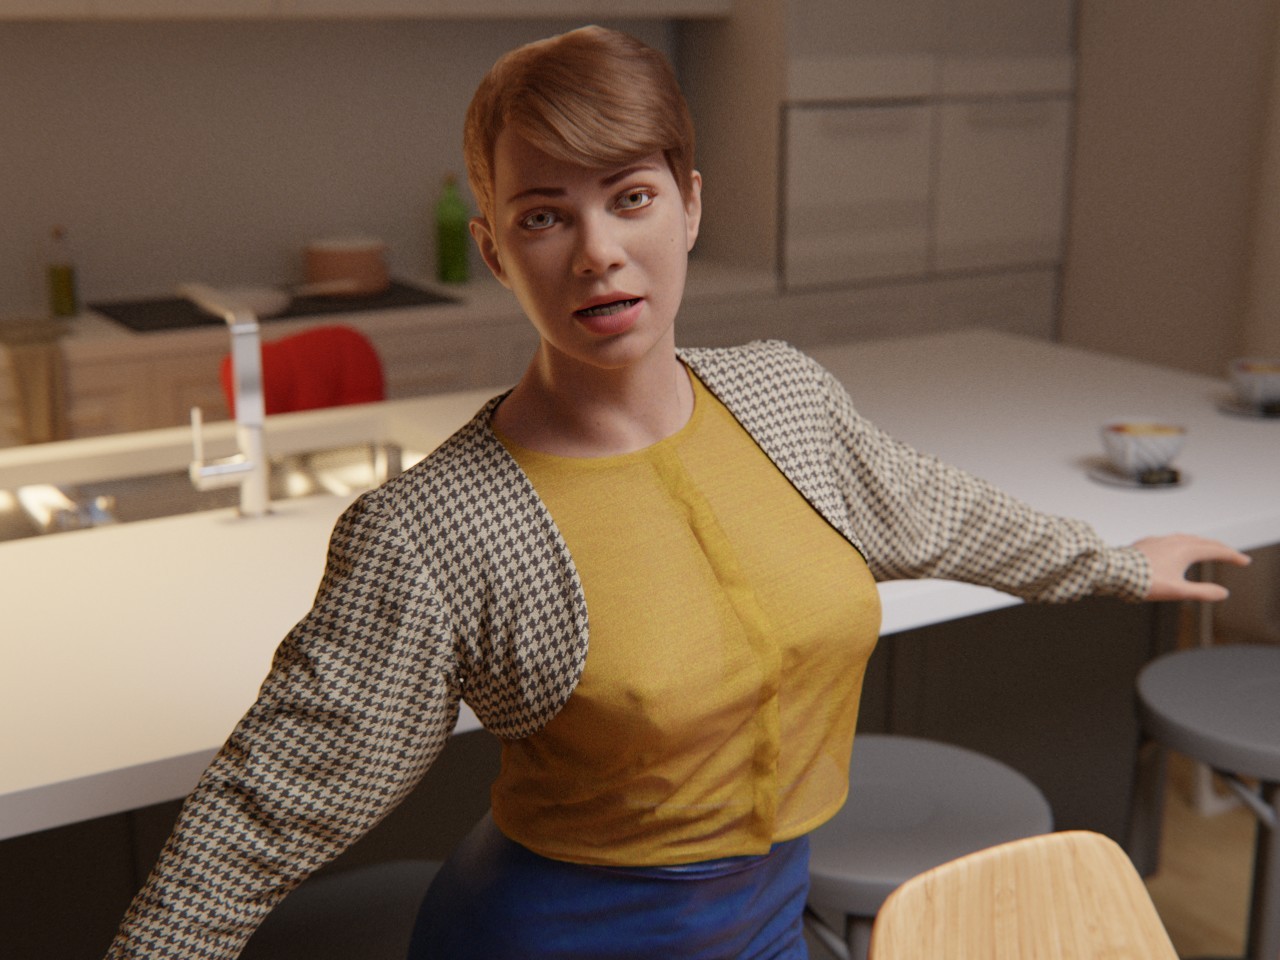
Incidentally, I haven't been updated this thread much lately and instead added brief "production notes" to my gallery posts. Happy to go into more detail here if there are any questions.
Here's my latest gallery post again:
-- I'm not mad at you, just Westphalian.