
Renderosity Forums / Carrara
Welcome to the Carrara Forum
Forum Coordinators: Kalypso, Anim8dtoon
Carrara F.A.Q (Last Updated: 2026 Jul 11 2:50 am)
Visit the Carrara Gallery here.

Subject: UVMapped texture not showing up properly


Measure
your mind's height
by the shade it casts.
Robert Browning (Paracelsus)
http://franontheedge.blogspot.com/
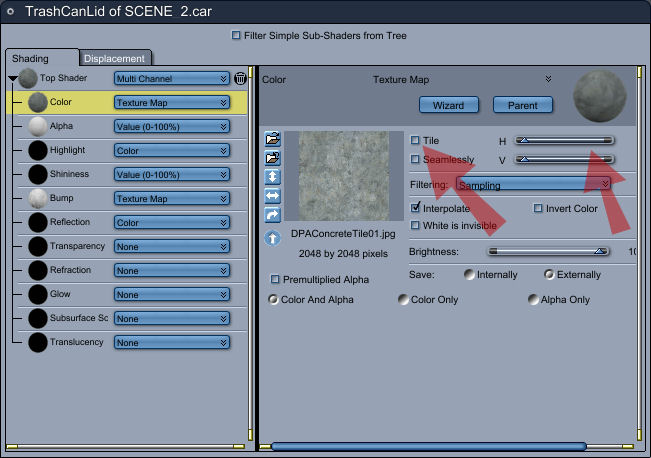
I tried ckecking "Tile" but that made no difference. Is there any way to see what clicking in a box in the Texure Room does without having to go to render and wait for the entire image to get down to the floor area, just to see what effect my actions have had?
All I've got in the Texture Room is an irritating shiny sphere - on a checkerboard.
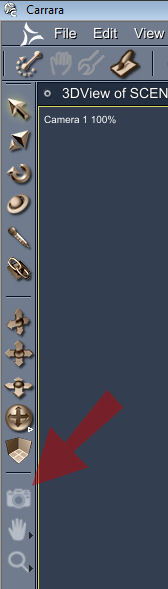
I.e. is there some sort of Open Gl preview in the Texture Room itself?
Ah! Never mind, I've found the OpenGL Preview.
Measure
your mind's height
by the shade it casts.
Robert Browning (Paracelsus)
http://franontheedge.blogspot.com/

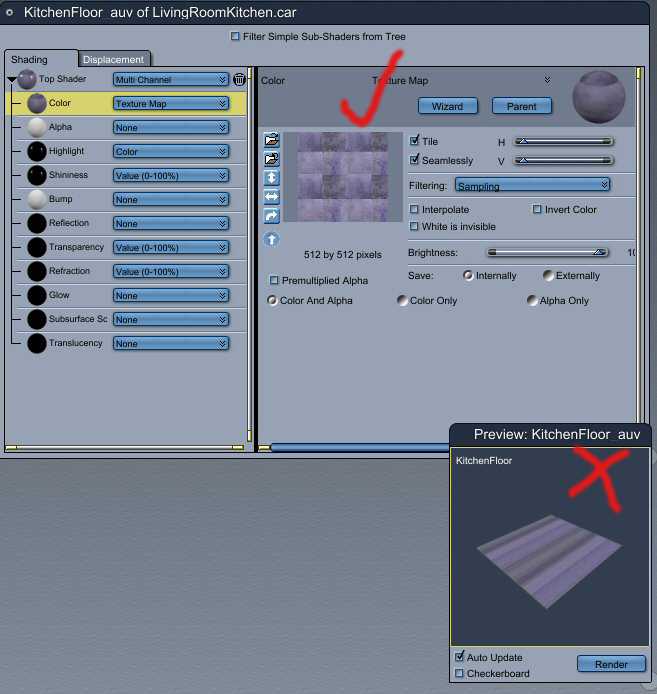
The tick shows what the floor should look like, the cross - what it does look like - i.e. rubbish.
Measure
your mind's height
by the shade it casts.
Robert Browning (Paracelsus)
http://franontheedge.blogspot.com/
Could you send a screen capture of the entire Carrara screen. Make sure to expand the shader box so we can see all of the settings and select the top shader from the menu tree. Also, are you using any displacement?
Quote - Okay, been trying those sliders - but they don't help.
The tick shows what the floor should look like, the cross - what it does look like - i.e. rubbish.
CaptainJack, tried the test render on a selected area as you suggested, all it shows is the same rubbishy thing that I get in the open GL preview in the Texture Room.
Sparrownightmare,
See above. (Except that I don't seem to have a shader room, just a texture room, with shaders in it... probably the same thing though. ggg)
Measure
your mind's height
by the shade it casts.
Robert Browning (Paracelsus)
http://franontheedge.blogspot.com/
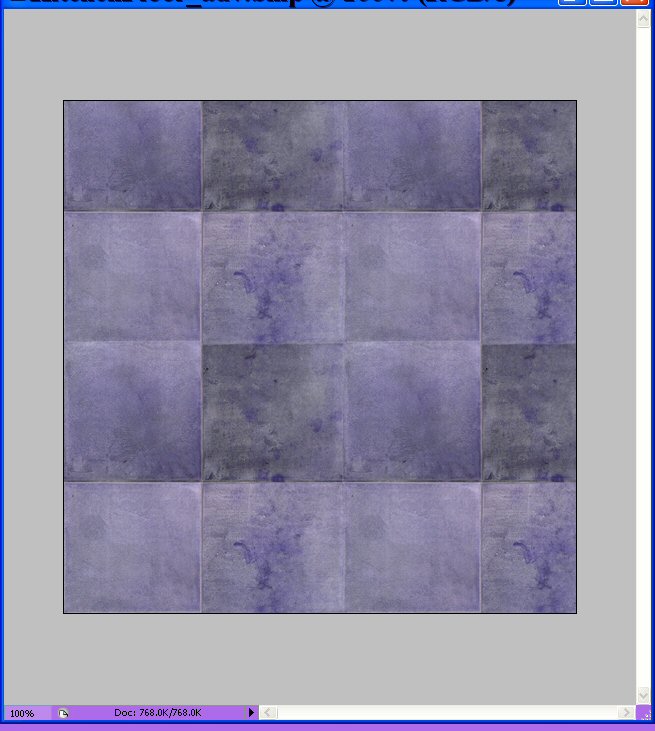
Er... I've got the kitchenfloor_auv.bmp saved outside of wings already, no need to export it again.
This is what it looks like: (see above)
Er, can't post the actual BMP so this is a jpeg screen shot of it:
Measure
your mind's height
by the shade it casts.
Robert Browning (Paracelsus)
http://franontheedge.blogspot.com/
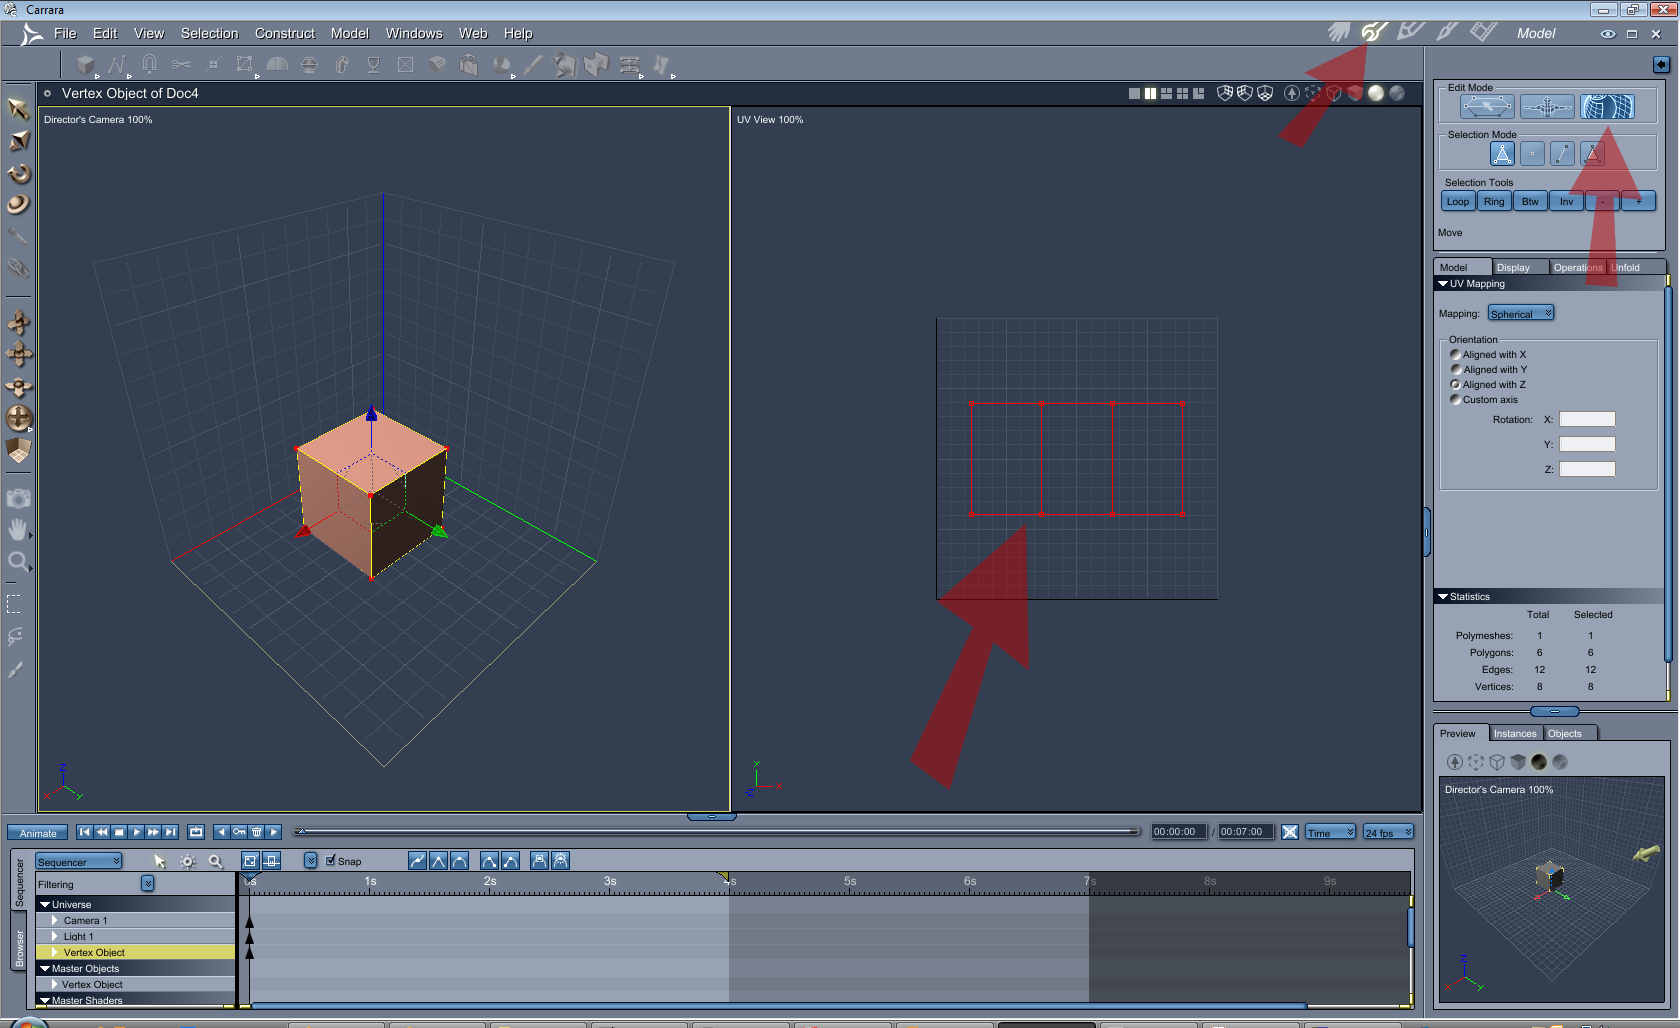
Both floors show up correctly in Cinema4D with no adjustment necessary other than connecting the Texture map images to the colour channel.
(I didn't connect up diffuse or bump or anything like that in C4D, as I just wanted to check the positioning of the texture in the UVMap.)
So how do I do it in Carrara?
Measure
your mind's height
by the shade it casts.
Robert Browning (Paracelsus)
http://franontheedge.blogspot.com/
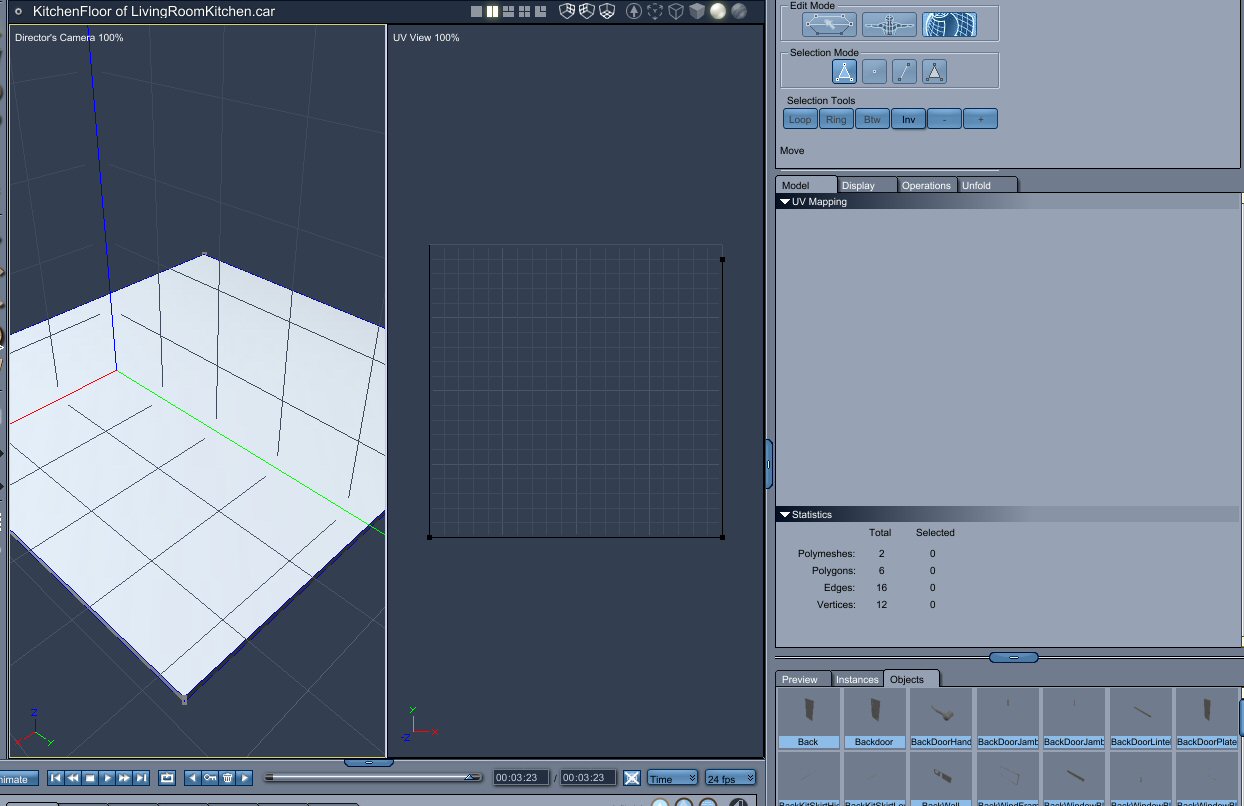
sparrownightmare,
I'm just a bit puzzled as to why it should need tweaking in Carrara's UV Editing, when it works right off the block in Cinema4D & Bryce.
Shrug,
but what the heck - I'm willing to learn.
Measure
your mind's height
by the shade it casts.
Robert Browning (Paracelsus)
http://franontheedge.blogspot.com/
I hope you can tell if it is, (or isn't) going corner to corner, or not, cos so far that UVEditing area in Carrara, means absolutely nothing to me...
Measure
your mind's height
by the shade it casts.
Robert Browning (Paracelsus)
http://franontheedge.blogspot.com/
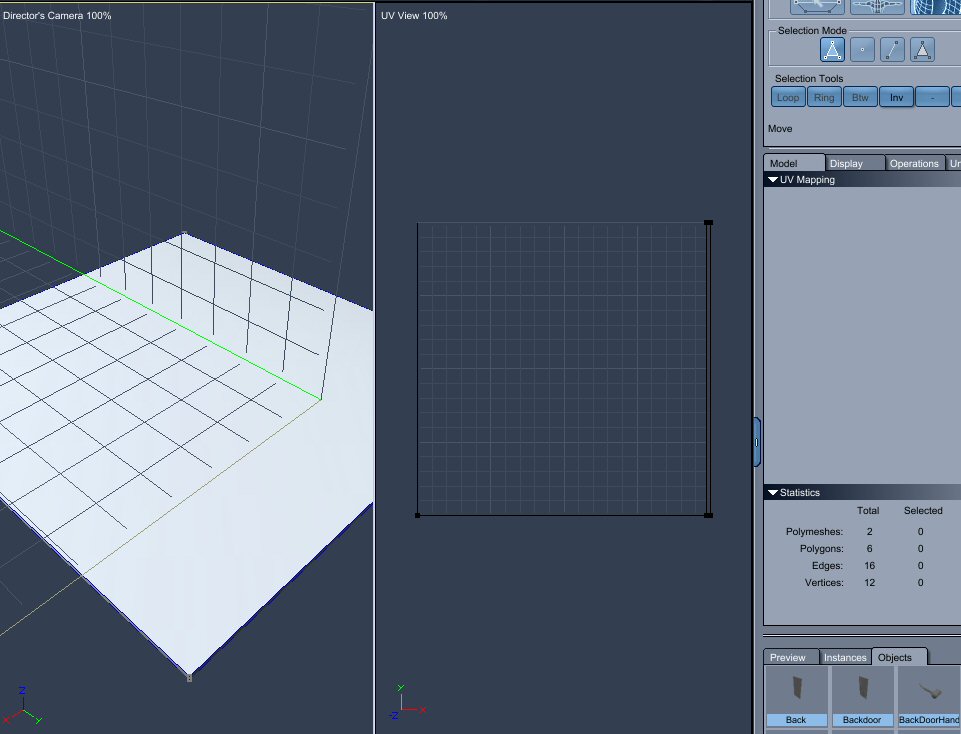
Measure
your mind's height
by the shade it casts.
Robert Browning (Paracelsus)
http://franontheedge.blogspot.com/
Quote - Both floors show up correctly in Cinema4D with no adjustment necessary other than connecting the Texture map images to the colour channel.
I don't know C4D, but it may not have been using the UV's. Some programs can do simpler kinds of texture mapping, where they map the surface mathematically, rather than use UV coordinates. That may be how C4D did it, and why it works there, but not in Carrara. I don't think Carrara can do a texture map in any way other than using UV coordinates.
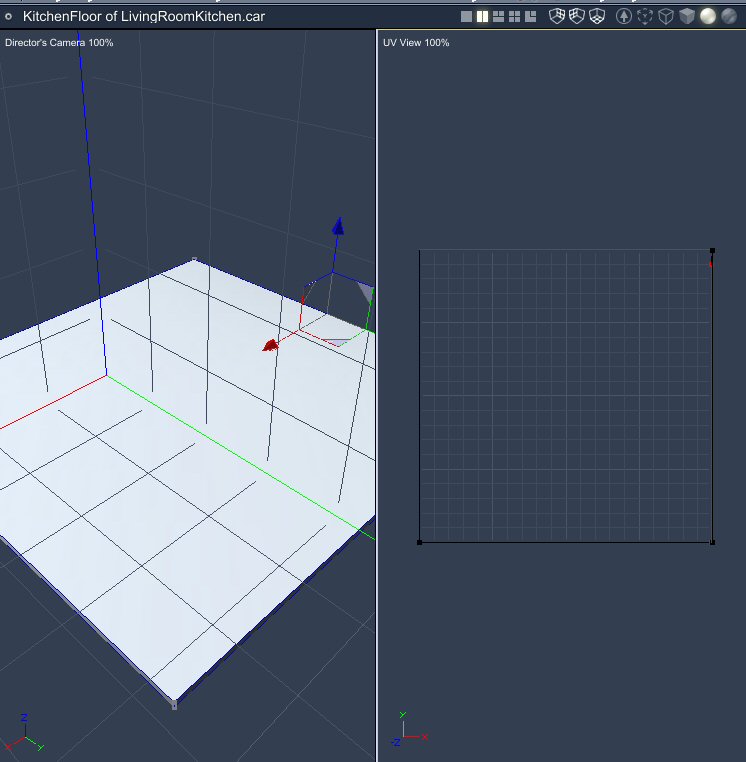
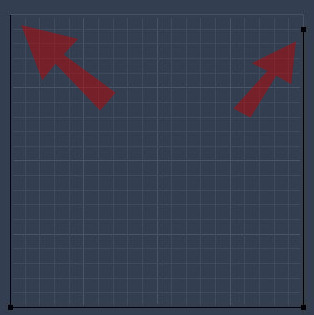
I managed to move the one at the top right, but no idea where the one at the top left is even... plus as you see when I moved the vert at the topright, it revealed something going on underneath...
(the red verts and edge)
Measure
your mind's height
by the shade it casts.
Robert Browning (Paracelsus)
http://franontheedge.blogspot.com/
Quote - > Quote - I've taken a screen shot of the living room floor in that UVEditing area as well, here it is:
Yeah, that one's way off... for a nice simple four vertex plane like you've got, the vertices should probably go corner to corner, to match your floor's texture image.
Well I tried moving those over, and although that did make a difference to the image in the render... I don't think it was an improvment, worse in fact.
Measure
your mind's height
by the shade it casts.
Robert Browning (Paracelsus)
http://franontheedge.blogspot.com/
I'm note sure what to do here... unfortunately, I'm a complete novice with the UV editor in Carrara (I've been doing all my UV mapping in Wings, too).
One thing to try at this point would be to delete the floor from the scene, insert a plane, then map your texture on it. The plane is already oriented correctly when it imports. If you need to keep what you have, it looks like the UV map will need to be re-done, I'm afraid.
(I won't be able to do much of this for long as the text in Carrara is so damn small it's giving me a severe headache.
Is there anyway to enlarge the fonts in Carrara?)
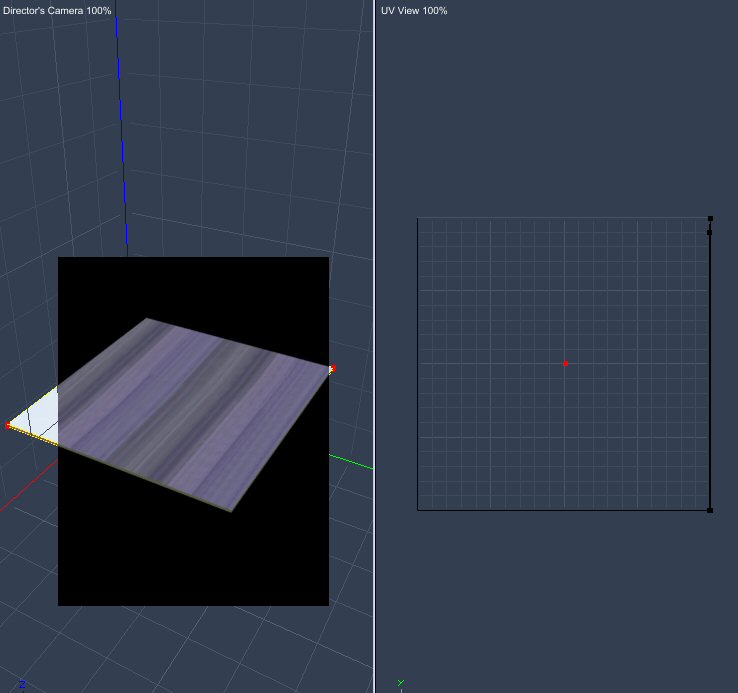
I tried moving the vert in the bottom left, and this happened:
it's just so weird! (there were 4 red verts selected in the left hand window even though I only selected one in the righthand window... ?????)
And moving it/them or not moving it/them made no difference to the pattern on the floor - still wrong.
Measure
your mind's height
by the shade it casts.
Robert Browning (Paracelsus)
http://franontheedge.blogspot.com/
What puzzles me is that the maps look just fine in other programs.
Could it be a CarraraBug do you think?
Measure
your mind's height
by the shade it casts.
Robert Browning (Paracelsus)
http://franontheedge.blogspot.com/
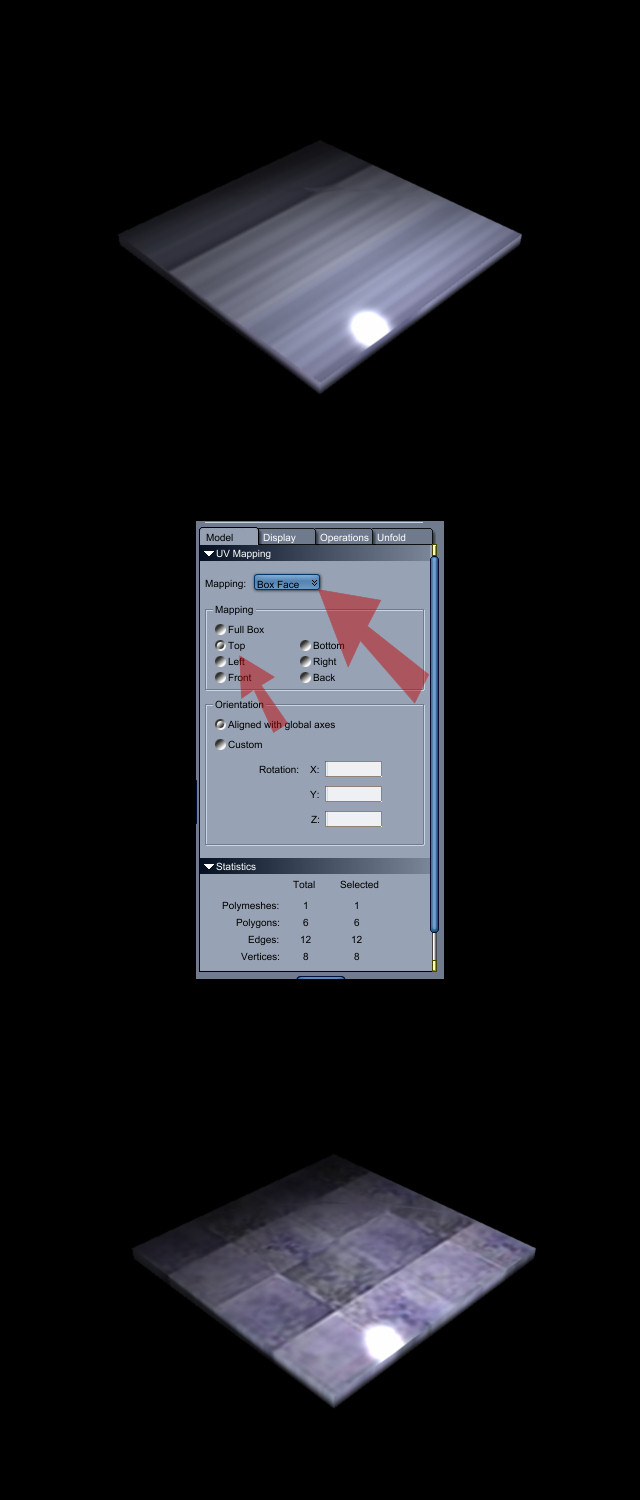
I went in to the Model Room, selected the entire object, and clicked the UV map mode. I changed the mapping to "Box Face" and just for fun, clicked "Top". That rendered correctly.
When I first looked at the custom UV's, they didn't match the UV layout I had in Wings.
I have no idea of this is a Carrara problem, a Wings problem, or a problem with my inexperience, but I strongly suspect the latter. 
I suppose it could be because I simply only UVMapped the area of the floor object that needed to be seen, that is the top of the cube I used to create the floor. (as you thought)
But why that would mean the UVMaps for this object work in other programs but not in Carrara, is not clear.
Does that mean that if you want to create seperate UVmaps for certain areas on a model, you just can't do that for a model intended for Carrara?
Odd if so.
Measure
your mind's height
by the shade it casts.
Robert Browning (Paracelsus)
http://franontheedge.blogspot.com/
I dunno... I'm willing to bet there's a piece of the puzzle missing here, rather than a program problem. I've imported tons of Poser content into Carrara, and I've never had a UV problem. And, I've never had a UV problem going from Wings to Poser or POV-Ray, so I don't think it's Wings, either.
Gonna go spend some more time with the ol' manual, and try to figger this one out.
I've recently found that exporting from Wings3d as a .3ds format preserves the hard edges and the UV Maps come in better when Importing into Cinema4D - I wonder if that also applies to importing to Carrara?
However I now no longer have the 7.1 Beta, so I'll have to start all over again anyway and import into my Carrara Pro 5 instead.
I'll try the .3ds format this time, see if it makes a difference.
Measure
your mind's height
by the shade it casts.
Robert Browning (Paracelsus)
http://franontheedge.blogspot.com/
I'll tell you what it does to Wings - it crashes it!
:ohmy: :m_fit:
Previously I had only exported the sink units as .3ds, trying to export the whole flat, killed Wings3D!
Measure
your mind's height
by the shade it casts.
Robert Browning (Paracelsus)
http://franontheedge.blogspot.com/
Yeah but I didn't think our flat was that big!
Of course, I am rendering in Bryce at the same time... oops.
Better let Bryce finish first I think.
Measure
your mind's height
by the shade it casts.
Robert Browning (Paracelsus)
http://franontheedge.blogspot.com/
First attempt to export the entire thing as .3ds, when I imported I got only some of the models, no floor, walls, or kitchen units, in fact those were all items that had been UVMapped.
However, the floor mats and books were also UVMapped and those arrived alright, the sink was not UVMapped and that did NOT arrive.
Weird.
I tried twice, letting wings have about half an hour to export while I went and did the laundry, but it's no better.
I think the only option might be to export items singly.
Measure
your mind's height
by the shade it casts.
Robert Browning (Paracelsus)
http://franontheedge.blogspot.com/
Found something that worked for OBJ files, but it's not what I'd call completely convenient. When importing, click on the option to import as "Facet Meshes" instead of as "Vertex Primitives". After the OBJ is imported, select it and go into the model room, and convert it to the vertex modeler. The UV map that was in the OBJ file will be intact. However, the mesh will be triangulated, so you will probably want to un-triangulate it from the menu in the model room.
I can duplicate reliably the UV map being distorted with selected OBJ meshes, and this does get around that. I haven't tried more complex models, say with multiple groups, but then, it seems to keep the UV map on more complex meshes, so it may not be a big problem over all.

Privacy Notice
This site uses cookies to deliver the best experience. Our own cookies make user accounts and other features possible. Third-party cookies are used to display relevant ads and to analyze how Renderosity is used. By using our site, you acknowledge that you have read and understood our Terms of Service, including our Cookie Policy and our Privacy Policy.
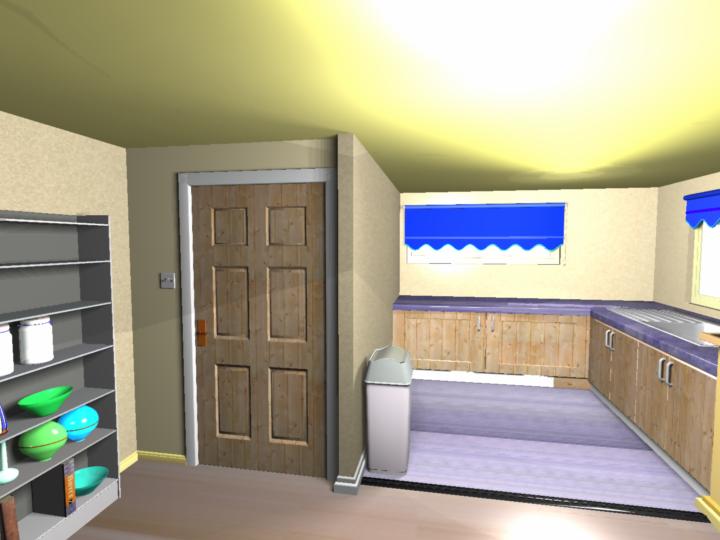
This is in windows, and using the Carrara7-1beta.I have various areas on this rather complex model that have been uvmapped and have their own textures.
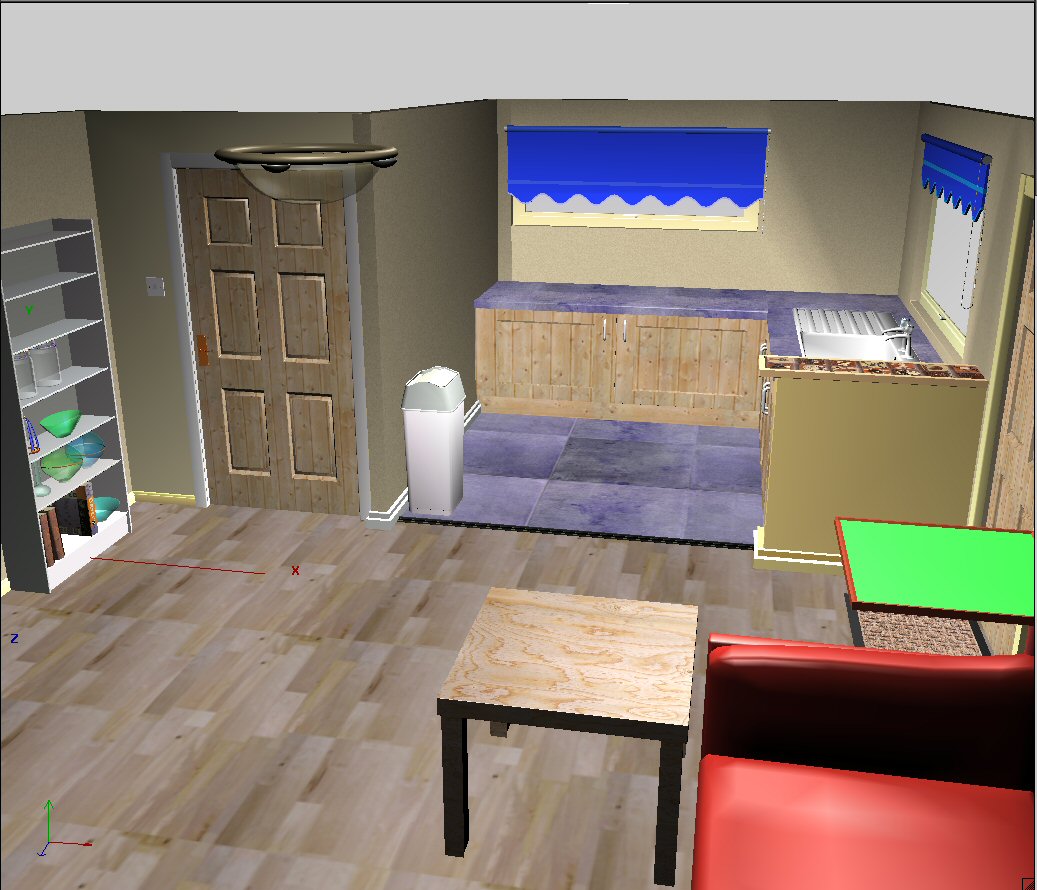
The ones on the doors and cupboards are just right, but the ones on the two different floors are coming up looking weirdly stretched.
Help?
What do I need to do to correct this?
(the UV-ing was done in Wings3D - and I'm a poor student so I can't afford to buy anything to make this work, so please don't suggest that.)
(Oh and I've tried looking at the Mark Bremmer tutorials but they are obliterated by adverts, so you can't see what's happening.)
So I'm hoping that it's some simple procedure that a Carrara user would know all about and it's just that I haven't used Carrara that much and then it was only Carrara 3D Basics, along time ago...
I have been able to jigger around with the basic Wings materials that were imported with the model - jigger with them in Carrara's texture room I mean, but again this is just prodding things and hoping. I can sort of get rid of excessive shine - I tried this out on the ceiling, and although I did manage to get rid of the shine, I seem to have got rid of it only to replace it with a sort of softer but much bigger area of white out.
Hmmm...
So the image above shows the stretching of the floor UV's and the odd soft shine on the ceiling...
Can anyone help with these two things?
Measure your mind's height
by the shade it casts.
Robert Browning (Paracelsus)
Fran's Freestuff
http://franontheedge.blogspot.com/
http://www.FranOnTheEdge.com