Filter: Safe | Sat, May 2, 12:03 PM CDT

Renderosity Forums / Cinema 4D


Welcome to the Cinema 4D Forum

Forum Moderators: CHMedia Forum Coordinators: Kalypso

Cinema 4D F.A.Q (Last Updated: 2024 Aug 27 11:07 am)

C4D Gallery Speed Modeling Sessions C4D Freestuff
 
 
Checkout the Renderosity MarketPlace - Your source for digital art content!


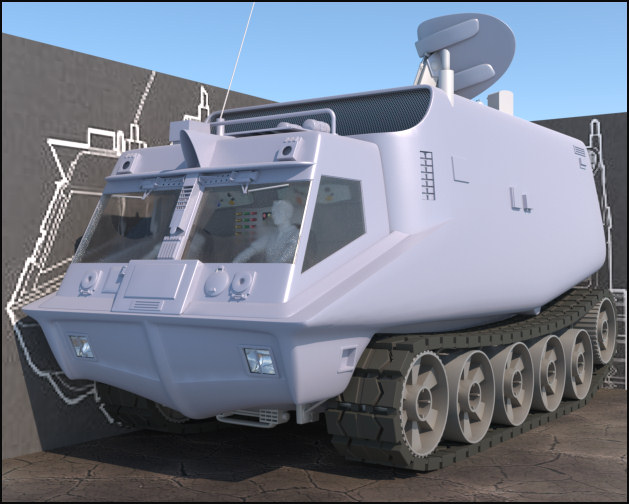
Subject: Space 1999 - Project Eagle - A 3D Model In The Making


Mandrake7062 ( ) posted Tue, 14 April 2009 at 10:49 AM

I have one cooking ;) now but yes a bit of both. The Body Paint is a whole new world, for me. I've had photoshop a long time and now i wish I had studied it more. I've only done the basic stuff and let it be. Making textures from scratch is difficult.


Becco_UK ( ) posted Tue, 14 April 2009 at 11:03 AM · edited Tue, 14 April 2009 at 11:09 AM

Mandrake7062: I thought BodyPaint would slow you down! However, some often write that BodyPaint is complex to use and so others get conditioned into believing this to be so.

In fact, BodyPaint is no more complex than any other modern software - it only has functions and tools to get used to using.

Perhaps becoming more familiar with the basic functions and tools of BodyPaint with a simpler model would save you time in the long term - the Eagle has some complex work to get nice UV maps and It would be a shame to spoil your nice modelling with poor BodyPaint work.


Mandrake7062 ( ) posted Tue, 14 April 2009 at 11:08 AM

I'm just glad I started texturing first. ;) Otherwise there it might not have been done. hehe


Becco_UK ( ) posted Thu, 16 April 2009 at 1:40 PM · edited Thu, 16 April 2009 at 1:41 PM

file_428801.jpg

All the landing gear parts are more or less finished at the modelling stage - once the UV work is done I will have a go at using Xpresso to get them working.


Becco_UK ( ) posted Sun, 19 April 2009 at 2:49 AM

file_428966.jpg

A completed landing gear assembly, UV mapped using BodyPaint and Ambient Occlusion was baked which is used in my paint software as a 'dirt' controlling mask.


Becco_UK ( ) posted Sun, 19 April 2009 at 2:55 AM · edited Sun, 19 April 2009 at 2:59 AM

file_428968.jpg

The Eagle has legs! The one assembly I made was simply copied to the other side pods. The footpad is moveable as are the link bars. However, at present each part has to be moved seperately but I still hope this can be automated using Xpresso before the model gets completed.

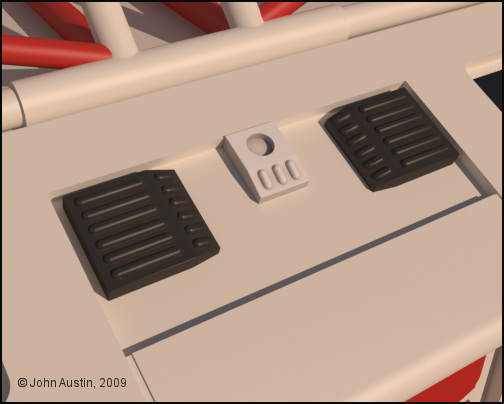
When painting gets finished I can give the each of the landing gears a bit of variation by swapping some of the footpad detail around. There are polygon selection tags for each part so they make it much easier to move selected polygons around ie: The paper labels 'stuck' to the footpad.


Mandrake7062 ( ) posted Sun, 19 April 2009 at 6:52 AM

Looks great Becco.


Becco_UK ( ) posted Tue, 21 April 2009 at 11:13 AM

file_429105.jpg

**Mandrake7062**: Thank you.

Attention now turns to the passenger pod. This starts out with some swept splines and editable planes welded together.


Becco_UK ( ) posted Tue, 21 April 2009 at 11:33 AM · edited Tue, 21 April 2009 at 11:37 AM

file_429107.jpg

Detail starts to get added to the passenger pod. The 'windows' are constructed in a similar fashion to the original model where the 'window' frames were simply  painted onto clear acrylic - this digital version has the 'window 'frame' cut out of the window and given a seperate material. All the underside of the 'window' underneath has a black material to replicate the original black painted acrylic.


Becco_UK ( ) posted Wed, 22 April 2009 at 7:40 AM · edited Wed, 22 April 2009 at 7:43 AM

file_429154.jpg

**Mandrake7062**: At last, here's a couple of photos' of the Gemini model kit parts fitted to the passenger pod. The tiny plastic tags should be disregarded - they are left over from cutting the parts from the sprue.


Becco_UK ( ) posted Wed, 22 April 2009 at 7:40 AM

file_429155.jpg

The second photo'.


Mandrake7062 ( ) posted Wed, 22 April 2009 at 11:00 AM

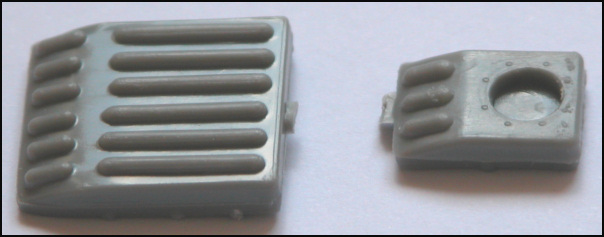
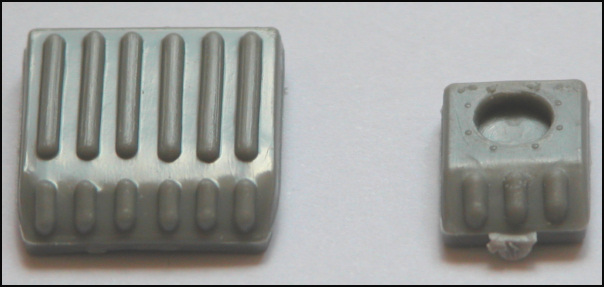
Thanks Becco, left one is close enough, well guess I could fix both, kind of moot at this point.
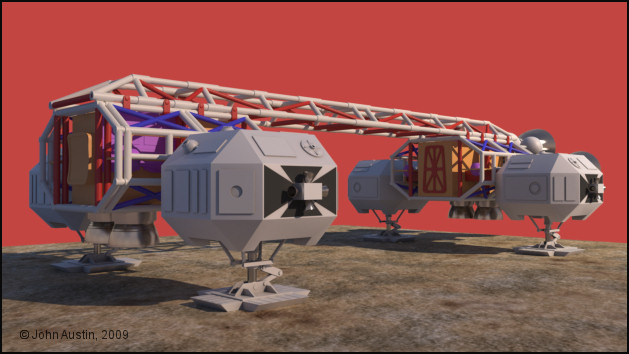
Little depressed I guess, I'm at the top of my 3gig memory limit with TG2 or my render engine. I tried a real world render, as in atmosphere the simplest of landscapes, power fractaled fake grass, and I still had to back off on the booster, the chrome, and I still got errors.
I need Win 7 64 bit and TG2 64 bit with 12 gigs of memory, maybe then..
http://www.kdf-computers.com/download/eagle9a.jpg


Becco_UK ( ) posted Wed, 22 April 2009 at 11:10 AM

Mandrake7062: I use 2GB memory so your 3GB would be a luxury for me. When I built this machine I was going to set up a duel boot 32/64 system but after more than a years' use I havene't found any need to (yet). I grew up with a just quarter Mb ram :-). Maybe you could render a few seperate images with Terragen and composite them together?


Mandrake7062 ( ) posted Wed, 22 April 2009 at 5:47 PM

I would probably take the time to fully learn c4d's rendering system before I try that.
Hopefully this fall will bring both along though.


Becco_UK ( ) posted Thu, 23 April 2009 at 6:18 AM

file_429258.jpg

My digital version of the Gemini kit parts.


Becco_UK ( ) posted Thu, 23 April 2009 at 6:19 AM · edited Thu, 23 April 2009 at 6:21 AM

file_429259.jpg

The passenger pod mesh tidied up and more detail added.


Mandrake7062 ( ) posted Thu, 23 April 2009 at 8:03 AM

Crew cabin came out very clean Becco.
I skipped the door, to save polys, but added the rest, because you could see it.
On the series II, I did,  I have those 3 rectangular blocks sticking out, guess I screwed up


Becco_UK ( ) posted Thu, 23 April 2009 at 9:01 AM

Mandrake7062: Thank you. I was undecided about adding the doors at the ends of the passenger pod but opted to make them - they can always be hidden from the render. Not sure what 3 blocks you are referring to but you can go back and fix the fault?


Becco_UK ( ) posted Thu, 23 April 2009 at 9:19 AM

file_429271.jpg

Detail starts to get added to the underside of the passenger pod. The white tube framework is all one mesh with the few red tubes simply poked through.

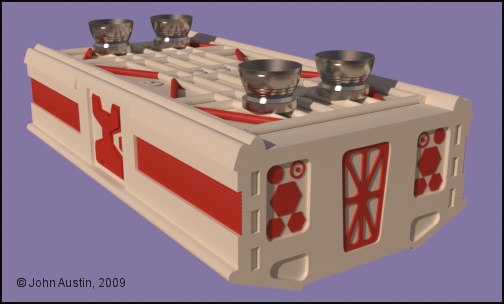
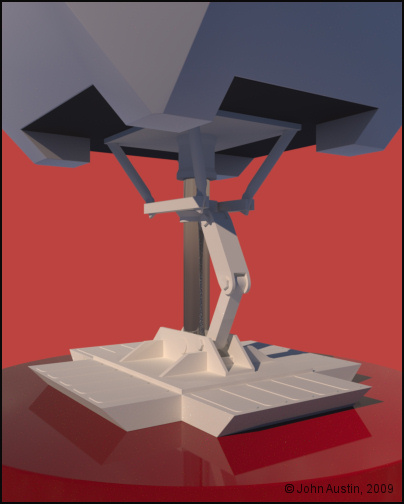
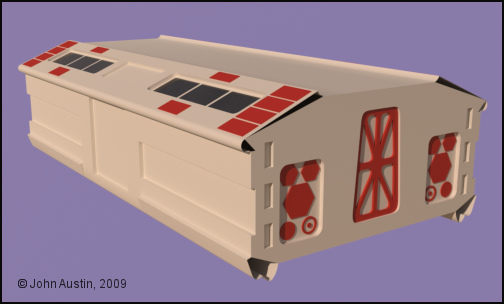
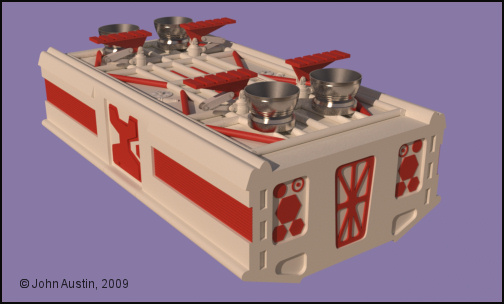
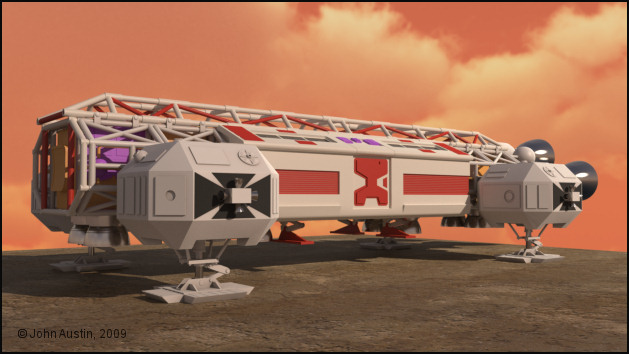
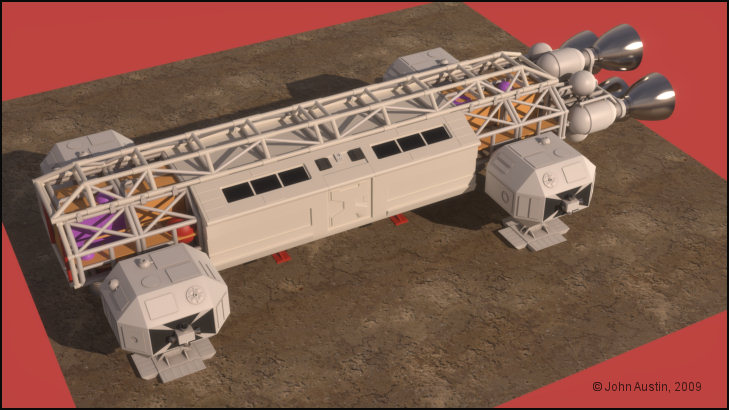
Three of the metal VTOLS' and a couple of model kit parts make use of Maxwells' true instancing and this saves 15,000 polygons at render time with only a negligable reduction in render speed.


Becco_UK ( ) posted Sun, 26 April 2009 at 2:02 PM

file_429535.jpg

The passenger pod seems to have taken a long time to finish the modelling stage. Anyway, it's finally completed, with all the Gemini and SaturnV model kit parts made and positioned.


Becco_UK ( ) posted Sun, 26 April 2009 at 2:05 PM · edited Sun, 26 April 2009 at 2:09 PM

file_429536.jpg

This is how the unpainted passenger pod looks with the rest of the Eagle. Now this component is finished at the modelling stage I can UV map the spine, cage and passenger pod assemblies and apply the base colour with some baked ambient occlusion. At this stage the Eagle has just over 400,000 polygons at render time. I had in mind a maximum of 500,000 render time polygons for this model so I have plenty left for the few remaining walkway kit parts and the command models. The end is in sight (just)!


Mandrake7062 ( ) posted Sun, 26 April 2009 at 3:08 PM

Looks great Becco, but that big engine bell, support loop bracket eclipse is turned off in this shot..

Been wondering about the way you bake your AO layers and wondering if I could use that as a displacement layer in tg2. I'm going to have to look at that one.


Becco_UK ( ) posted Sun, 26 April 2009 at 3:16 PM

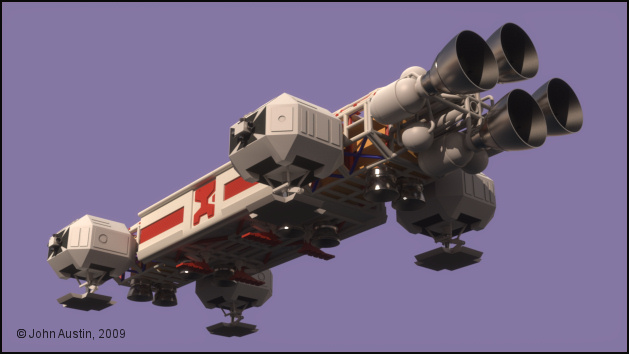
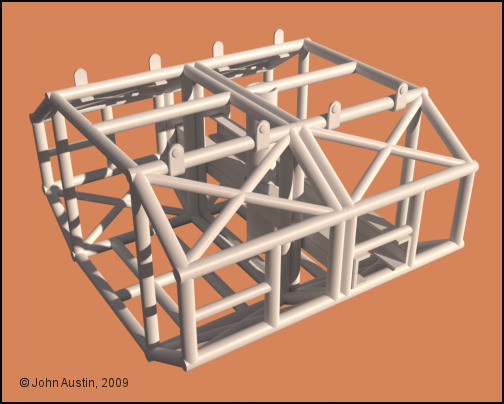
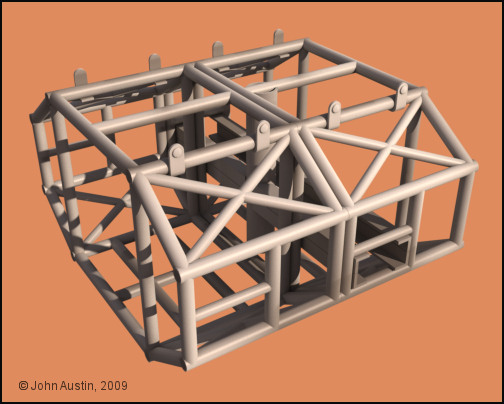
Mandrake7062: Thank you. There is no support loop fitted to this version of the Eagle so that's why it isn't anywhere to be seen.

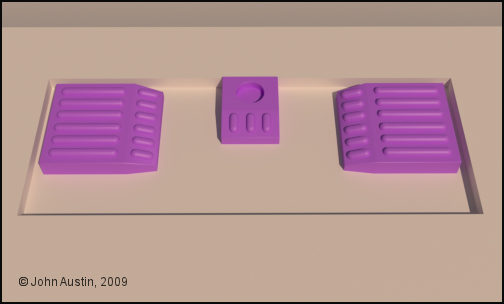
The AO I bake is just a greyscale image so could be used for many purposes. When I start texturing the Eagle I was going to try the AO bake in roughness and refection matererial channels. If you do some baking - remember to check the 'keep UV' box. Your original model will be hidden automatically and a copy made. I always delete the copy and apply material changes to the original object/s. I only use the baking to produce a greyscale image for use in my Paint software.


Mandrake7062 ( ) posted Sun, 26 April 2009 at 3:33 PM

Wow I just found a 22 in the catacombs that did not have that elliptical type support bracket, that thing was hard to make..


Becco_UK ( ) posted Sun, 03 May 2009 at 2:45 PM

file_430079.jpg

I chose to UV map the cage assembly seperately. A number of** polygon selection** tags were made for each of the parts that made up this structure were given. All the parts were then **connected** into one object ready for UV mapping with Bodypaint.


Becco_UK ( ) posted Sun, 03 May 2009 at 2:49 PM · edited Sun, 03 May 2009 at 2:50 PM

file_430083.jpg

The 'cage' has now been UV mapped using only **interactive** mapping with the **UV** **relax** tool used where required. Ambient occlusion was **baked** and used as a mask layer in my paint software to control some 'dirt'. In this image the dirt may look a little odd but it's being seen in isolation from the rest of the 'Eagle' model which influenced the baking process.


Becco_UK ( ) posted Sun, 03 May 2009 at 2:57 PM · edited Sun, 03 May 2009 at 2:58 PM

file_430084.jpg

The cages in place. The rear 'cage' is a copy of the 'front cage. The copying of parts shouldn't be that noticable due to the distance and different rotation between each of the 'cages'.

The sky came from Vue and was converted to a .mxi image for use as a background in Maxwell Render. 


Mandrake7062 ( ) posted Sun, 03 May 2009 at 4:38 PM

Looks great! I flipped around a copy of the front cage also.


Becco_UK ( ) posted Mon, 04 May 2009 at 6:24 AM

file_430135.jpg

This Command Module was the equivalent of a 3d doodle. I was trying to determine the minimum number of control points if I decide on making the CM with an hyper nurbs. No plans or anything used for this very quick test. Not bothered about this too much yet though because I still wish to UV map the Spine & Passenger Pod before starting to make other parts. 


Becco_UK ( ) posted Mon, 04 May 2009 at 3:40 PM

file_430164.jpg

Back to the 'painting' I've decided to sort out the passenger pod next. These Gemini kit parts will be used on my 3d Shadow Mobile so they have been UV mapped seperately.


Mandrake7062 ( ) posted Mon, 04 May 2009 at 3:53 PM

"3d Shadow Mobile "
I don't understand that Becco?
This kit is going to be used on the land rover fron UFO?


Becco_UK ( ) posted Mon, 04 May 2009 at 4:00 PM

file_430169.jpg

**Mandrake7062**: The Gemini kit parts I modelled are also used on the in progress Shadow Mobile. So these new parts will also eventually replace the less accurate ones I made some time ago.


Mandrake7062 ( ) posted Mon, 04 May 2009 at 4:04 PM

Ok nice.. That bad boy is so kewl!


Becco_UK ( ) posted Mon, 04 May 2009 at 4:16 PM

Mandrake7062: Thank you. I hope to finish that Mobile soon after the Eagle is finished. Most of the work left to do is UV mapping and painting. All being well it should (eventually)  feature in my UFO 'Moment Of Truth' sequence.


Mandrake7062 ( ) posted Mon, 04 May 2009 at 4:26 PM

Becco, if you ever feel so inclined, email me that c4d model of the ufo, I know you said you put it up for poser, but I can't work with that.. I'm curious as to how well I can get that glass to work in tg2... Look next to impossible, but that's why I ask..


Becco_UK ( ) posted Mon, 04 May 2009 at 4:55 PM

file_430179.jpg

**Mandrake7062**: I will have a think about a Cinema version. All the UFO materials are Maxwell Render ones and at present I haven't bothered too much with making decent materials for anything else yet.  I have no idea how Terragen handles transparency but I'm sure you will give it your best shot. For information - the UFO glass is actually clear acrylic.


Mandrake7062 ( ) posted Mon, 04 May 2009 at 5:12 PM

That glint of the Sun looks nuts.. Love it.

I guess I can just try your cockpit, as if it were glass, that would be close.. hmm i'll try that. Double wall though, sorry, didn't mean to distract. get back to work. ;) Thanks Becco.


contrafibbularities ( ) posted Mon, 04 May 2009 at 11:37 PM

Nice progress on the Eagle, Becco! I'm looking forward to the command module. :-)

That UFO render looks fantastic!

Cheers,
contrafibbularities


Becco_UK ( ) posted Tue, 05 May 2009 at 2:58 AM · edited Tue, 05 May 2009 at 2:59 AM

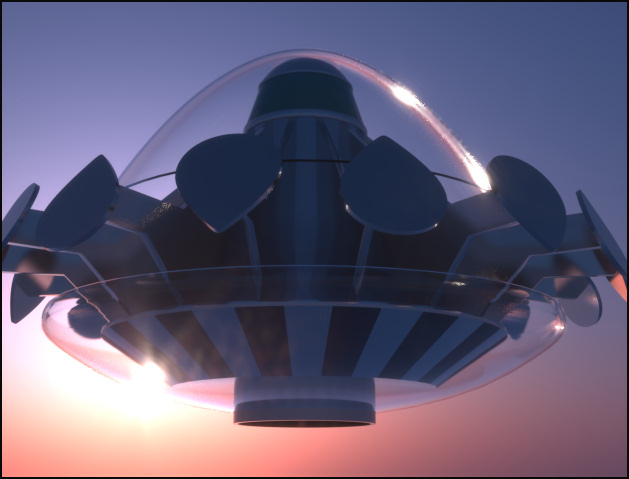
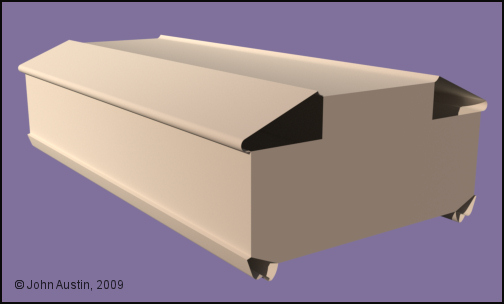
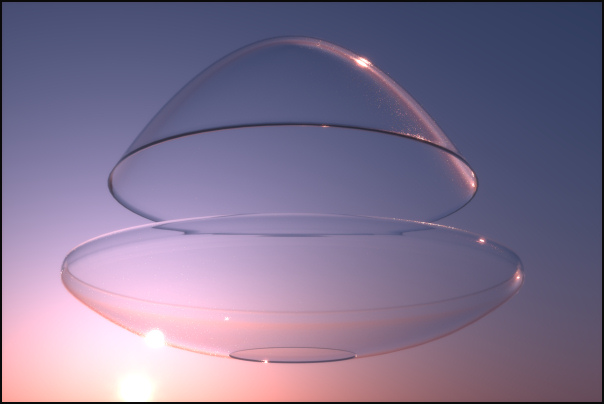
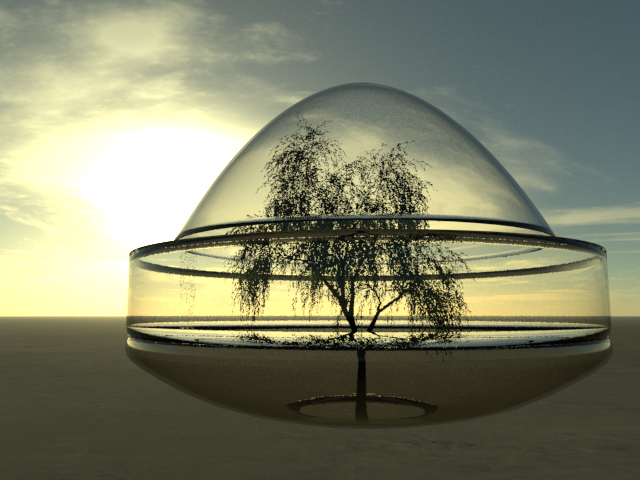
Mandrake7062: I have sent you a PM with download details for the UFO acrlic domes - they are not actually acrylic any more though because all Maxwell materials and tags have been removed.

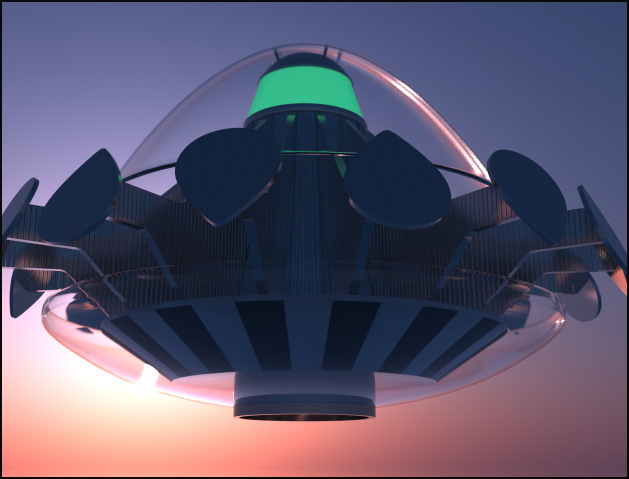
contrafibbularities: Thank you. That in progress UFO render is still one of my favourites while I was making that model. I saved the Maxwell sky being used so I might render the final UFO model with some rotational motion blur in that sky. The only thing I didn't take note off was the Maxwell glare and light scattering settings I used - I can hopefully get something very similar though.


Becco_UK ( ) posted Tue, 05 May 2009 at 4:42 AM

file_430212.jpg

**Mandrake7062**: These are the parts you can download. I'm curious how Terragen will render those.


Mandrake7062 ( ) posted Wed, 06 May 2009 at 6:26 AM

I did manage to look at it in c4d, I stuck an oil can in the open space.


Becco_UK ( ) posted Wed, 06 May 2009 at 8:17 AM · edited Wed, 06 May 2009 at 8:21 AM

file_430317.jpg

**Mandrake7062**: I have all the UFO in my open space :-) None of the UFO parts are difficult to create. Make one 'arm' and one 'paddle' and use a Cinema arrays for positioning. The base starts out as a cone.


Mandrake7062 ( ) posted Wed, 06 May 2009 at 8:23 AM

Yes, I've got  ya.. I just wanted to fill in some more glass, in the open area.


Becco_UK ( ) posted Wed, 06 May 2009 at 8:25 AM

Mandrake7062: I modelled the UFO over scale. You may need to resize the parts a lot smaller.


Mandrake7062 ( ) posted Thu, 07 May 2009 at 4:42 AM

file_430374.jpg

Well I scaled down by 20 but when I started the first test I could still see poly lines in the prepass so I stopped and scaled down some more but it looked wrong, so I decided to pop an obj inside. It came out better then I thought it would. I'll have to ask about this over at Planetside.  I could never have got this clean, in past builds. Thanks for the test obj Becco


Becco_UK ( ) posted Thu, 07 May 2009 at 5:48 AM

Mandrake7062: Those UFO parts turned out nice in Terragen - I thought you may have to scale down from my modelled (very large) size. The render engine I use works best with correctly scaled objects but many times I overscale to control depth of field to my personal taste.


Becco_UK ( ) posted Thu, 07 May 2009 at 4:42 PM

file_430403.jpg

The passenger pod and spine is taking me longer to UV map than I thought it would but slowly all the temporary colours I've used are steadily being replaced with a single base colour. All the underside kit parts have been UV mapped seperately.


Mandrake7062 ( ) posted Thu, 07 May 2009 at 4:47 PM

Boy oh boy, looks so much cleaner then mine!!


Becco_UK ( ) posted Thu, 07 May 2009 at 5:15 PM

Mandrake7062: Your Eagle turned out fine too. I'm not saying anything about mine until it's finished - I have plenty of time to mess it up! I've been watching some early episodes of Space 1999 and the 1st Eagle looks a lot more basic in terms of painting so that will hopefully make things easier. What I've decided to do with the passenger pod is to UV map it so that texturing the red striped rescue pod colour scheme is made more simple.


Mandrake7062 ( ) posted Thu, 07 May 2009 at 5:20 PM

I almost tried that rescue paint scheme. But it was the uv that stopped me.


Privacy Notice

This site uses cookies to deliver the best experience. Our own cookies make user accounts and other features possible. Third-party cookies are used to display relevant ads and to analyze how Renderosity is used. By using our site, you acknowledge that you have read and understood our Terms of Service, including our Cookie Policy and our Privacy Policy.