Filter: Safe | Wed, May 20, 1:25 PM CDT

Renderosity Forums / Cinema 4D


Welcome to the Cinema 4D Forum

Forum Moderators: CHMedia Forum Coordinators: Kalypso

Cinema 4D F.A.Q (Last Updated: 2024 Aug 27 11:07 am)

C4D Gallery Speed Modeling Sessions C4D Freestuff
 
 
Checkout the Renderosity MarketPlace - Your source for digital art content!


Subject: Space 1999 - Project Eagle - A 3D Model In The Making


Becco_UK ( ) posted Thu, 17 December 2009 at 9:10 AM

file_444926.jpg

**smokeyC4D**: Thank you. I hope in time to get this Eagle nicer. At present it's what I would decribe as being useable.

The Cargo Pod and Waste Containers have had some texture adjustments that may improve the next full render of the Eagle. I've decided that any additional dirt/grime will be added gradually.


Becco_UK ( ) posted Fri, 18 December 2009 at 7:07 PM

file_445035.jpg

Depending on the render in mind I also render a depth map to use as a mask for some light foreground mist. I was looking at one of those maps and had an idea that they could be used in a displacement channel of a material applied to a a simple flat plane or even used in something ZBrush to physically displace mesh. The result could then be 3d printed and cast in a suitable material ie resin.


Becco_UK ( ) posted Fri, 18 December 2009 at 7:09 PM

file_445036.jpg

Any such 'raw' cast would have this sort of apperarance - real relief art from a 3d model. A concept for another time and any licence issues would have to be sorted out.


Becco_UK ( ) posted Fri, 18 December 2009 at 7:12 PM · edited Fri, 18 December 2009 at 7:13 PM

file_445037.jpg

Back to the renders, this is a reduced size second render of the Eagle Model fitted with a Cargo Pod.


Becco_UK ( ) posted Fri, 18 December 2009 at 7:16 PM

file_445038.jpg

That colour render was boring me so another variation was done for posting in my gallery in the next day or so. Film grain, sepia toning and a small amount of soft focus added as postwork.


Mandrake7062 ( ) posted Fri, 18 December 2009 at 7:33 PM

Might be a bit to much sepia like for me but stunning none the less, like them all really.
The biggest reason I like rendering in TG2, is that what your doing here with light is way out of my league. Your comment on Scifi-mesh cracked me up John "High degree of.."  ;)
So I had to put in The highest... hehe All to true of course, but anyone that can't see that was not a fan. ;)

I've been playing with body paint and using the paint texture to try layering some more texture to my walker. I know it's common place for you but I haven't done it yet, so it's fun./


Becco_UK ( ) posted Fri, 18 December 2009 at 7:48 PM

Mandrake7062: Thank you. I think I'm getting a bit Eagle weary now so I will leave any more significant work until the new year, Terragen 2 looks to be a very capable renderer and I suppose like all render engines the results get better each time. I'm not doing much with the light in my renders - the render engine sorts most of that that out!

At SciFi meshes, are those your Eagle renders posted just before my last one?

You are getting to grips with Bodypaint the only way anyone can. It really is exceptional software and the more you make use of it the easier it gets to use. There is something new to learn each time you use it.

Are you posting progress of your Walker model anywhere or are you keeping it secret?


Mandrake7062 ( ) posted Fri, 18 December 2009 at 9:12 PM

file_445043.JPG

No, those are not mine, took a quick look at them..

I've been to busy to do much..

There is a new release of TG2 with new obj. handling, spec and some more stuff.
So I'm doing a bunch of testing with it, and  some body paint stuff.
Nothing to exciting. The new render engine is proving hard to get a grip on for some reason, can't put my finger on it, light on the obj to bright, object to flat... may just be me, don't know yet


Chris ( ) posted Mon, 21 December 2009 at 4:19 AM

great work on the eagle! What about that lil tutorial for the command module? :biggrin:

Hope to see more updates soon

Chris

"It Is Useless To Resist!" - Darth Vader


strata ( ) posted Mon, 21 December 2009 at 5:14 AM

 I think your sepia render enhances the reality factor by x2. :) Strata

“The scientists of today think deeply instead of clearly. One must be sane to think clearly, but one can think deeply and be quite insane.” Nikola Tesla


Mandrake7062 ( ) posted Tue, 22 December 2009 at 8:37 AM

Well i had been working on texturing the walker when something bad happened. The screen went to nothing but tiny squares that blinked different colors..
I blew my brand new ati card, I put a cheapo card in and it ran fine. :(
I need to send that back, I hate rma work!!!

Frustrated I stole your pov and tried a render...
http://www.kdf-computers.com/download/eagle03.jpg


Mandrake7062 ( ) posted Wed, 23 December 2009 at 4:46 PM

file_445258.jpg

This bad boy just went back in the box, :(


Becco_UK ( ) posted Sun, 27 December 2009 at 10:25 AM

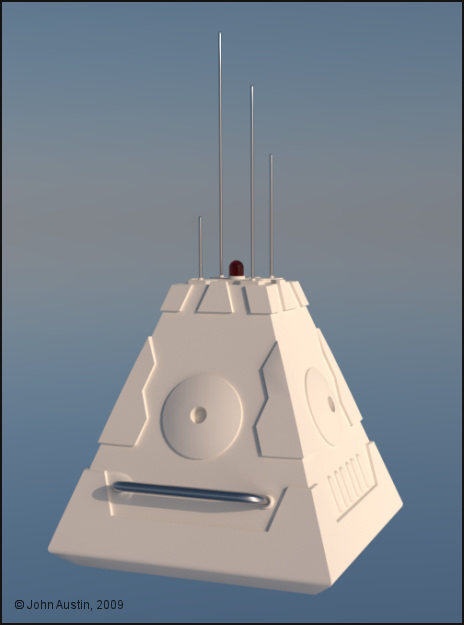
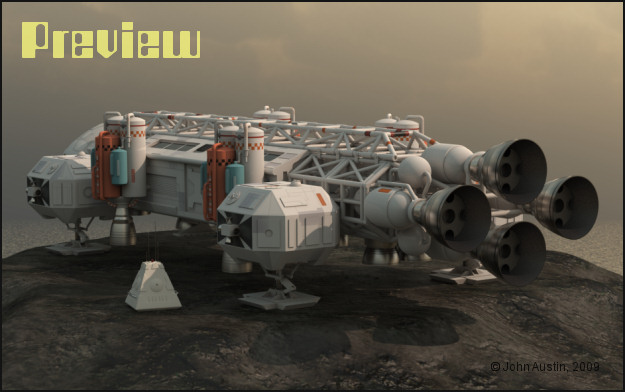
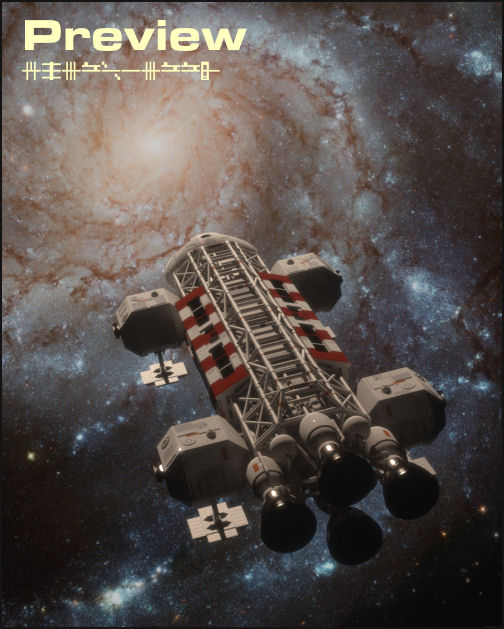
Chris: Thank you. I hope Eagles 2 and 3 will be faster to make. I can use quite a bit of Eagle 1 so that should help. I've thought about a tutorial for the command module and have concluded that this can be done when I make an improved command module. Although, earlier in this thread, I included preview renders of the command module when it was being made.

strata: Thank you. The sepia tint also disguises the poor environment I used. Next one should be much better (hopefully!).

Mandrake7062: Shame about the card. Reminds me of an earlier system - the mainboard decided to die and it took ram and processor with it. That was costly!


Becco_UK ( ) posted Sun, 27 December 2009 at 10:26 AM

file_445400.jpg

The 3rd render of this 3d Eagle will feature the 'white' passenger pod fitted with side booster units.

This is one side booster - lacks the accuracy of the Eagle model but works ok in previews I've done.


Becco_UK ( ) posted Sun, 27 December 2009 at 10:27 AM

file_445401.jpg

The painted side booster.


Becco_UK ( ) posted Sun, 27 December 2009 at 10:28 AM

file_445402.jpg

This component will also be included in the 3rd render. Still has to be UV mapped and painted.


Mandrake7062 ( ) posted Sun, 27 December 2009 at 11:27 AM

oh boy oh boy, haven't seen this booster yet, can't wait to see the render!!


Becco_UK ( ) posted Mon, 28 December 2009 at 3:12 AM

file_445448.jpg

**Mandrake7062**:  Thank you. You dont have to wait to see a preview :-)

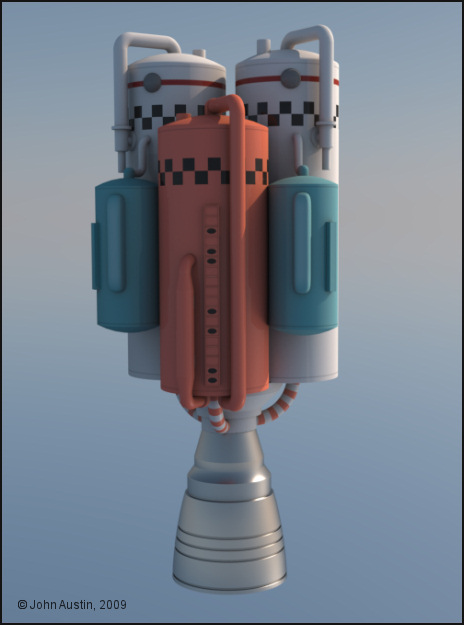
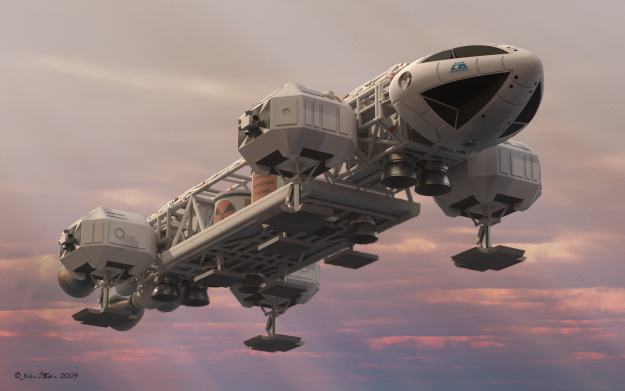
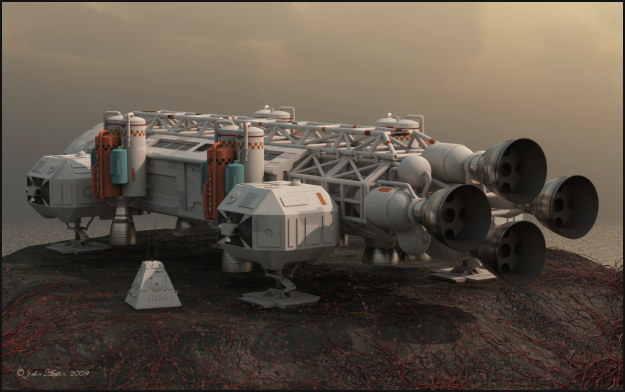
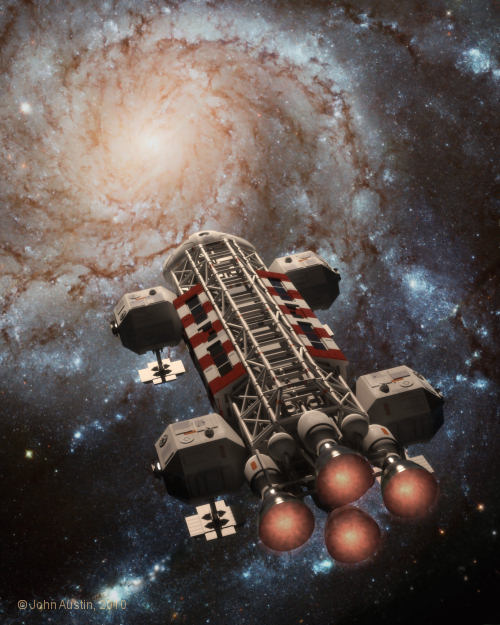
This is roughly how the 3rd final render will look - I've done more painting to the Eagle. Dirt/dust is being added a bit at a time during the course of the renders. The side boosters now have a more accurate colour scheme - the 'DANGER' sign wasn't on the original boosters and my addition is a scanned decal from an old Mercury Capsule and Atlas Booster model kit. Still some things to do with the terrain/environment.


Becco_UK ( ) posted Thu, 31 December 2009 at 6:40 AM

file_445620.jpg

A reduced size final 3rd render. Displacement was added to the basic terrain.


Mandrake7062 ( ) posted Sun, 03 January 2010 at 11:39 AM

Awesome renders Becco!!

I need a global cloud system! This is an ice planet, don't know about the physics of the moon though. too close I'd guess.
http://www.kdf-computers.com/download/EagleIIceplanet02.jpg


Becco_UK ( ) posted Sun, 03 January 2010 at 12:22 PM · edited Sun, 03 January 2010 at 12:22 PM

Mandrake7062: Thank you. I like your render of the Eagle and the moon. I suppose you know that the landing gear is not in the extended flight position - hydraulic failure! I still haven't made my Eagles' landing gear workable - at present I have two sets, one raised and one lowered so I switch them on and off to suit whatever I'm doing.

My Eagle 1 is useable. At some point I will converting this Series 1 Eagle into Eagle 3 complete with a lab pod and spine boosters. Before then, other adventures loom.

Thanks to everyone for comments along the way - they helped keep the motivation going to finish the Eagle.


Mandrake7062 ( ) posted Sun, 03 January 2010 at 12:25 PM

My Eagle 1 is useable. At some point I will converting this Series 1 Eagle into Eagle 3 complete with a lab pod and spine boosters

I was wondering about that.. The #3 does look awesome!!


Mandrake7062 ( ) posted Tue, 05 January 2010 at 9:16 AM

I have caught some comments about the landing gear but they all think that it should go all the way up into the pod while in flight..

I tried a couple of global cloud systems, they are very difficult, and I thined out the stars.
http://www.terragen.org/gallery/displayimage.php?pos=-6154


Becco_UK ( ) posted Tue, 05 January 2010 at 9:44 AM

Mandrake7062: The landing gear of the real model always extends when in flight - there is no mechanism to retract it so gravity takes over. In the landed position  the landing gear tube simply compresses against a spring. The landing gear could not fo all the way up into the side pod without major alterations and doing so would mean the Eagle is no longer an Eagle. Of course, how you present your model is entirely up to you :-)


Becco_UK ( ) posted Thu, 14 January 2010 at 7:19 PM · edited Thu, 14 January 2010 at 7:22 PM

file_446466.jpg

A background preview for my next render of the Eagle model - not for a while though.


Mandrake7062 ( ) posted Tue, 26 January 2010 at 2:37 PM

Becco, can I ask you a question you may well laugh at? ;)

Seems like you should be able to do it somehow but it's got me stumped..

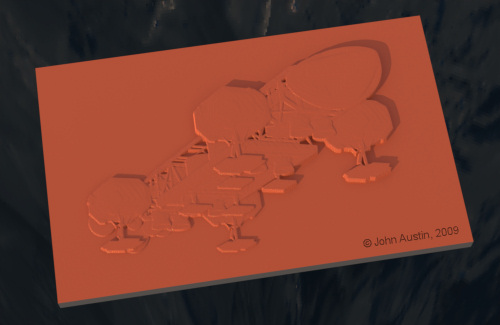
Is there a way to take the baked obj ao "dirt map" and remove all the white so it's transparent except for the shadows, so it could be added on top of a layer then faded back?


Becco_UK ( ) posted Tue, 26 January 2010 at 3:30 PM

Mandrake7062: I suppose there is a few ways to do that but the method I use is:

1. Bake the object at the same size as the objects texture map.

2. Open the objects texture in your paint software. Create a new layer and fill it with your desired dirt colour.

3. Open the Ambient Occlusion bake in the paint software.

4. With the object texture selected, use the ambient occlusion as a mask from image on the dirt layer - change opacity to suit your requirements (this works much better than Cinemas' straight AO).

Can't be more detailed than that because I use Paint Shop Pro and whatever you use may differ to get exactly the same end result.

Have fun :-)


Mandrake7062 ( ) posted Tue, 26 January 2010 at 4:30 PM

I have to figure that out John!!

I have photoshop but have never really studied it, but this is a must see! Much appreciated!!
Thanks!!


Becco_UK ( ) posted Tue, 26 January 2010 at 5:34 PM

Mandrake7062: Ok. You may also be able to do that in Bodypaint too but haven't tried that - stuck in my ways!


Mandrake7062 ( ) posted Tue, 26 January 2010 at 6:08 PM

I hope I have it now.
I dragged the ao layer over and dropped it on the top of my layers.
Right clicked on it and choose Clip Layer.
I can't be positive yet but I think this is turning the white transparent and I can scale back the opacity.

It's tied to the layer just below it.
I think this should be a big plus, thanks again Becco.


Becco_UK ( ) posted Tue, 26 January 2010 at 8:47 PM · edited Tue, 26 January 2010 at 8:48 PM

Mandrake7062: Those ambient occlusion texture bakes from Cinema can be so flexible in their uses - I'm sure you will find many ways to use them. No fun if I tell!


Becco_UK ( ) posted Fri, 29 January 2010 at 7:32 AM

Attached Link: Outer Rim Vue Atmospheres

file_447262.jpg

I used an Outer Rim vue atmosphere by Renderosity  vendor *didi_mc * to create a 3000*1500 image for use in Maxwell's Relection, Refraction and lighting channels. This is a fairly close match to my background image.


Becco_UK ( ) posted Fri, 29 January 2010 at 3:43 PM · edited Fri, 29 January 2010 at 3:44 PM

file_447278.jpg

It took over a day to render those couple of  Vue skies. Was it worth it? Probably was now I can see how the Eagle looks in the 4th Render. This is a small preview of the colour render at sample level 17. I'm rendering this image at 2160*1350 and will stop the render at sample level 20.


Mandrake7062 ( ) posted Fri, 29 January 2010 at 6:27 PM

I'd guess so.. I'm not that crazy about the alien green clouds, I know they are tv show related.
But the lighting and detail is fantastic!!


Becco_UK ( ) posted Fri, 29 January 2010 at 8:56 PM

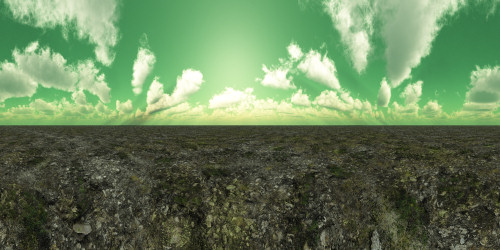
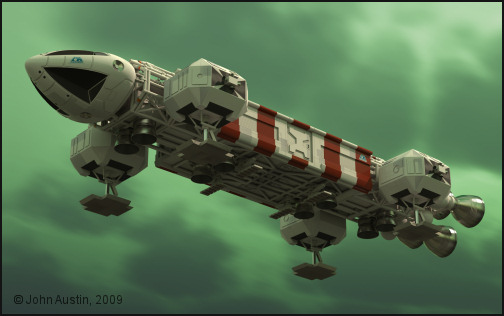
Mandrake7062: I was doubtful about using a green sky but thought I would try something different. A lot of detail has been lost in the small image. The lighting is a balancing act between Maxwells' sun (with a reduced colour temperature and ambient lighting from the vue sky. I didn't want a fully green Eagle so the ambient lighting is only contributing about 15% of the total lighting. Still some work to do before completing this image though - including rendering a z-depth image, mainly for controlling scene mist.


Becco_UK ( ) posted Sun, 31 January 2010 at 4:05 AM

file_447376.jpg

Here's some tiny previews of renders being used for the 4th Eagle image. Colour, depth and alpha done with Maxwell render and a mist image done with paint software. The colour image has some light scattering and a small amout of glare applied. All images have a full size of 2160*1350


Becco_UK ( ) posted Sun, 31 January 2010 at 4:25 AM

file_447383.jpg

Alpha map used to cut out the Eagle from background mist. The mist layer will have its opacity reduced- left it full opacity for the purposes of this post.


Becco_UK ( ) posted Sun, 31 January 2010 at 4:54 AM

file_447384.jpg

While the above renders were being done I made a start on a Lab' pod for use later in the year.  Using my existing Eagle spine, cages and side pods to help with getting the lab' pods proportions as close as possible. The small part is a 3d version of Gemini kit part made earlier  - additional kit parts used on the lab' pod made in 3d to the same overall dimensions will further assist in the lab' pods 3d construction.


Becco_UK ( ) posted Mon, 01 February 2010 at 4:28 PM · edited Mon, 01 February 2010 at 4:31 PM

file_447487.jpg

This is how the 4th full render turned out with some mist added. Original render size - 2160 * 1350


Becco_UK ( ) posted Mon, 01 February 2010 at 4:33 PM

file_447488.jpg

This spiral galaxy image is to form the background of the 5th and very likely final render of my Eagle model in its present form.

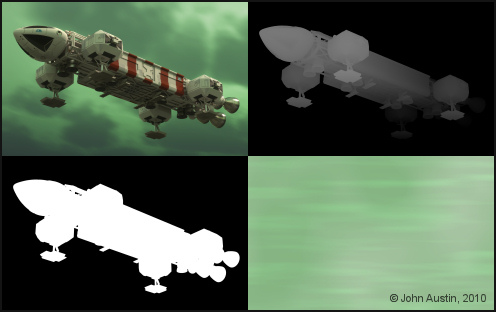
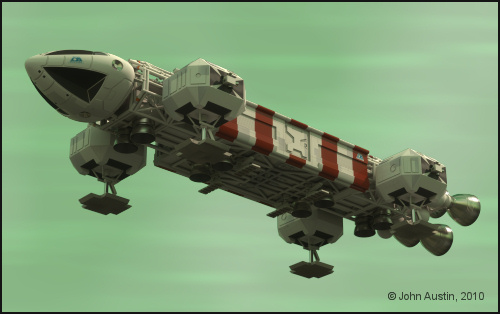
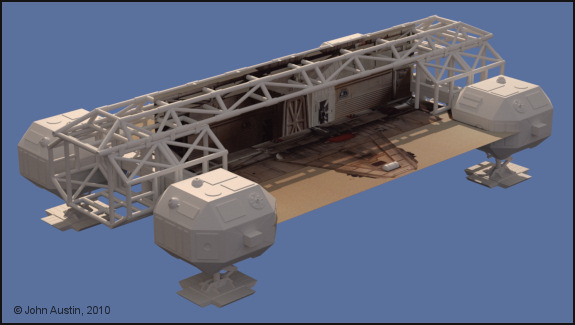
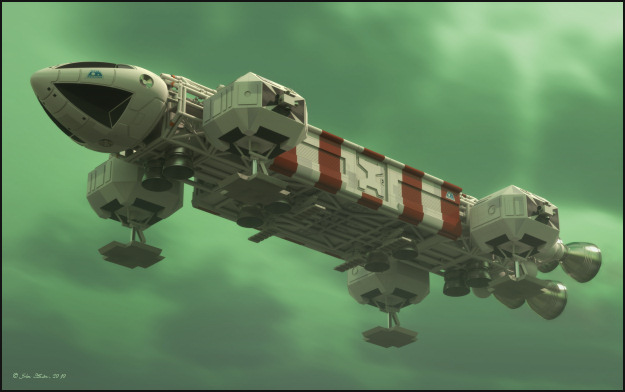
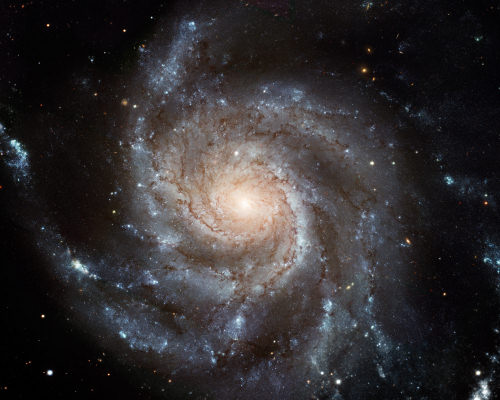
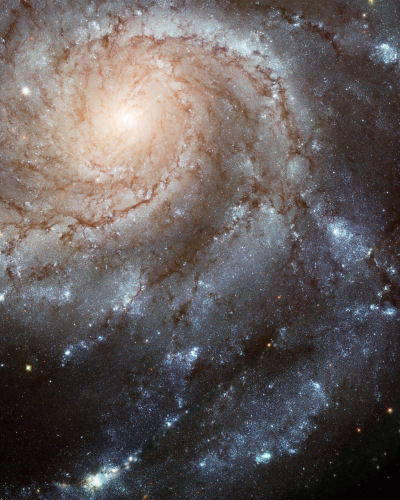
Image courtesy of: http://hubblesite.org/gallery/printshop/ps21/


Becco_UK ( ) posted Mon, 01 February 2010 at 4:34 PM

file_447489.jpg

Rotated and cropped the spiral into my favourite portrait 8X10 image format. Its resolution is large enough for a 2000x2500 render although I may moderate that size.


Becco_UK ( ) posted Mon, 01 February 2010 at 7:06 PM

file_447499.jpg

Small, low sample level preview of the 5th render - to be finished later this week.


smokeyC4D ( ) posted Mon, 01 February 2010 at 7:41 PM

That looks soooo SWEET!  Nice work Becco


Becco_UK ( ) posted Wed, 03 February 2010 at 4:33 AM

smokeyC4D: Thank you.


Becco_UK ( ) posted Wed, 03 February 2010 at 10:04 AM · edited Wed, 03 February 2010 at 10:06 AM

file_447609.jpg

It's likely the original 'Lab' pod used a base from a Cargo pod. I've already made one of those so that's what I will using as a starting point. Seen here with many of the cargo pods' unwanted poygons deleted.

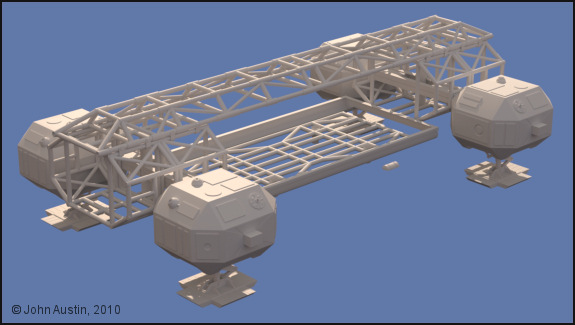
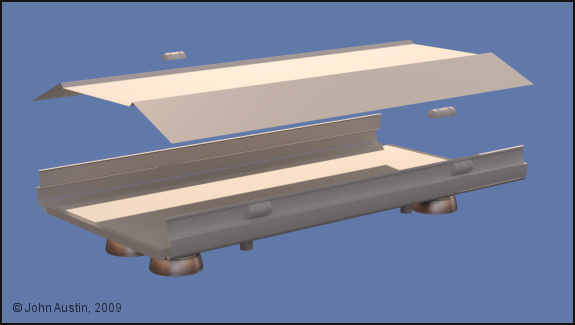
What's left is being used to check dimensions and positioning. The pods' connected tube framework looks accurate when the overlaid on the reference photos' I'm using.

However the base side rails wil need to be redone to improve their profile shape. So those parts will be the next bits to form and from there the remainder of the Lab pod looks straightforward enough to complete.


Becco_UK ( ) posted Fri, 05 February 2010 at 6:56 AM

file_447700.jpg

Lab pod continues with the lower side rails more or less how I want them. The roof gets started too. All made from a selection of extruded splines and a few planes, left unconnected for the time being until all the overall shape of the lab pod has been formed.


Becco_UK ( ) posted Fri, 05 February 2010 at 6:57 AM

file_447701.jpg

Roof edges start to get detailed. Lab pod is more or less ready to have the large side parts made and added. The ends of the pod will be filled when the overall shape looks ok.


Becco_UK ( ) posted Mon, 08 February 2010 at 8:53 PM · edited Mon, 08 February 2010 at 8:56 PM

file_447890.jpg

Reshaped cubes form the basic shape of the large side parts. The 'doors' at the ends of those parts were copied from the passenger pod and look a very close fit when overlaid over photos'.


Becco_UK ( ) posted Thu, 18 March 2010 at 6:48 AM

file_449734.jpg

This is how  the 'Siren Reef' image of my Eagle Transporter turned out. Full size version to be posted in the Cinema 4D gallery later.


strata ( ) posted Thu, 18 March 2010 at 6:03 PM

 "Siren Reef", Magnificent, excellent and great. Just splendid Sci-Fi illustration, that fits anywhere!!

:)) Strata

“The scientists of today think deeply instead of clearly. One must be sane to think clearly, but one can think deeply and be quite insane.” Nikola Tesla


Privacy Notice

This site uses cookies to deliver the best experience. Our own cookies make user accounts and other features possible. Third-party cookies are used to display relevant ads and to analyze how Renderosity is used. By using our site, you acknowledge that you have read and understood our Terms of Service, including our Cookie Policy and our Privacy Policy.
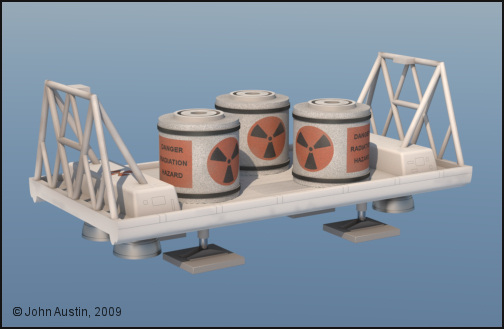
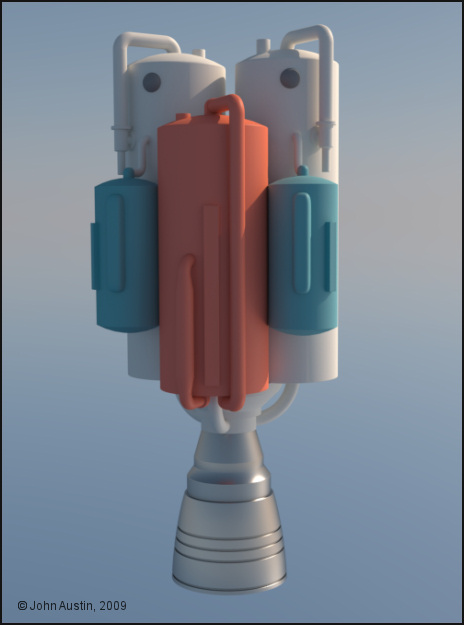