Renderosity Forums / Cinema 4D
Welcome to the Cinema 4D Forum
Forum Moderators: CHMedia Forum Coordinators: Kalypso
Cinema 4D F.A.Q (Last Updated: 2024 Aug 27 11:07 am)

| C4D Gallery | Speed Modeling Sessions | C4D Freestuff |

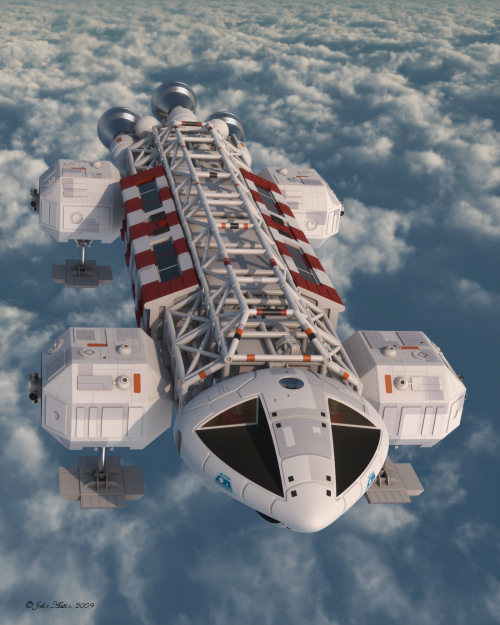
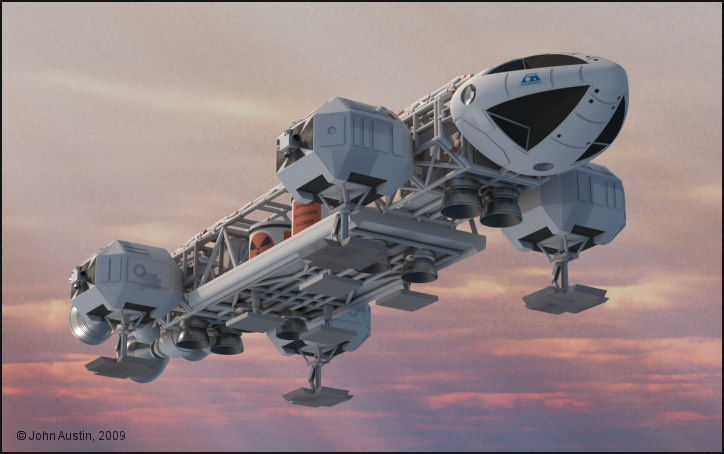
Subject: Space 1999 - Project Eagle - A 3D Model In The Making


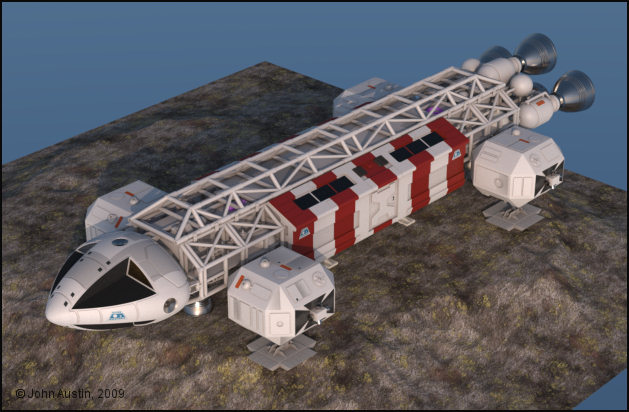
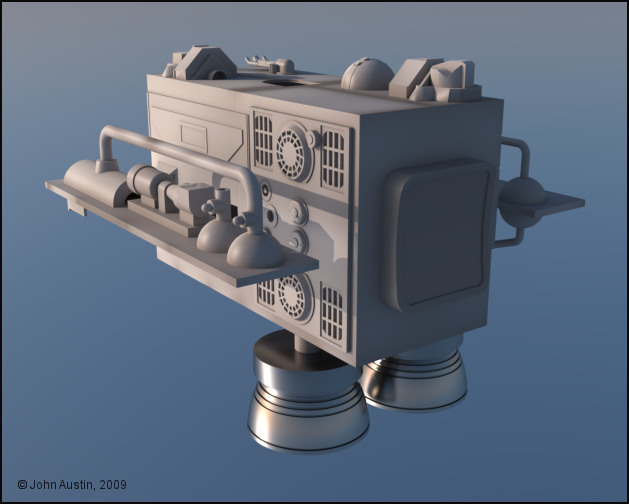
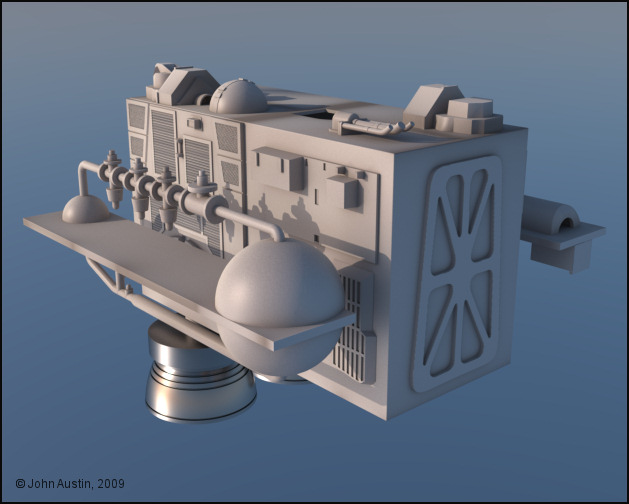
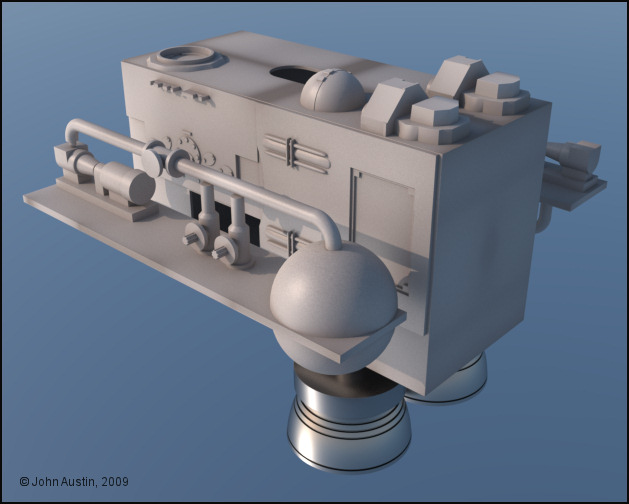
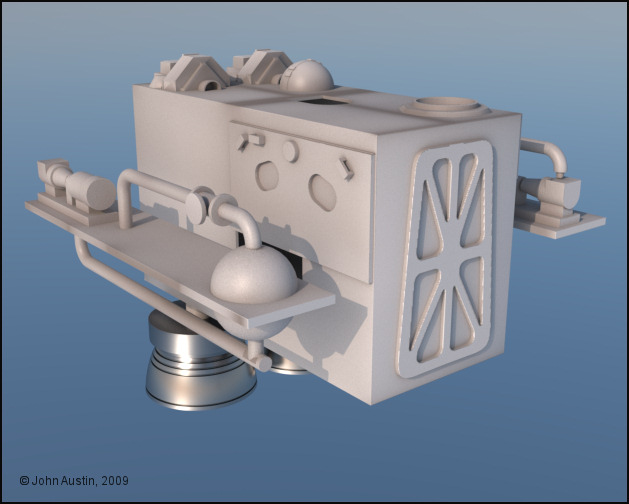
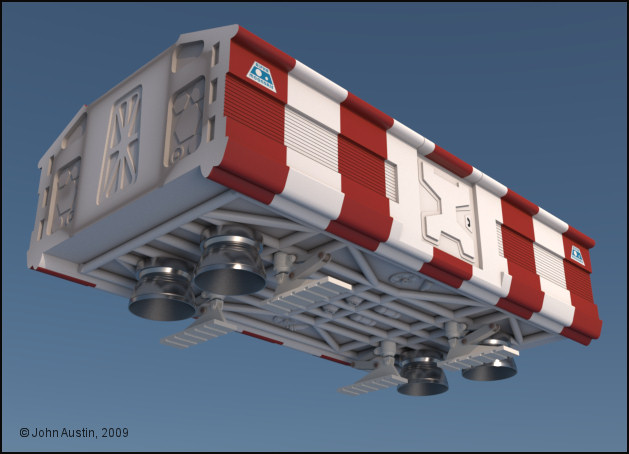
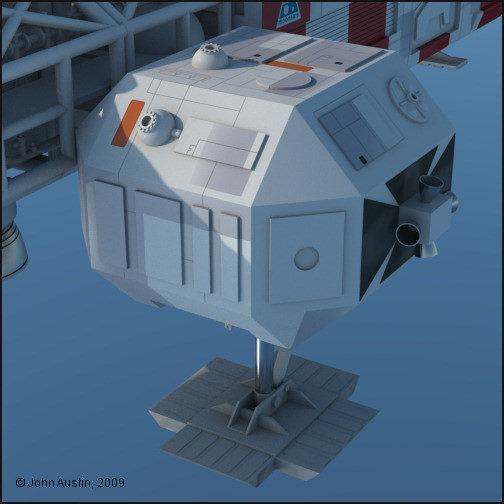
Mandrake7062: Some pictures of an original Cargo Pod can be seen here - http://www.space1999.net/~catacombs/main/models/eagle/cargo/w2mecargo.html Those are the ones I used to model my 3d version from. I modified and used the framework from my Passenger Pod on the underside.
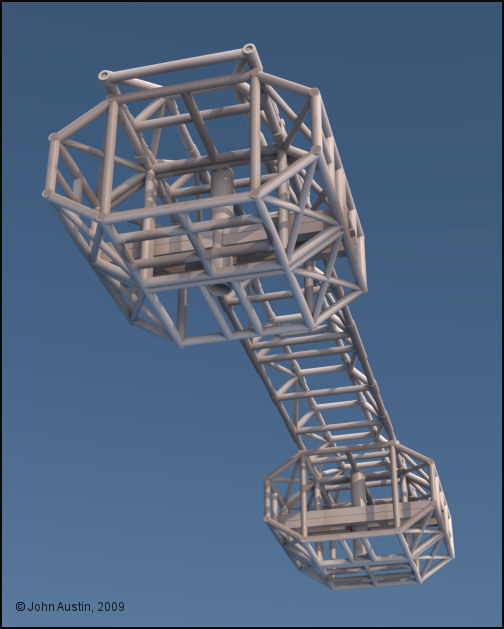
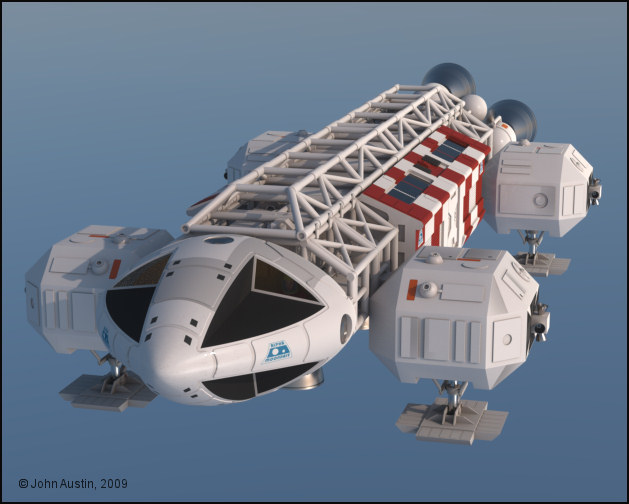
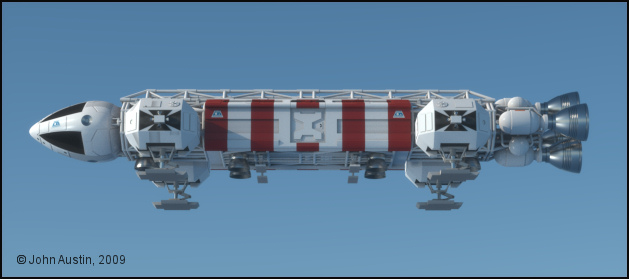
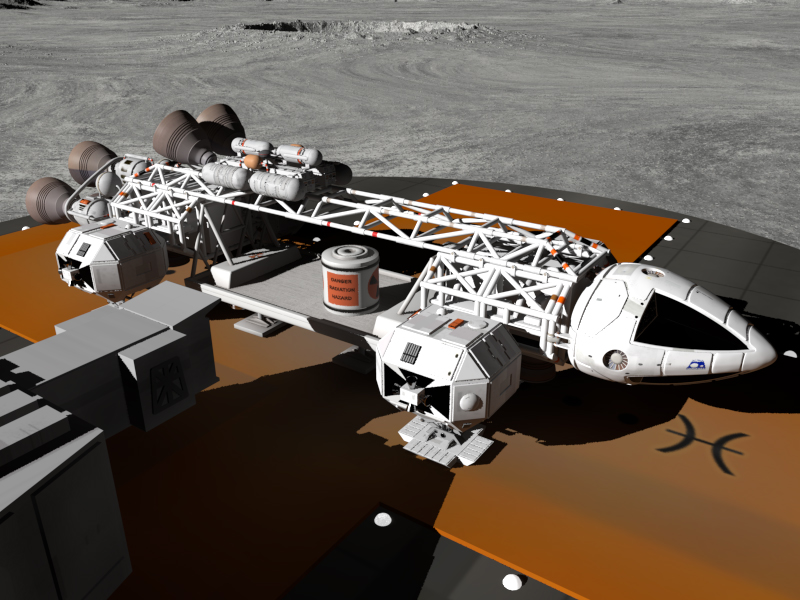
When I started the Space 1999, Eagle model I done so by UV mapping and basic texturing as I went along. This helped spread out the tedious process of creating polygon selection tags/UV mapping. However, this resulted in a relatively unmanageable model - too many seperate parts and too many materials to adjust.
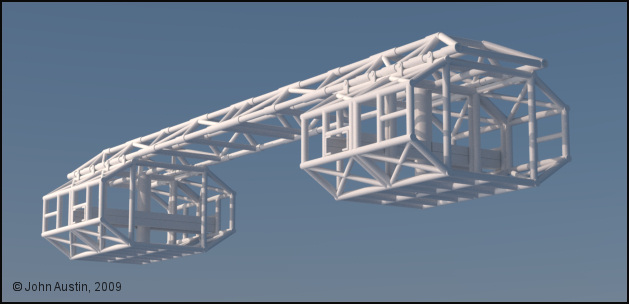
So, I've started to connect various objects together into a more logical structure. This has commenced with anything that was forming the spine and cages. From many objects and materials this has resulted in a single object with just one material. When I reposition the UV's in Bodypaint I will bake another ambient occlusion to use as a mask for controlling some light dirt/dust. Much more manageable :-)
Mandrake7062: When I had a look at this earlier today I was surprised just how many things had built up. The model kit parts I made are all seperate objects so that I can use them on other things but it just makes them unmangeable when used on the Eagle.
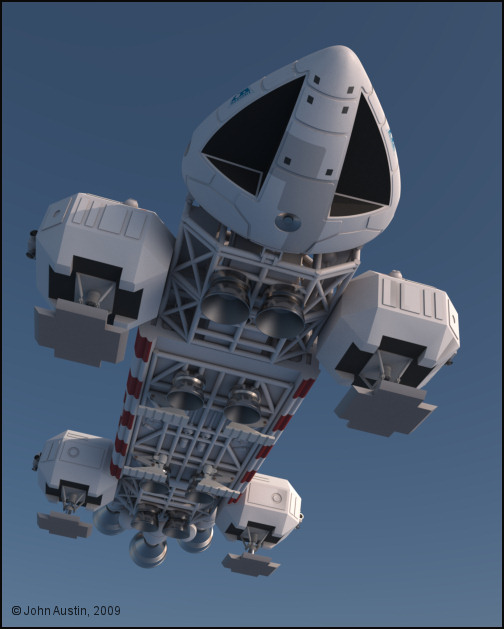
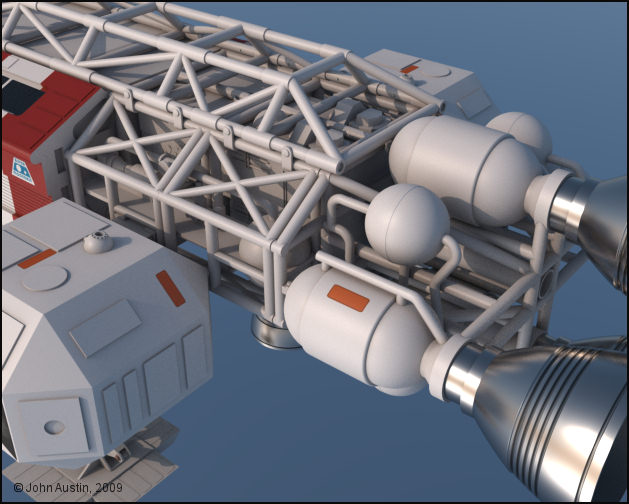
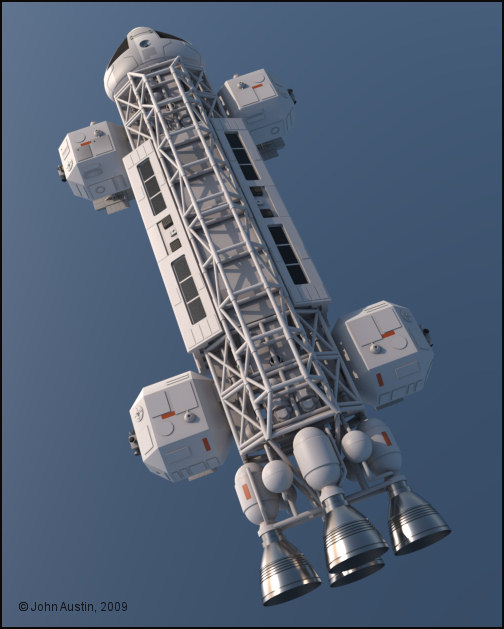
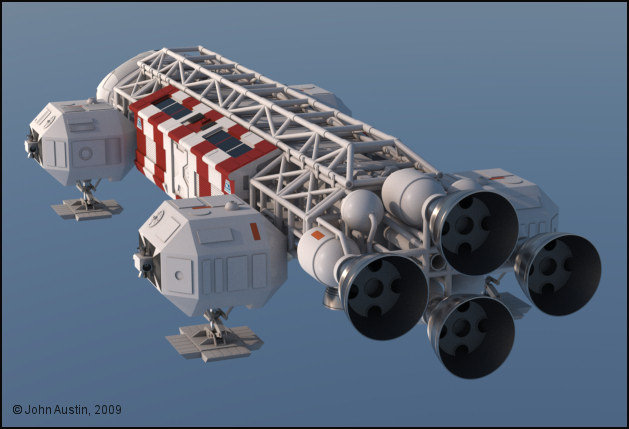
I will be happy to get this down to these sub assemblies:
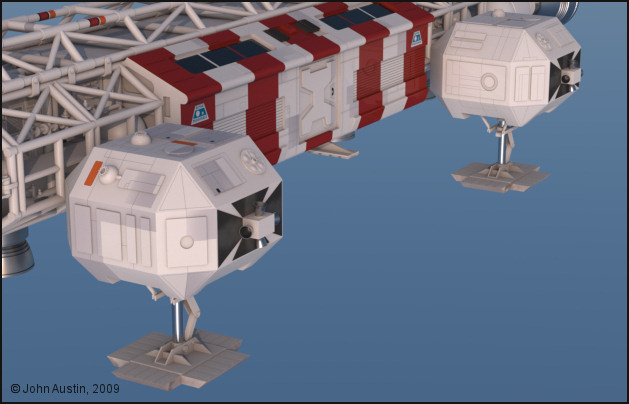
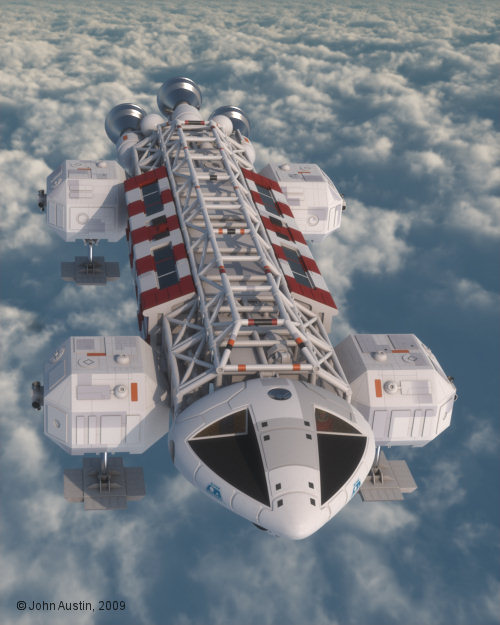
Spine and Cages (done).
Walkways, Shelves and Kit Parts.
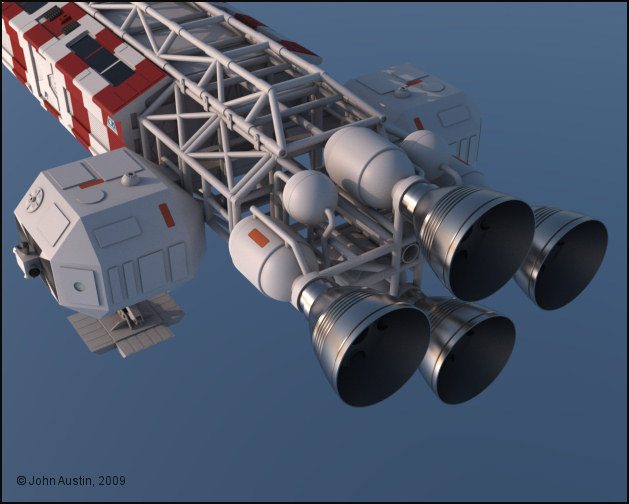
Engines.
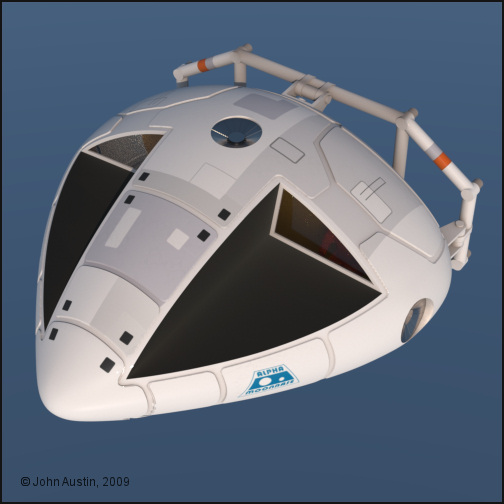
Command Module.
Passenger Pod.
Cargo Pod.
Those sub assemblies will still allow me to make other versions of the Eagle without too much messing about.
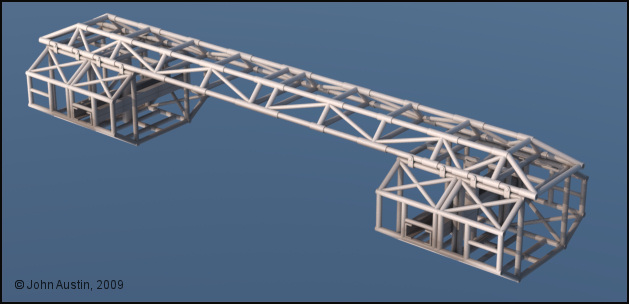
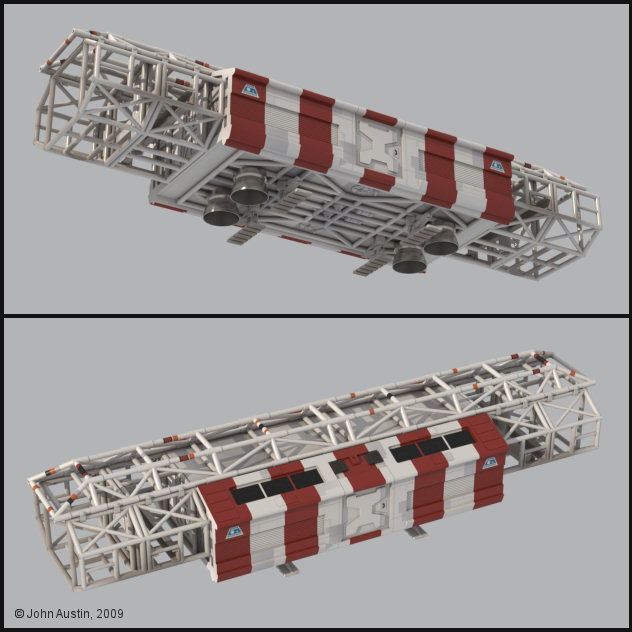
With some connecting of objects and moving UV's about on one map this sub assembly is now down to 3 objects, 3 materials and 2 texture maps. Total polygon selection tags have been reduced from almost 150 to 4 . The whole thing has had another ambient occlusion bake too.
Much more pleasant to work with now
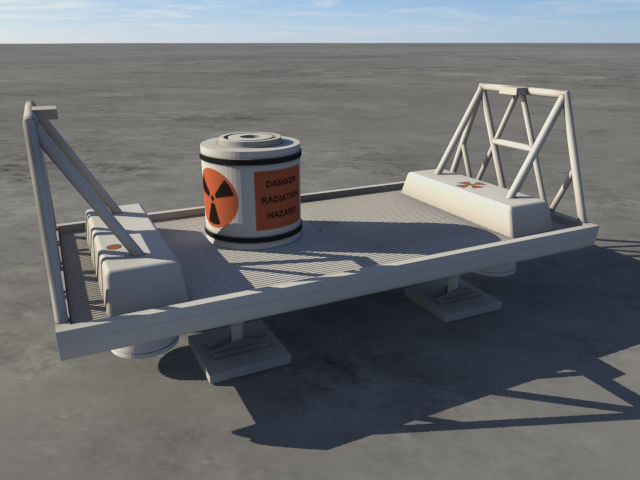
Mandrake7062: Almost forgot - do you still require a cargo pod? If so, you can have the one I made + a waste canister at no cost for non-commercial use.. It will load in C4D 9.6 and higher. The Maxwell materials will be removed but the rough Cinema mats will be left. I will leave it up to you to sort out the metal materials :-)
If you would sooner have all the Eagle then it will cost you a lot of money. Lots and lots of money!
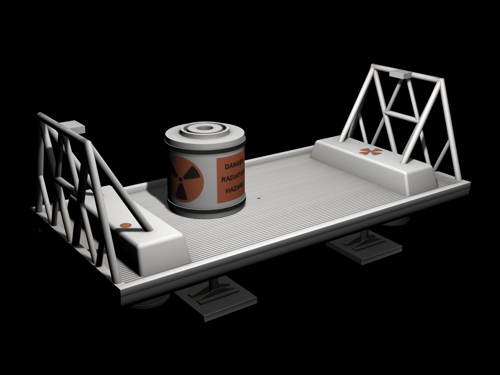
Non commercial use only and no redistribution please. The Maxwell metal materials have been replaced with plain Cinema4D ones that you will need to sort out - I assumed you would be rendering with Terragen so I wasn't too fussy about how the materials looked in Cinema.
You will find a small hole cut into the center of the floor - this is to make any modification to a Freighter Pod easier. The winch cable would go through the hole.
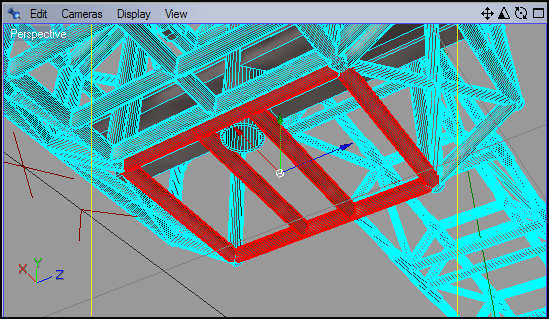
Revised mesh of the rear lower section of the front cages - still has 'welded' joints. I will repeat that for the rear cage. That's only the start though - the revised 3d mesh will need the UV's correcting and the ambient occlusion bake will have to redone too. That will teach me to pay attention :-)
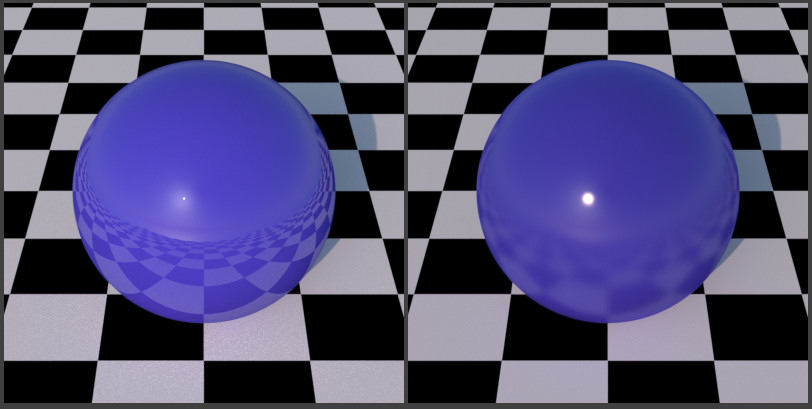
These two blue spheres show this. The left one has a uniform sheen layer across the whole surface. The other sphere has variable roughness driven by a white to black gradient image. Therefore, I will use the raw ambient occlusion bakes to simulate this on my Eagle model.
Mandrake7062: You got it to render so that's a good start :-) I like the natural looking shadows in your render - far too many renders (any software) have deep black shadows that I find strange in an earth like atmosphere. I can see the polygons that make up the canister though - can you increase the phong setting in your renderer? It will scale without problem - just select all the objects and use Cinemas' scale tool. If your Eagle is accurate then the Cargo Pod will fit perfectly. Don't forget to sort out some metal textures for the engine bells and leg pistons.
No that's a problem with the free riptide, it does not support the smoothing angle.
I will run it through poseray to get the phong back later.
TG2 requires an mtl file along with the obj file, to load an obj.
Riptide creates a .mtl file
So it's easy to test with because it's one step to TG2
I just use it for a quick test.
The full version does the smoothing but I'm cheap.

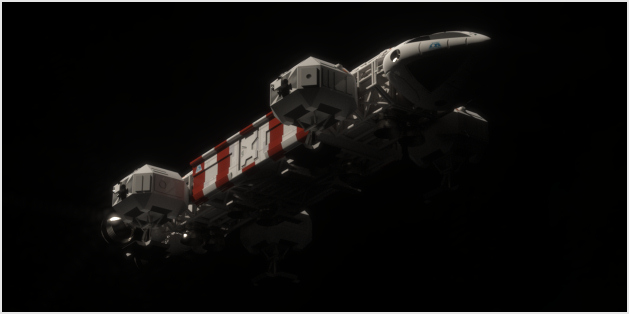
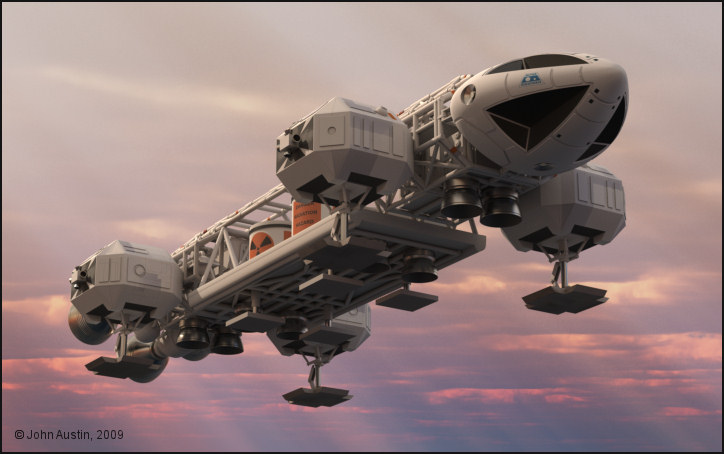
strata: Thank you. Addding all the detail was very time consuming though and much of it gets hidden by the cages around the 'walkways and shelves'.
The painting starts with some work to the spine and passenger pod.
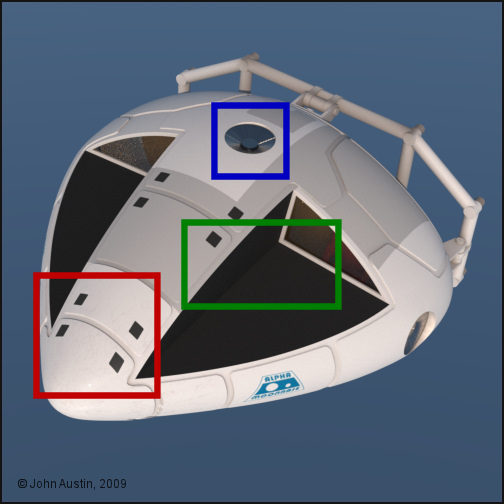
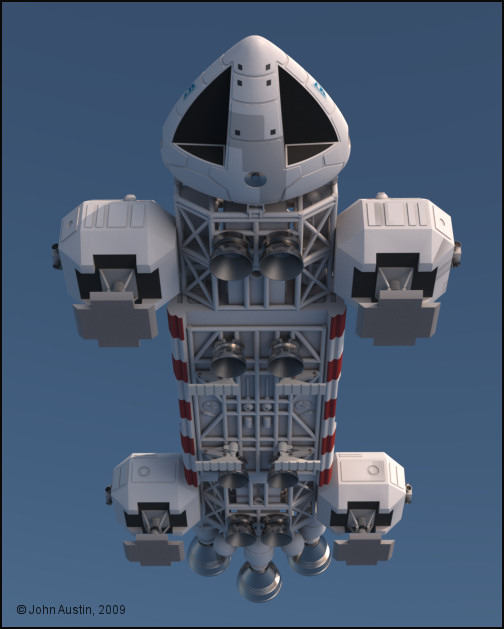
Now to tidy up the command module paintwork/materials. Not that much to do here, just sort out a few distorted UV's towards the front. Some light coloured 'dust' needs to be added to the black area, the sensor dish material could do with tweaking and a more representative panel shading to be added..
Before then, there is still some painting to the underside of the command module required. The cargo pod will also have some more paintwork done to it. I think at this stage the addition of some localised 'grime' may benefit the model.
Privacy Notice
This site uses cookies to deliver the best experience. Our own cookies make user accounts and other features possible. Third-party cookies are used to display relevant ads and to analyze how Renderosity is used. By using our site, you acknowledge that you have read and understood our Terms of Service, including our Cookie Policy and our Privacy Policy.
Mandrake7062: Thank you. The access problem also applies to the front door too. There are lots of thing with the Eagle that could be altered to make it more operational but doing so would depart from the original so I'm leaving it as it is. You knew that would be my answer! Maybe in the future I will make an more fictional Eagle. I doubt the Eagle, if real, would ever get off the ground let alone fly.