Renderosity Forums / Character Creators
Welcome to the Character Creators Forum
Character Creators F.A.Q (Last Updated: 2024 Aug 27 11:07 am)
THE MIGHTY WINGS3D
THE CHARACTER CREATOR DEPOT

Subject: Odd Ends; A Character/Project/WIP Gallery Thread...

- 1
- 2


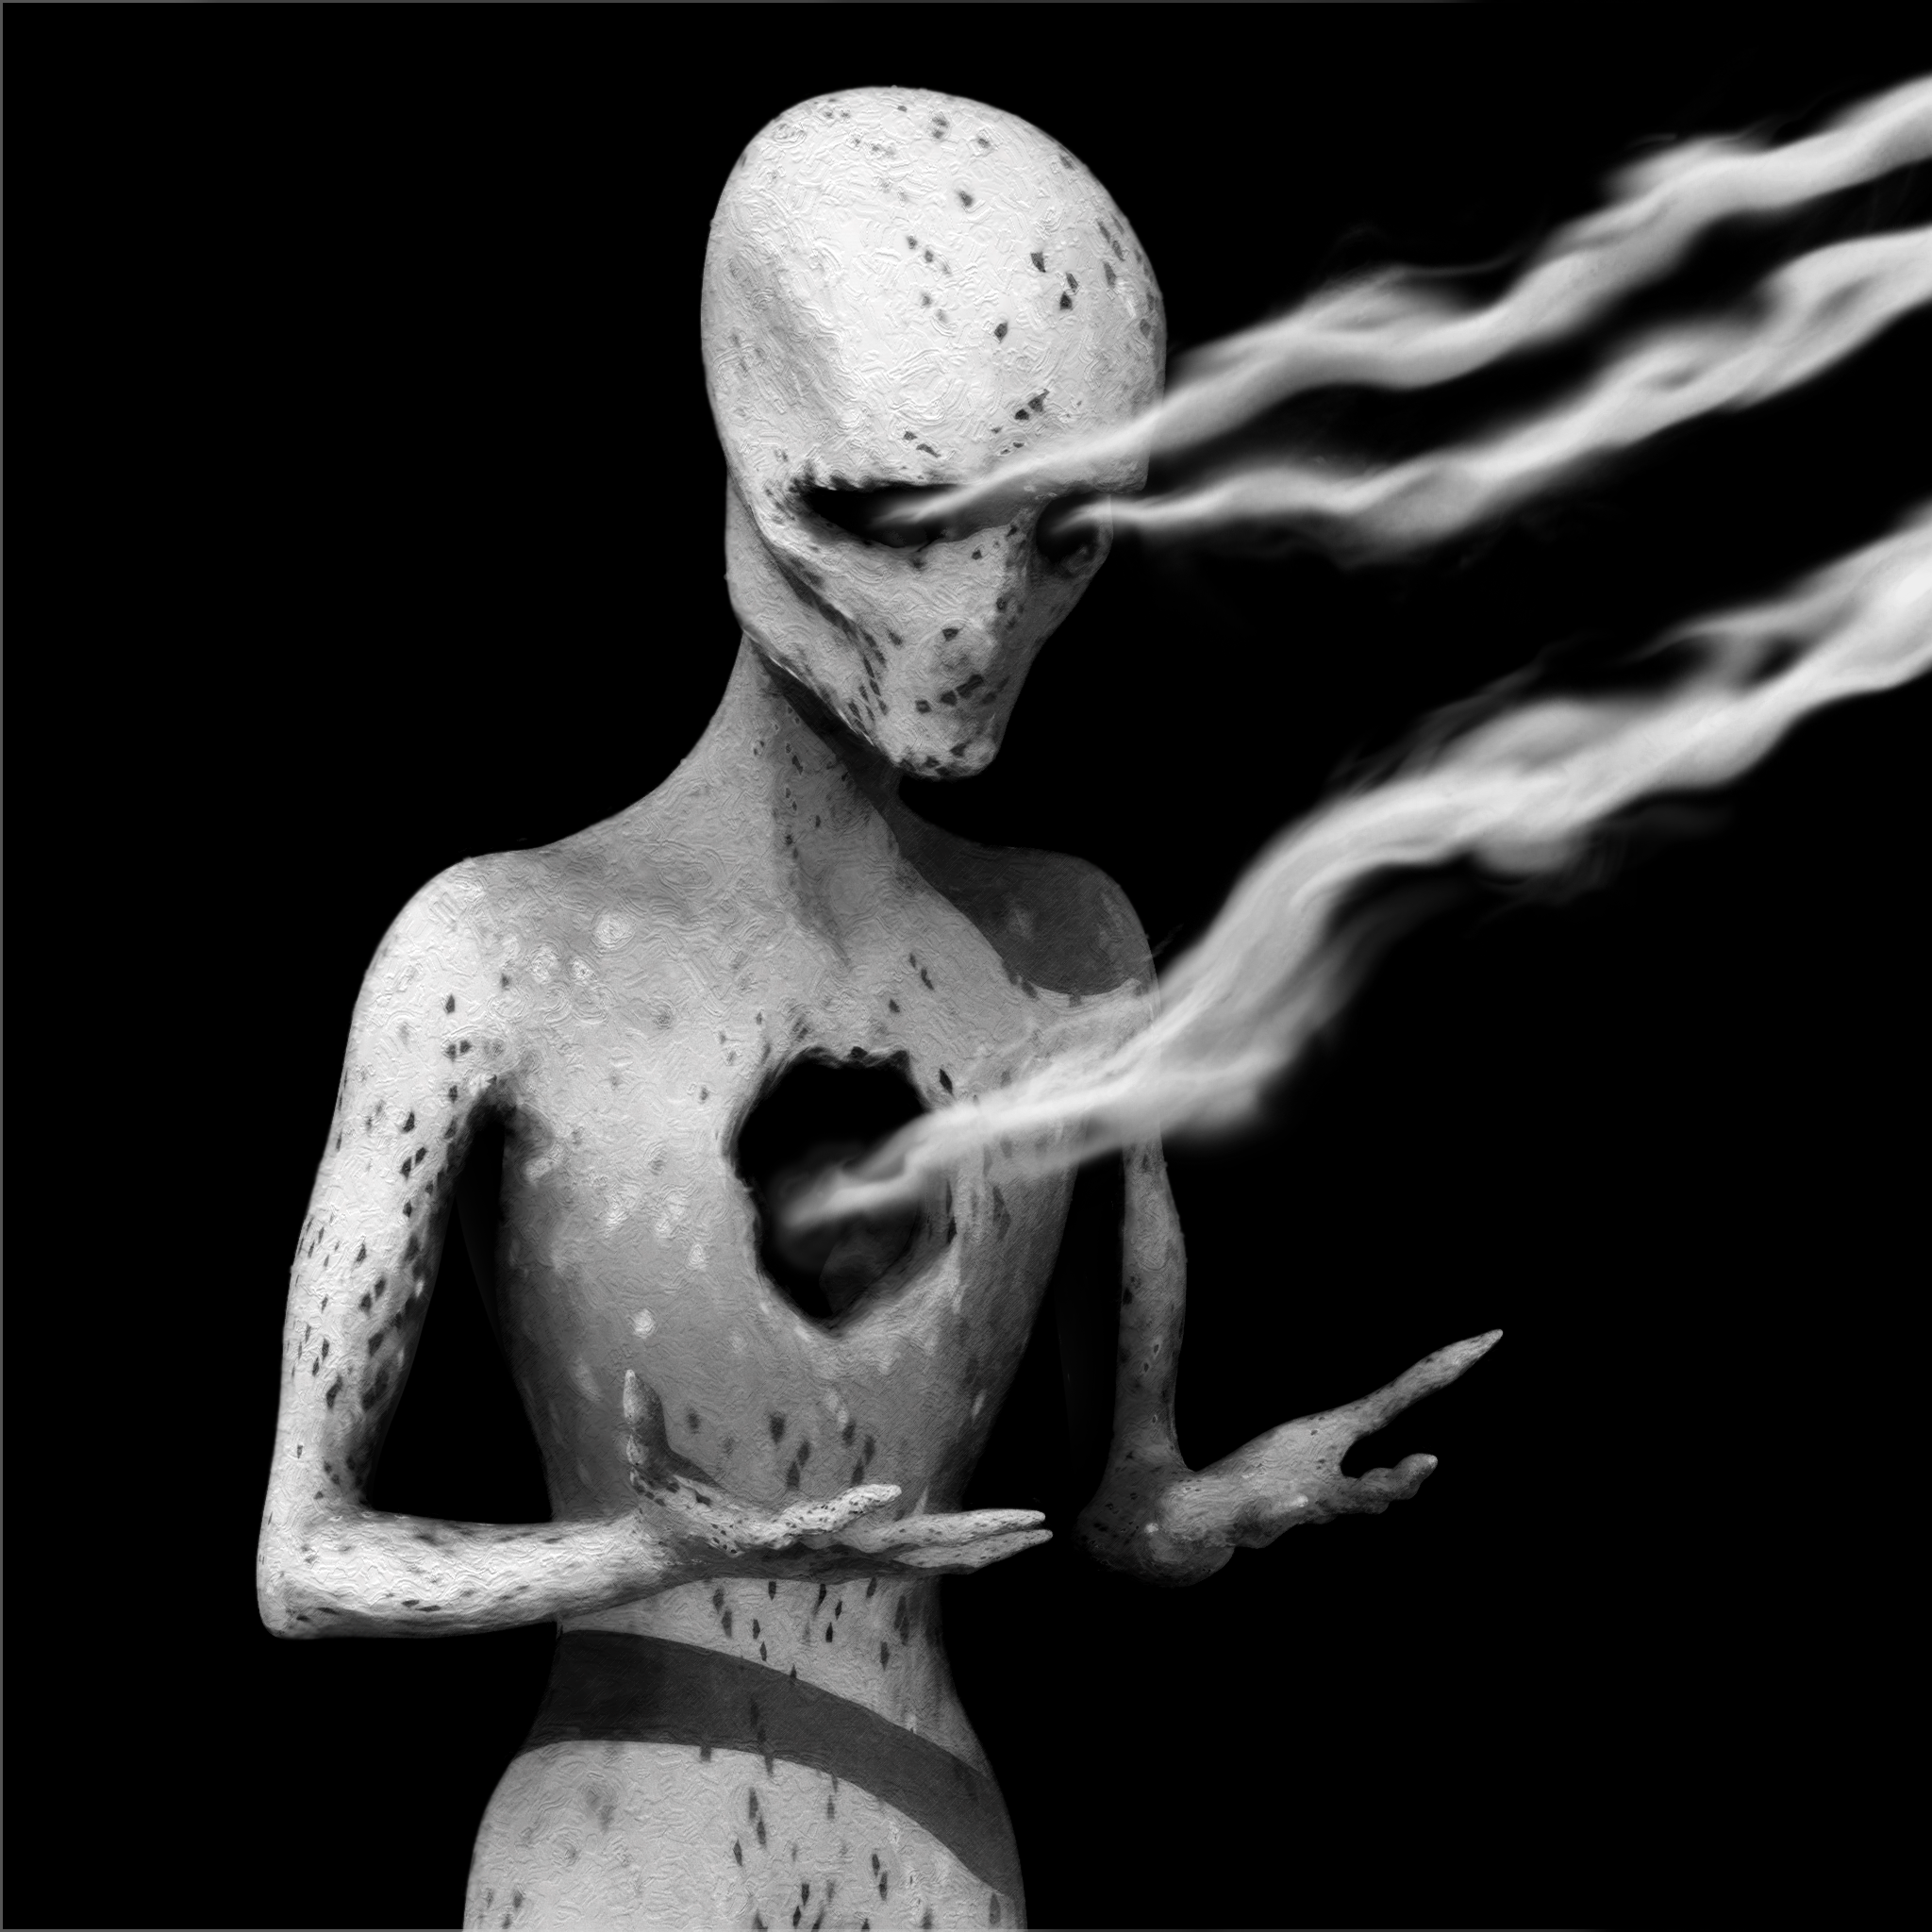
Content Advisory! This message contains nudity
A process oriented post.
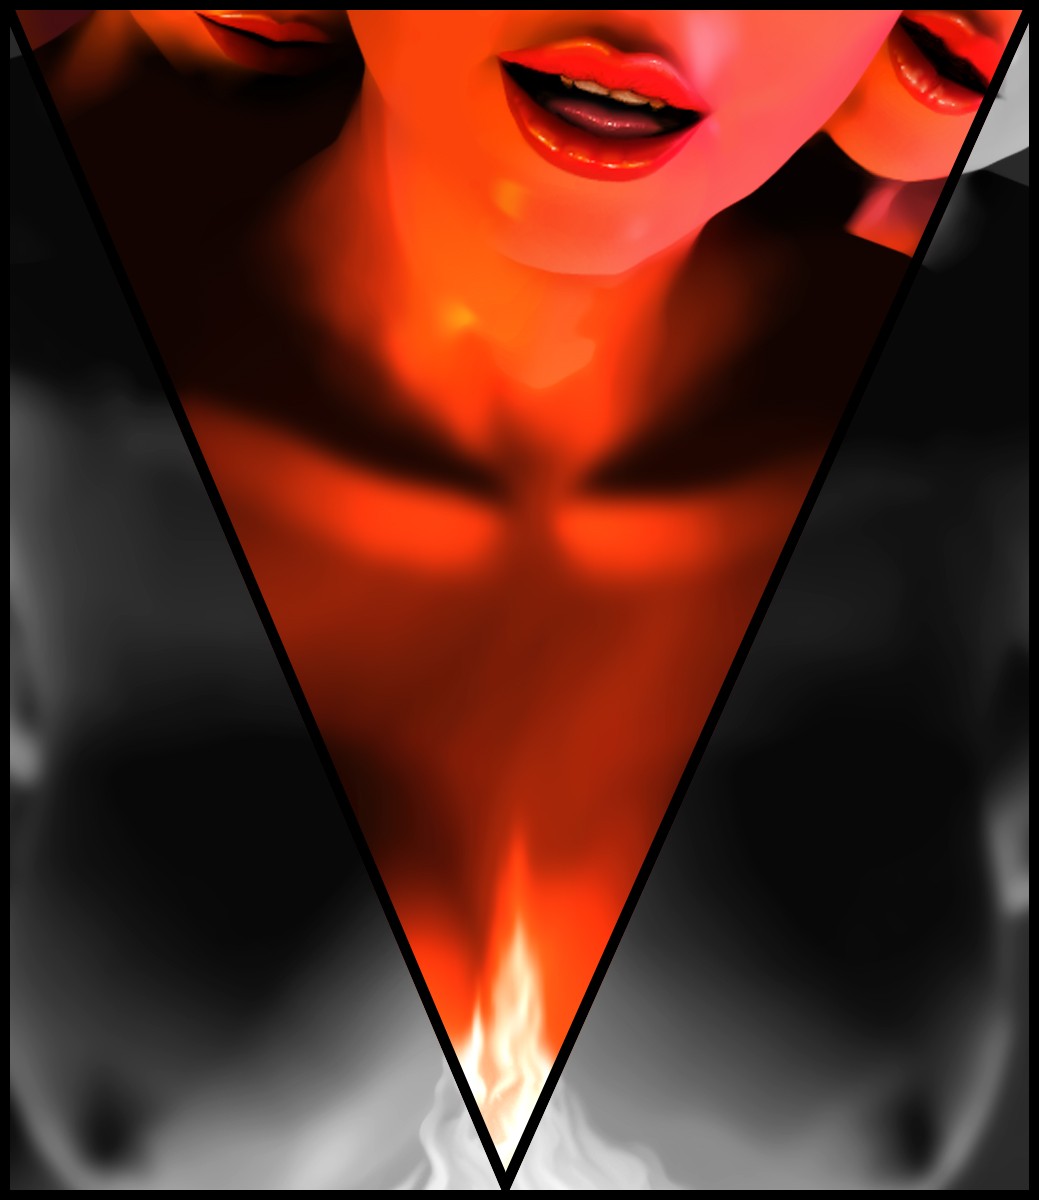
I'll do this quite a bit with texturing, morphing, rigging and modeling. Whatever I happen to be working on at the moment. In this instance painting subtle breast veins. A minor detail being added to an existing texture for V4 created by Jess Herbert. I find her textures to be most excellent for pin up and illustration type characters, very little baked specular and shadow and very pure looking. As this character is for my own personal use I'm at liberty to change things at will. But more on that later... and character images/renders further into my posts timeline.
I begin by exporting V4's chest actor out of Poser. I leave all export options unchecked. I import it into Mudbox, scale it to 3000 (the scales are radically different and the brushes in mudbox work much better at a more native scale), and add a diffuse white material with no specular. I then switch to the painting layers tab. Mudbox functions much like Photoshop and live bridges with Photoshop, it's very convenient. Mudbox prefers UDIM but thoughtful chopping and welding of target meshes with stacked UVs is possible to paint across seams. UDIM UVs figures are no fuss painting.
I import the character's base torso texture, add a painting layer above that, select a brush and choose a dark blue color. For painting this the work doesn't need to be incredibly precise, though mudbox is very capable of detailed and precise work. For more precise blood vessels I have converted abrs that I've collected.
I just draw out some rough vein like strokes on my transparent paint layer and begin using the blur tool to blur them quite a bit...

I then go in with the eraser and trim and fade parts of the blurred strokes.
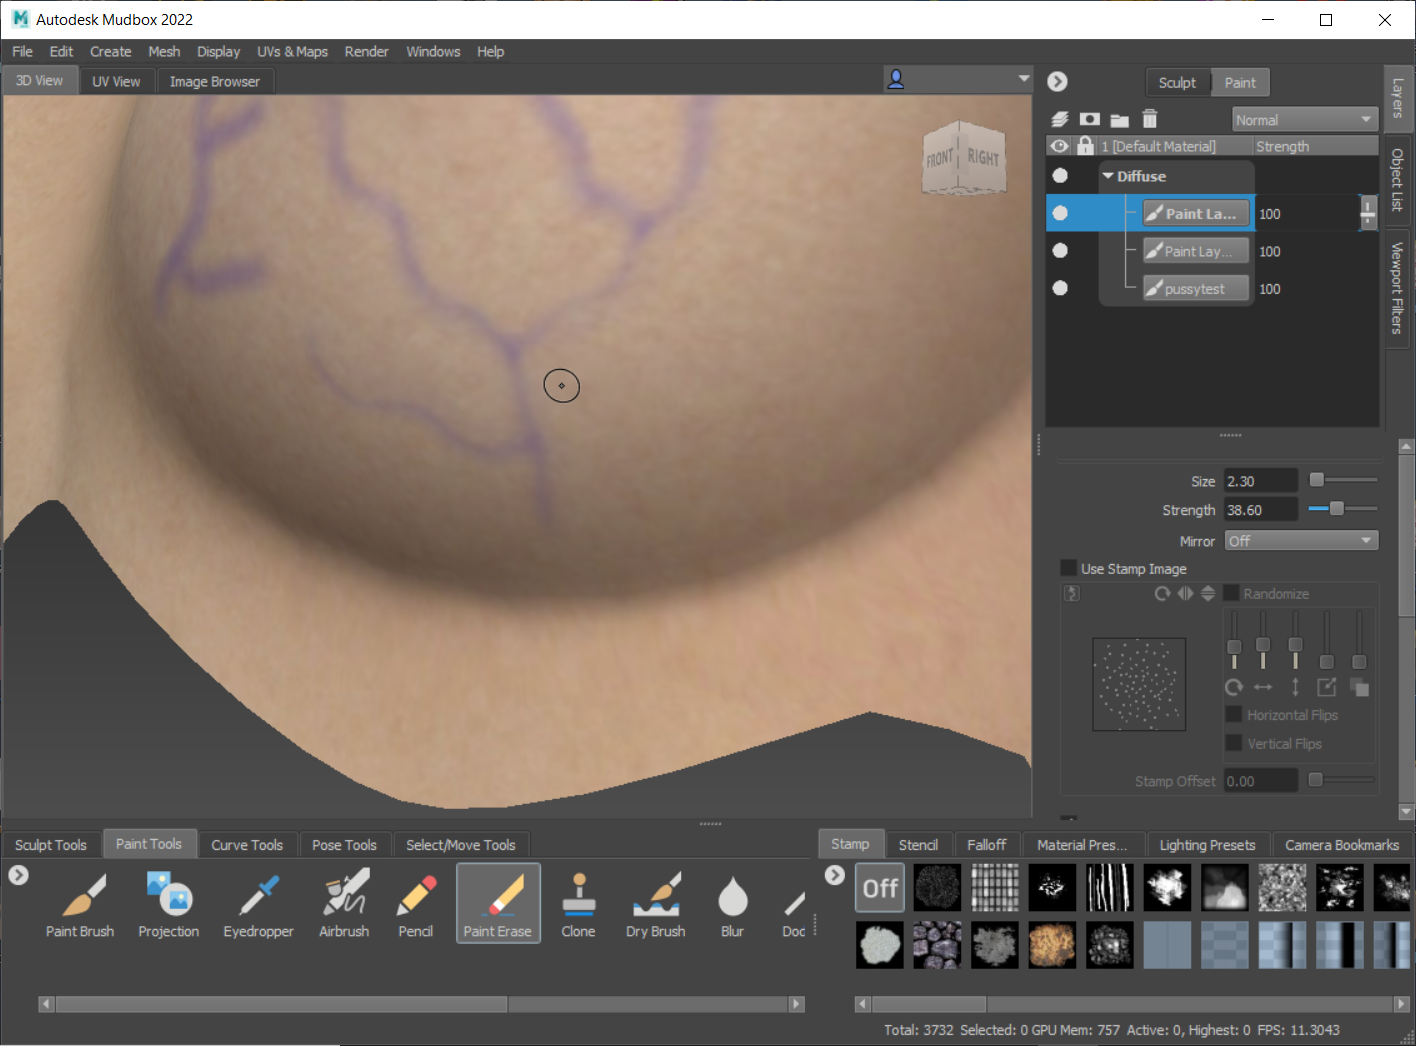
Once I'm done doing this for all the paint stroke layers I've created, I usually do quite a bit of layers and merge down gradually, I lower the opacity on the merged layer until it's barely visible. I delete the underlaying base reference texture. Here's the merged vein layer against the model's white diffuse material. The effect is very subtle, barely noticeable against the base texture.
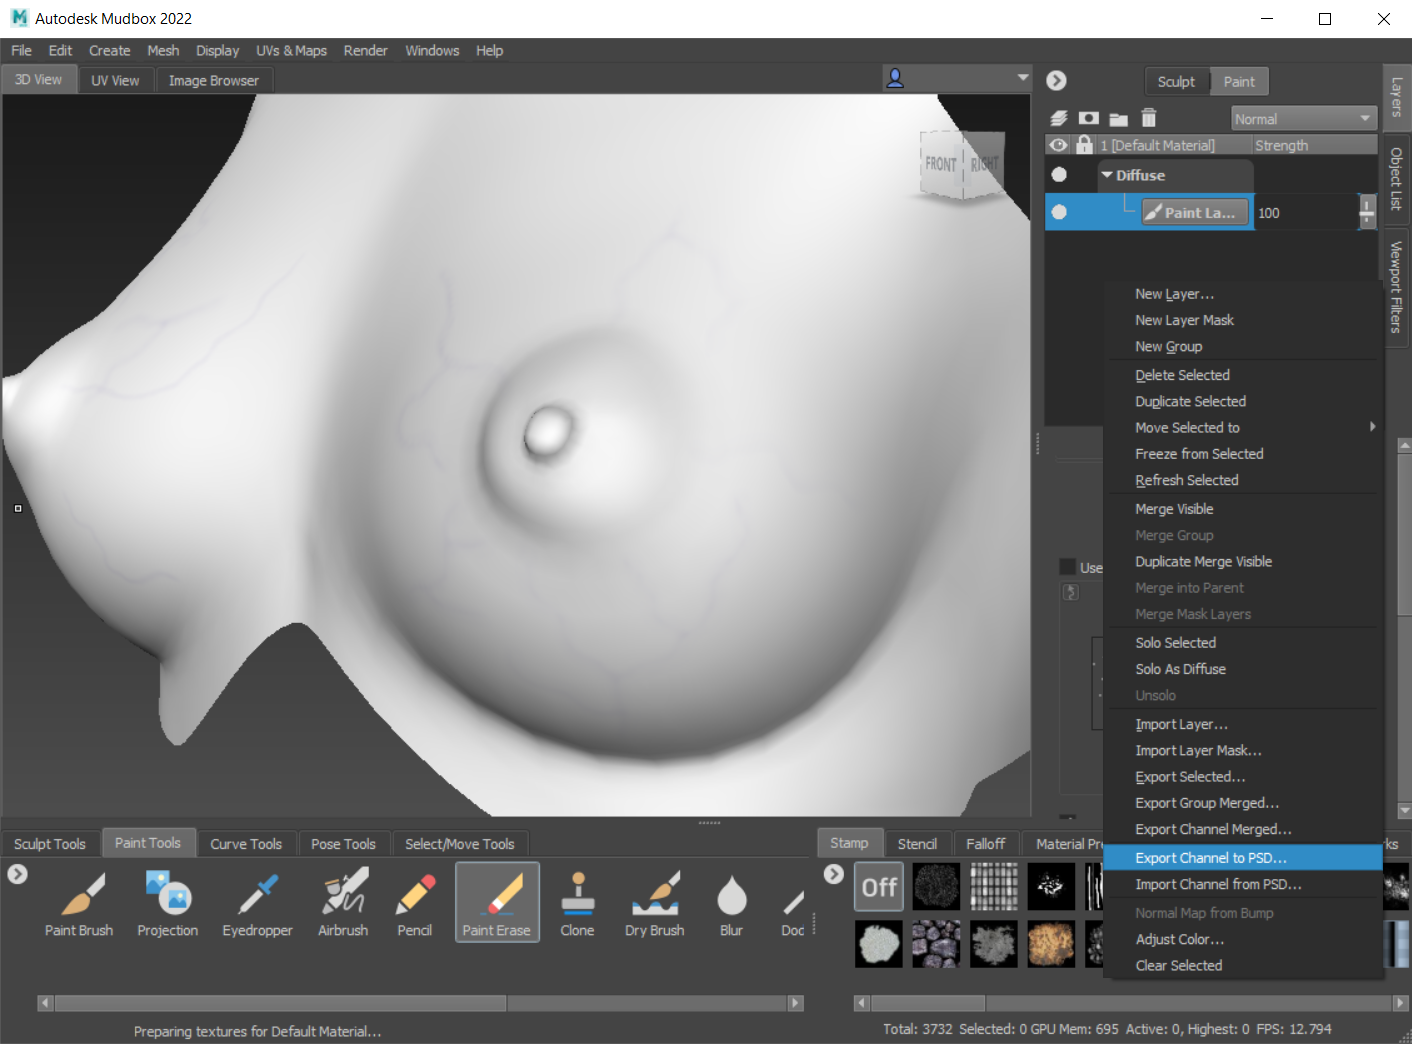
I export channel to psd, this brings up photoshop and the layered file. The layered file consists of a template layer for that geometry, all of the paint layers (only one in this instance), and a diffuse color background...
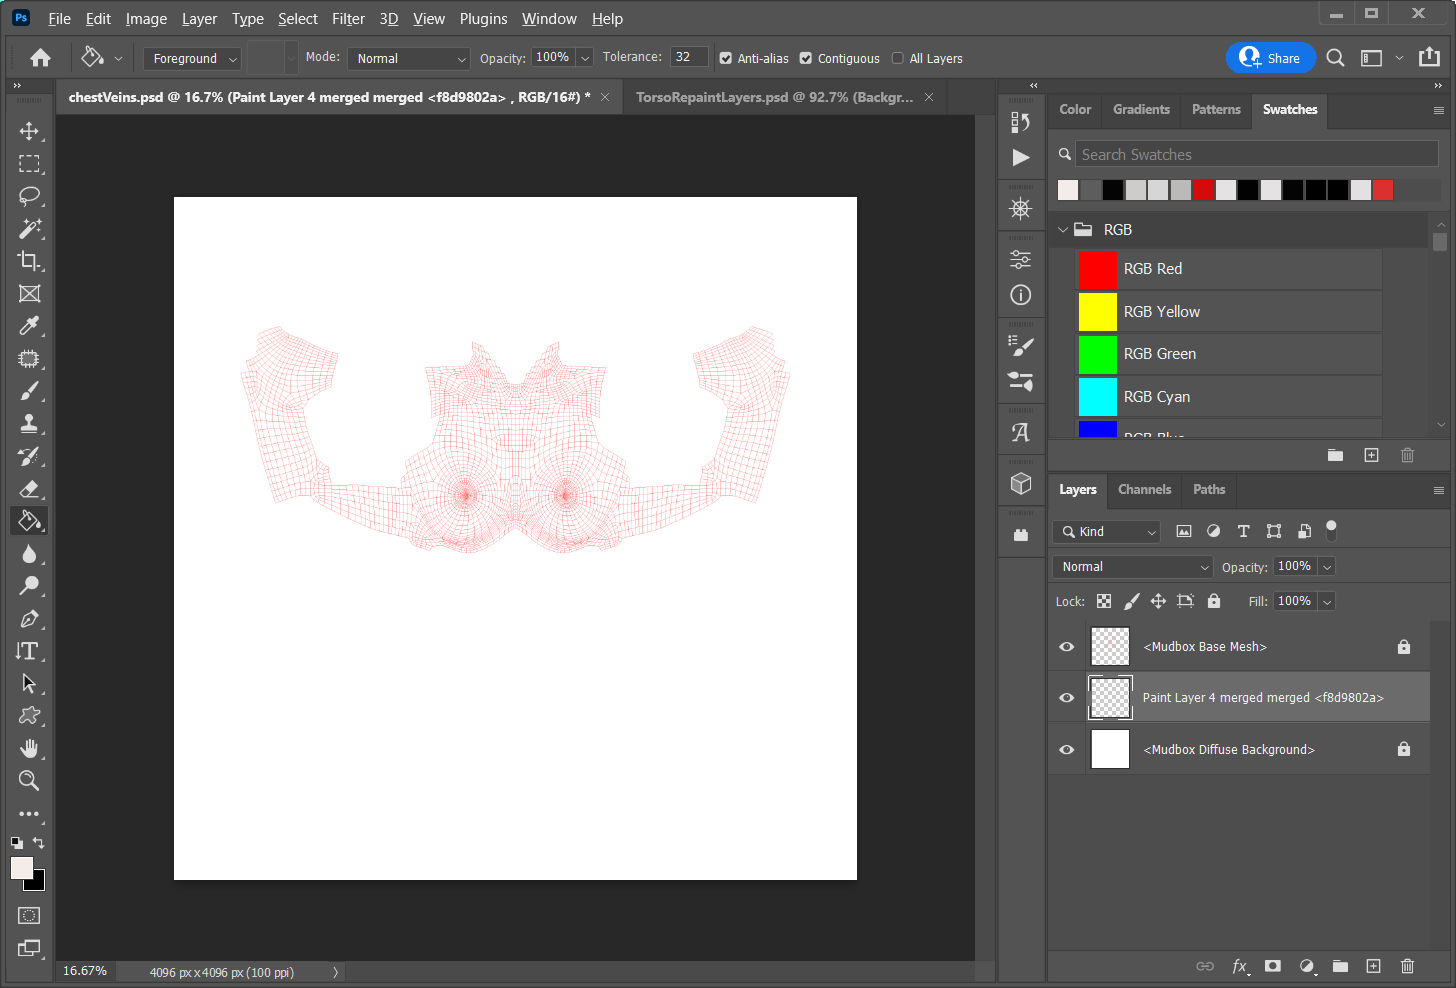
At this time I also have the torso texture file open, which contains all my edits on separate layers. This is my archive work file. I duplicate the vein layer over to my archive file.
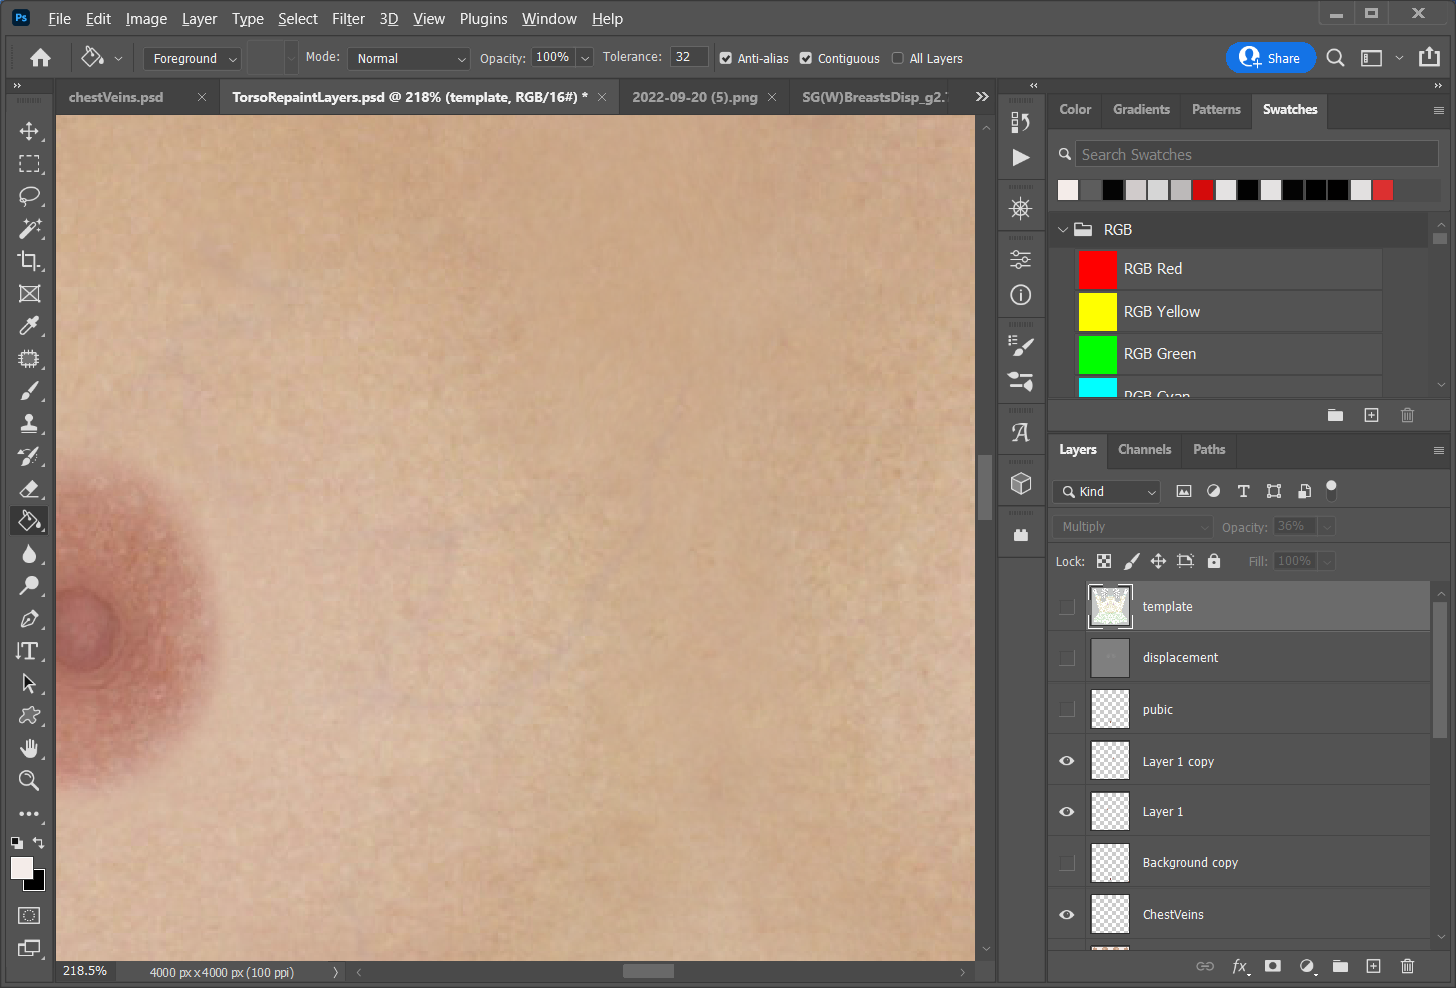
As you can see the effect is very subtle, it will be more or less visible, almost subliminally, depending on the lighting and/or HDR I'm using.
End of today's little demo.
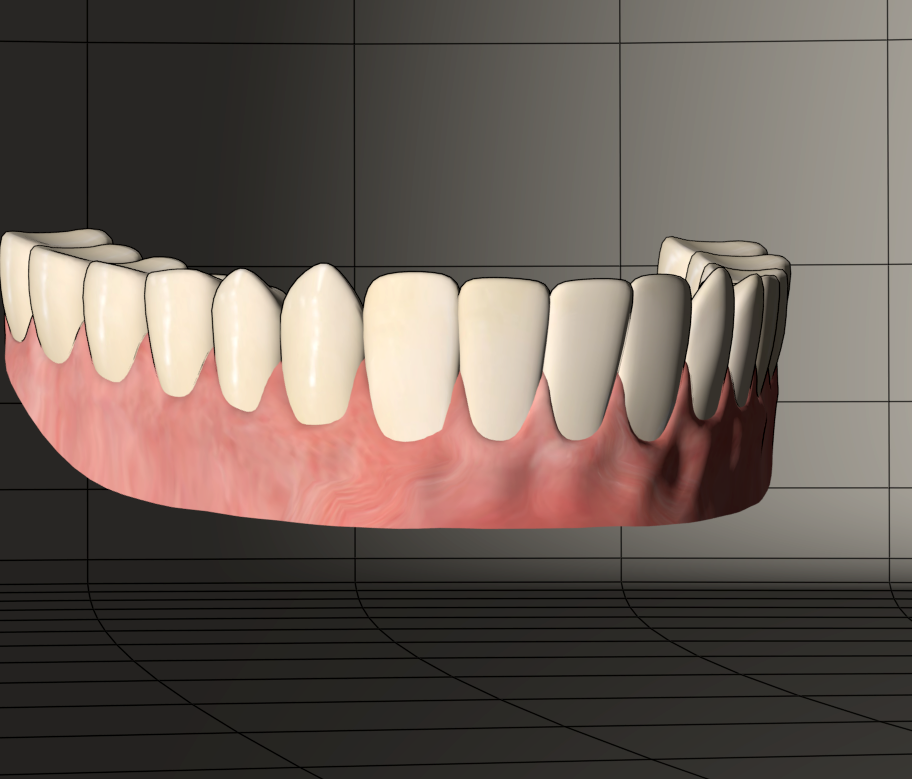
A process oriented post; Adventures with (conforming) Dentures featuring Antonia.
ODF's Poser figure Antonia is on the cusp of a 1.3 update. I plan on making some creature morphs for the release. Just some head morph stuff with some texture maps. I know that I'll need to create quite a few teeth morphs to go along with the character morphs.
Unfortunately Antonia's teeth are relatively low poly in comparison to a figure like V4. Also the gums and teeth are not a seperate mesh, again, as they are with V4. This makes creating fangs and teeth scaling rather difficult. If I stretch the teeth too much the textures from the gums will smear into the teeth and moving and scaling the teeth and gums separately is not possible.
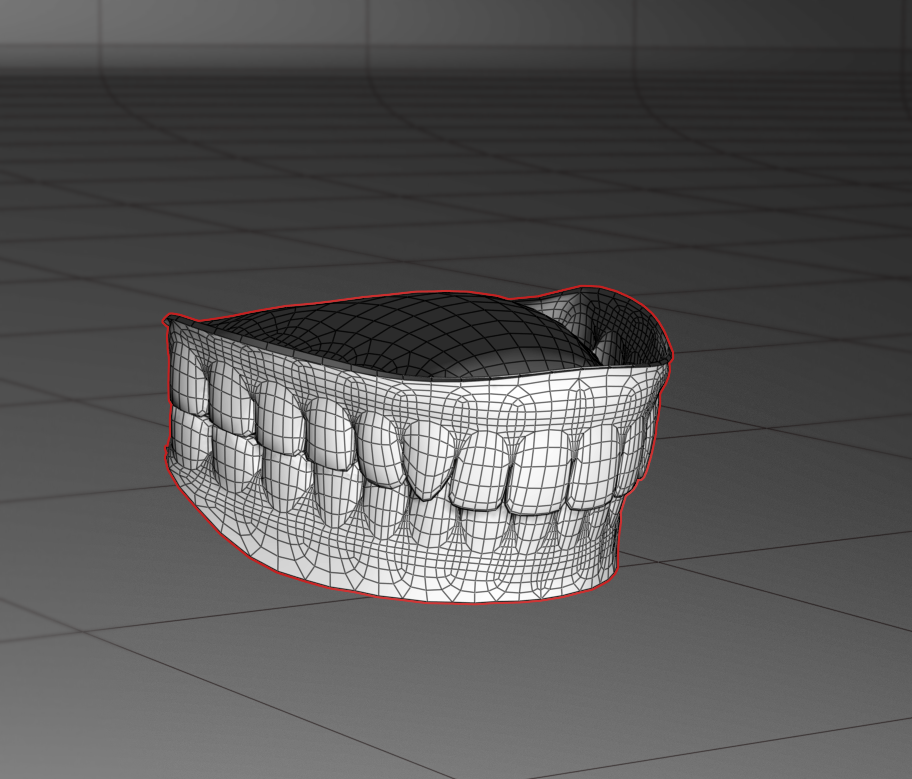
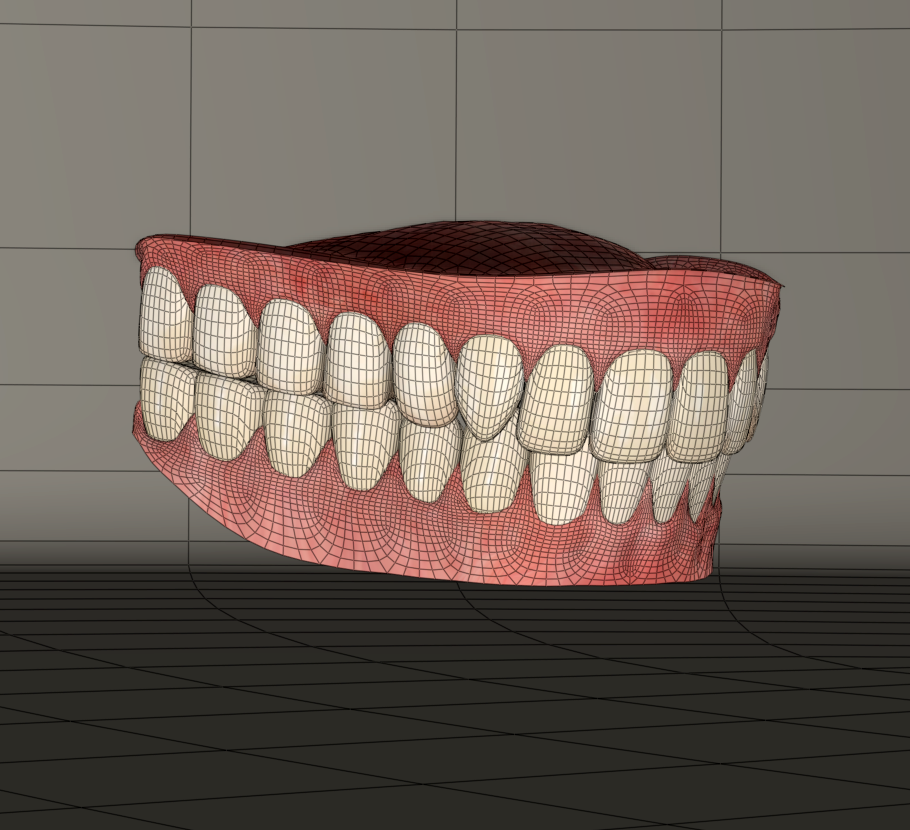
As a solution to this I've decided to create some higher res conforming dentures based off of Antonia's existing geometry. The idea is to create an extraction of the jaw actors, separate the teeth from the gums without creating holes in the gums, integrate the separated teeth deeper into the separate gums, giving all a level of subdivision, and retaining the original UVs.
I start this process by importing the Antonia 1.2 obj from the Geometries folder.
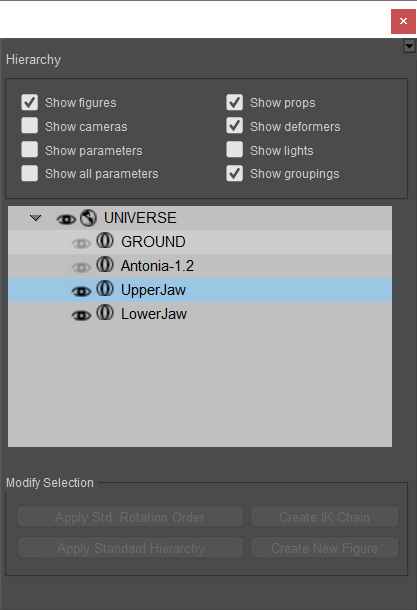
I open the grouping tool, select the upper jaw actor, and spawn a prop from this which I name UpperJaw. With this new prop extraction of the actor I use the grouping tool to add a new group called teeth, the polys are which are added by adding the teeth material to the new teeth group. This will help later for masking. I repeat the process for the Lower jaw actor. Naming conventions aren't really important at this stage...
This leaves me with prop versions of both the upper and lower jaws with separate groups for the teeth.
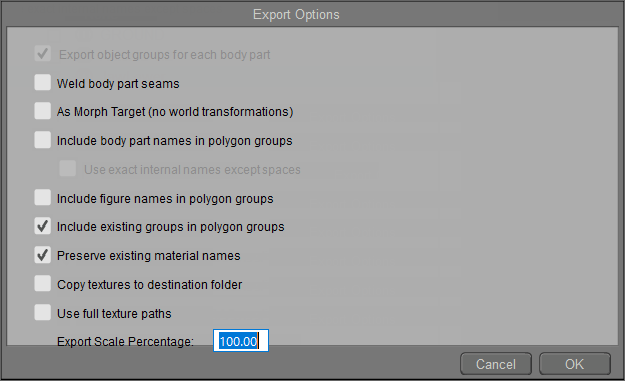
I want to export these out as obj to be modified in Mudbox and Wings3d...
I choose include existing groups and maintain material names. I can edit these obj files in a text editor to manipulate groups and material names and existence later if needed. But more on that when the rigging starts.
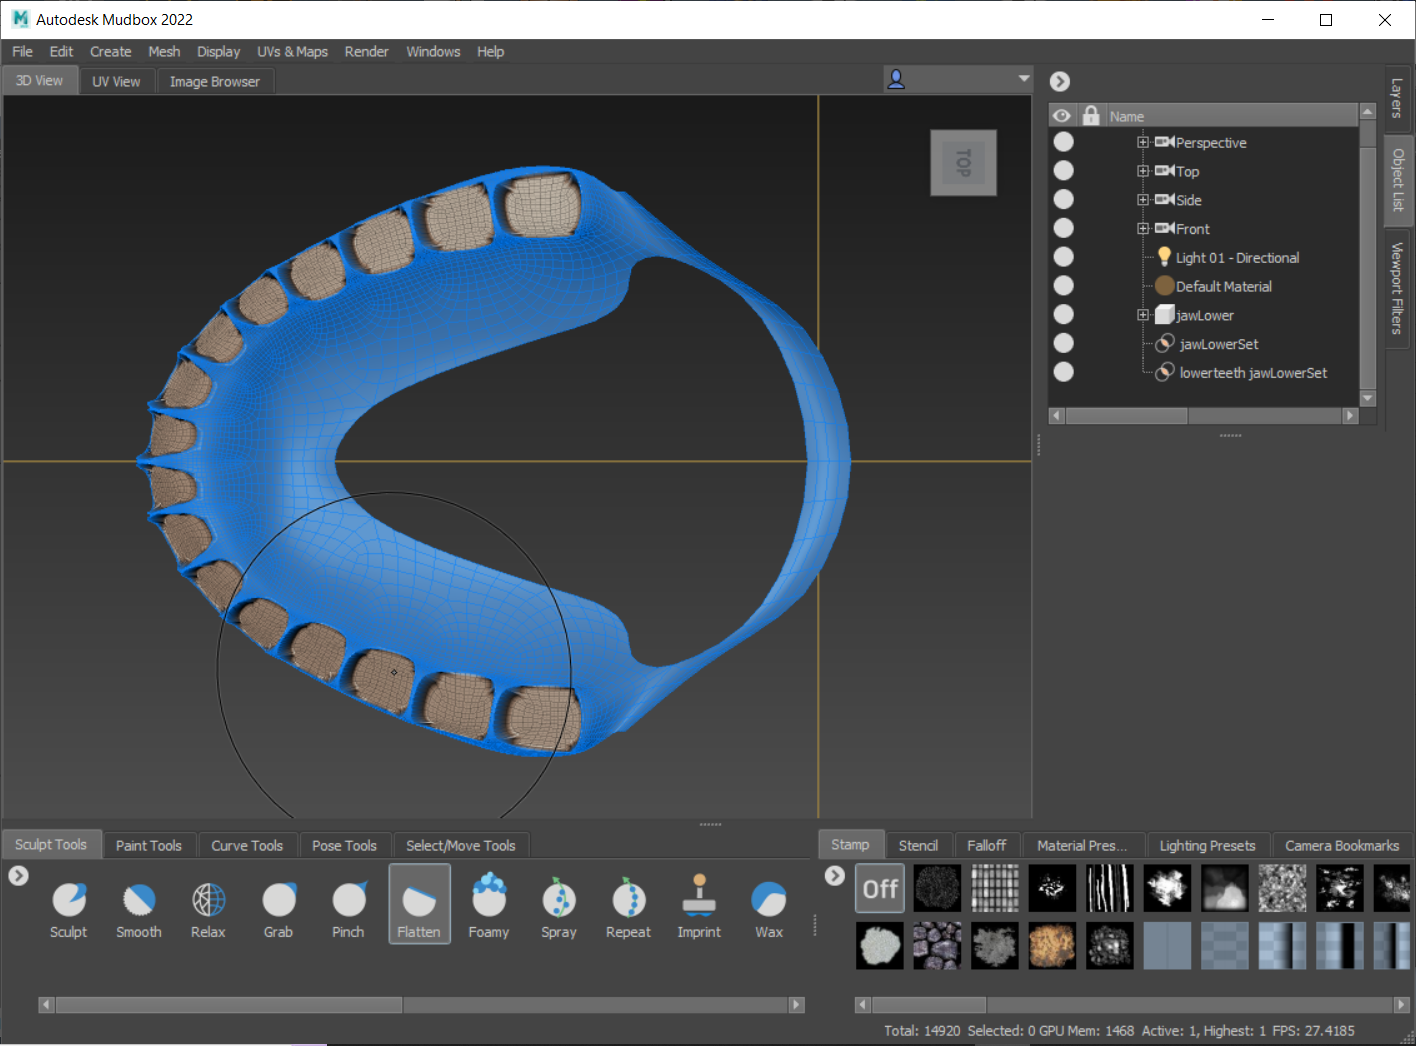
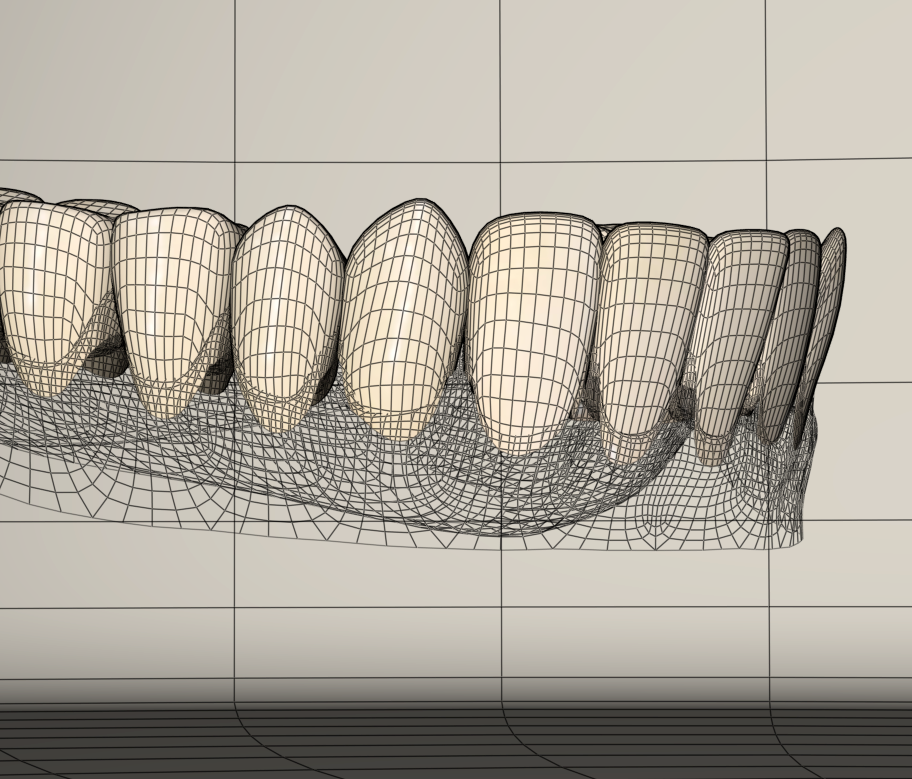
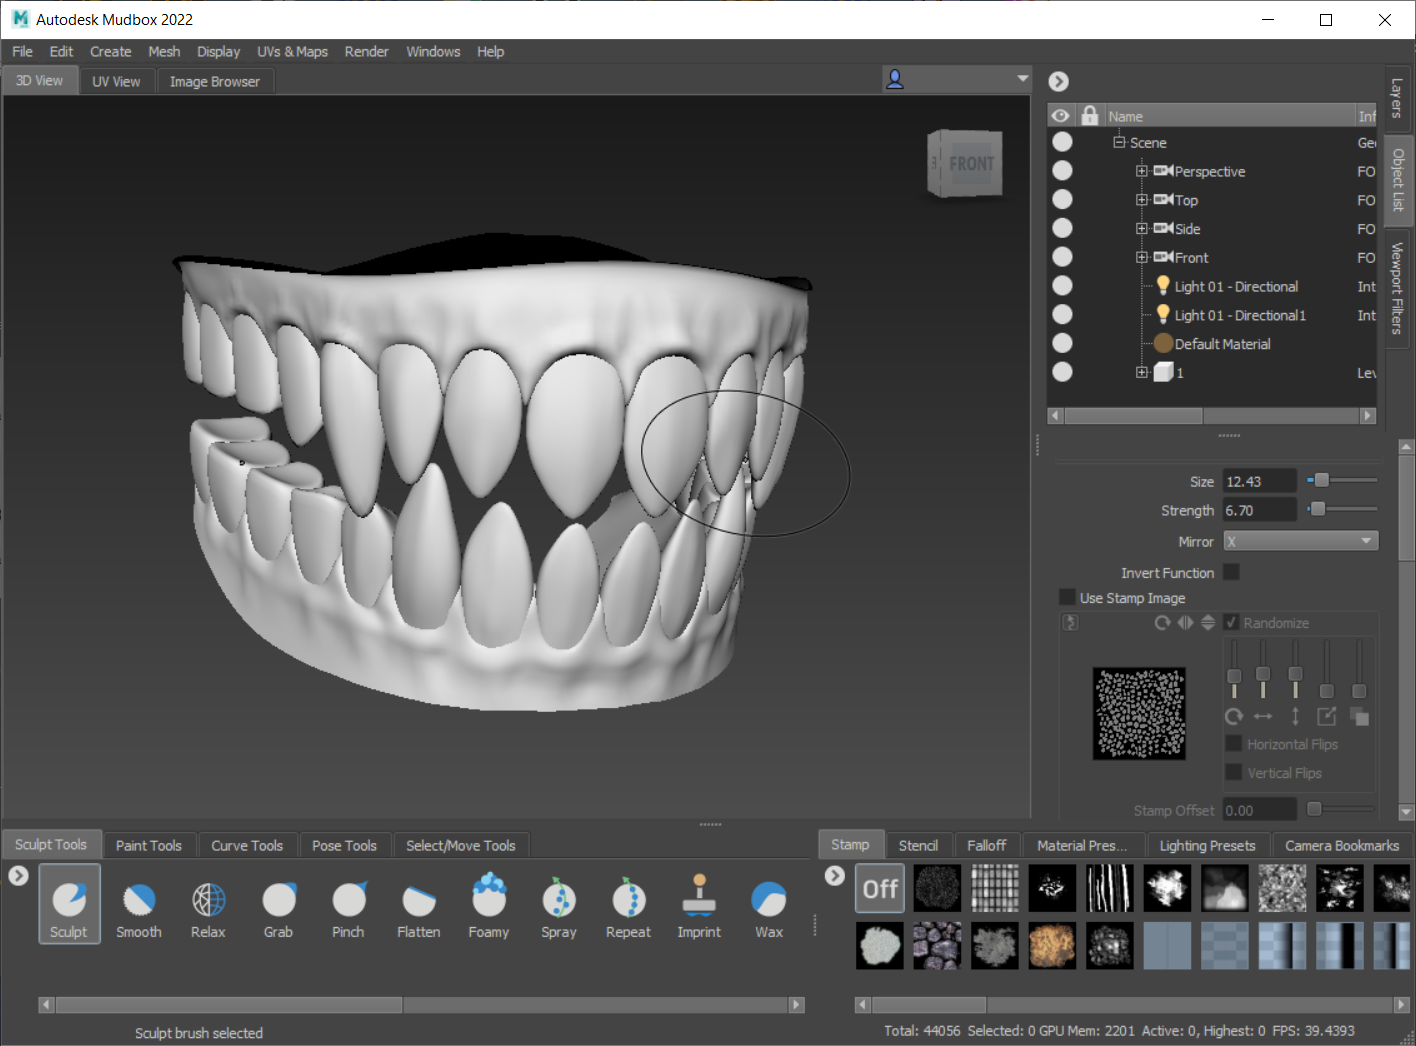
Now that I have my jaw props exported I need to do some sculpting. The idea is to completely flatten and sink the integrated teeth mesh parts down into the gums, neatly, so that there aren't big holes left after the teeth extraction. I'll use the sculpting tools in Mudbox for this...
Inside Mudbox I add a level of subdivision, freeze the gum group polygons (mask) so they're not effected by the brushes as I flatten the teeth polys. I use very large low intensity flatten and smooth brushes, alternating as needed, to do this... Frozen polygons shown in blue. I occasionally switch from base res to subdivision1 and back as I smooth the gum cavities..
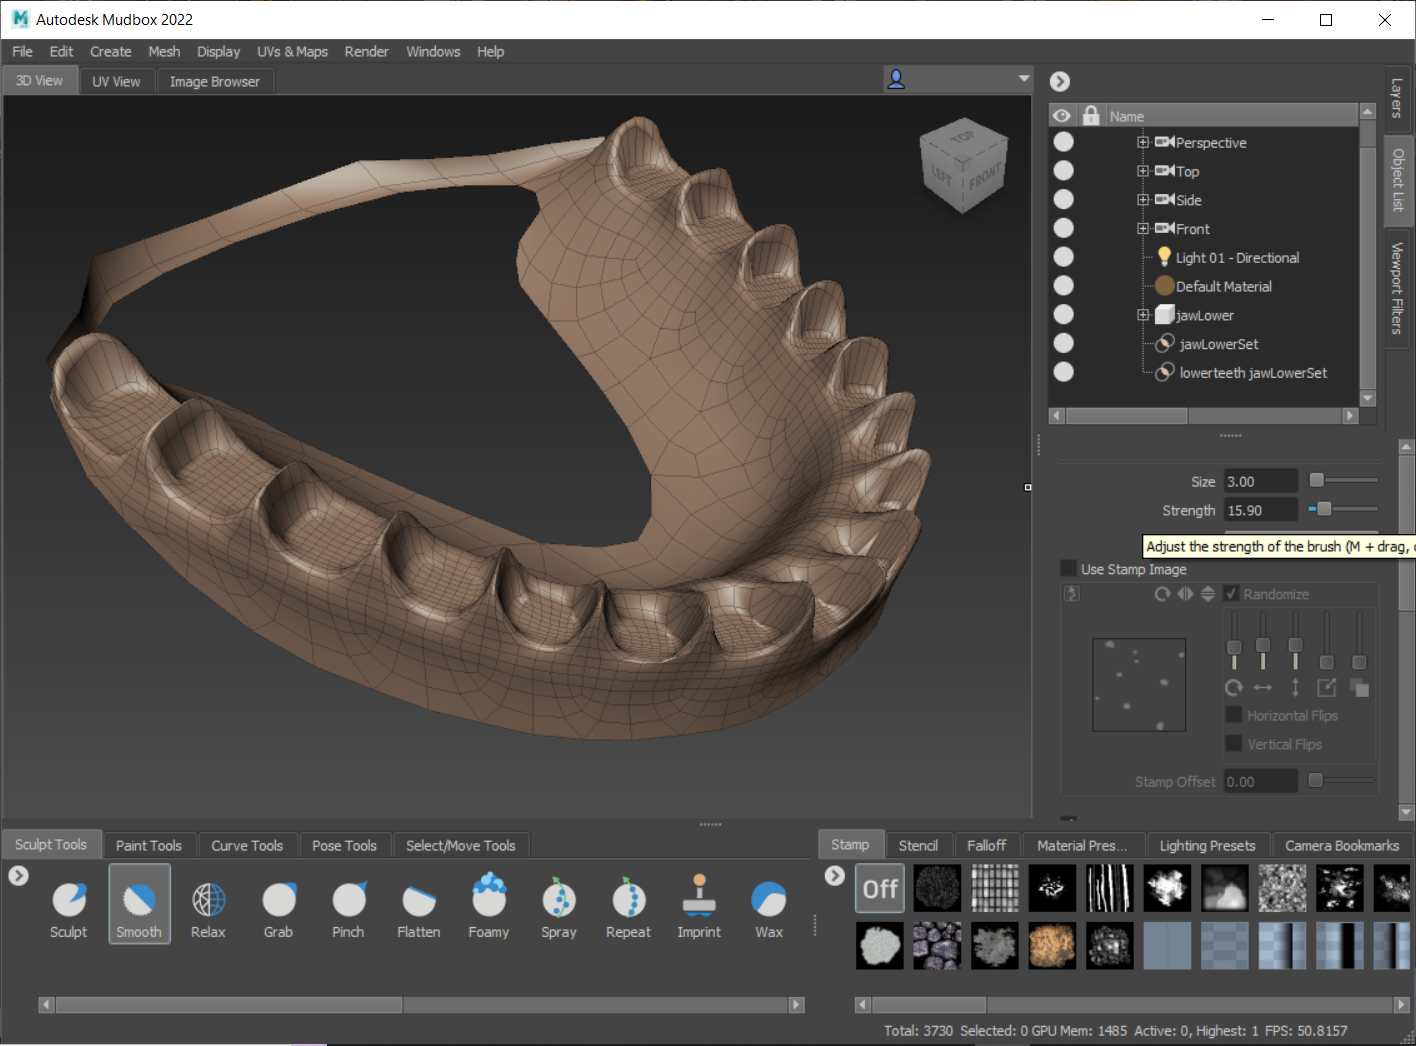
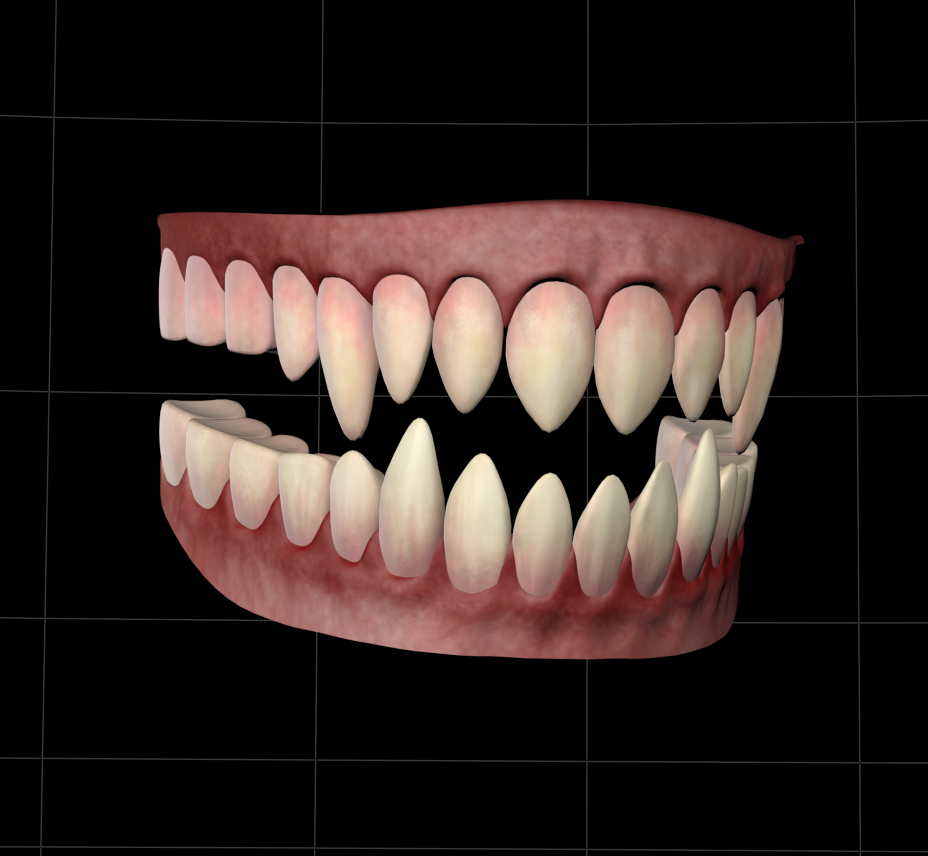
I repeat this process, on both upper and lower jaws, until I'm satisfied and export this out for import into Poser and Wings 3d. Here's the teeth flattened models in Poser. I'll give it a higher level of subdivision in the next steps, for now the base resolution is fine.

Now it's on to the teeth separation. For this I'll use Wings. In wings I want the original unflattened props to extract the teeth, lengthen the base of the teeth down into the flattened gums versions and export these out as joined objects for further sculpting. It's a bit of work. I'll just skip ahead all of this tedious stuff.
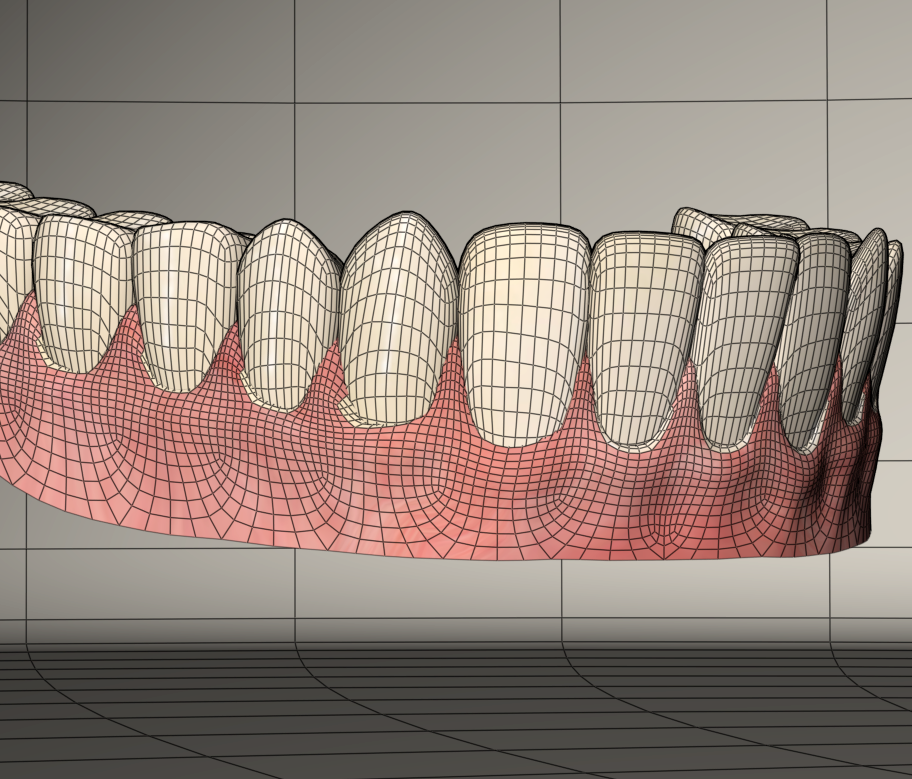
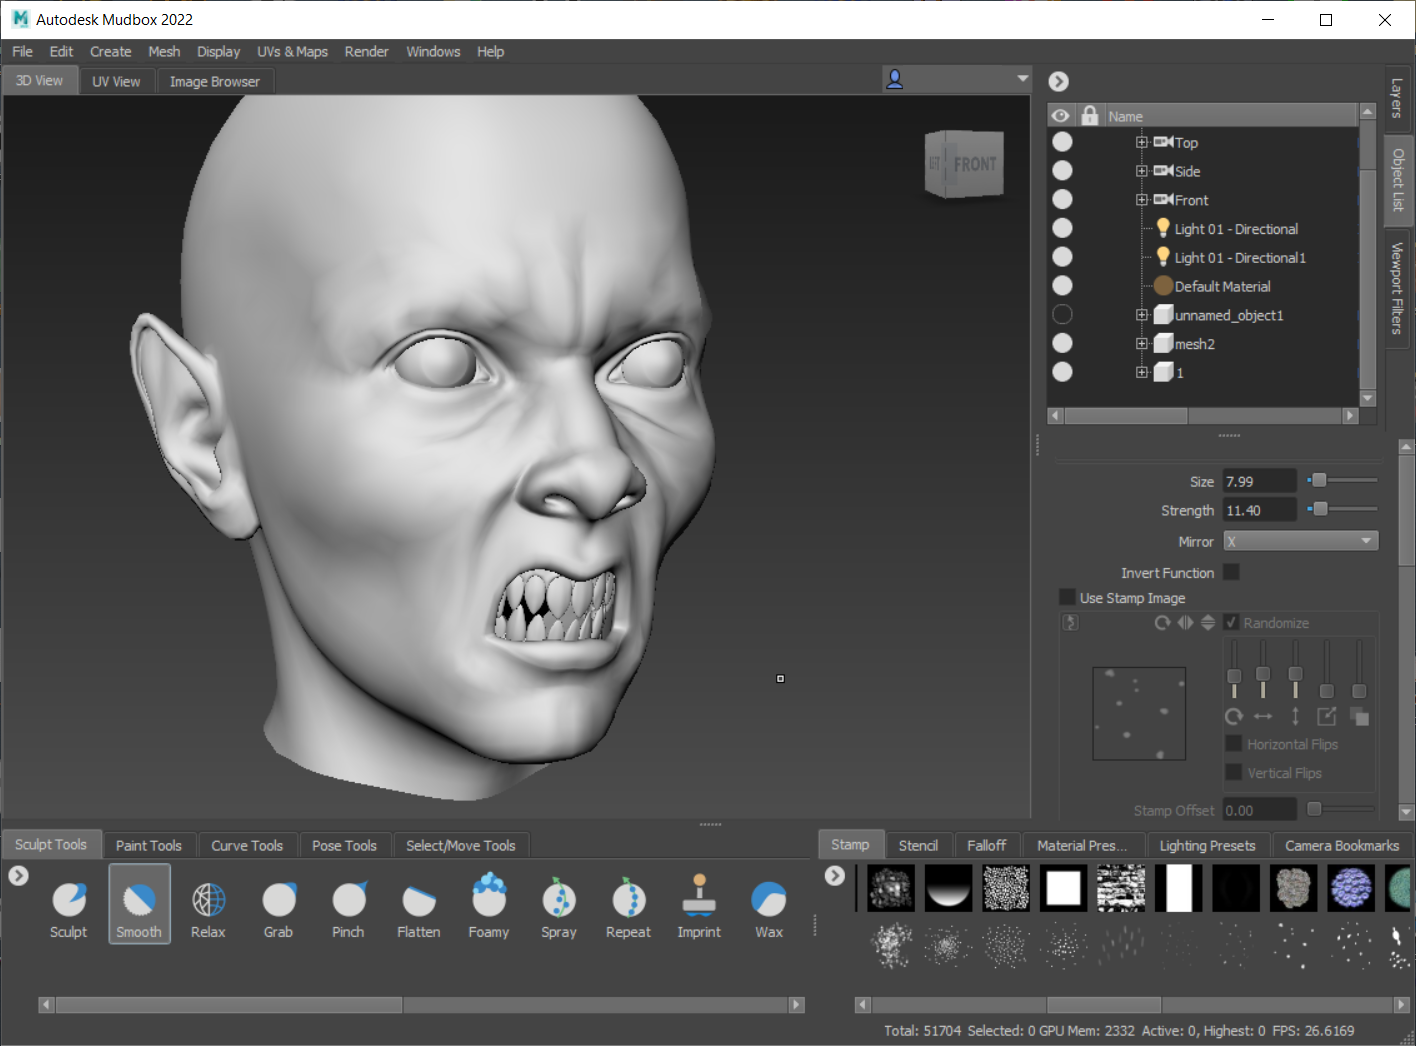
So what I have now is a completed lower jaw actor with separate teeth. UVs are intact, and I've increased the resolution by one subdivision level. I regroup the model, collapsing it to one group merged, by editing the obj text. I import this new lower jaw actor into Poser to take a look at it with existing textures applied. In this case I'm going to use Saintfox's textures that are included with Antonia. I have some other textures of my own creation but that will come later. The upper teeth/jaw actor still needs to undergo the process I just glossed over but that will be done once the lower jaw is wrapped up.
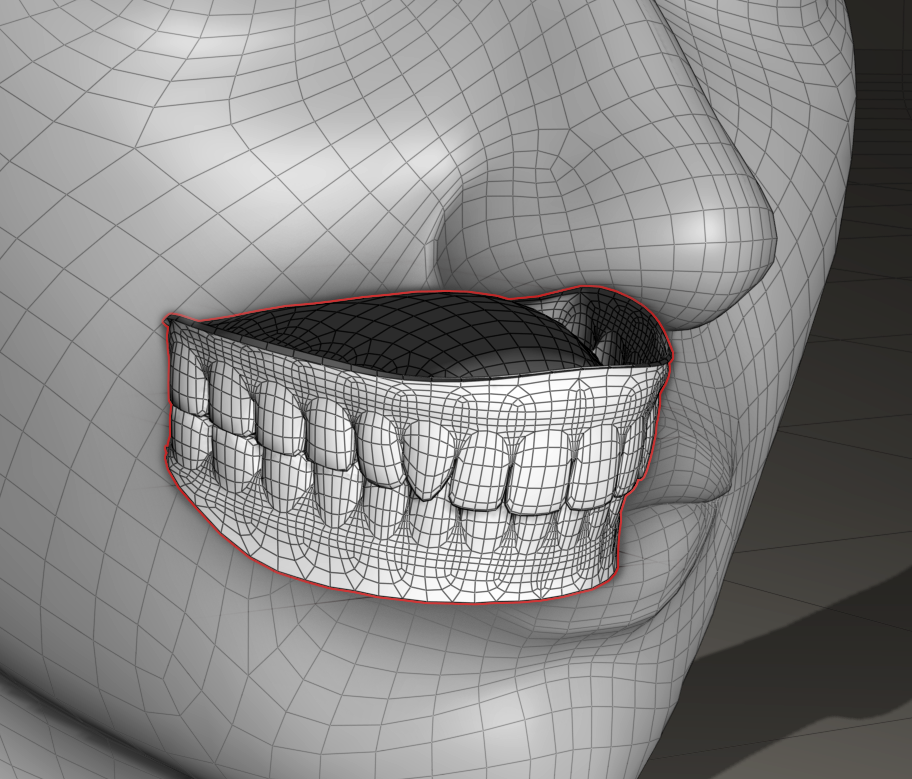
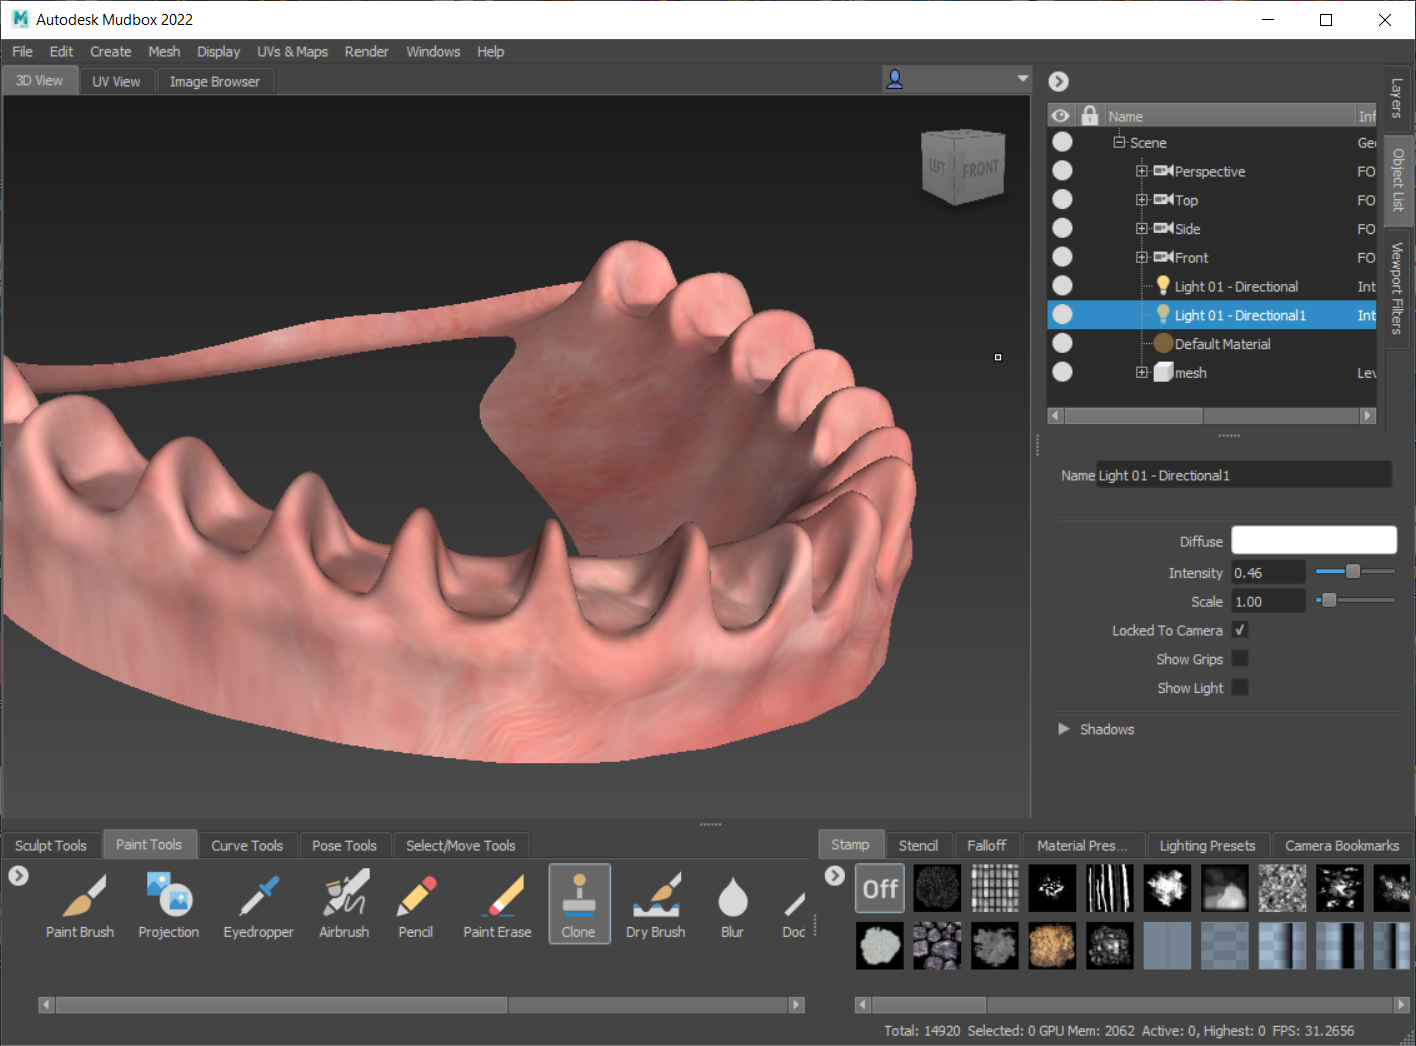
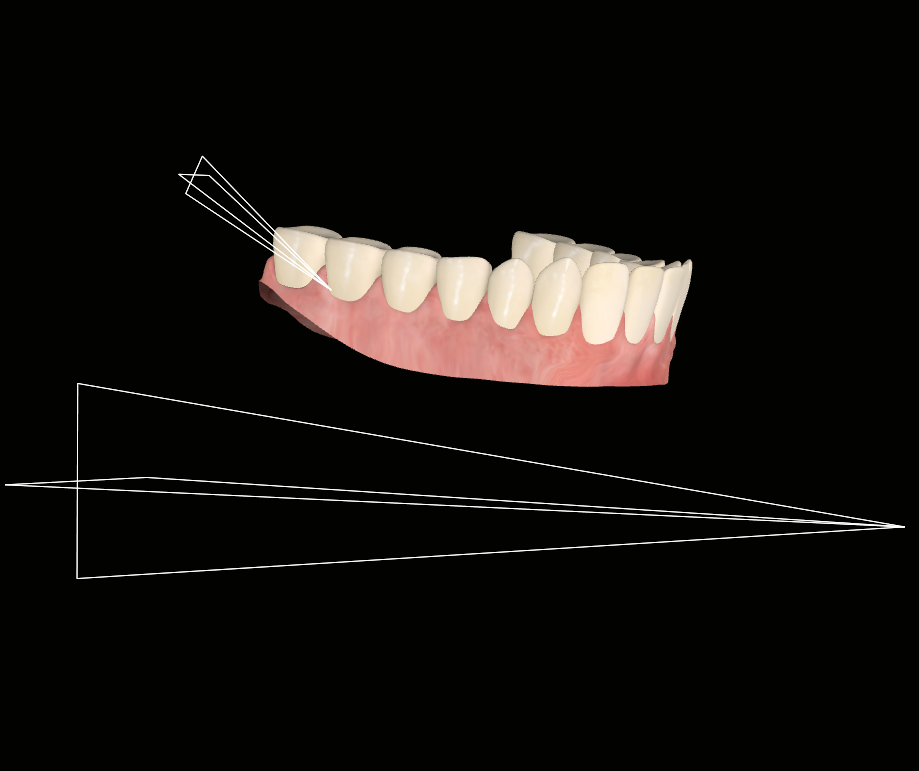
I'm already aware that there are some problems before I even bring the model into Poser. Nothing serious, it's about what I expected. The teeth material UVs are peeking a bit on the gums. Though I merged the original teeth material with the jaw/mouth interior material there's no escaping the original UV island placements... you can see the texture peeking on the gums here in this image.
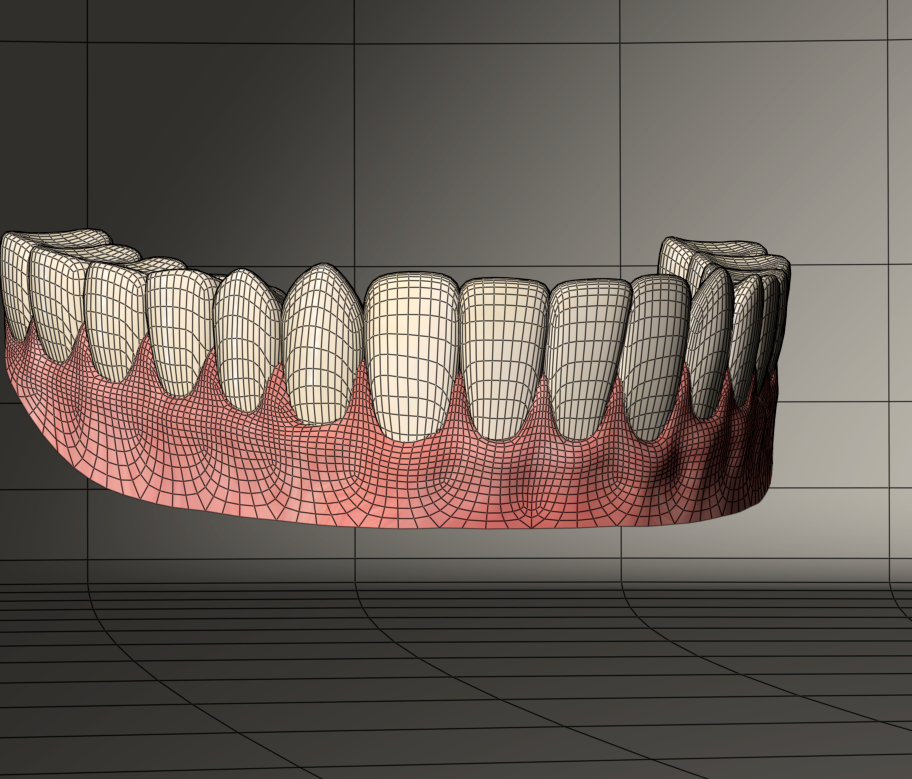
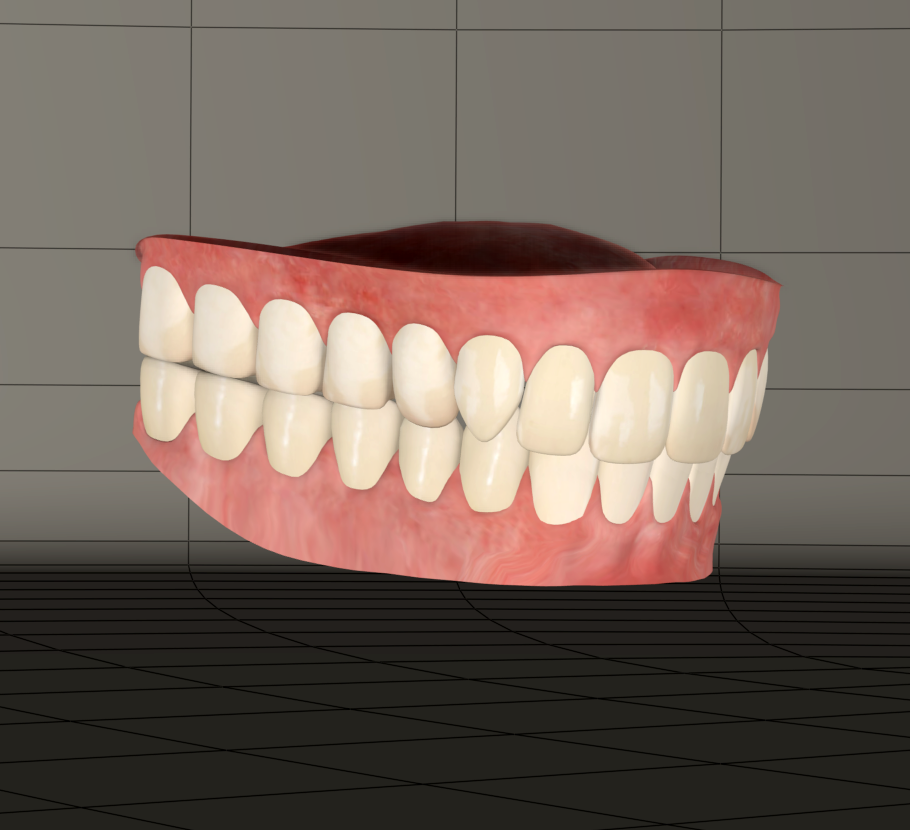
I can fix this by taking another trip to Mudbox. I'll clone bits of the original texture over to another layer which will create a transparent overlay with the fixes which I can merge with the original textures. Here is the fix results...
Wireframe showing the separated teeth recessed into the intact gums
To be continued tomorrow, wherein I'll finish the upper teeth, create donors for both upper and lower jaw actors and convert these props into conformers...
On the subject of teeth; A lost freebie link.
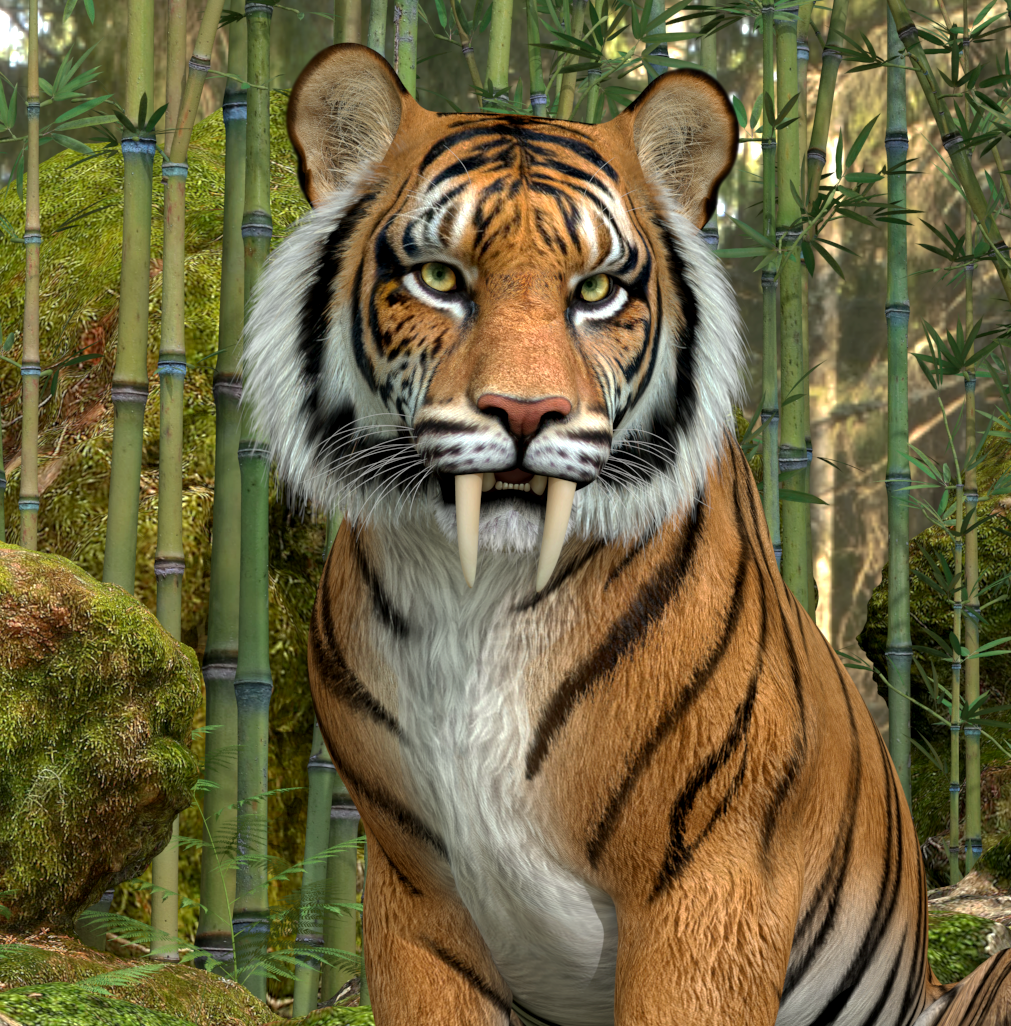
A SaberTooth morph for the HiveWire Tiger. Forum request. Morph will only work properly if applied to the HW Big Cat with Tiger morph applied. See included ReadMe. Poser only.
Adventures with (conforming) Dentures featuring Antonia: Part 2
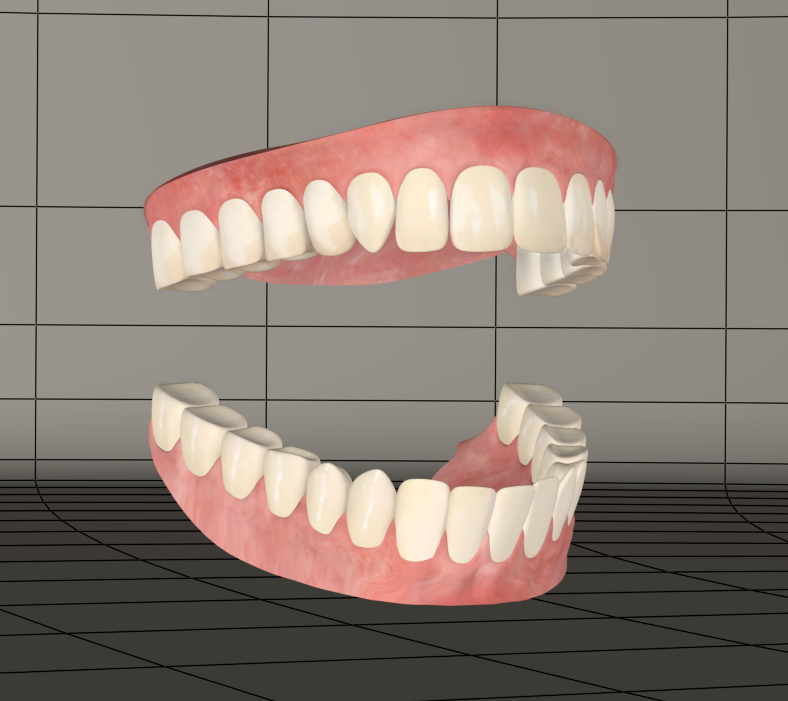
Picking up where I left off, I finished remodeling the upper jaw prop and teeth. Here are the finished objects...
Now it's time to turn these into conforming figures. In preparation for this I use Netherwork's Creator's Toybox Scripts to generate a blank figure of the Antonia 1.2 cr2 as an optimized donor.
Here's what this will do...
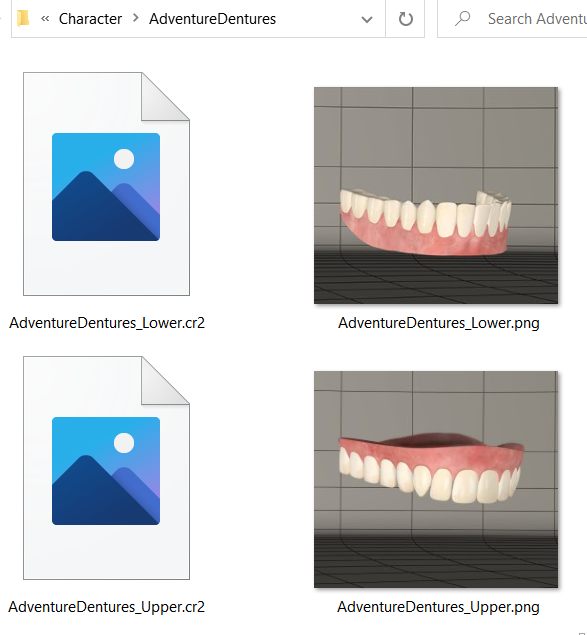
Here's a copy of the Antonia 1.2 Blank Cr2 if anyone is curious...
Prior to creating the blank I made sure to edit the obj files of the jaw props so that they both contain a single group named matching the exact internal name of the target bone the polys will be attached to, jawUpper and jawLower.
With the Upper Jaw prop selected I enter the Set Up room.
I navigate to the library and load the blank cr2.
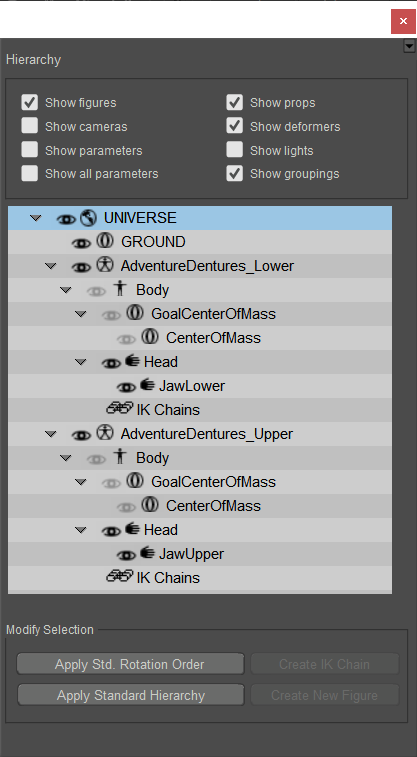
I'm presented with a hierarchy of bones I want to donate to the prop. In this case I want the head and jawUpper bones. I select these and only these in the hierarchy. Poser insists on attaching parents, generally from the hip, or in Antonia's case the waist. For head conformers I find the parent hierarchy isn't usually needed. For body stuff it's best to include the hierarchy from the hip. it's ok I can delete those extra bones for this. After the Skeleton is loaded I use the select tool and methodically select and delete all parents up to the head bone.
I exit the set up room. The relative rigs appear like this for both new conforming figures, both contain the head bone and their respective jaw bones... the large bones are the head.
Back in the Pose room I do some preemptive tidying up. I rename some dials, specifically the external names for XYZ rot dials to Bend SideSide Twist. I turn off bends in properties for the jaw actors. I check all conforming option checkboxes in body properties. I rename the figures from Antonia 1.2 Blank in the hierarchy to their proper new names. I apply my modified SaintFox textures.
I save the new figures to the library. I choose use existing geometries. I open the cr2s in a text editor and double check that file path references and some other things copied properly to the saves.
Next I'll load my new conformers, conform them to Antonia and test everything out. They conform great. I toggle the visibility of Antonia's existing jaw actors off and my new high poly dentures work seamlessly...
Continued Tomorrow; Wherein Antonia finds herself with some new teeth morphs and has a frightening encounter with Pazuzu from the Exorcist.
Adventures with (conforming) Dentures featuring Antonia: Part 3
Sculpting Fangs1 morph
Finished morph with textures
Now to make a character to go along with the Fangs. I've chosen 'Captain Howdy' from the film the Exorcist
I start by sculpting the base resolution morph
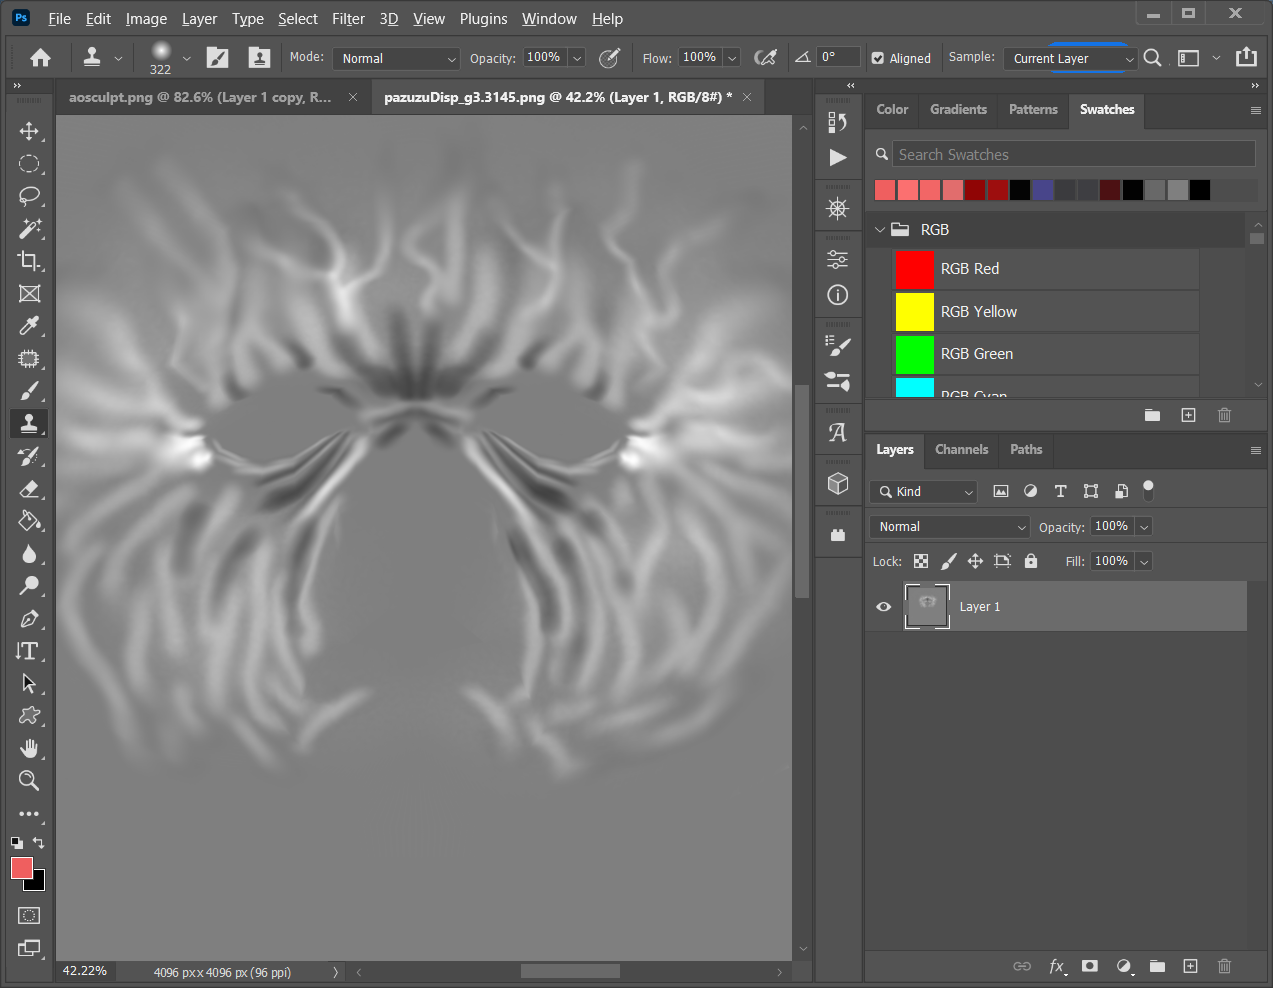
I then create a displacement map after subdividing the mesh a few times. Not really high frequency, just some forms to add interest...
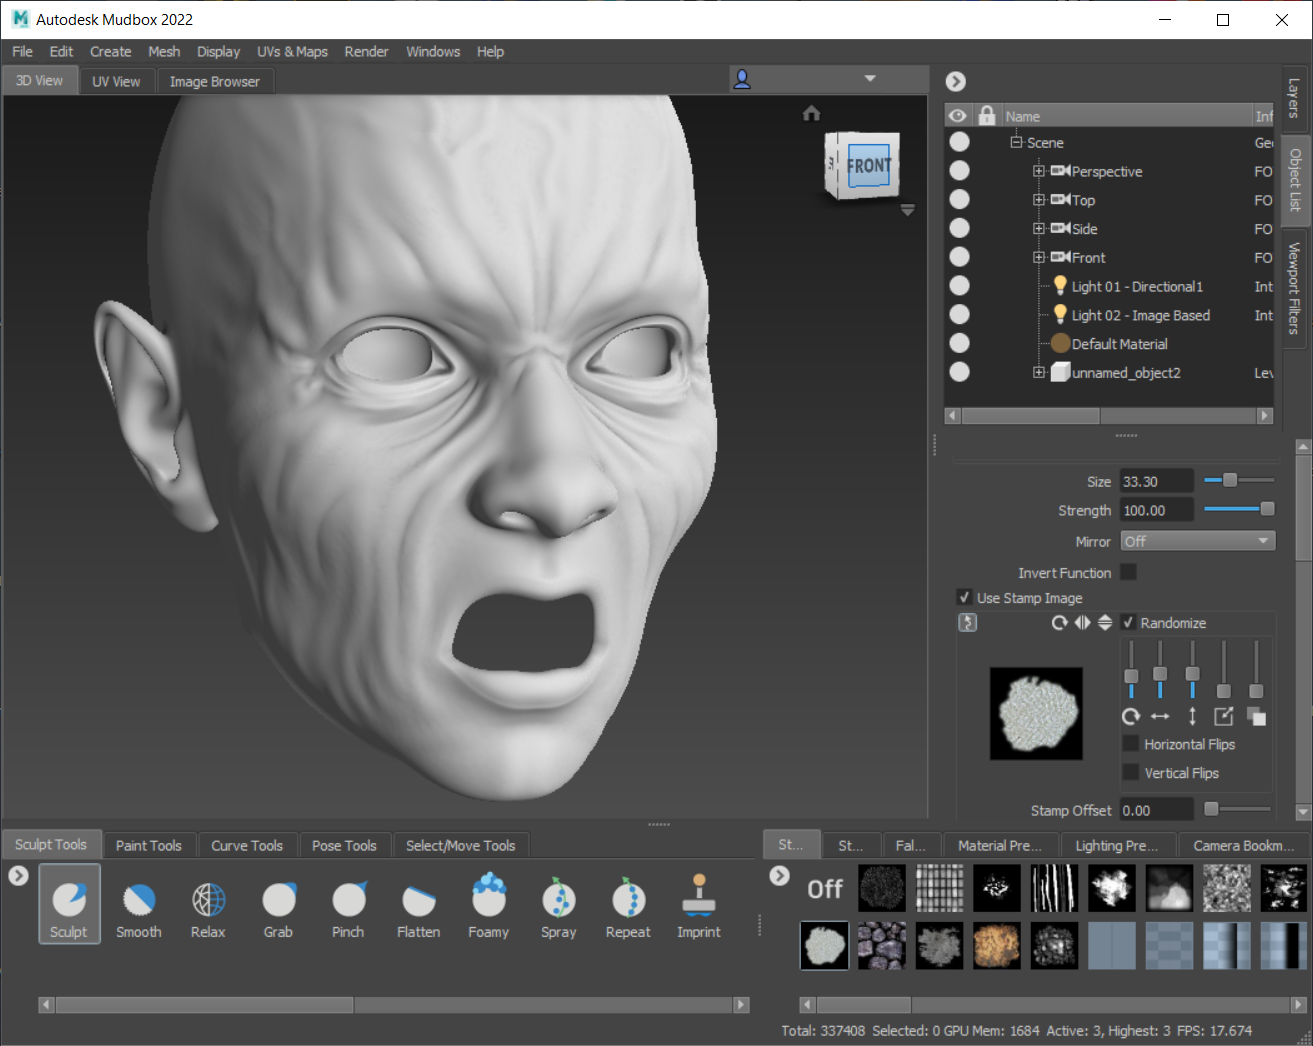
The baked out map...
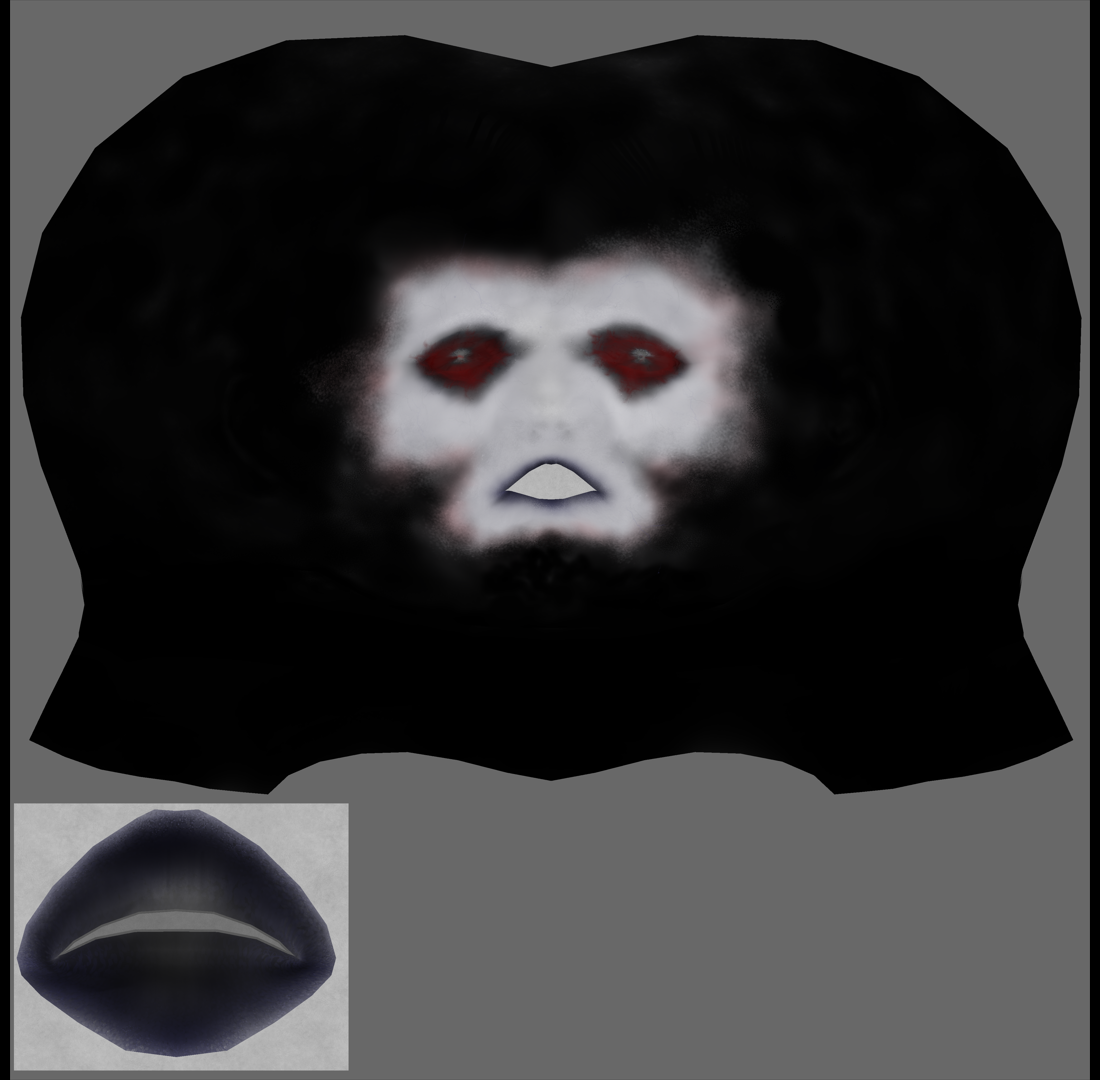
I then paint the diffuse texture map...
I assemble my materials and set up my lights. I render this with a single spot and an area light. I also model a crucifix and place it in the scene as a light emitter so that it shows up in the eye reflections. Firefly IDL.
The result...
Antonia: Captain Howdy.
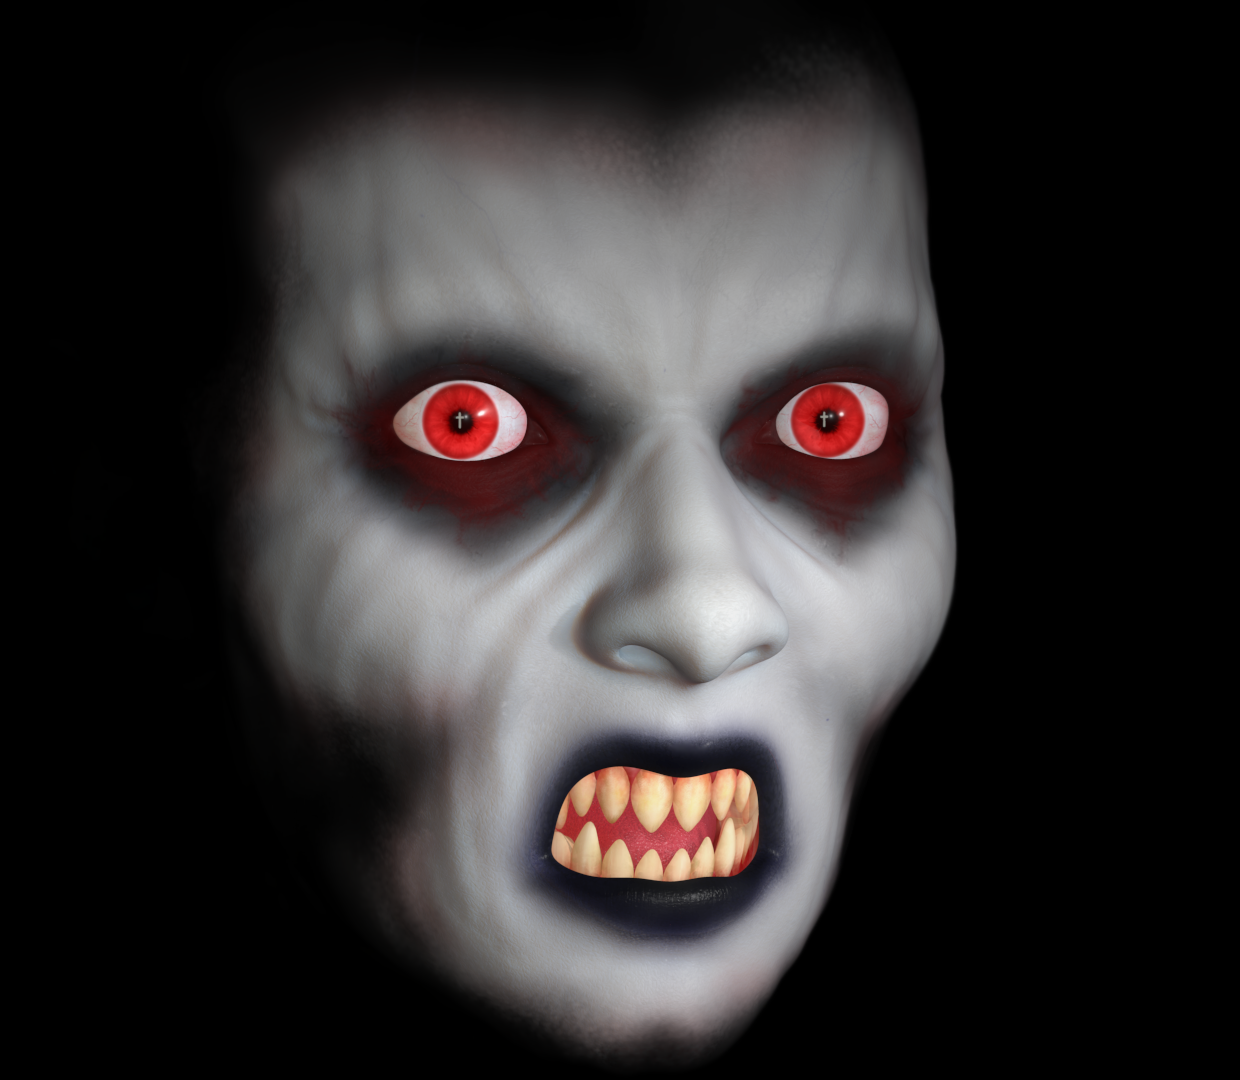
Sweet dreams.


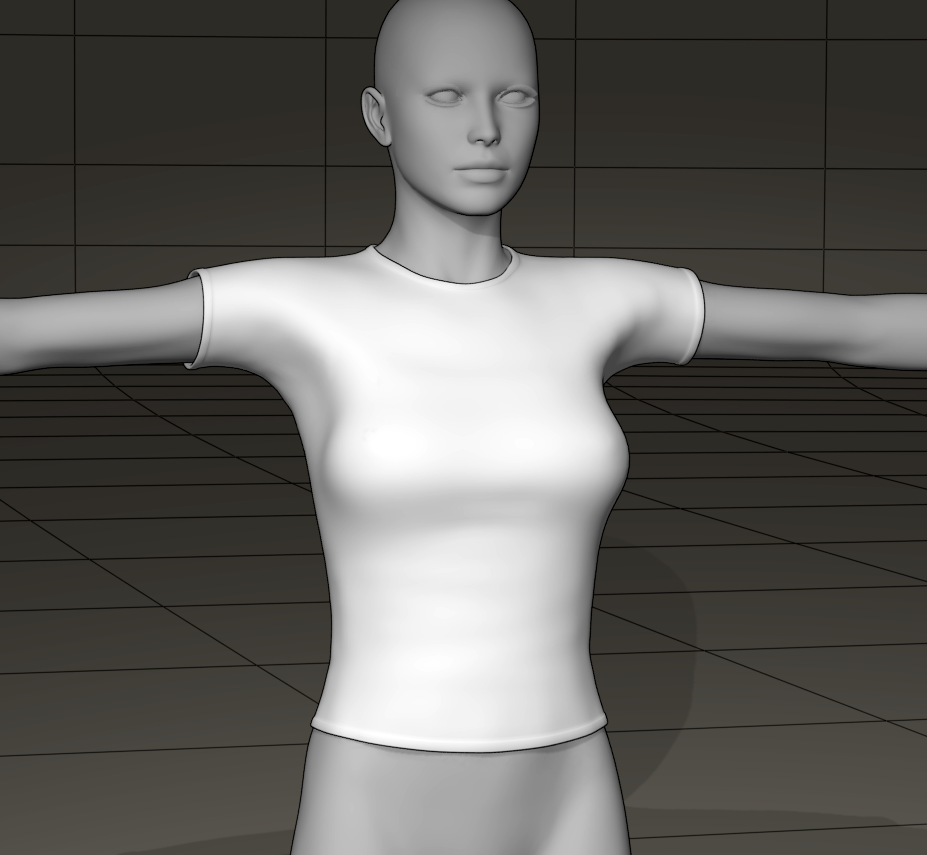
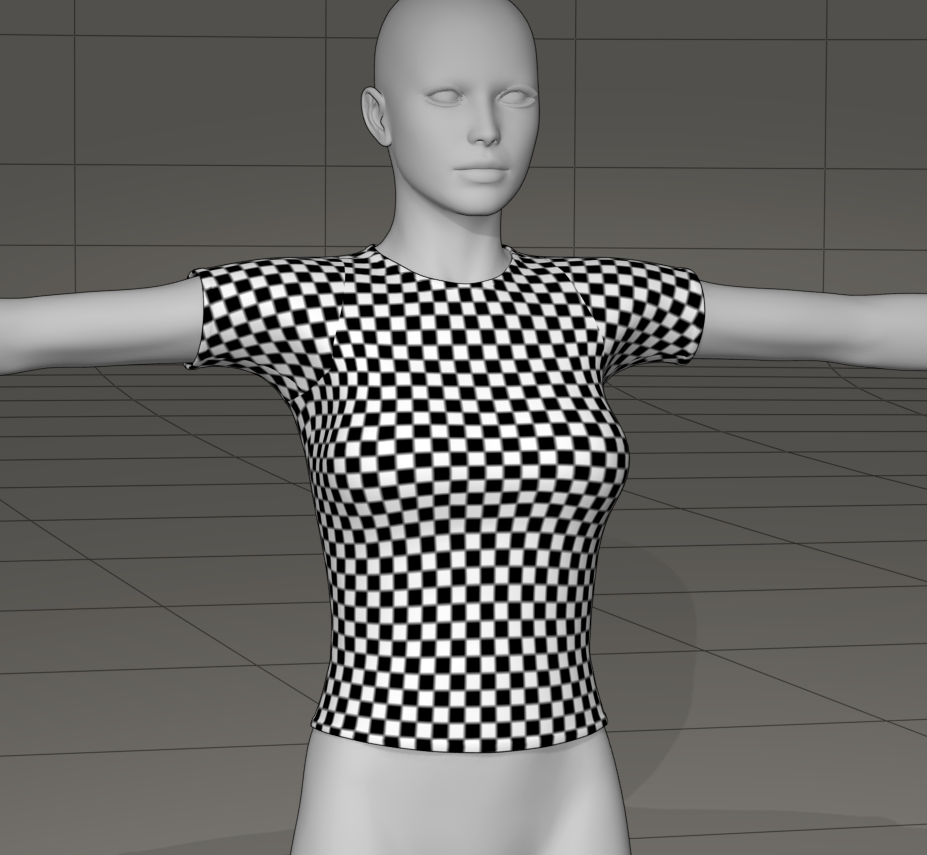
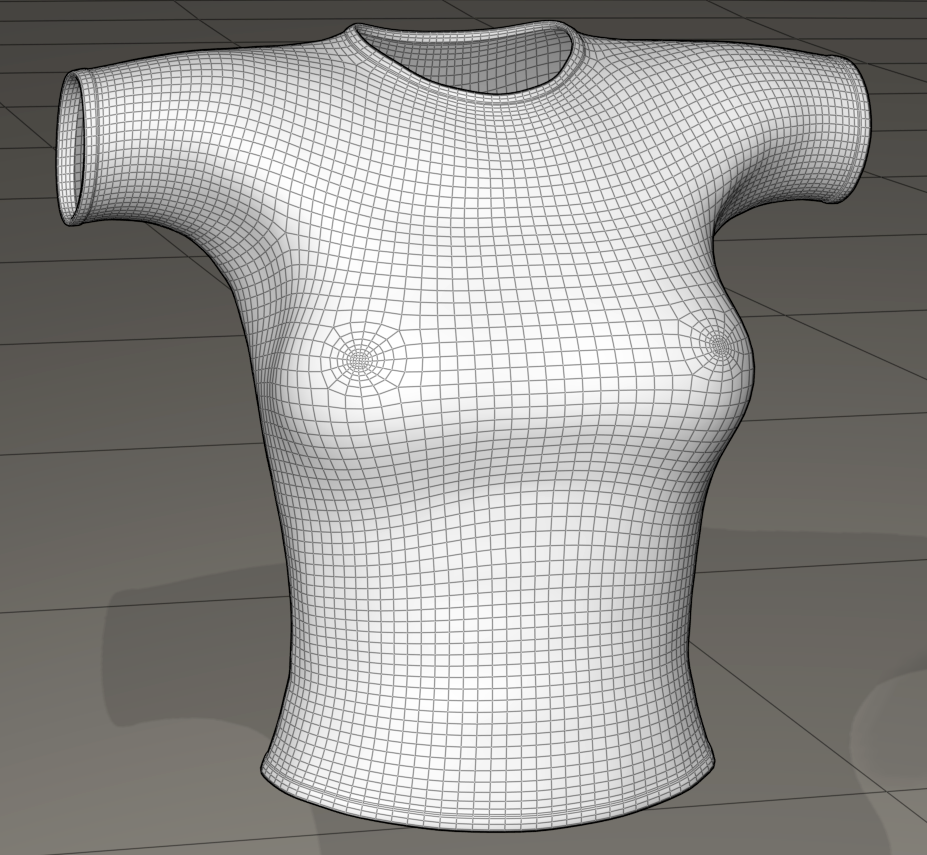
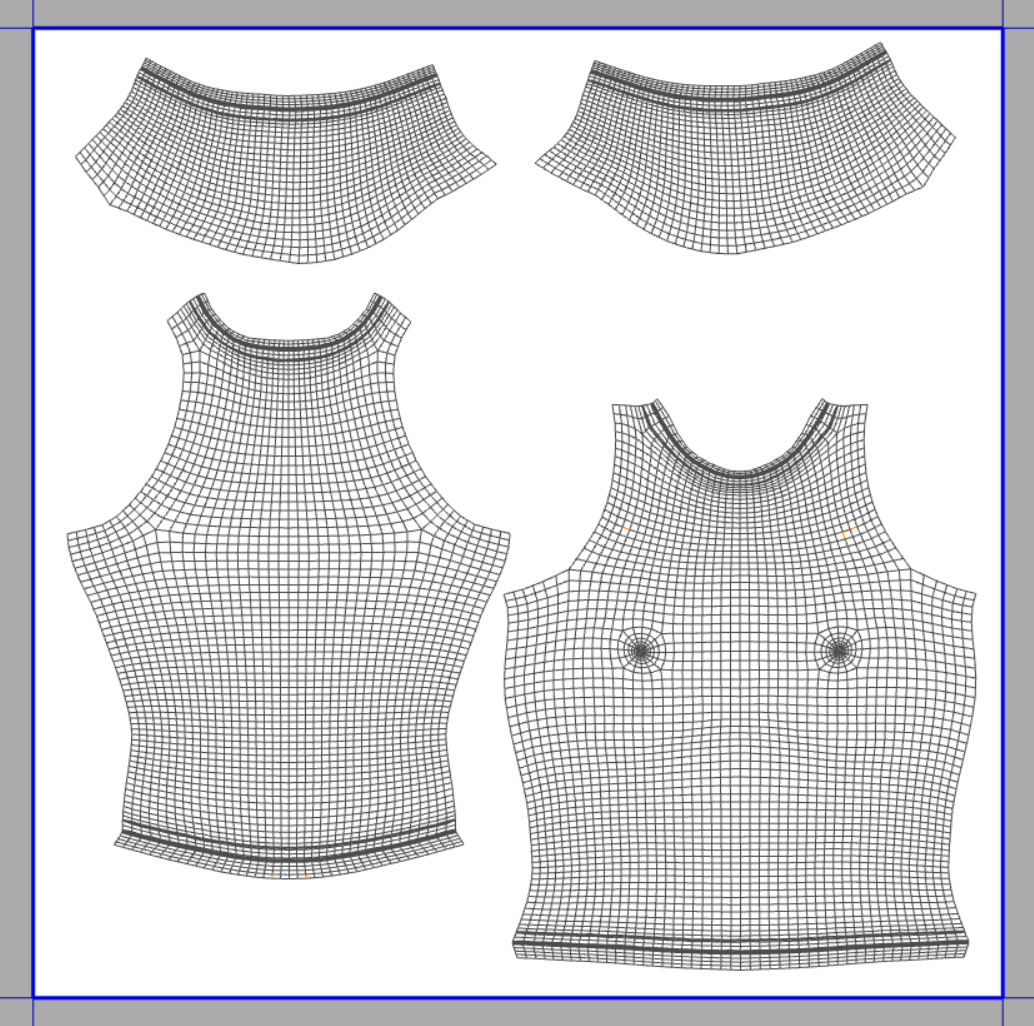
A simple TShirt modeled for V4 that I made today. It's has not terrible UVs and nipple geometry. It's an obj file, maybe someone can use it as a dynamic piece. I'll probably rig it as a conformer as practice and test out Dimension3D's Morphing Clothes utility to see how well it copies V4's morphs ++ to it. For personal use only please. As if everyone doesn't already have 30 TShirts for V4...
Mysterious Freebie:
A high resolution plane Poser Figure; 62496 Polys, UV Mapped, Single Actor origin 0 0 0

Not what on earth use could this have and why a figure?
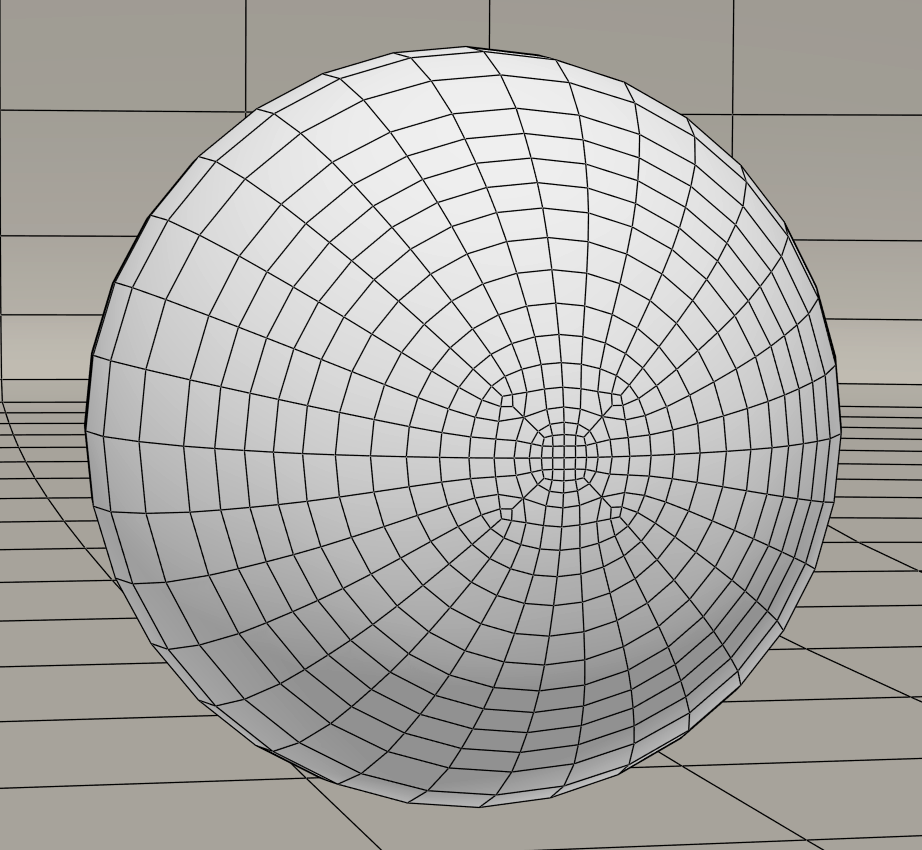
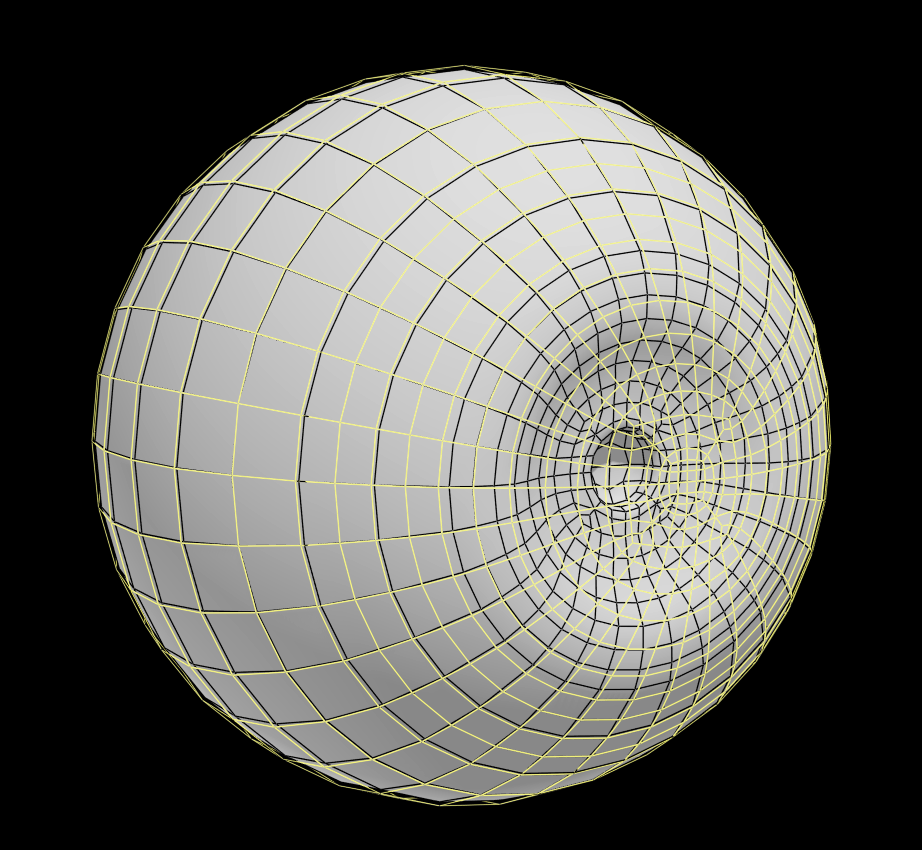
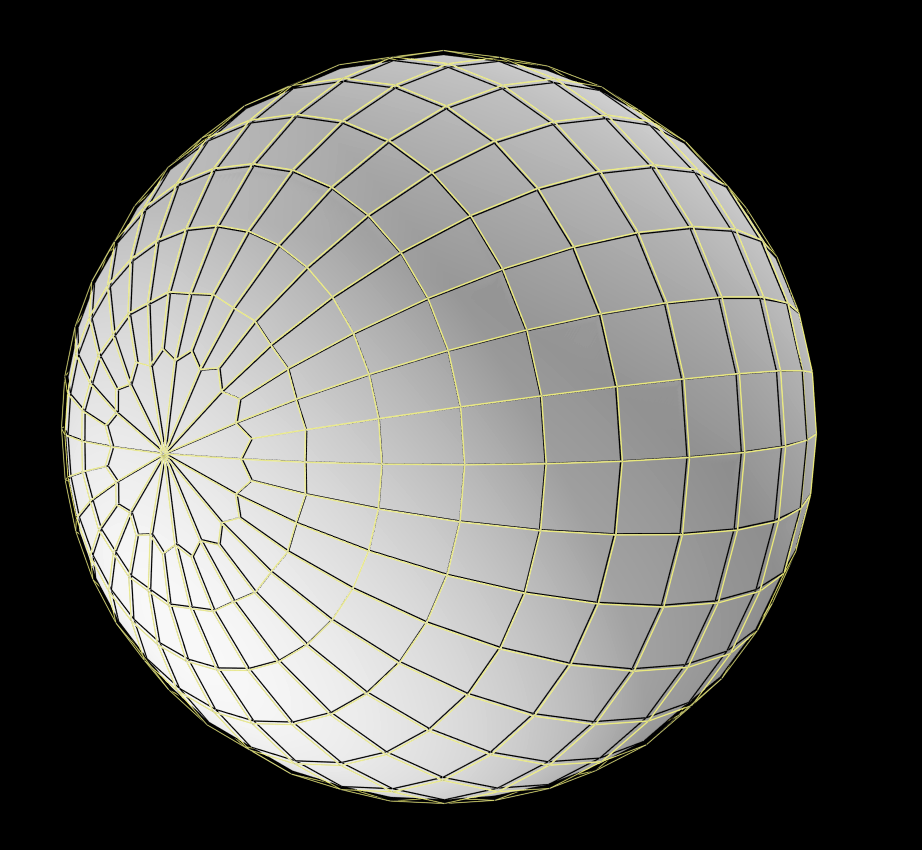
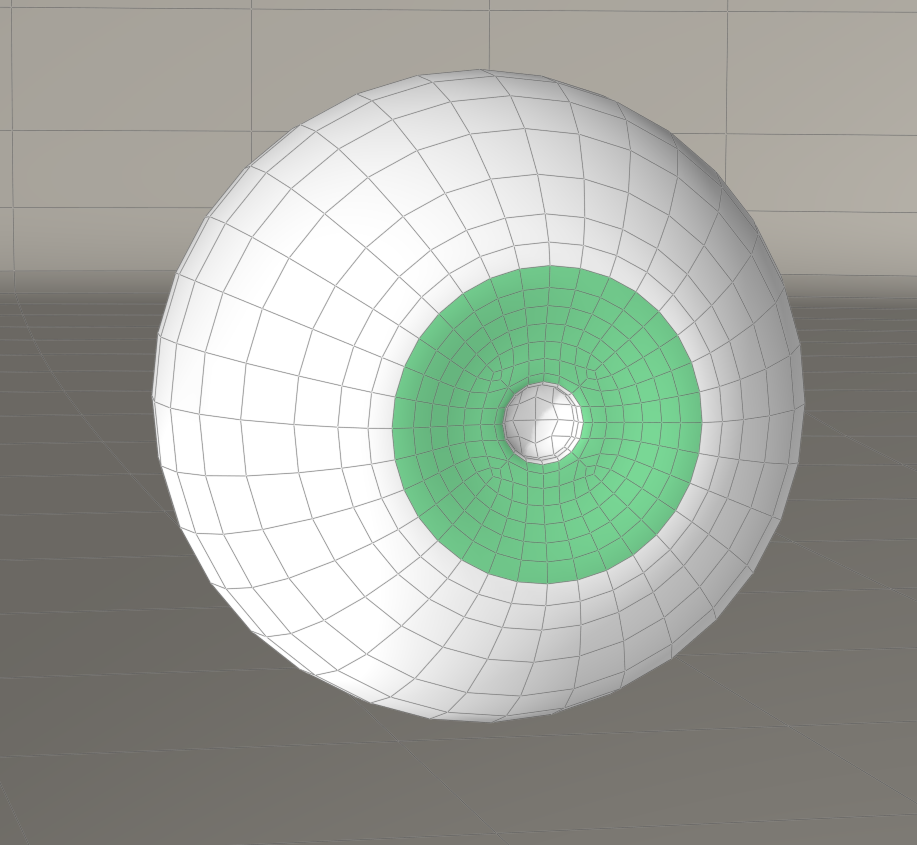
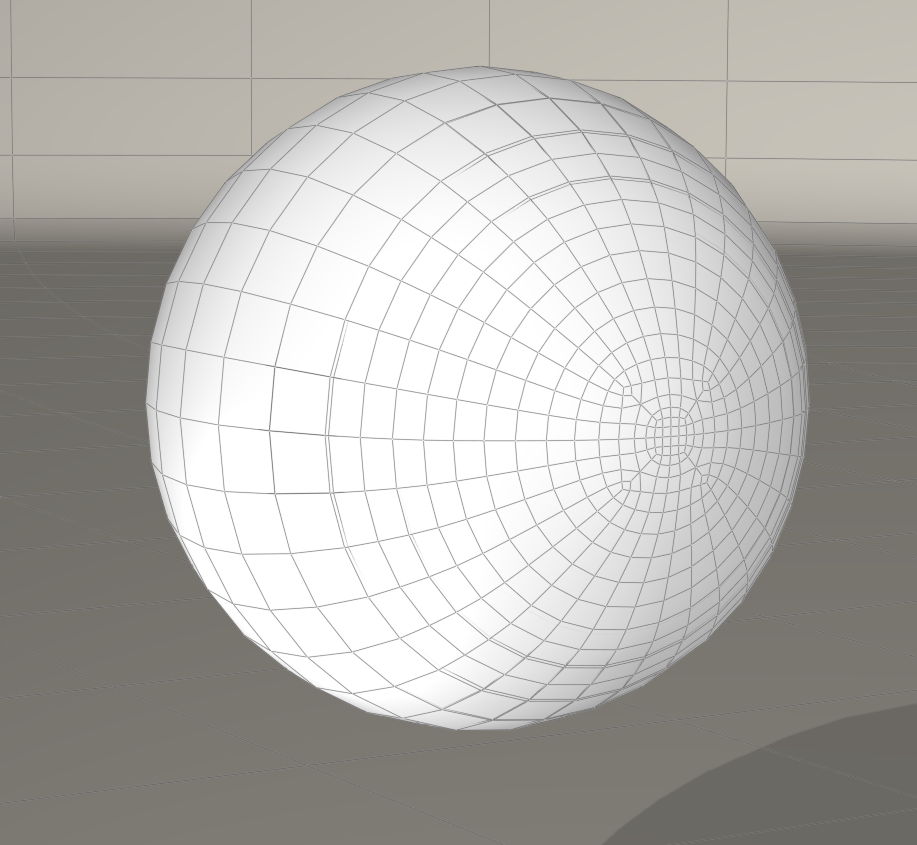
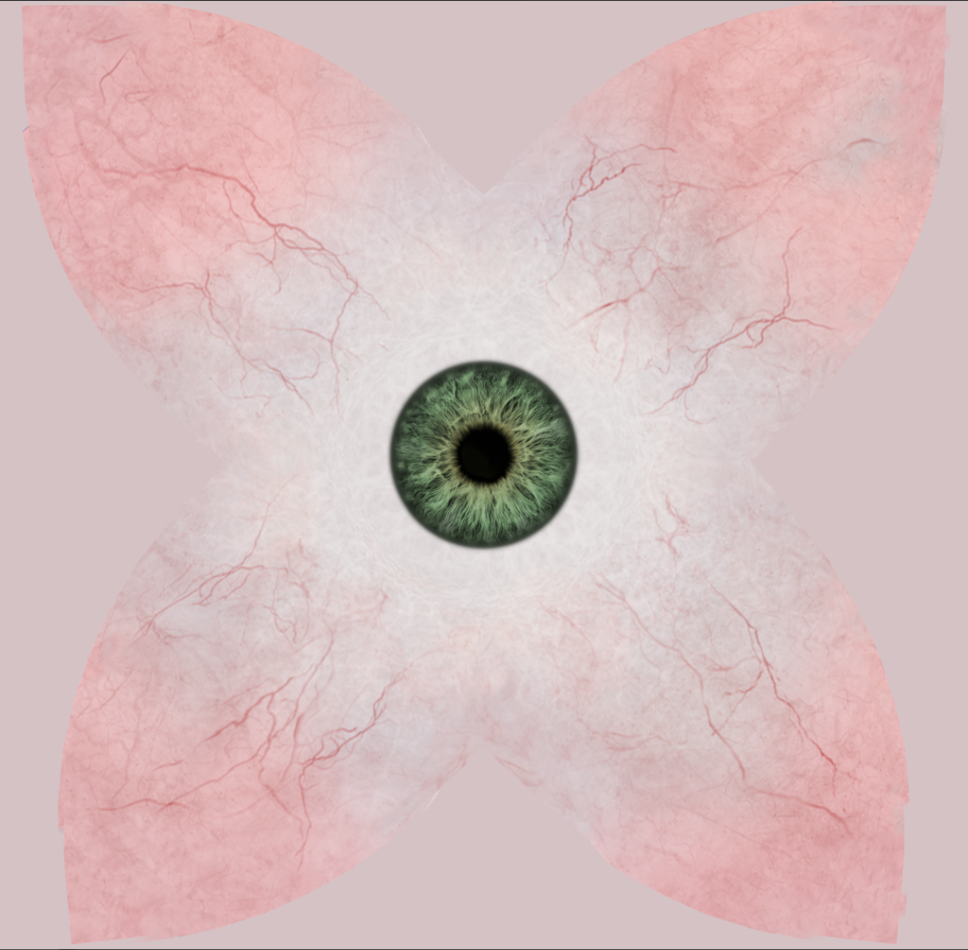
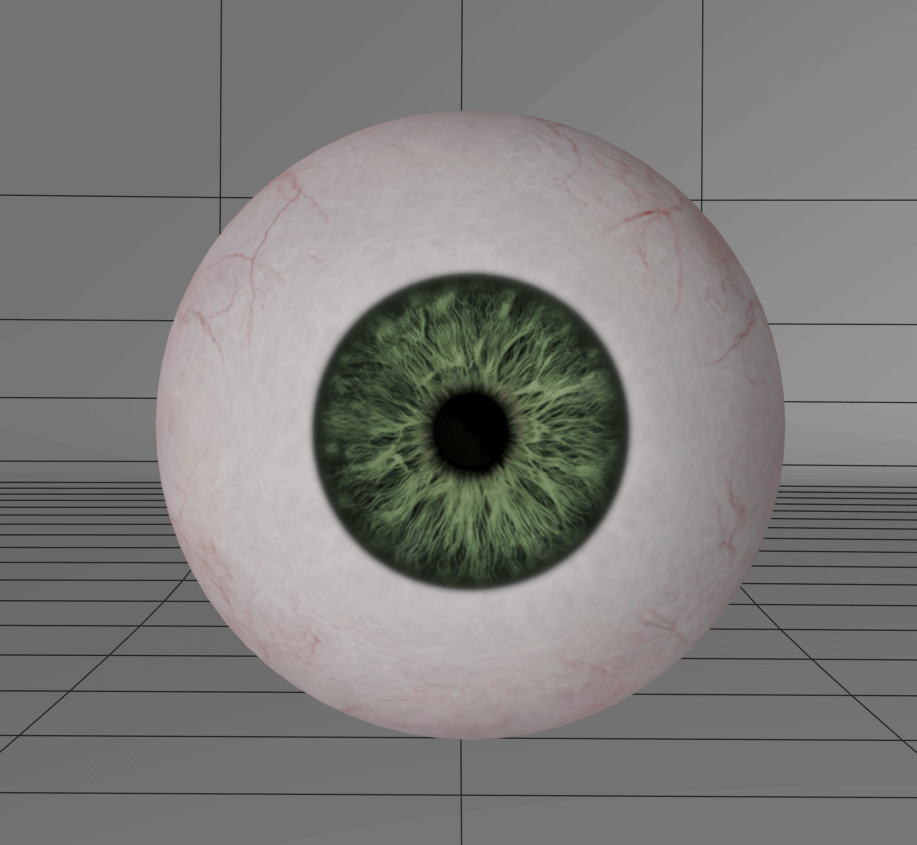
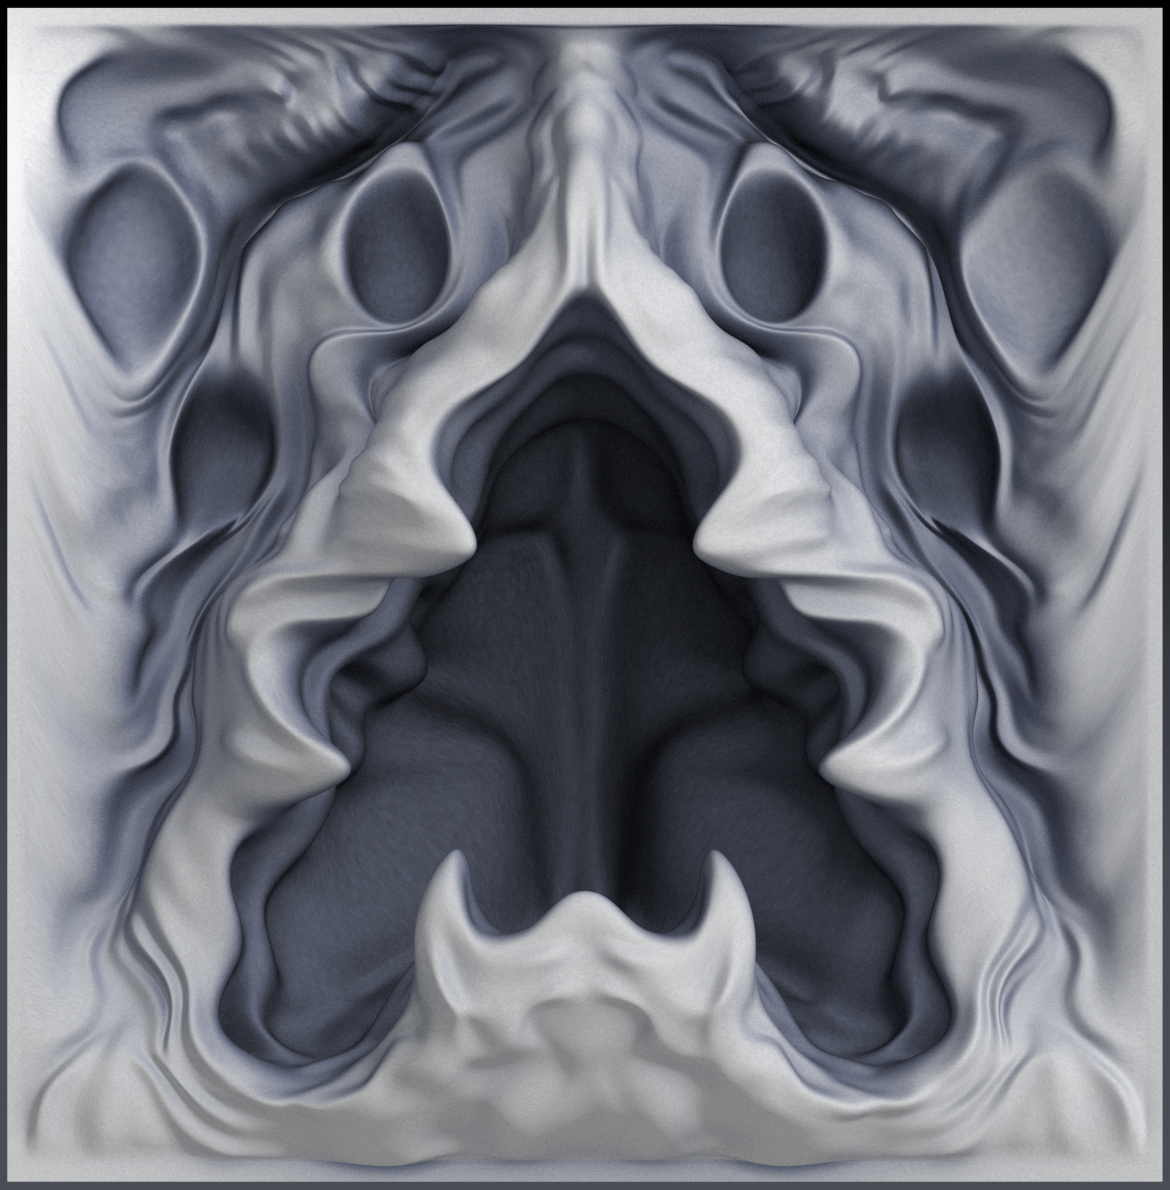
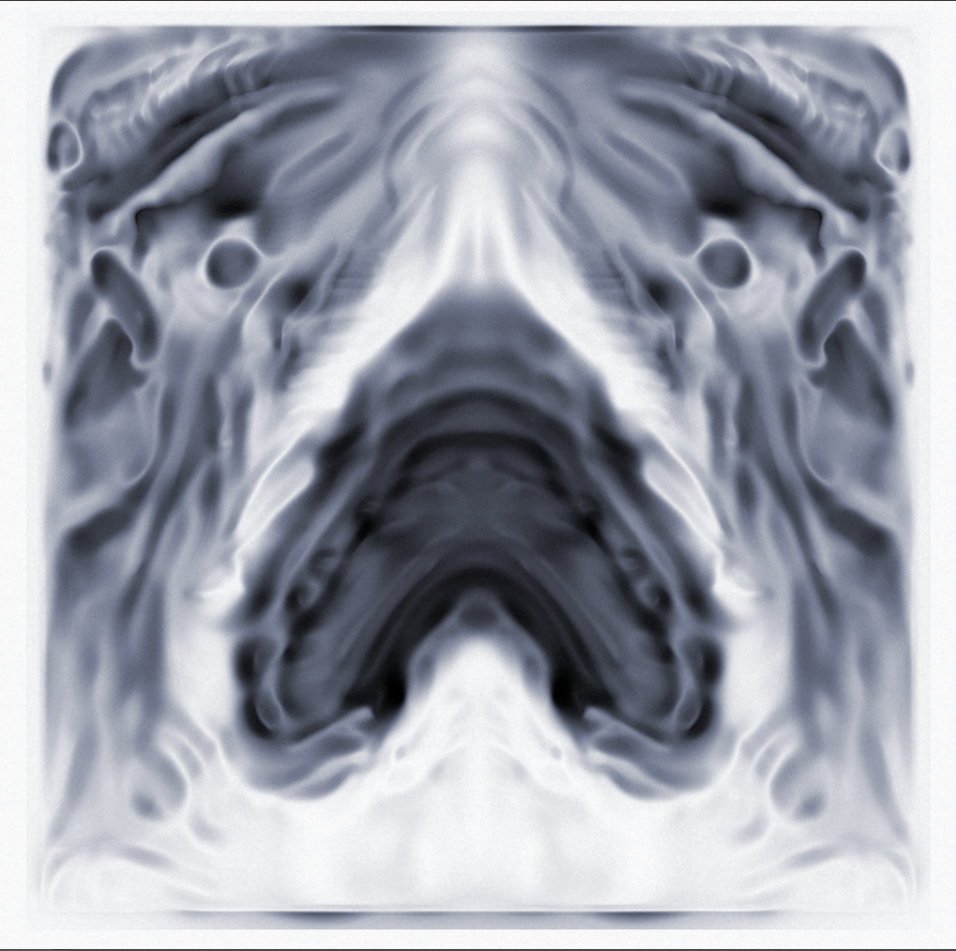
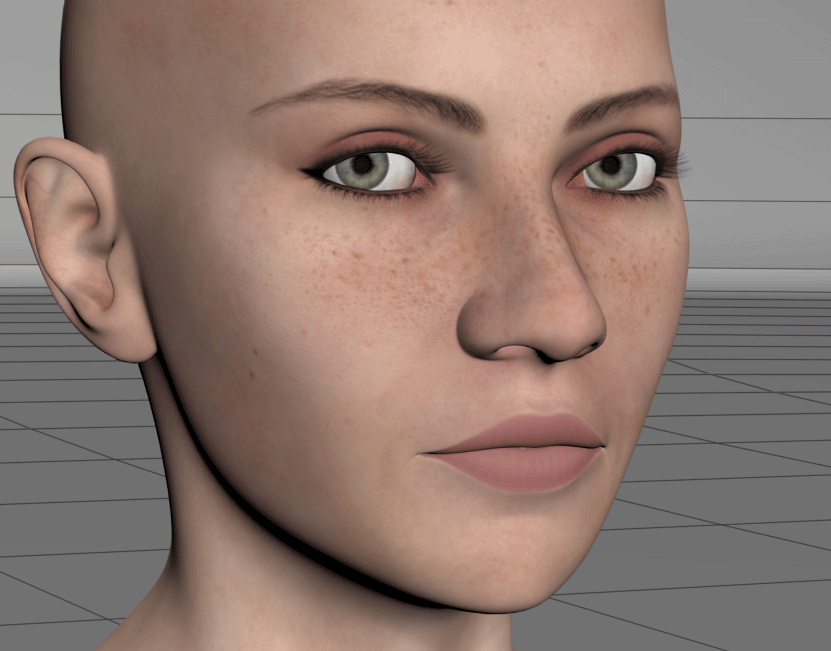
Just finished modeling a new eyeball. In this case I wanted a completely "water tight" Eyeball and cover entirely of quads, I need it for some things I'm playing around with. All of the other eyes I've made have high valence tri poles...
Cover
Eyeball
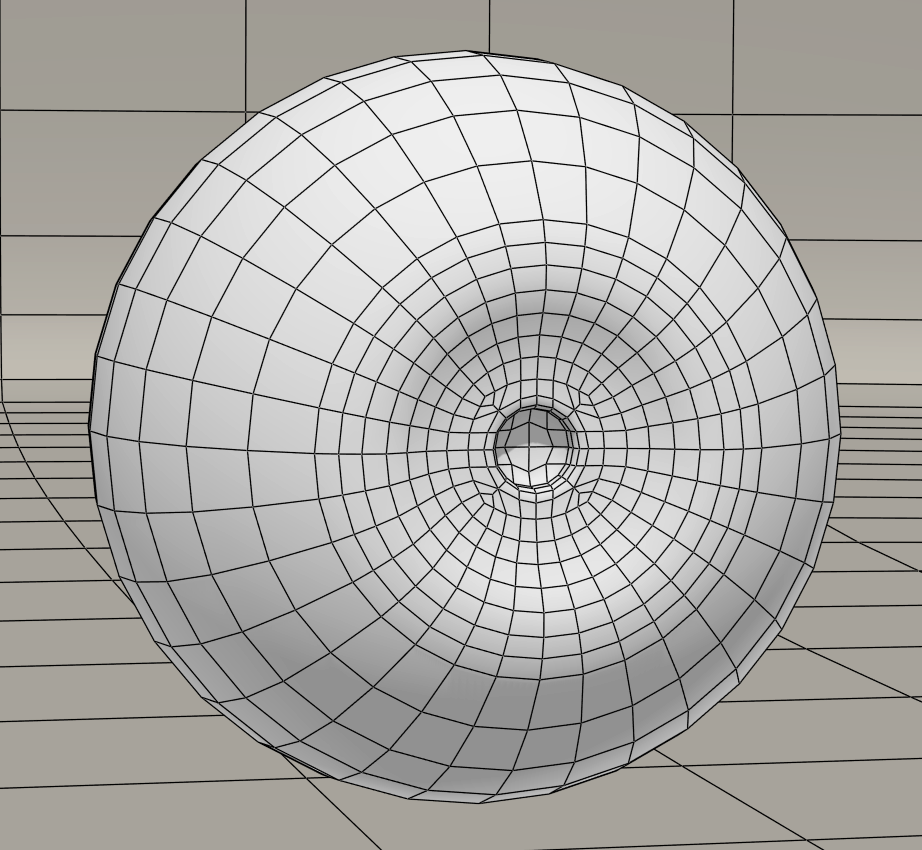
Combined rotational views, there is a 16 edged pole at the back but it's quads and being that it's at the back I figured it would suffice. UV mapping this eye will be a bit tricky... the edges need a bit more snugging but essentially this is the final geometry at base resolution.

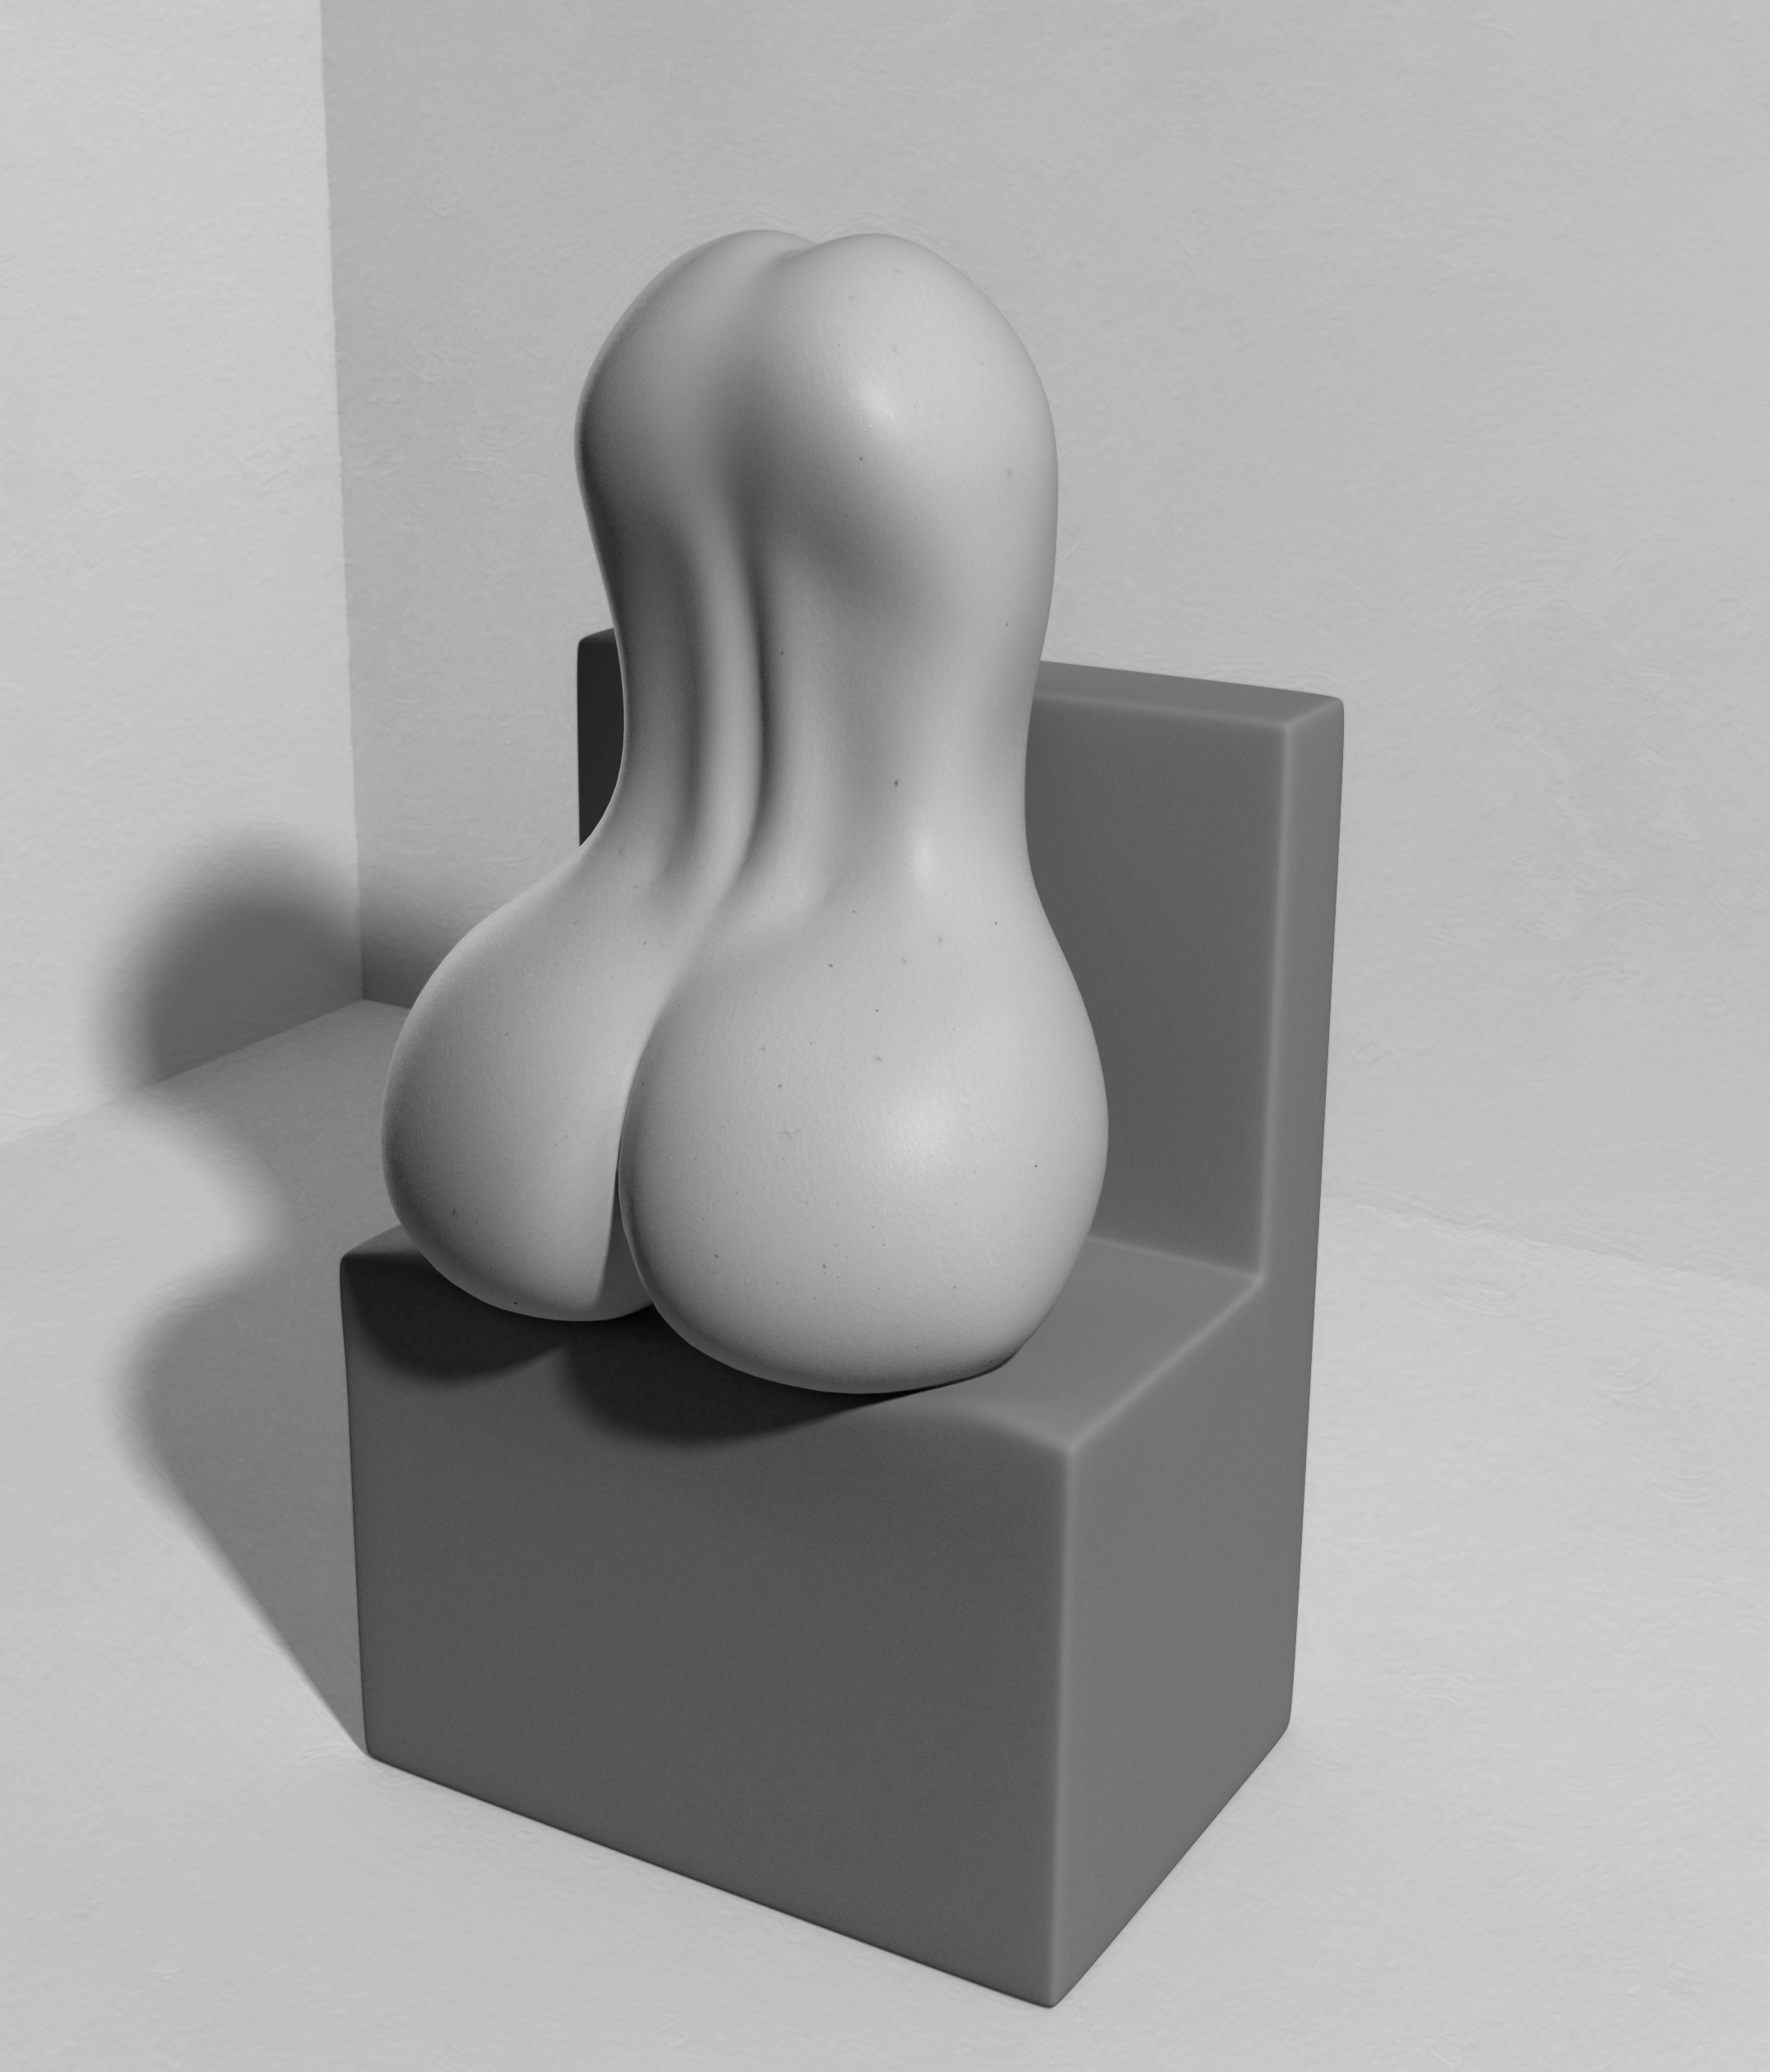
Content Advisory! This message contains nudity
Gallery Offering; here's 2 images rendered in Carrara with GI
Variation 1 on Scenes from the Gaol; Cararra, post Photoshop. Model by me. This render ended up with some self shadowing poly artifacts that I ended up keeping and incorporating in the image.
Venus Object; Carrara, Post Photoshop. Models by me. Just a weird fragmented figurative piece/ Study...
Just a question to the maybe one or two lurkers who happen to stumble by...
Is a cornea material zone incorporated into the cover an important thing for a Poser eye? I'm inclined to think it isn't as all of the reflections and specularity can be done by the cover material alone. Just curious if anyone had any thoughts on this.
The reason I ask is because I see that the daz figures generally have a cornea material, including Genesis, whereas La Femme simply has an eye surface material that encompasses the cover...
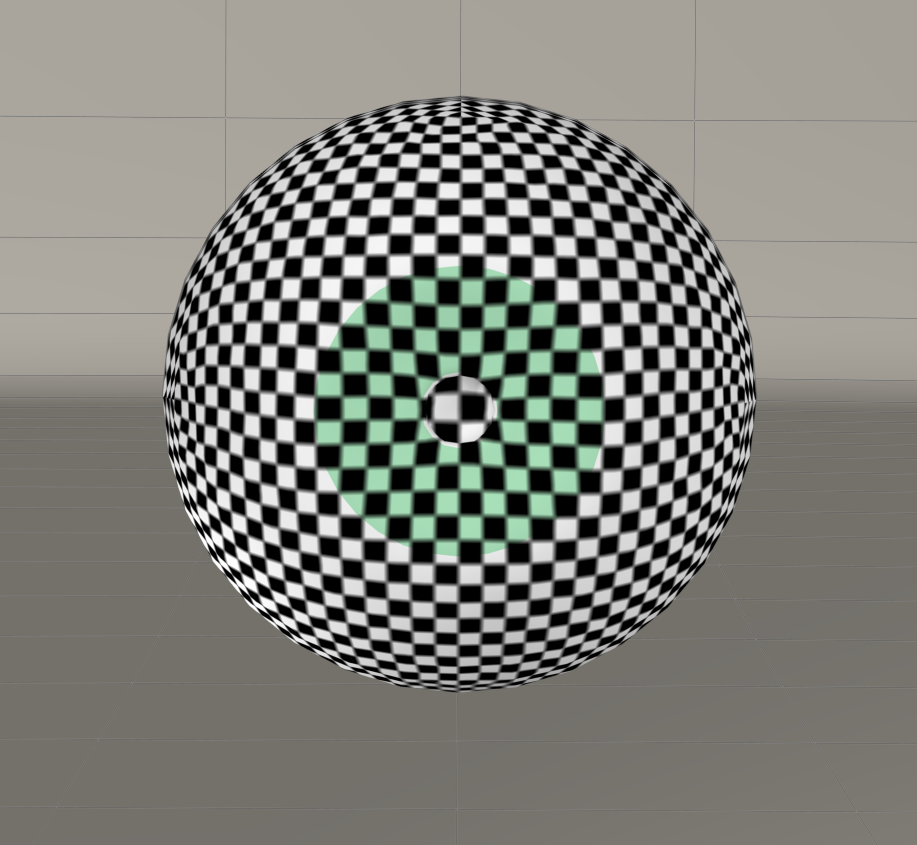
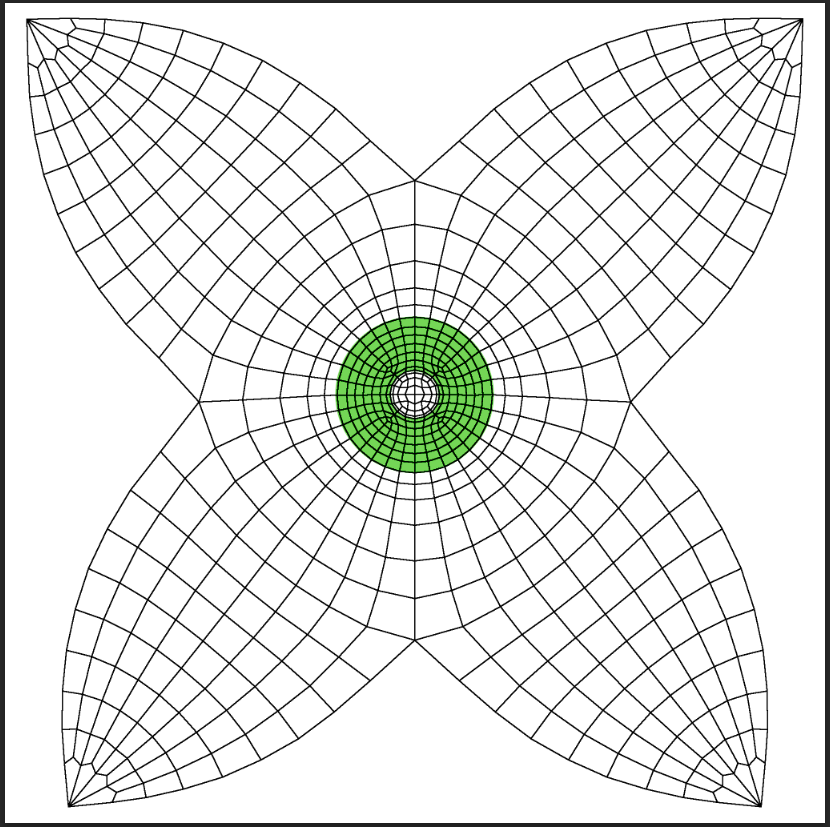
Finished UVing and started texturing my new Eyeball model shown earlier.
I went with a UDIM mapping with the Eyeball occupying the 0-1 tile and the Cover the 1-2 tile...
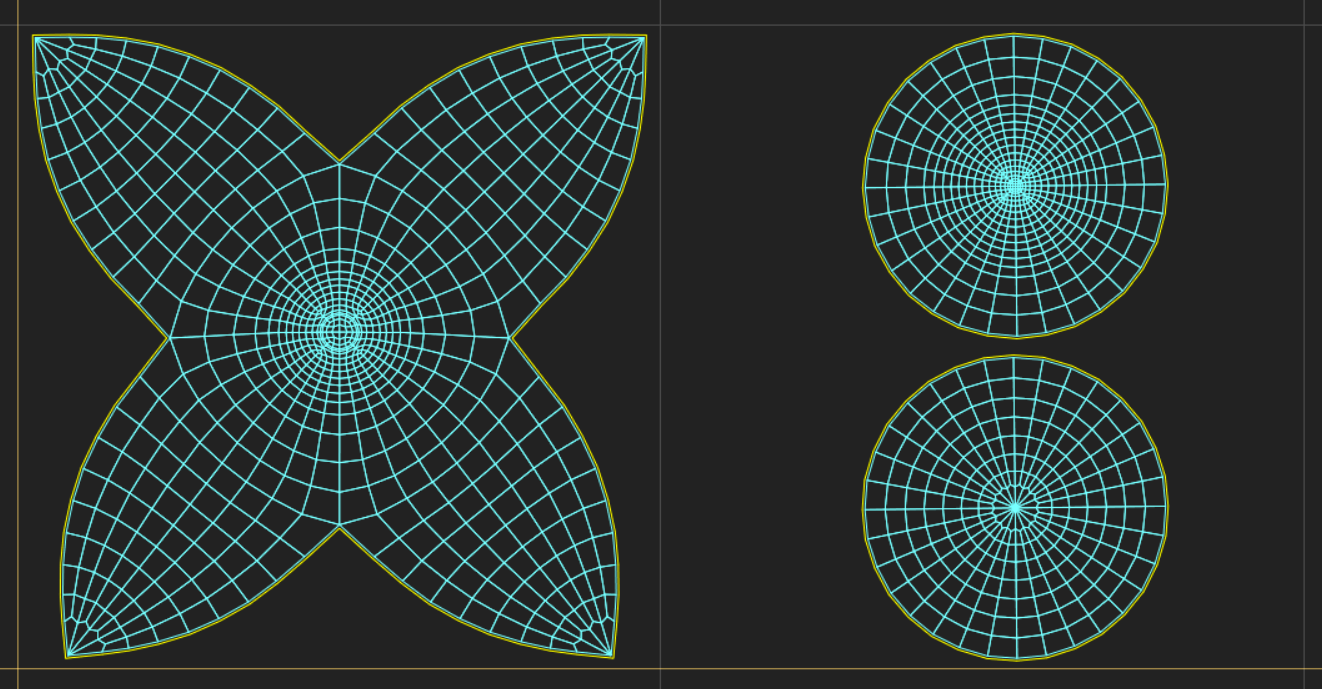
I managed to map it so there is a minimum of distortions overall, there's a tiny bit of stretching but nothing that will show on the textures themselves or at least not noticeable. Here's the main Eyeball with a UV checker applied, green indicating the iris material
The Cover
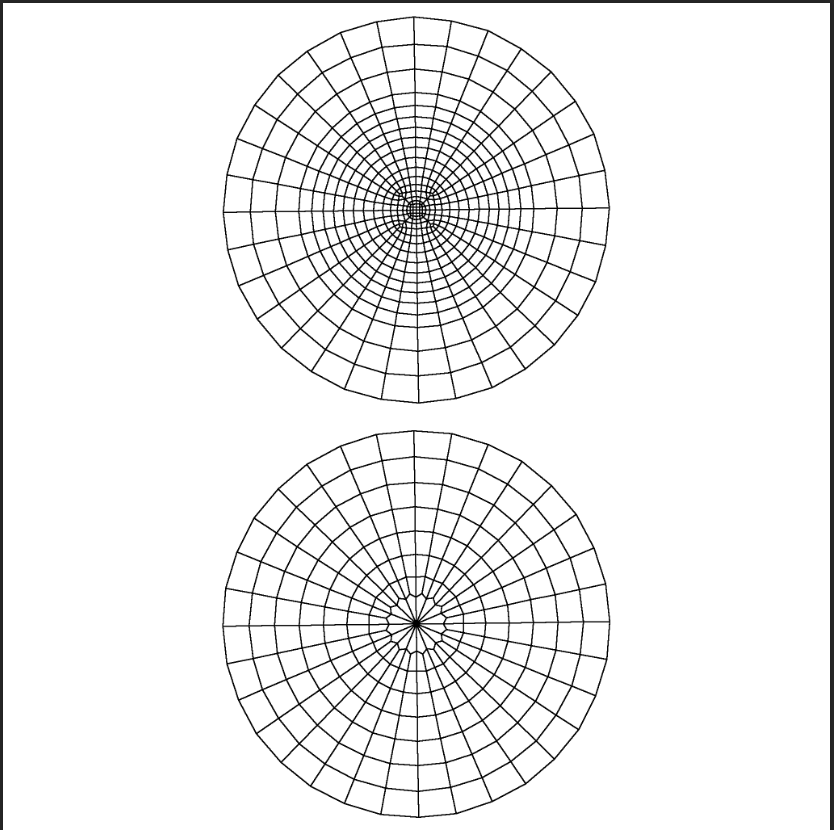
Wires Eyeball
Wires Cover
Templates
I also started the texturing process. For this I'm repurposing some eye maps I made for the Nova Poser figure; as I created those textures with each element on a seperate layer in a psd, it was easy enough to rescale and reposition everything to fit these UVs and then fix seams with the 3d painting tools in Mudbox. I mostly used the clone tool there.
Here's an example texture for the Eye...
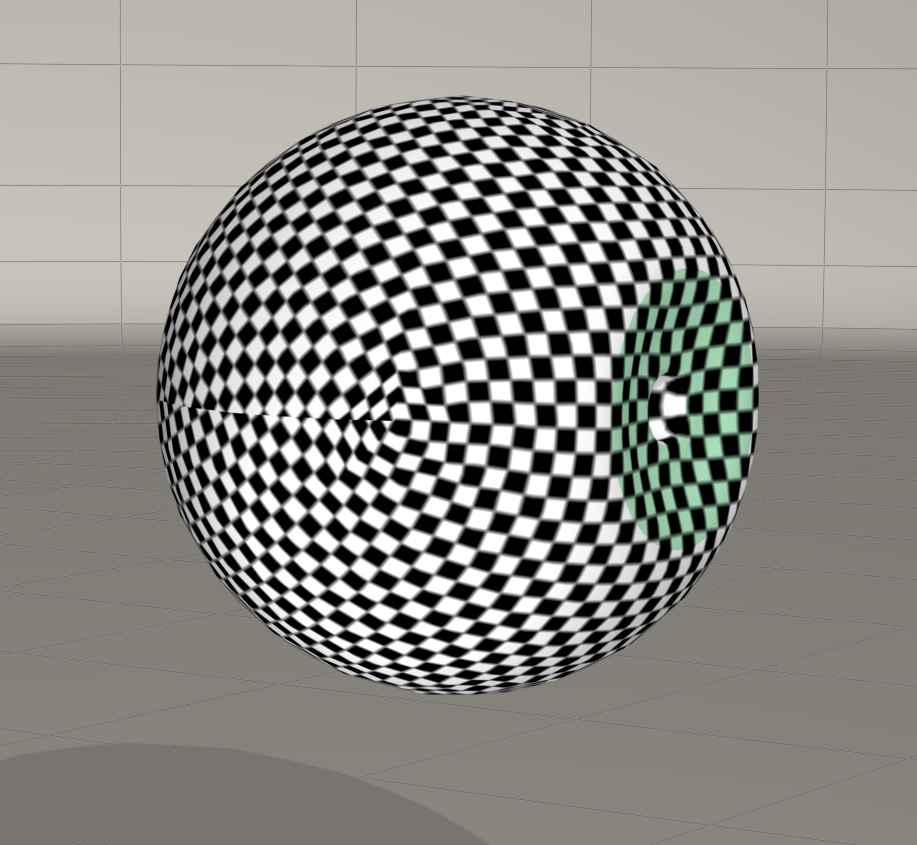
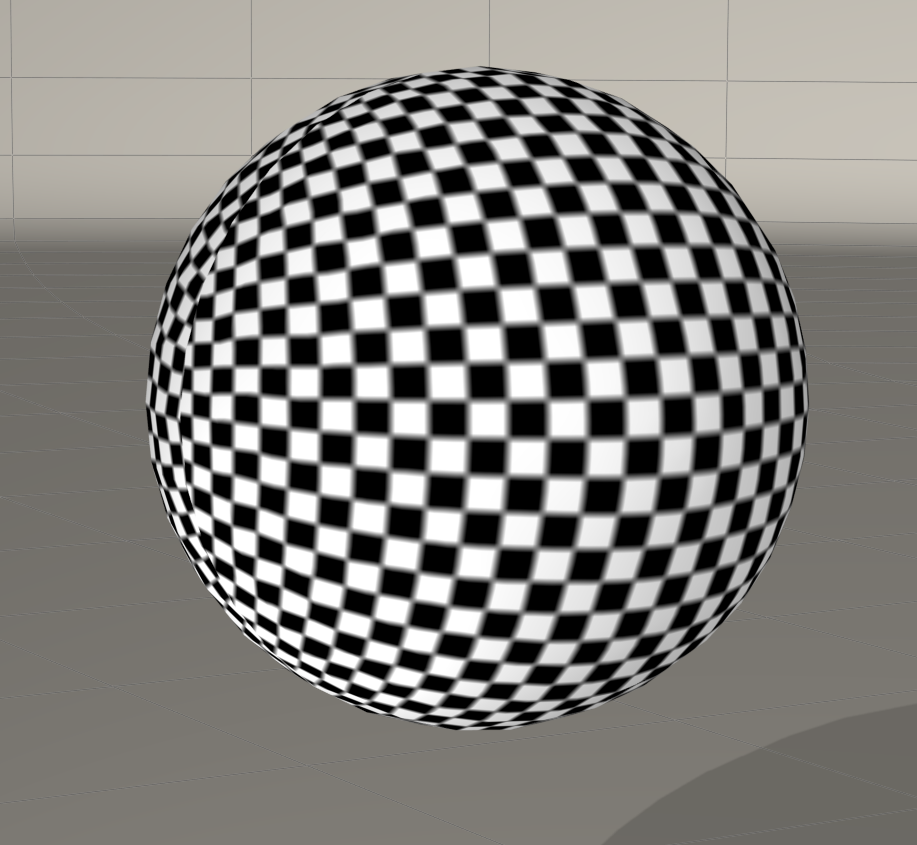
A turntable preview animation out of Poser, one level of subdivision
This new Eyeball should be optimal for my upcoming projects, seamlessly and over all mapped. All that needs to be done is a bit more texturing. I'm very happy with how this turned out...
Content Advisory! This message contains nudity
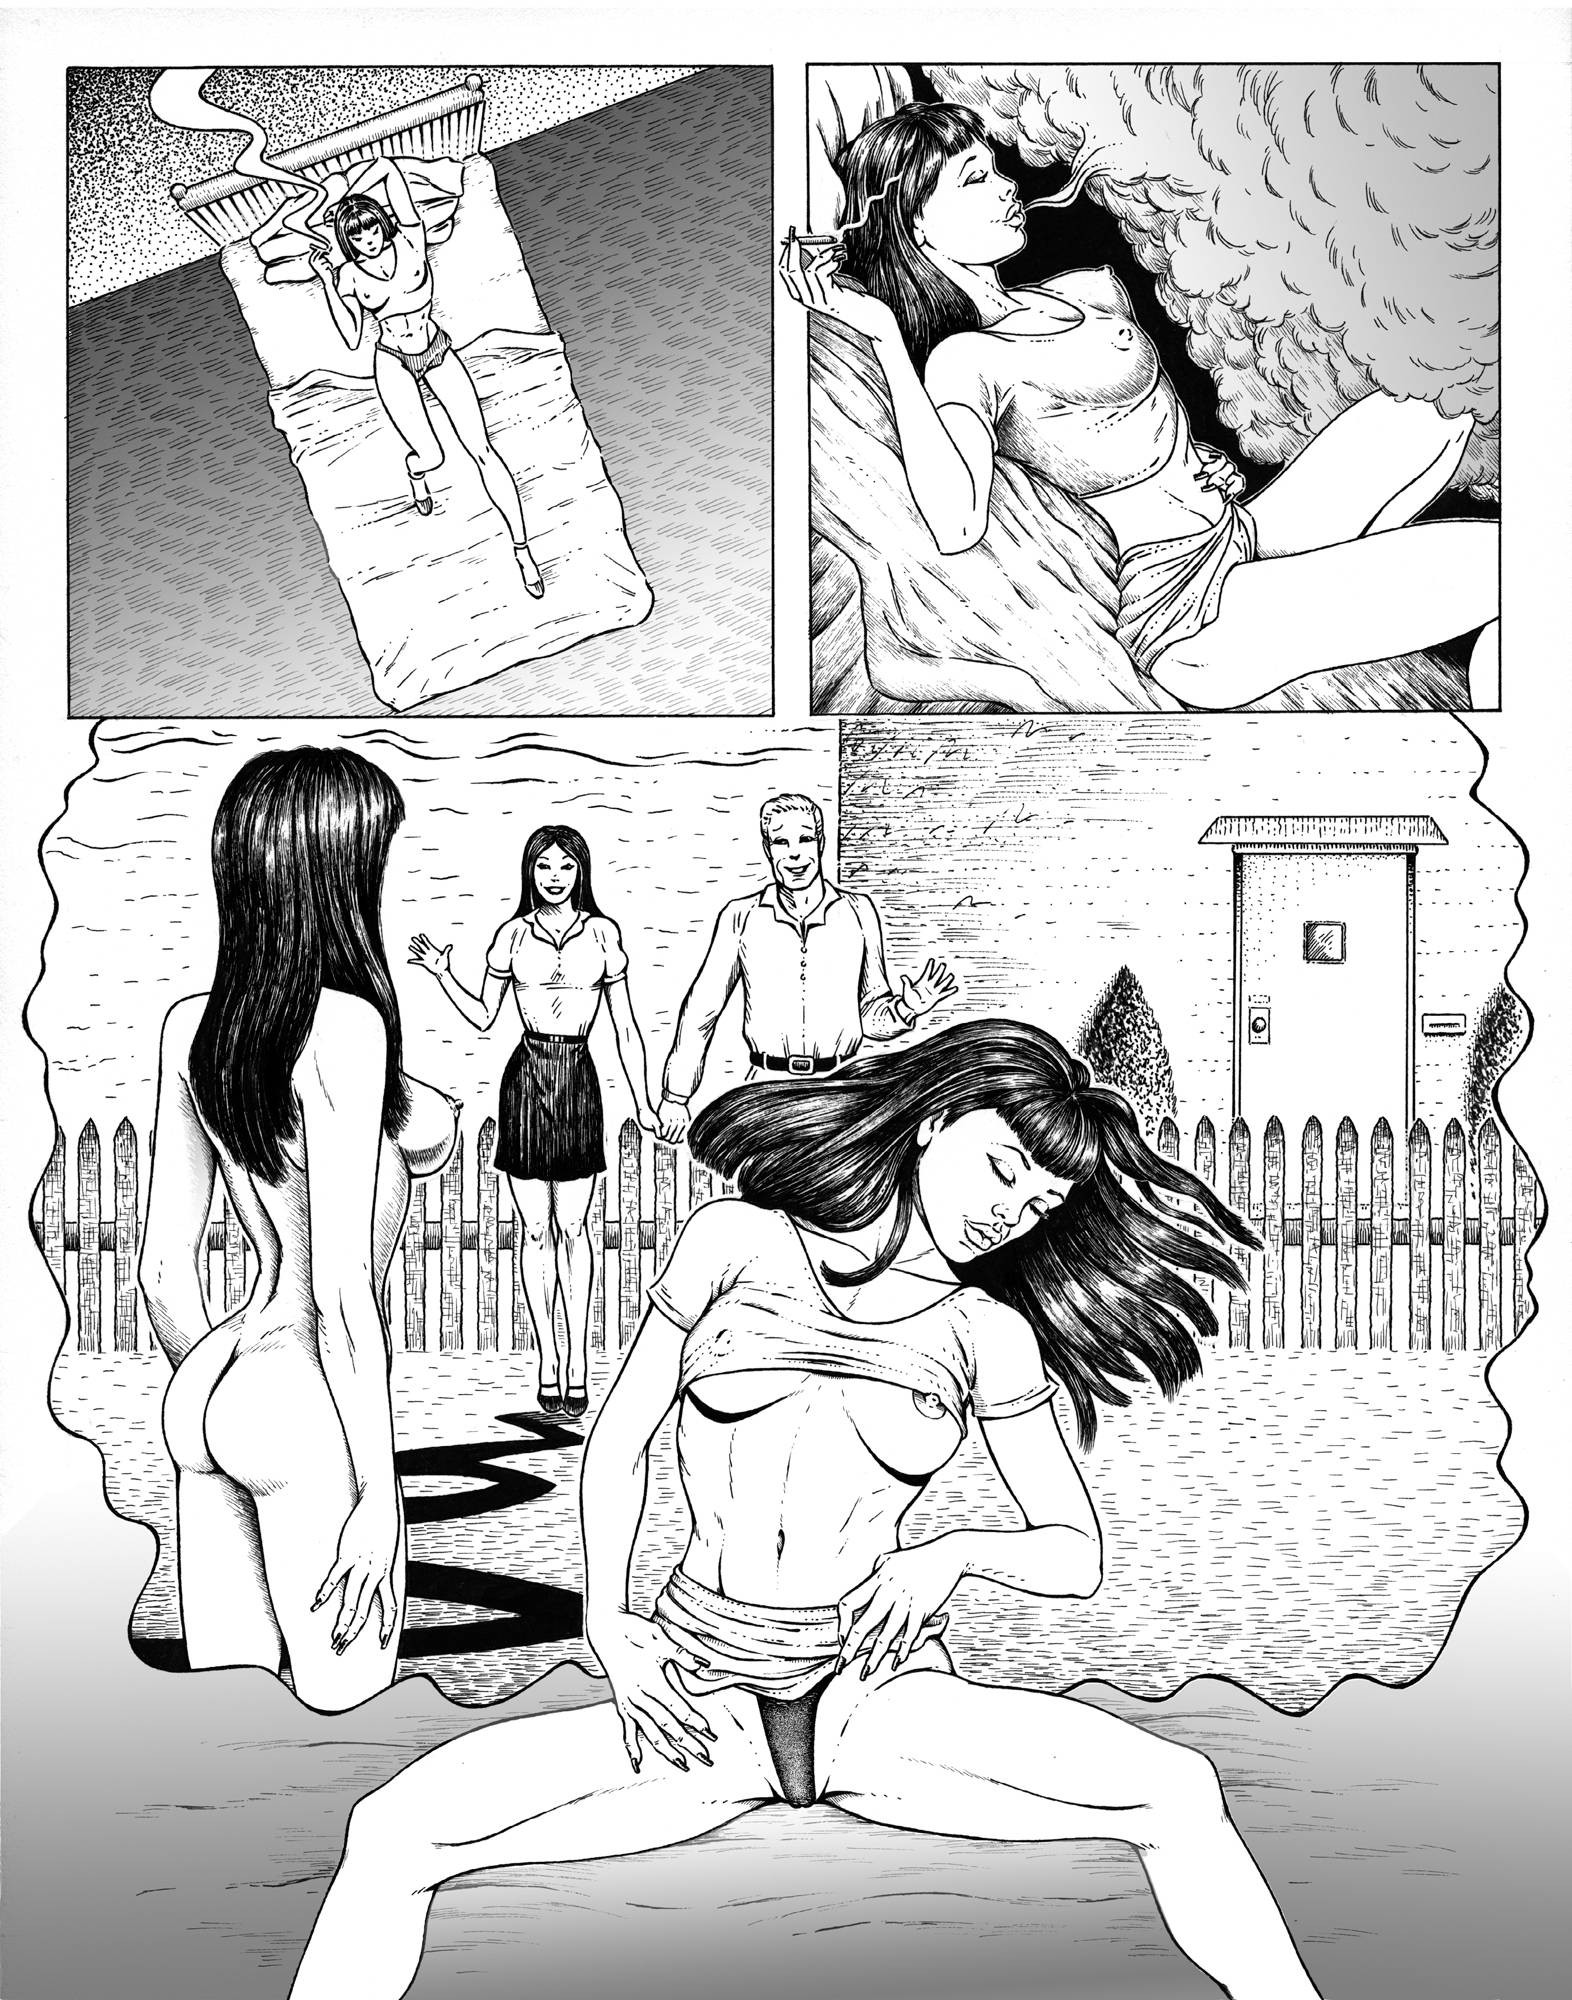
Gallery Offering; a page from my unfinished (though finished in storyboard form in a large lined paper notebook) comic book 'FILTH'. Medium is Pen and Ink on Bristol board. Gradients much later added in Photoshop.
Much of my early comics work I can't show here (stuff I did in my twenties when I used to smoke a LOT of pot) as it would be an extreme violation of TOS. I was early on heavily influenced by underground comics...
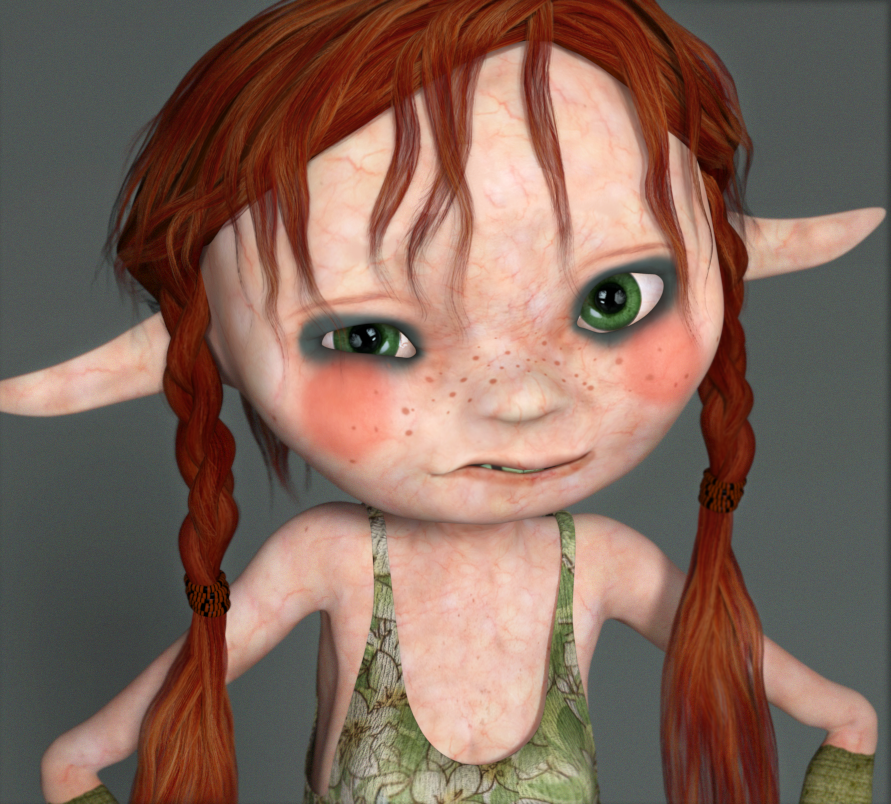
Returning to a character sculpt that I left unfinished years ago...a female Orc, Snarla. One of my old Dungeons and Dragons characters immortalized in polys for V4. The skin should be fun to paint. Was also thinking of creating some simple vulture motif jewelry for her, a nose ring and earrings. The character was a Barbarian class with a pirate background and path of the totem warrior (Eagle substituted with vulture, same specs).
http://dnd5e.wikidot.com/barbarian:totem-warrior
I already have her costume elements that I bought a while back
https://www.renderosity.com/mod/bcs/sexy-savage-armor-v4-a4-g4-/88199
https://www.renderosity.com/mod/bcs/power-barbarian-v4-a4-g4-elite-f4/90863
Maybe I should make her tusks/fangs a little longer?
And yes... She has gigantic battle impractical boobs that have proven the downfall of many an overconfident Frost Giant.
Gallery Offering; years ago I started using a high resolution plane to make relief sketches in Zbrush, sort of like a 3D/2D sketchbook. I would store the various "sketches" with the plane as morph targets as pages in a sense. A lot of times the sketches would just be random shapes and 3d textures; surfaces and scapes and such. Sometimes I'd do more fully realized things, actual representational reliefs. I ended with quite a mass of morphs for the plane, unfortunately I lost the project (not to mention years of work on other things) when my hard drive on my old PowerMac G5 died. It did save a few images from stuff I did with the plane though...
The plane figure I shared earlier in this thread will be the start of a new Plane Sketchbook. I chose to use a cr2 this time so that I can more easily take advantage of GoZ subdivision morphs, difference morphs, and pmd injection. I'll document here in this thread my sketches (morphs), conformers created as add ons for the plane, and various other things involving the new sketchbook, as they occur...
Clean House Freebie...
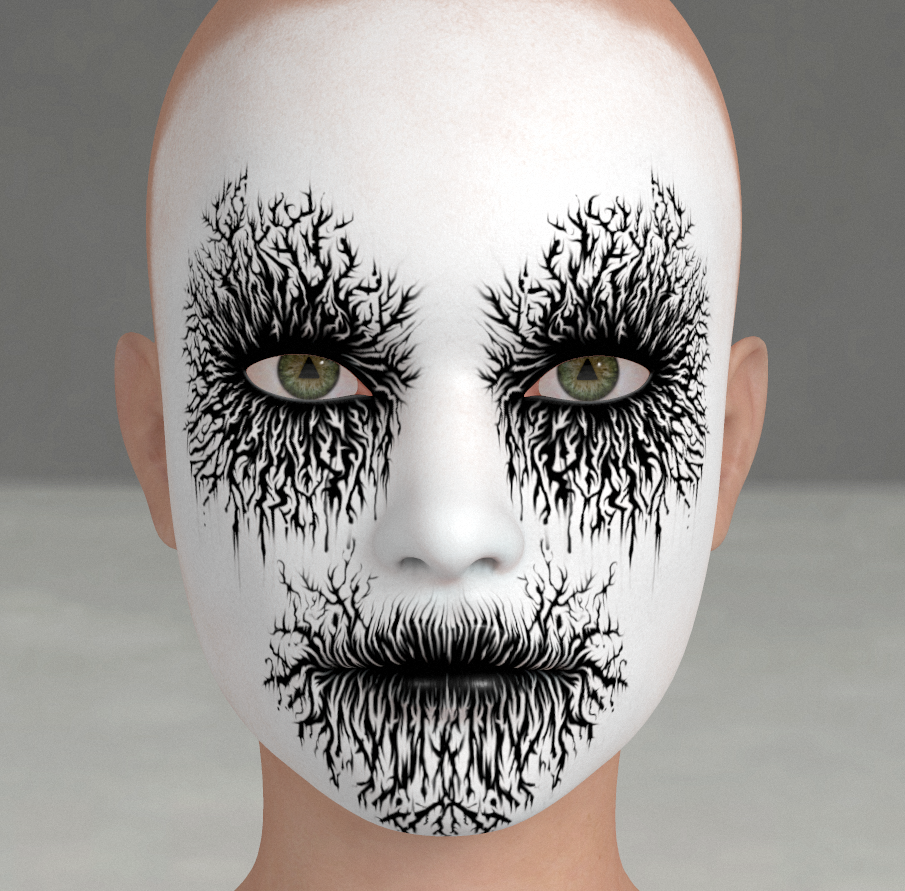
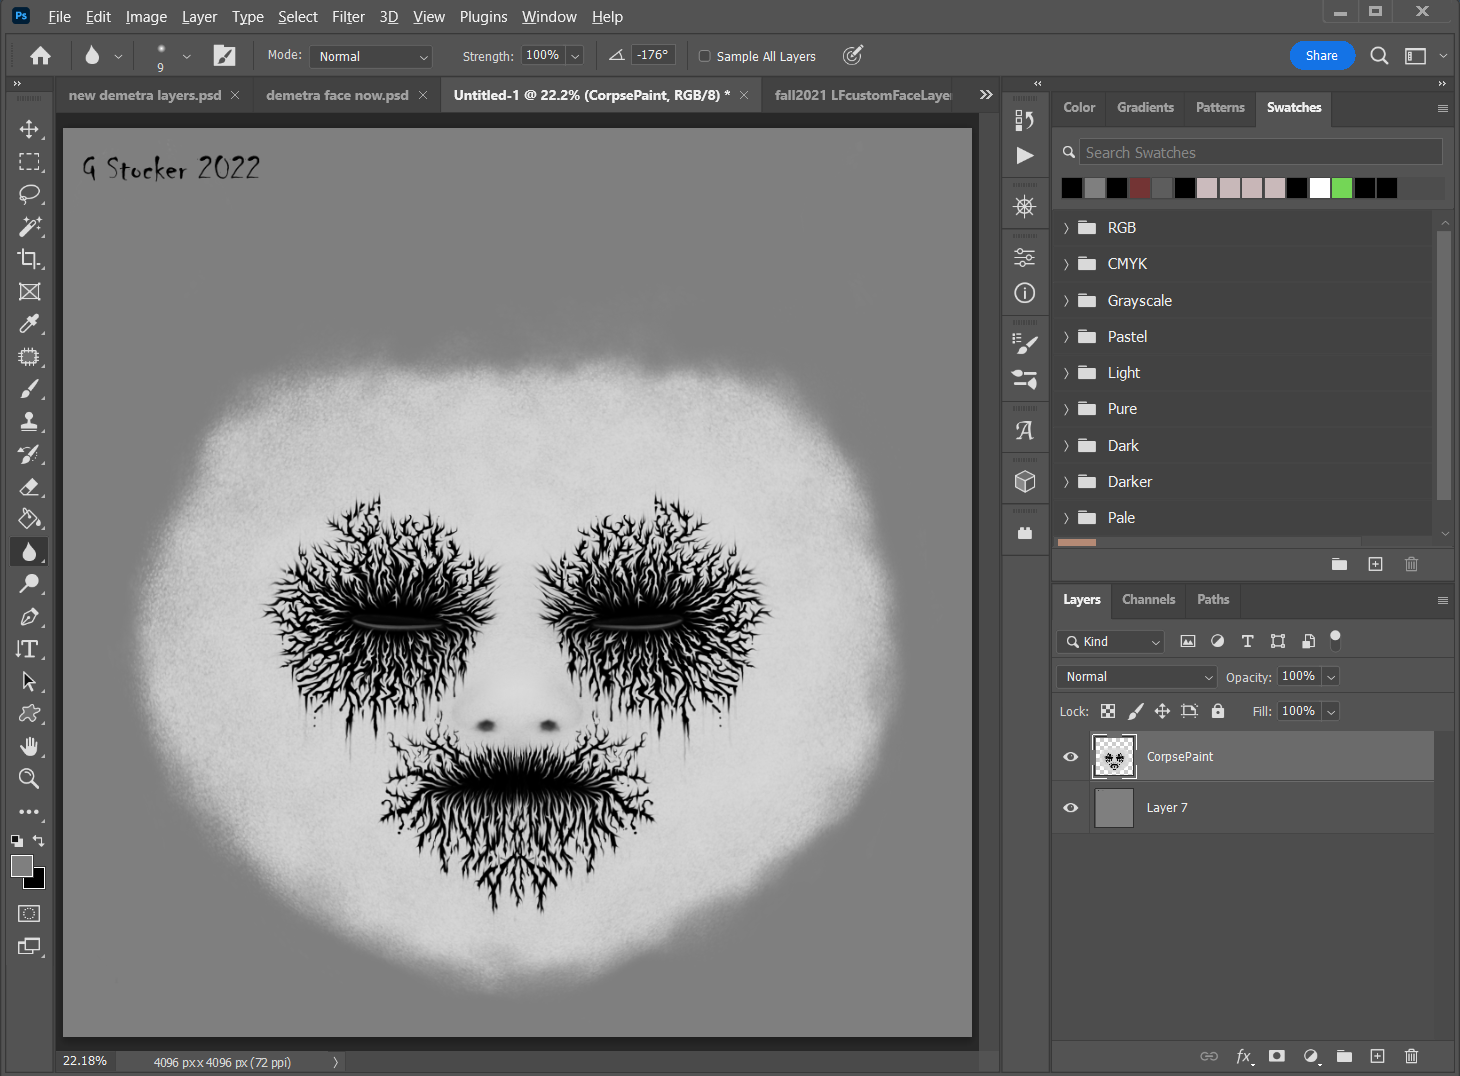
A Norwegian Black Metal Style Corpsepaint for La Femme.
https://en.wikipedia.org/wiki/Black_metal
The makeup is on a transparent layer. It merges well with just about any existing face texture. Import the file into an image editor and copy the makeup layer above the existing texture and merge down, save out a flattened copy and apply image map to skinface and lip materials.
Clean House Freebie
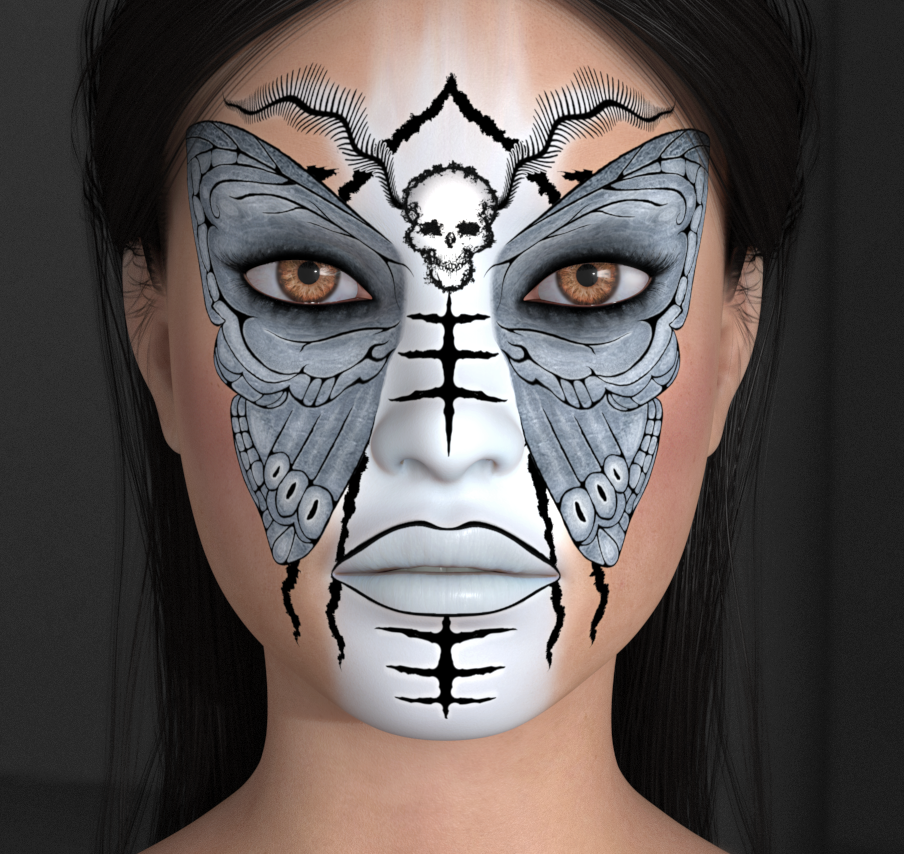
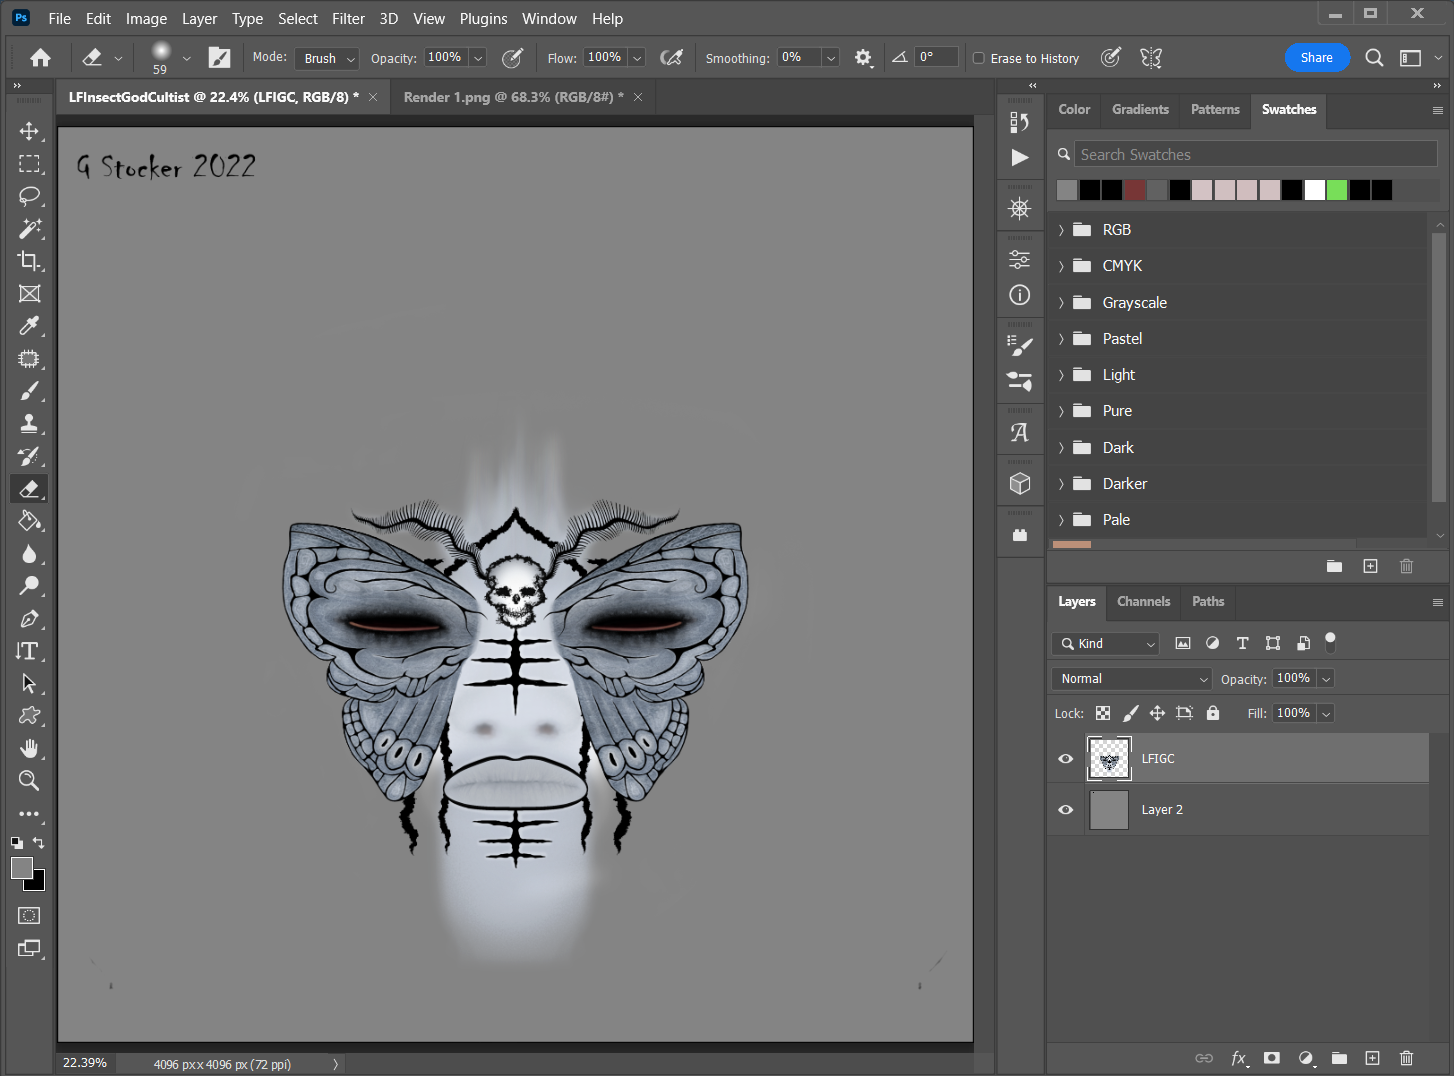
A makeup for La Femme inspired by Edward Gorey's The Insect God. The makeup is on a transparent layer. It merges well with just about any existing face texture. Import the file into an image editor and copy the paint layer above the existing texture and merge down, save out a flattened copy and apply image map to skinface and lip materials.
Content Advisory! This message contains nudity
Gallery Offering
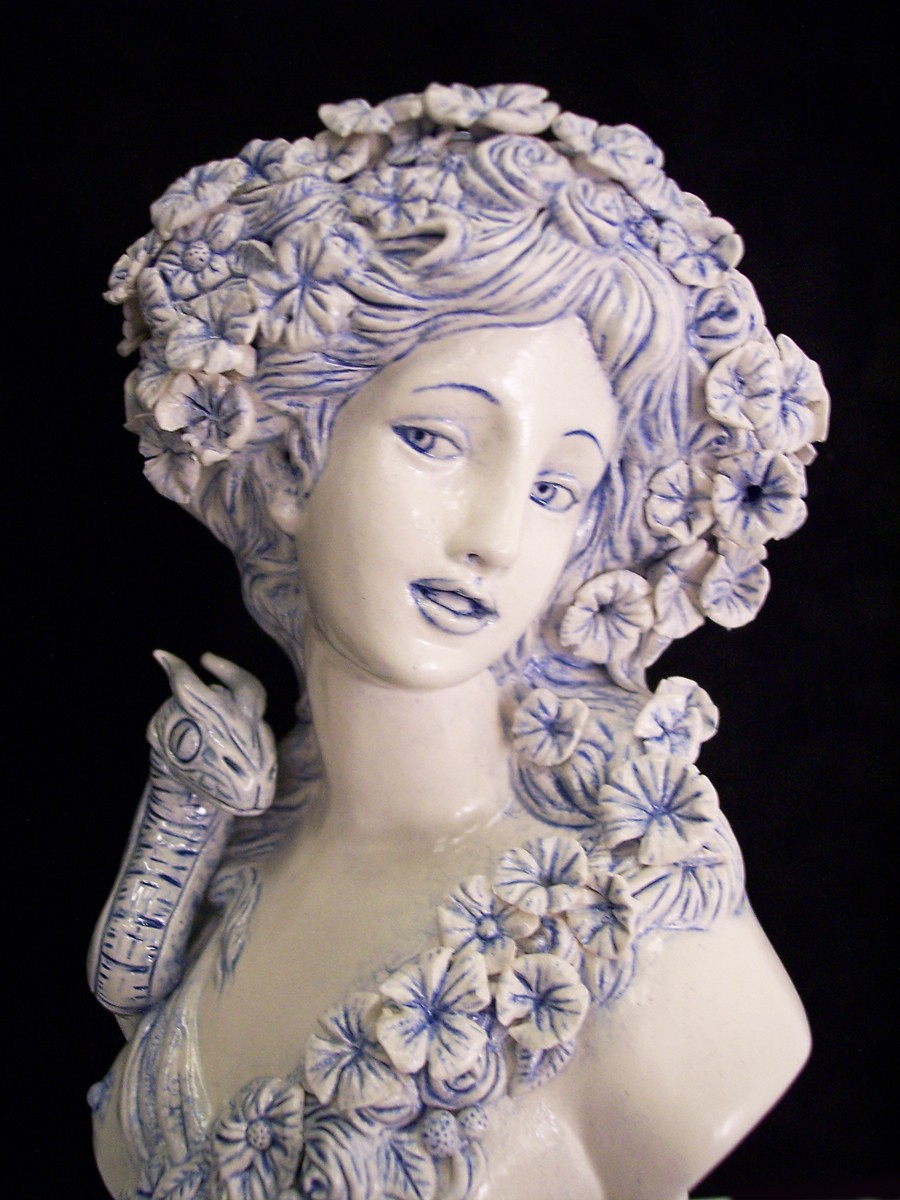
Lilith and the Serpent; Earthenware, Ceramic Underglazes and Glazes.
A small ceramic piece I made when I was a student at the San Francisco Art Institute, I guess about a foot high, maybe smaller. The gallery I was contracted with at the time was having a fund raiser event and asked if I'd donate the piece. I didn't attend but apparently it was a popular item. Wish I had taken better photos of it, but I feel that way about a lot of my older work.. much of which is who knows where and undocumented.


bwldrd posted at 3:33 PM Mon, 10 October 2022 - #4446312
The Sera's Secret stuff is basically done. I just need to go back to it and redo the textures. Because of the way the limbs are on the same tile as the torso I'm afraid the textures will have to be 8k for the body. In any case I tried contacting Futepen for permission to redistribute a remapped obj. I never recieved a response. So expect that to be actually finished and released eventually. All told its like 100 morphs, quite possibly more, textures, and a conforming tongue. As far as Missus goes I'm on the fence with that one, I started remodeling the figure but I'm not quite sure where I'm going with it. It's on my agenda though. I work full time and have about 10 different irons in the fire and growing. Missus is an elaborate project on the morph and modeling front.So let me be a nuisance here and ask, are you still working on your sera project and missus update? :)
Plus Antonia 1.3 just had a more or less stable release that I'd like to make some things for that.
I expect I'm going to completely stop working on other peoples figures and concentrate soley on my own things.
At the moment I'm tidying up some La Femme character morphs that I've been playing with for a long time, so expect my next freebie and set of renders to concentrate on that. I should be done that sometime this coming weekend, I'm in the render stages for a set.
I've been working 6 days a week so things are a bit difficult to work on as I'm basically exhausted.
In any event I'm not going anywhere so projects are continuing. Sorry no more definitive answers to your query.
TY for the follow up. Yah, don't burn yourself out, good state of body and mental health first :)
I was just wondering as I have a hard time keeping up anymore on who's doing what, etc.
--------------------------------------------------------------------------------
Consider me insane if you wish, but is your reality any better?
Content Advisory! This message contains nudity
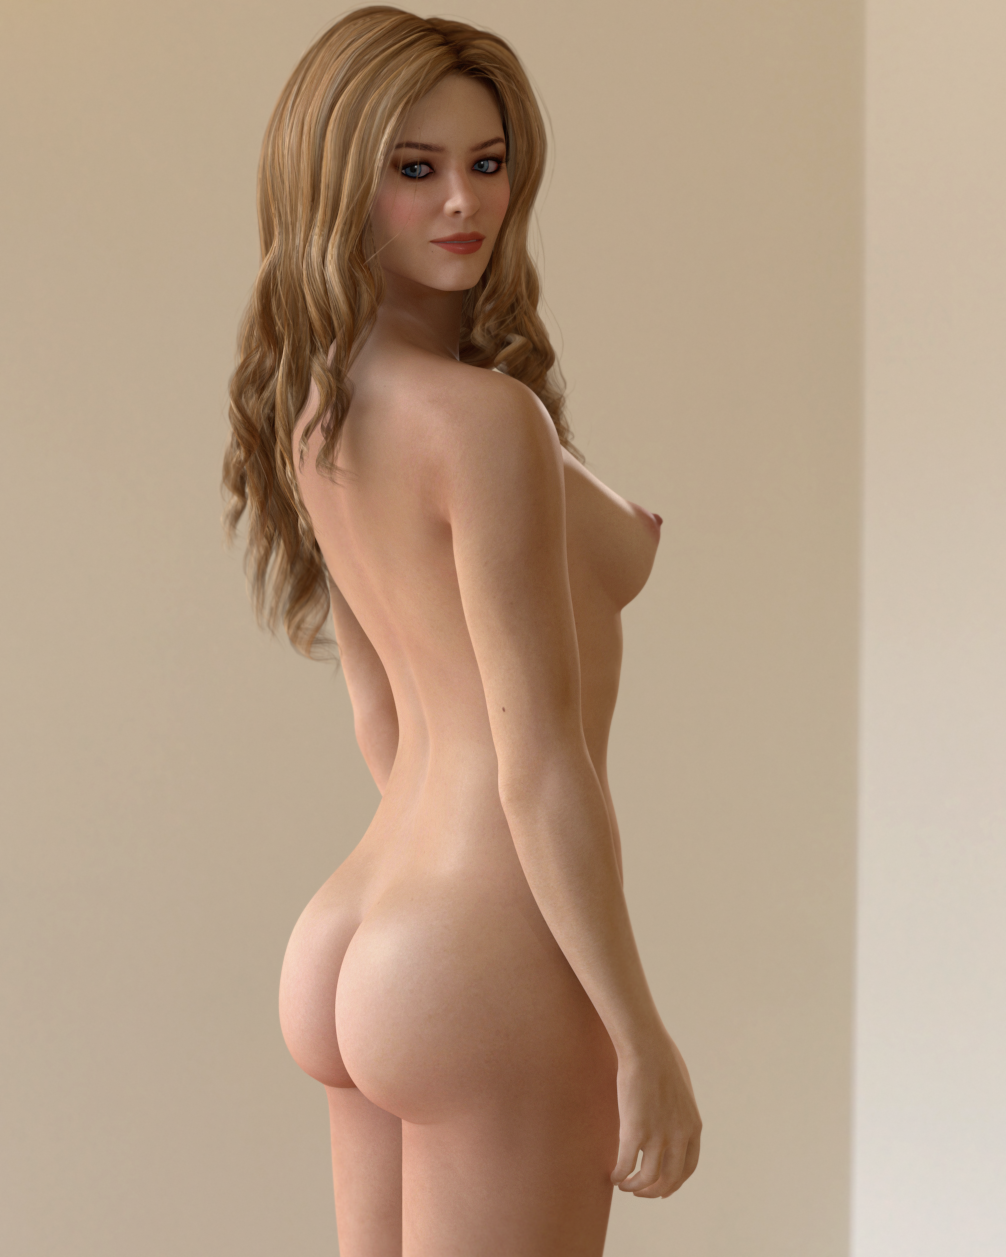
Freebie: Demetra
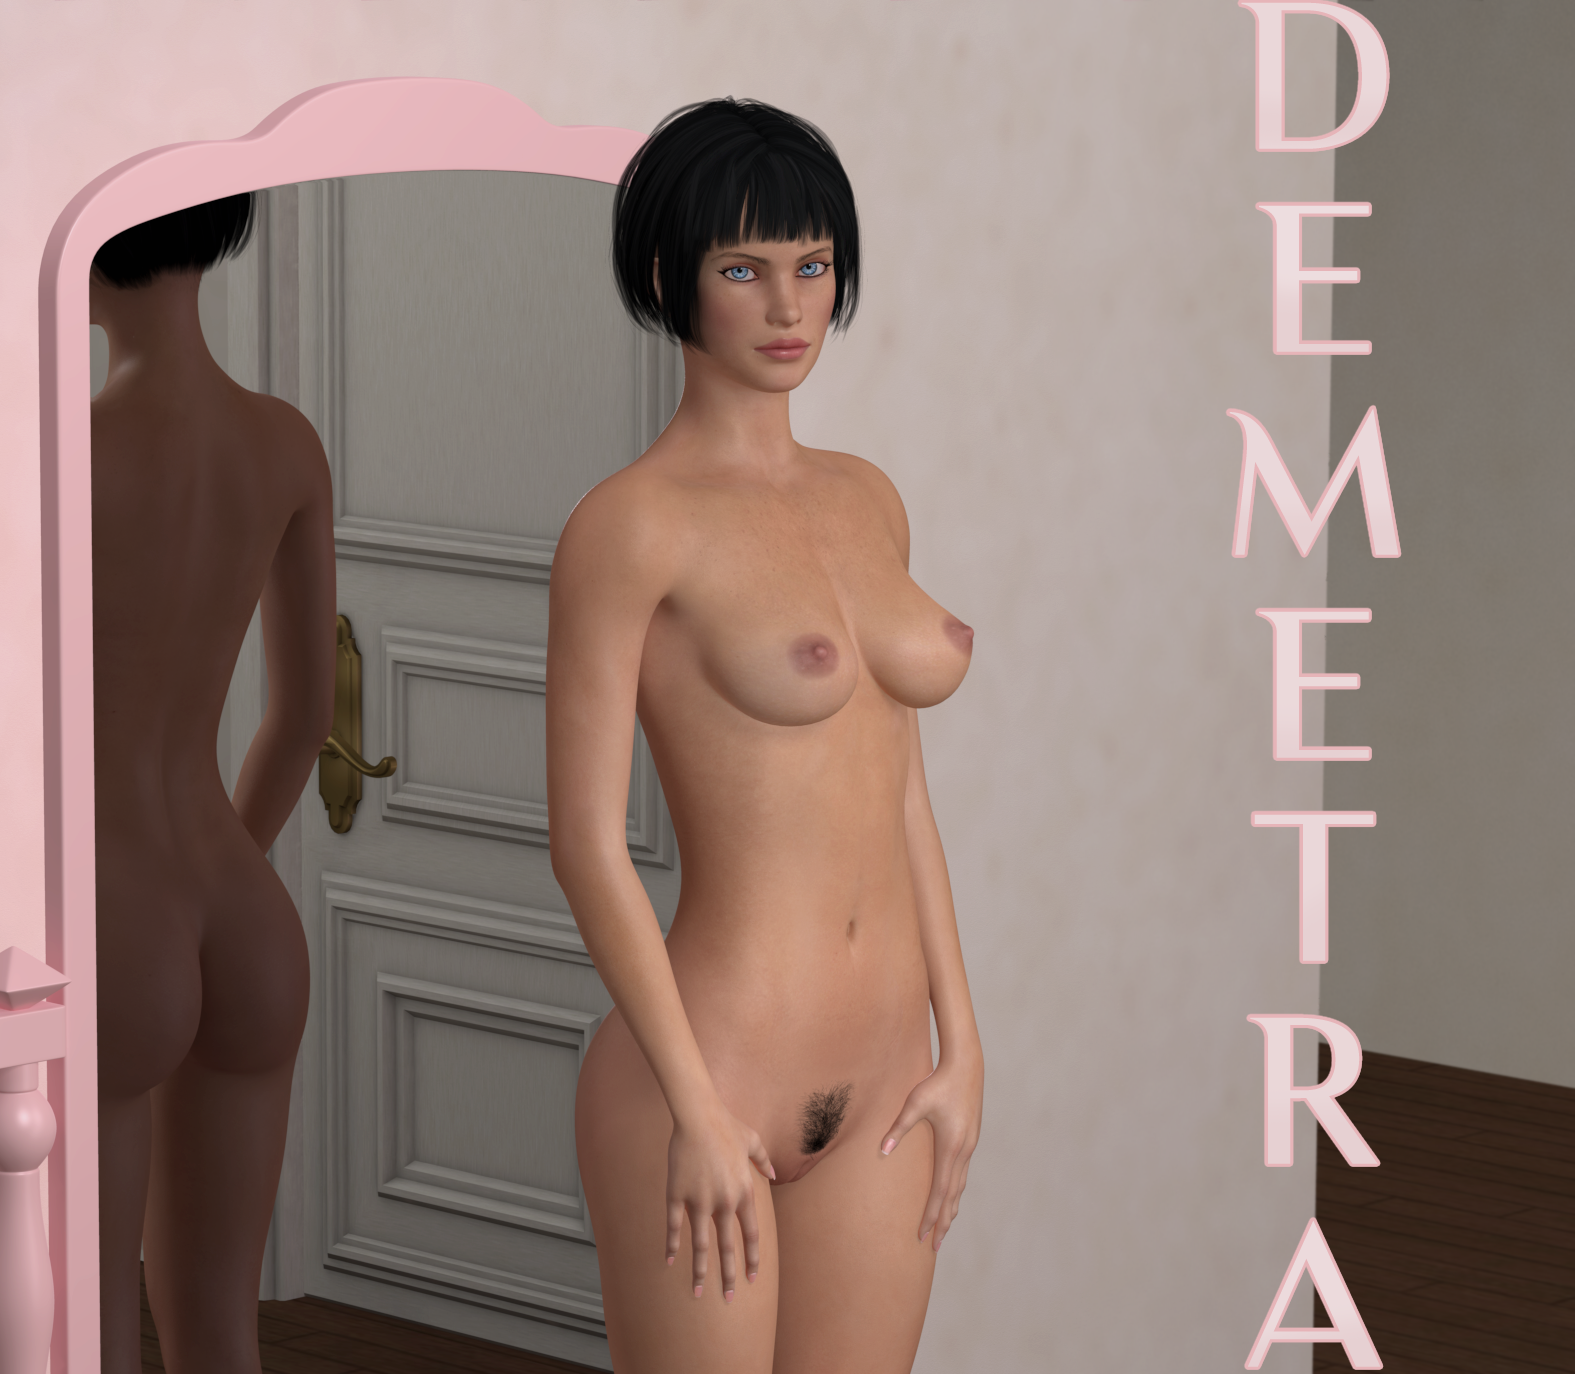
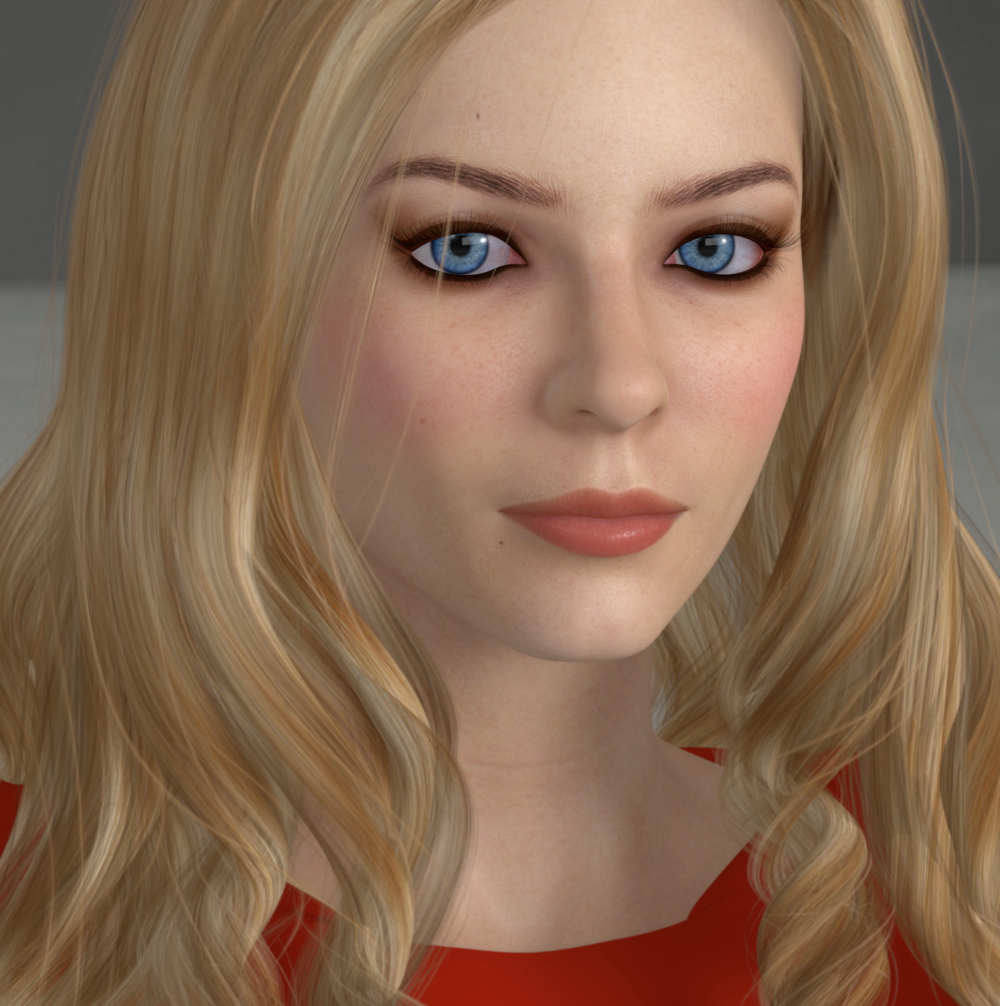
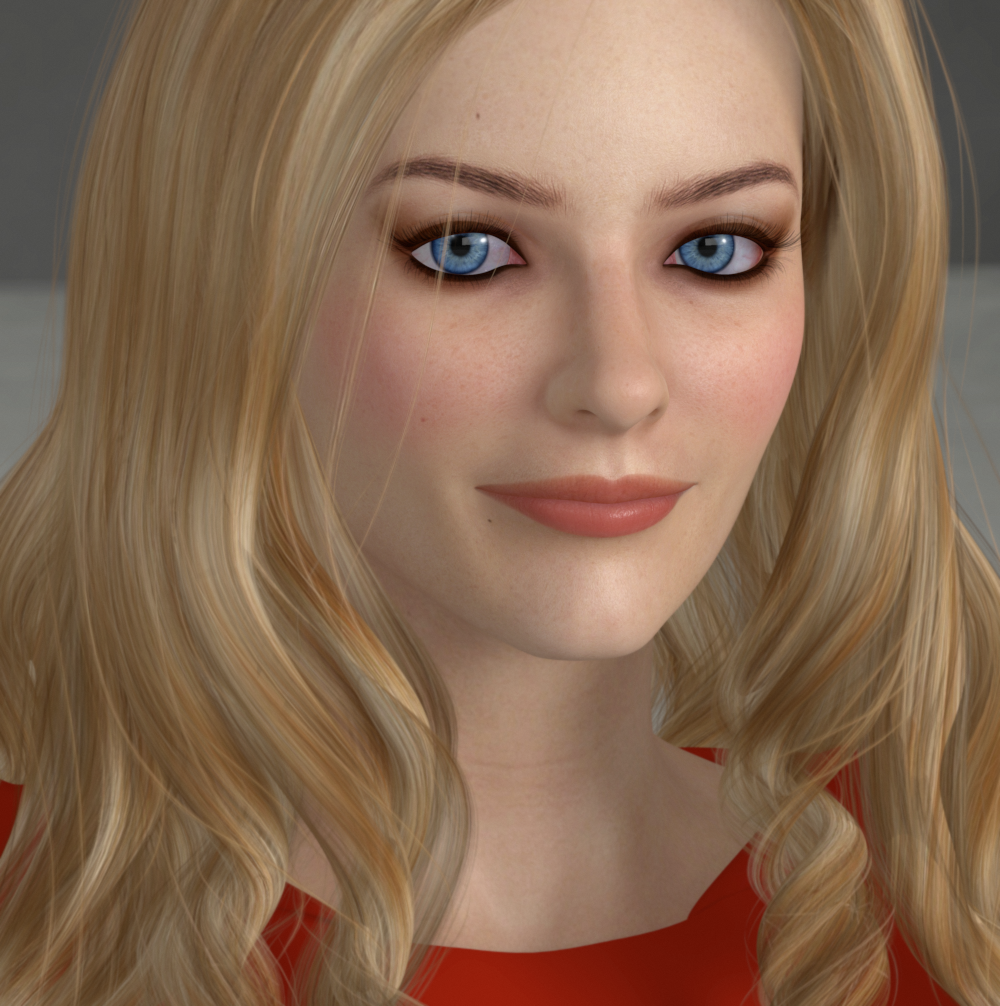
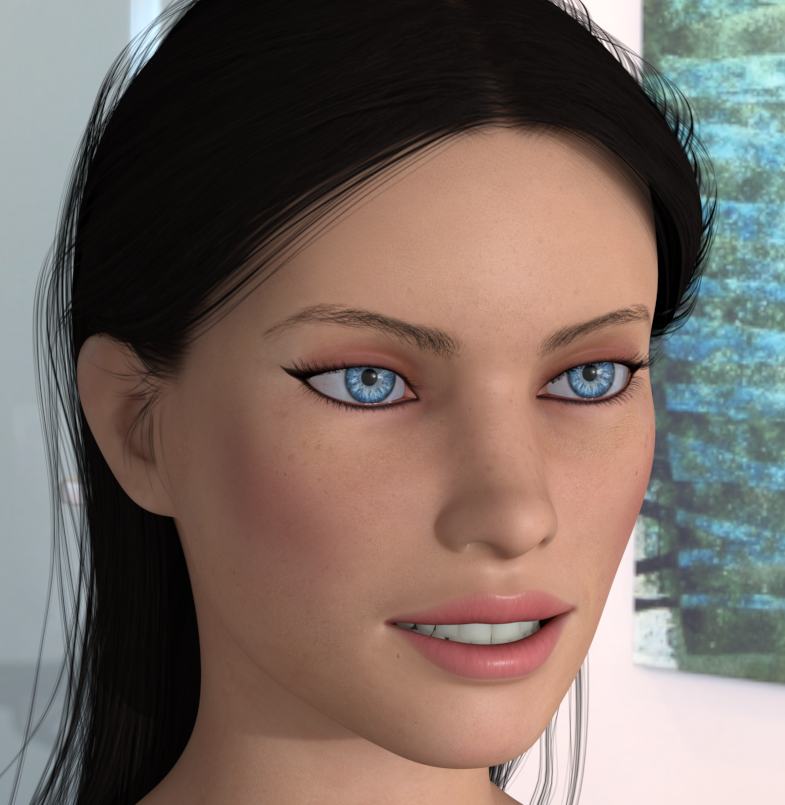
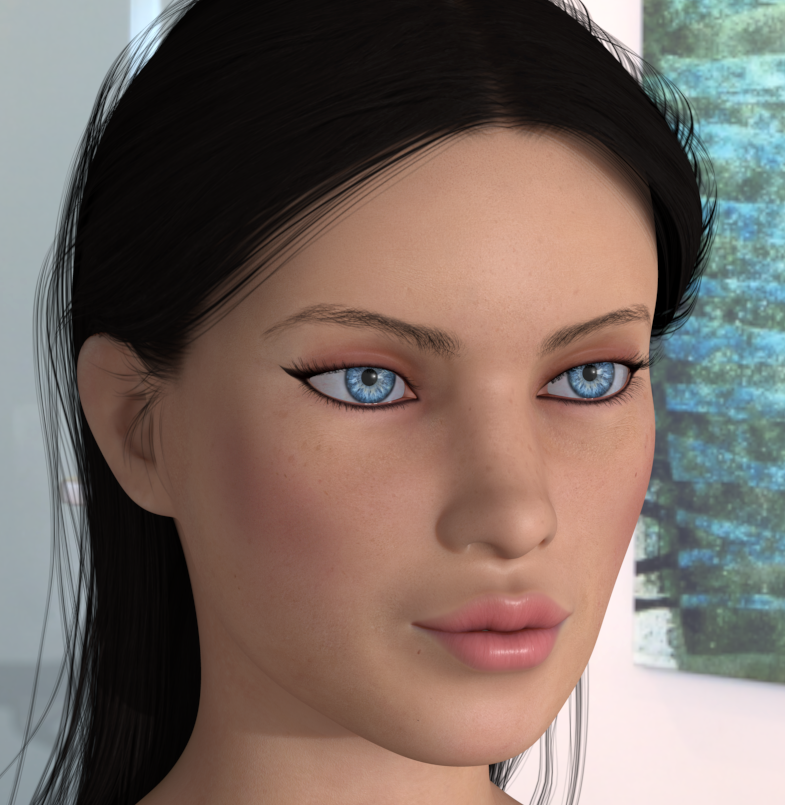
An abbreviated version of my default La Femme character morph, Demetra. It's a custom head morph with some custom expression dials fit specifically for this character. I refer to this as my Default La Femme because this is the specific morph I usually have on her whenever I've shown images of La Femme on the forums.
The morph is loosely based on the visage of the actress Demetra Hampton as she appeared in the role of Valentina in the late 1980s Italian erotic fantasy TV series of the same title. The series was based on Guido Crepax's comic, later parts of which were featured in the fantasy magazine Heavy Metal.
https://en.wikipedia.org/wiki/Valentina_(1989_TV_series)
https://en.wikipedia.org/wiki/Valentina_(comics)
These morphs will work on either LF Base or LF Pro and require no additional morphs to be present, however if used on the Base LF I suggest you use the included hide brows morph to hide the transmapped brow geometry and transmapped textures that she loads with (or simply disconnect the transmap in the material room). The included brow morphs for Demetra are intended to be used with her face texture brows and will not work with the transmapped brows geometry.
Though there are no included textures (the ones I use for this character are customized merchant resource based) she looks ok with the ones that load with LF Pro. The brows on that texture are a bit too high up on the forehead for this character IMO. I've also included an Iris Convex morph to minimize the concave appearance of LF's Irises, which I find give Demetra's eyes a more pleasing appearance.
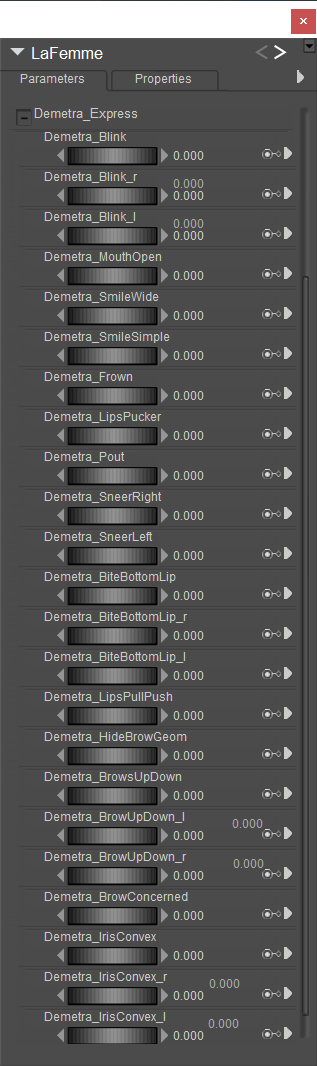
Because this morph changes the positions of the eyes and interior mouth parts (match centers to morphs stuff) it's suggested you use the included expressions I've made specifically for this character, especially the blink dials. She also looks as intended with her custom mouth open and smile morphs included. The morphs should all be dialed from their main parm group in the Body actor.
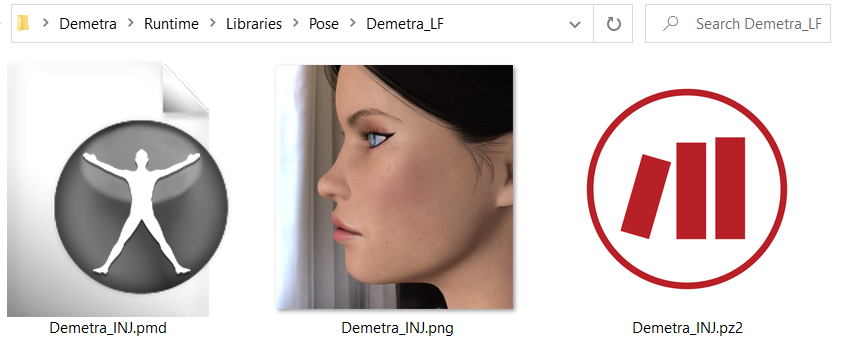
See the ReadMe included with the Runtime zip.
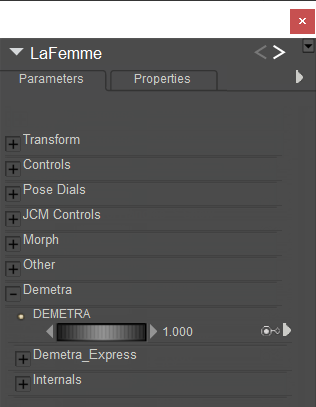
The dials...
Some examples

Content Advisory! This message contains nudity
Gallery Offering; Succubi, Poser and Photoshop
My first forays into Poser, rendered in Poser 3 or 4 I think.
Might be Posette, but I'm not sure. I think the tongue is painted in. There's a lot of post, the lips highlights are definitely painted.
Story behind my getting into Poser was I was completely computer illiterate at the time and studying art at the San Francisco Art Institute; traditional media, painting and sculpture. This was around 2004/2005 I guess. A friend of my then girlfriend, a graphic designer, dropped off a PowerMac G3 at our apartment that he was getting rid of. It came with Poser and Photoshop installed. I started messing about with it, "Holy Crap! Poseable Nekkid Ladies! I could make comics with this! I don't have to draw shadows!" Etc etc. Then I saw a box for Poser 5 or 6 in a store and the figures had transmapped hair, I was mightily impressed. The rest is...
A lot of agony rendering transmapped hair ;)
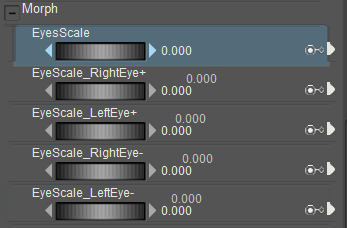
Messing about with Animated Centers and Orientations for Antonia 1.3's eyes. Unfortunately match centers to morph refuses to work with Antonia's eyes for some mysterious reason and to top that off I can't generate a working inject for animated centers so I'm just going to release a modded cr2 with all the morphs I create added. Everything works fine embedded. It will be a default Antonia with the addition of more morphs and a bit of loose end cleaning that odf missed, fine tooth comb stuff, otherwise it will work exactly as default 1.3 so there won't be any conflicts with content that works with the base. Anyway, I'll give updates on my progress with this here, amidst other things I'm doing.
Very cool! Primorgetonia is taking shape.
Can I have that unsuccessful injection file, if you still have it? I am somewhat reminded of trying to inject weight maps. The maps inject fine, but apparently the necessary joint transformation channels can't be created by an injection pose, so either they have to be in the CR2 or the figure has to be manually prepared for injection. I'd like to see if there might be something similar happening for animated origin injections.
Incidentally, I've had some problems loading materials that use animated material node parameters. The trick there was to load the material twice. Could be a similar issue. Anyway, I'd like to play around a bit and see if this can't be solved. If you don't have the injection file, anymore, no problem. I'll just cook up something myself.
-- I'm not mad at you, just Westphalian.
Oh, and my stupid question of the day - I think it's been a few days, so I'm allowed one: why do you morph the eyeballs and then adjust the centers to the morph rather than leaving the eyeballs as they are (i.e. load the FBM and then delete the eye actor parts of it) and instead translate and scale the eye actors to fit the morph. There must be some advantage, but I don't quite understand what it is.
-- I'm not mad at you, just Westphalian.
odf posted at 1:37 AM Mon, 17 October 2022 - #4446840
I haven't tried creating the injection for this particular successful iteration. The injection I created and tested was for only the eyes scaling up. In that instance as soon as I loaded the morph the eye centers would automatically pop into the scaled up position and be stuck there. In this version the centers are animated to scale up and down in the same dependency. I'm hoping that this causes the centers to behave as they should in the animated origins portion of the inject. When I get home from work today I will test.Very cool! Primorgetonia is taking shape.
Can I have that unsuccessful injection file, if you still have it? I am somewhat reminded of trying to inject weight maps. The maps inject fine, but apparently the necessary joint transformation channels can't be created by an injection pose, so either they have to be in the CR2 or the figure has to be manually prepared for injection. I'd like to see if there might be something similar happening for animated origin injections.
Incidentally, I've had some problems loading materials that use animated material node parameters. The trick there was to load the material twice. Could be a similar issue. Anyway, I'd like to play around a bit and see if this can't be solved. If you don't have the injection file, anymore, no problem. I'll just cook up something myself.
Yes, I can give you any unsuccessful injection files. I'll zip it up and link you via PM later this evening.
Your last suggestion about deleting the eyeball scaling and leaving the head deformations and using a scale to match dial is a very viable alternative. Scaling dials pass well to injection. Matching the exact scales could be a bit fiddly, and because I created the scalings in several steps it's not possible to record the exact scales I used from Blender. Also because I foolishly expected everything to work in injection without any set backs. It's worth an attempt though. In any case it all works as it should embedded in the cr2 at the moment, which for me is a very good step forward. The working version I have now will need a slight blink difference morph adjustment baked or attached as a sub dependency (more than likely at this point) into the head deformations to fix a small discrepancy at full blink.
I'll update you this evening.
I'm not sure why ADP is so excited, in it's current state it isn't injection passable. Only through a live cr2.
- 1
- 2
Privacy Notice
This site uses cookies to deliver the best experience. Our own cookies make user accounts and other features possible. Third-party cookies are used to display relevant ads and to analyze how Renderosity is used. By using our site, you acknowledge that you have read and understood our Terms of Service, including our Cookie Policy and our Privacy Policy.
I'm going to start sharing my images, thoughts, and project WIPs here. Also this will function as my Gallery page and sketch book. I've become disillusioned with trying to share these things with people on the Poser Forums, it's been a waste of time for a very long time.
Here, in my own thread, I can be at liberty to do as I please, within TOS guidelines of course, without having to try and fit into all that stuff over there. Consider this my resignation from technical advice, thoughts, and freebie files on the public forums. You'll find those things here now. It's a vanity thread, without the hubris to plaster it across the official forum ;)
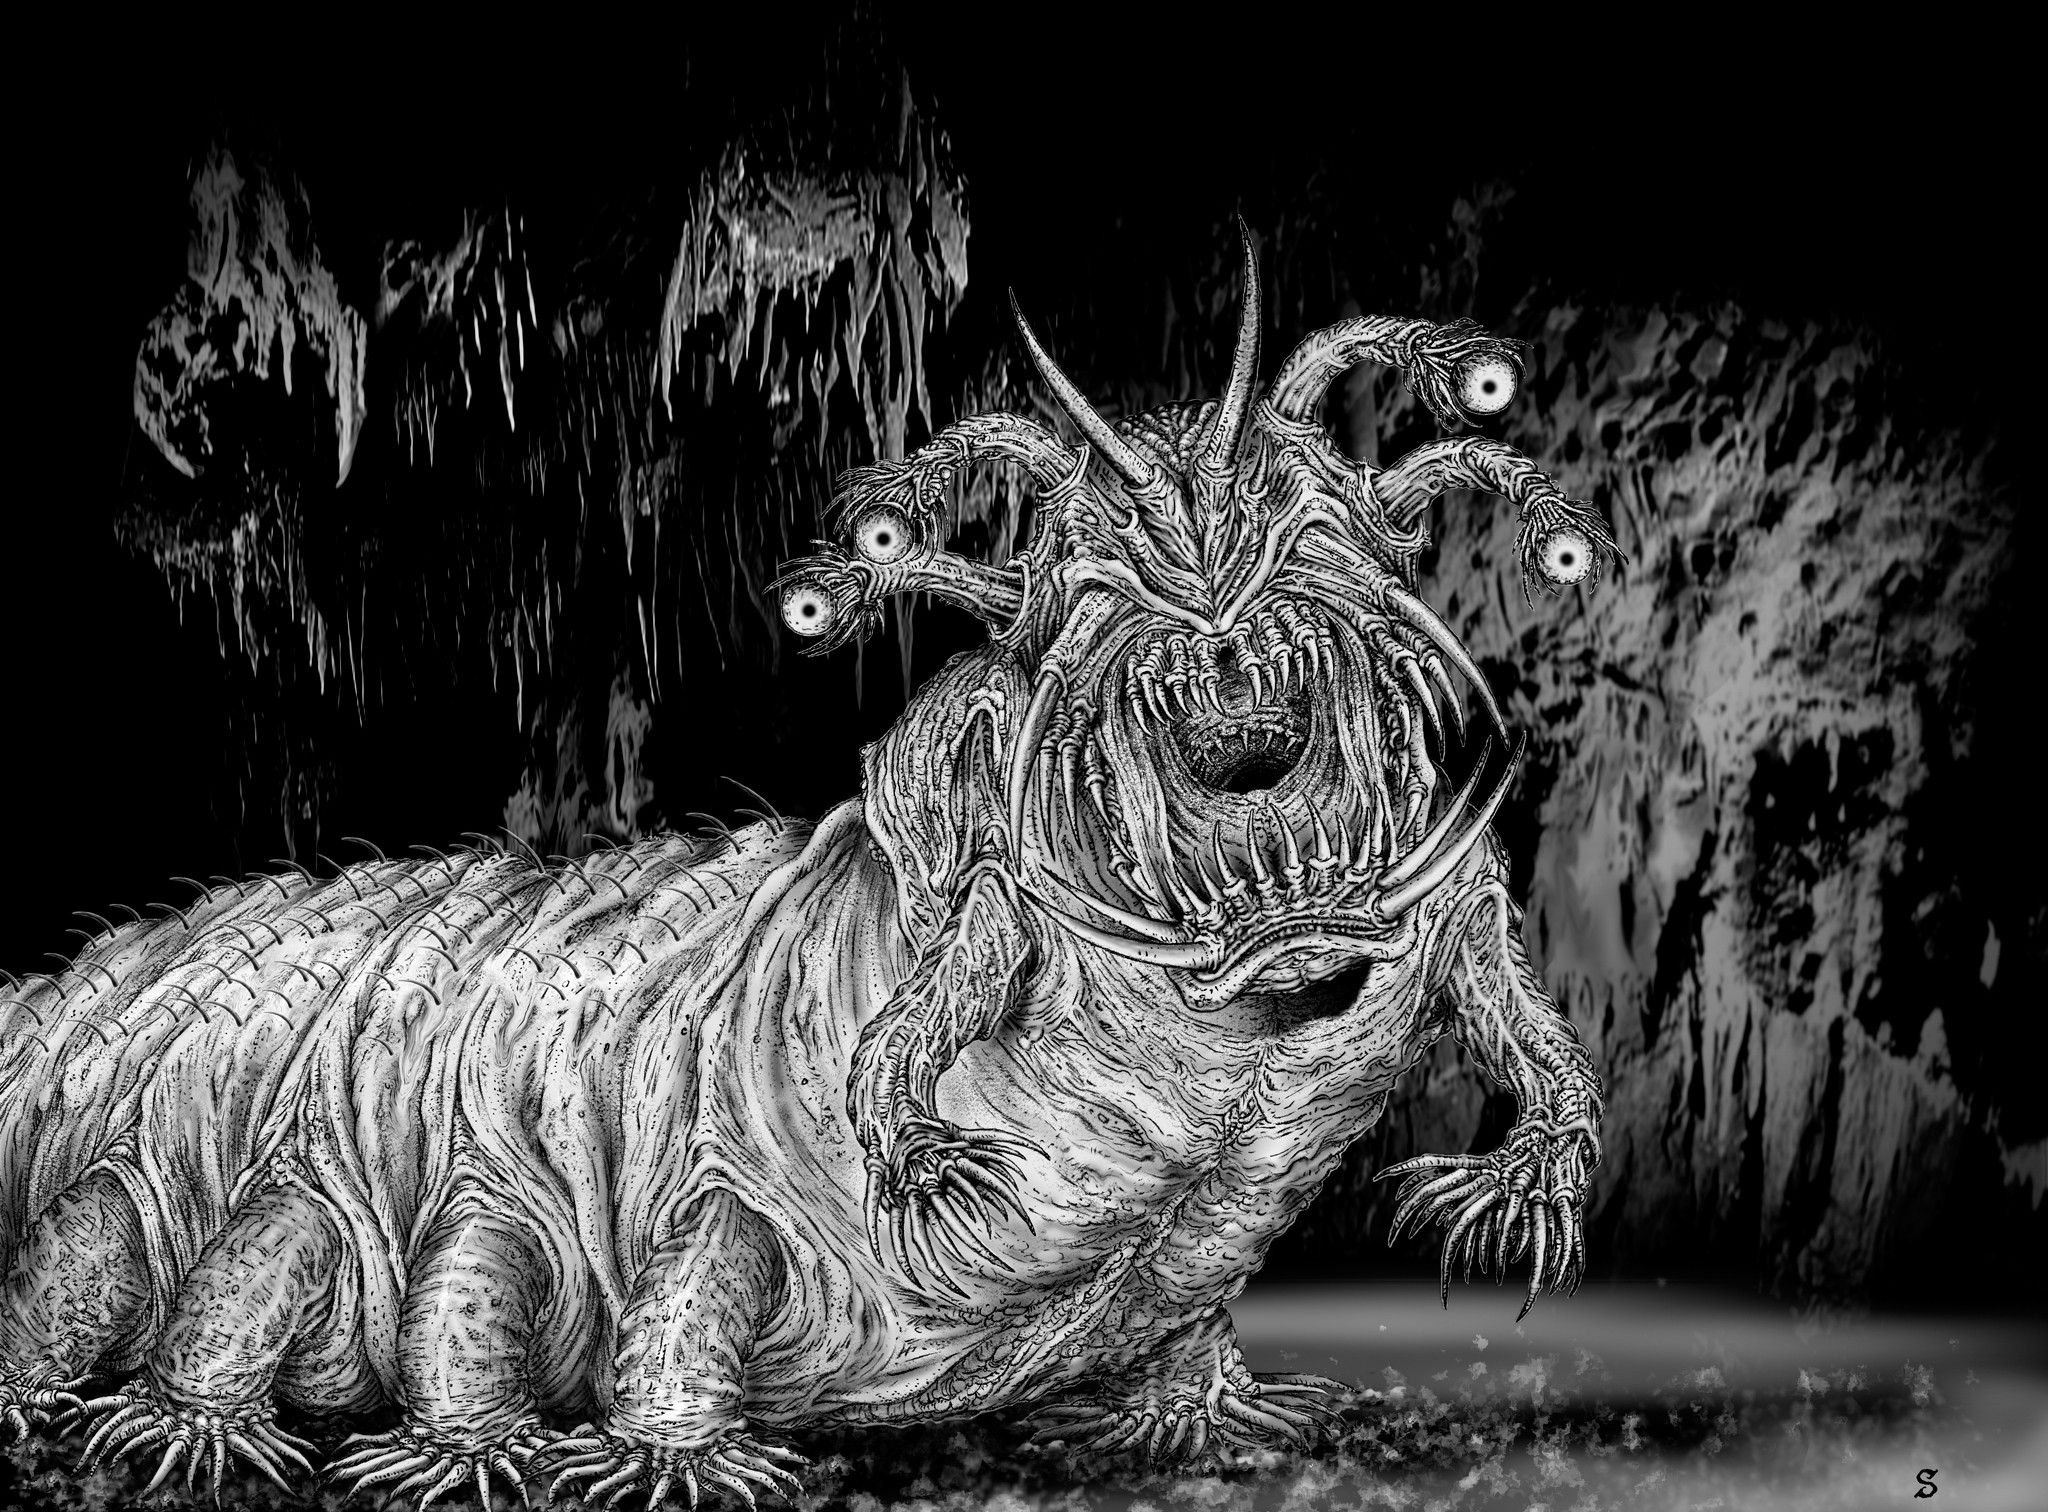
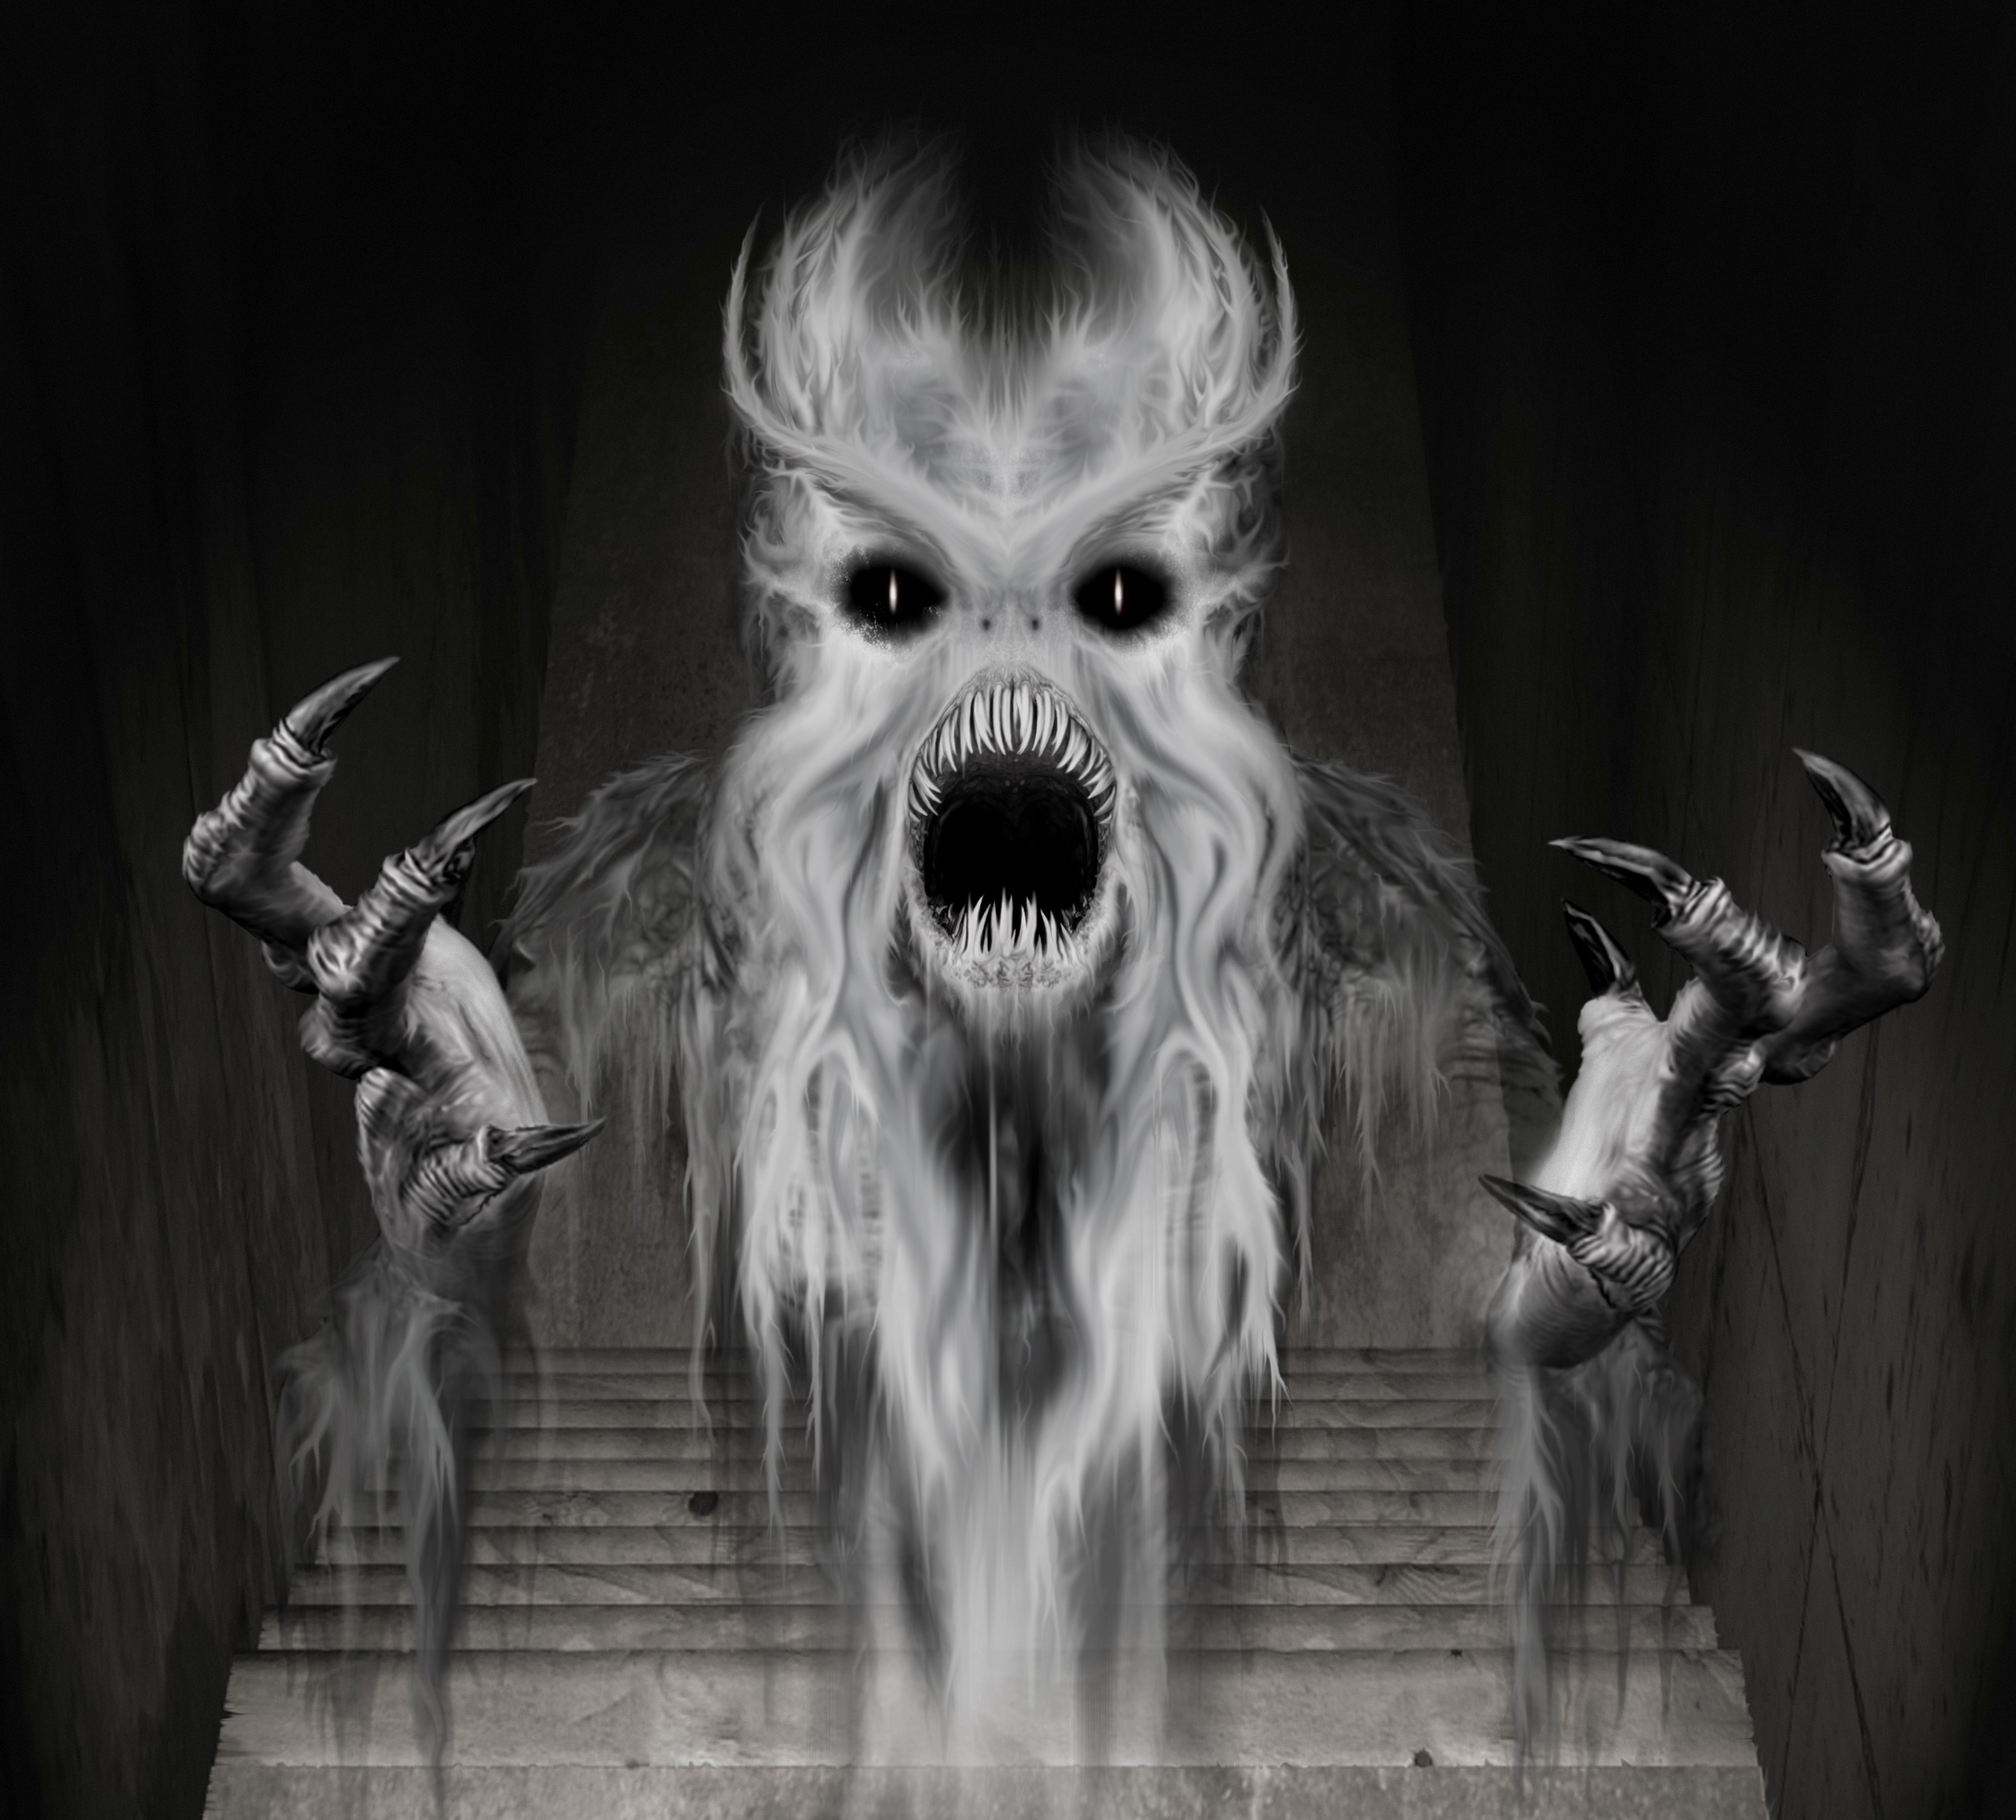
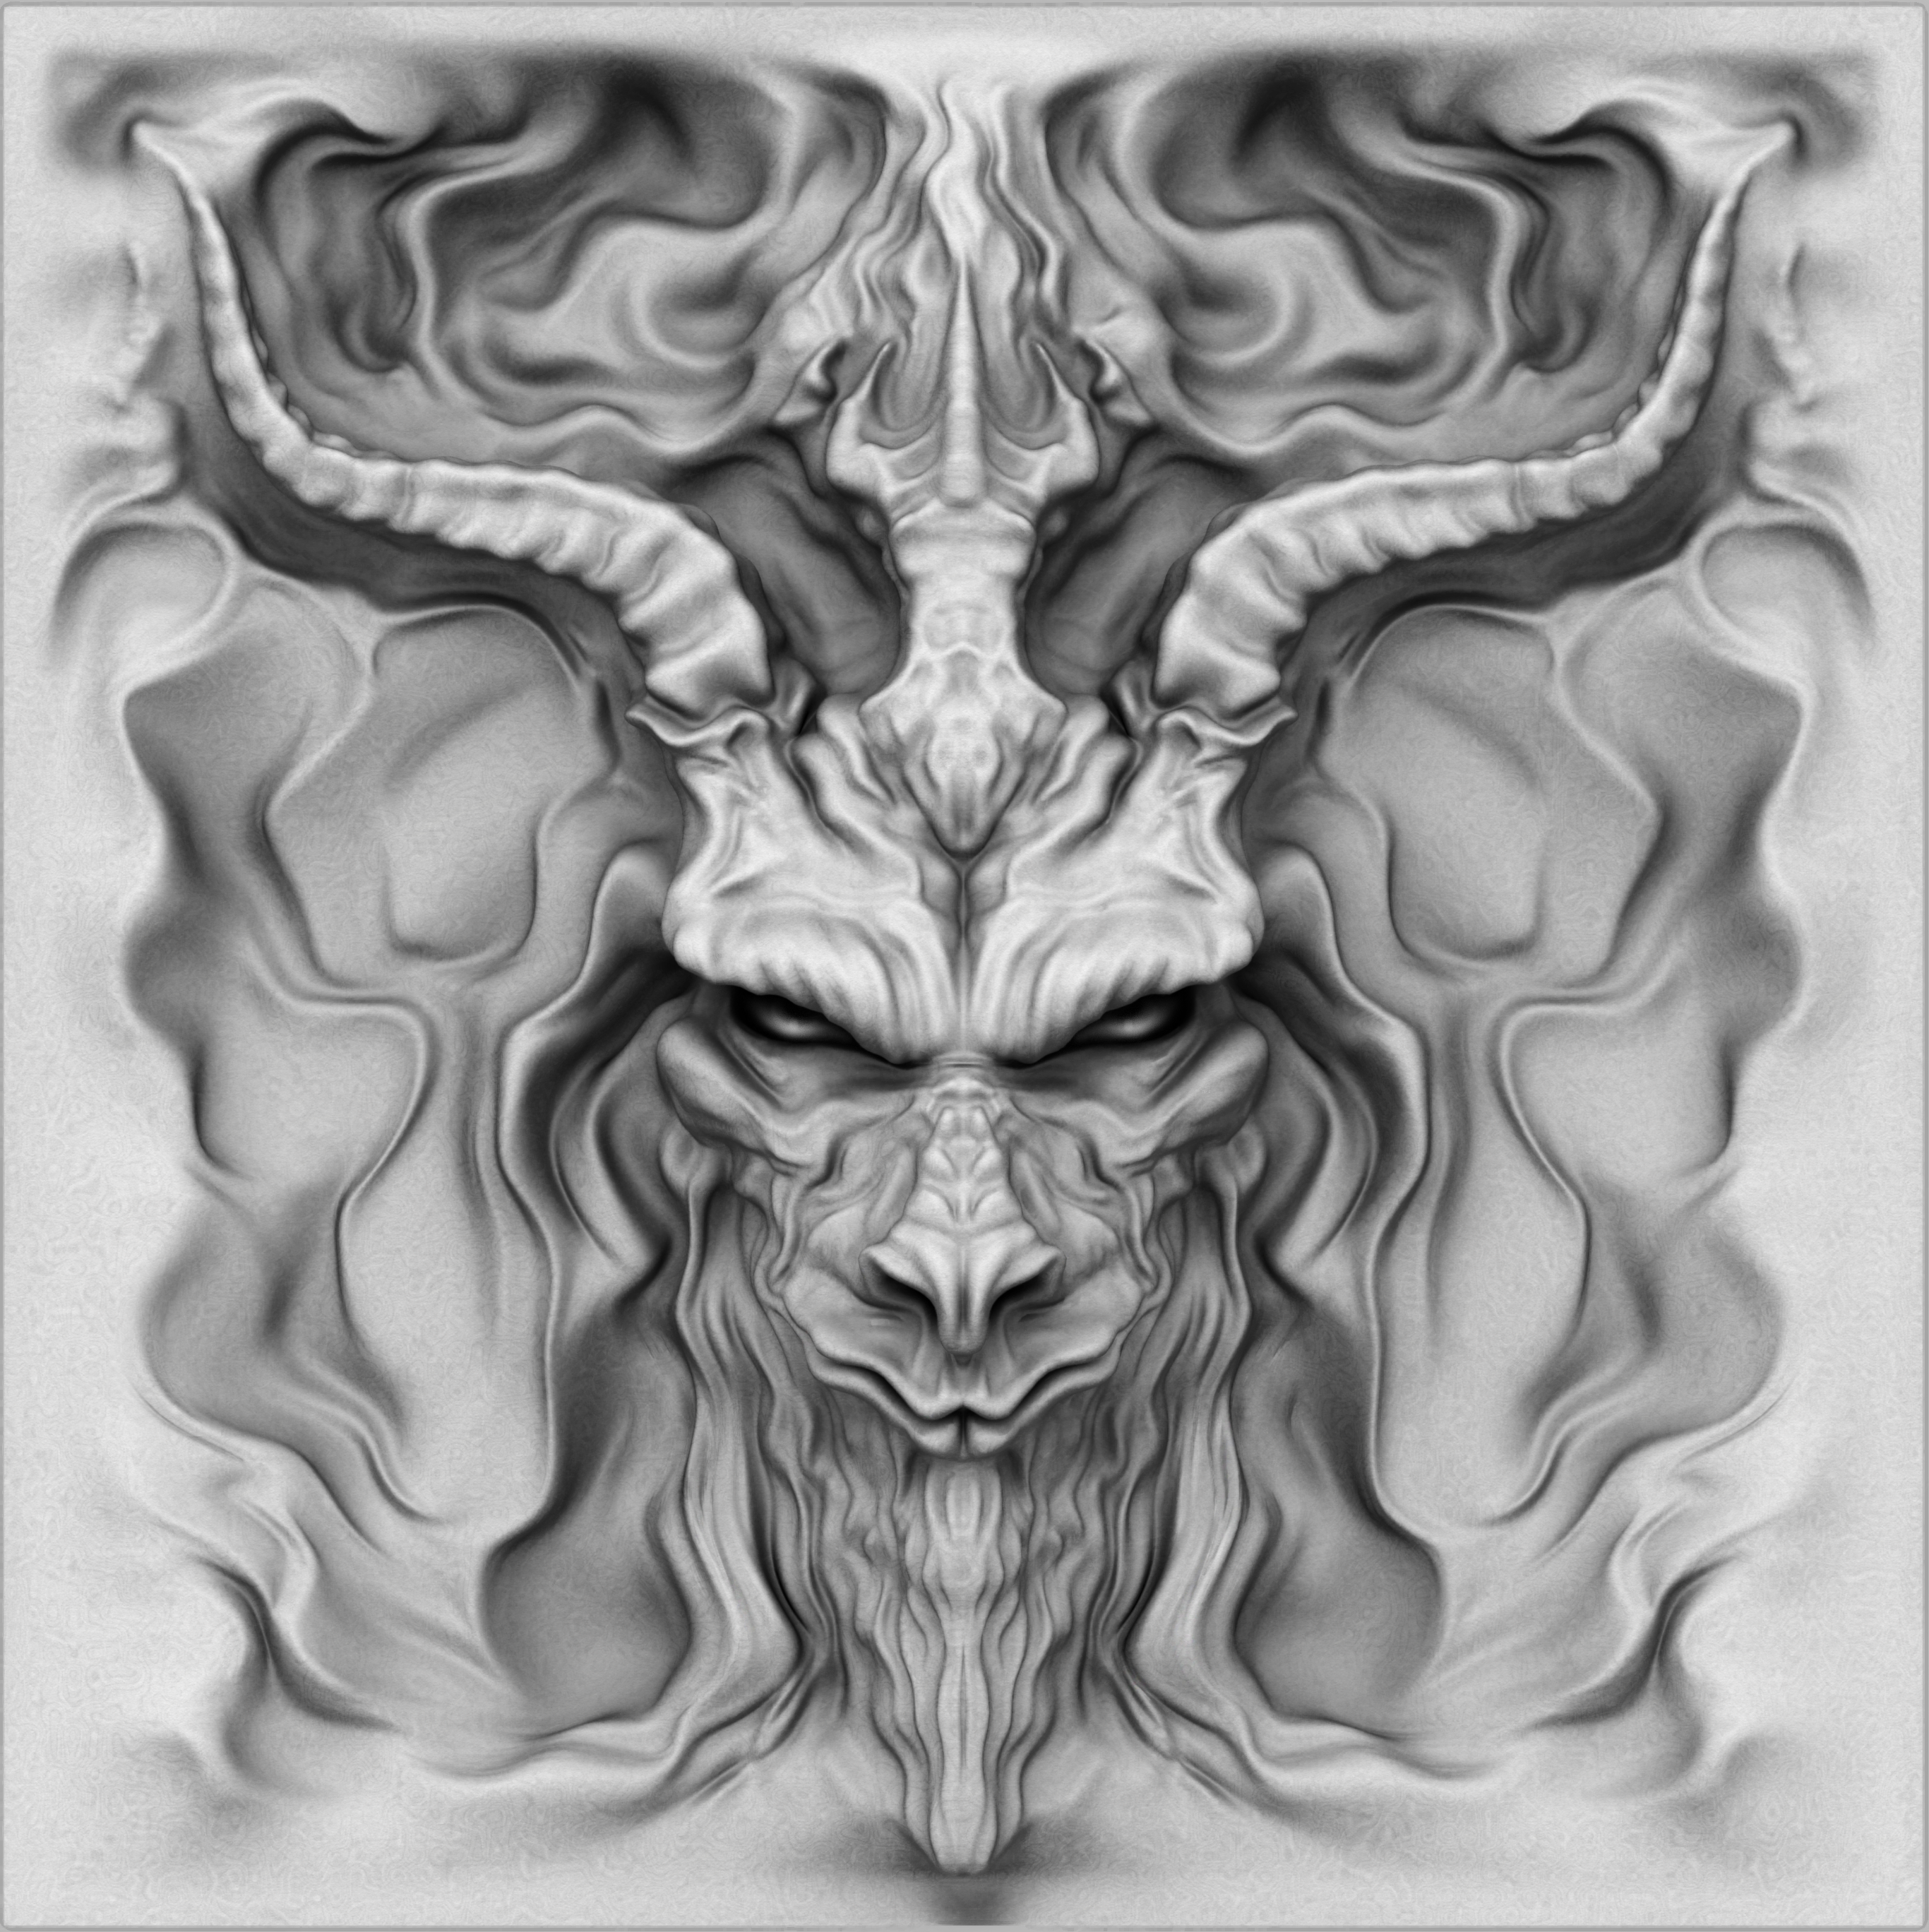
With that in mind please consider this a dank, dark cavern lit only by the light of flickering candle and sputtering torch. There's something hunched and shadowy in the far recesses of the cave, working away at something. Ningauble the Seven Eyed from Fritz Leiber's Fafhrd and the Grey Mouser tales comes to mind as I evoke this image.
Ningauble
I'll start by posting some of my old artwork I guess... Media is both traditional, in some instances, and digital. The digital tools consist of Poser, Carrara, Blender, Zbrush, Mudbox, and Photoshop. All of it is Character Creation in one way or another... I'll be inclined to jump through time and context as it occurs to me.
Welcome...