
primorge opened this issue on Sep 20, 2022 · 92 posts
primorge posted Wed, 21 September 2022 at 10:15 PM
A process oriented post; Adventures with (conforming) Dentures featuring Antonia.
ODF's Poser figure Antonia is on the cusp of a 1.3 update. I plan on making some creature morphs for the release. Just some head morph stuff with some texture maps. I know that I'll need to create quite a few teeth morphs to go along with the character morphs.
Unfortunately Antonia's teeth are relatively low poly in comparison to a figure like V4. Also the gums and teeth are not a seperate mesh, again, as they are with V4. This makes creating fangs and teeth scaling rather difficult. If I stretch the teeth too much the textures from the gums will smear into the teeth and moving and scaling the teeth and gums separately is not possible.
As a solution to this I've decided to create some higher res conforming dentures based off of Antonia's existing geometry. The idea is to create an extraction of the jaw actors, separate the teeth from the gums without creating holes in the gums, integrate the separated teeth deeper into the separate gums, giving all a level of subdivision, and retaining the original UVs.
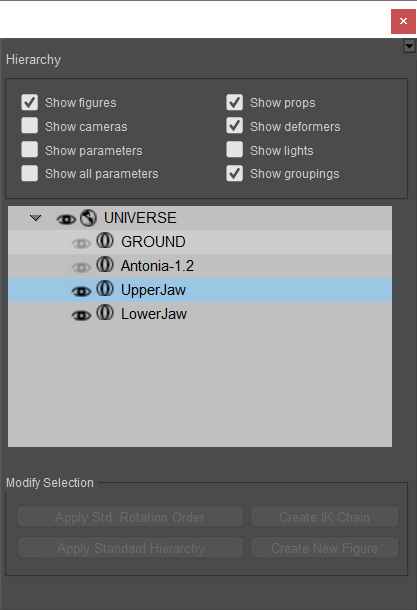
I start this process by importing the Antonia 1.2 obj from the Geometries folder.
I open the grouping tool, select the upper jaw actor, and spawn a prop from this which I name UpperJaw. With this new prop extraction of the actor I use the grouping tool to add a new group called teeth, the polys are which are added by adding the teeth material to the new teeth group. This will help later for masking. I repeat the process for the Lower jaw actor. Naming conventions aren't really important at this stage...
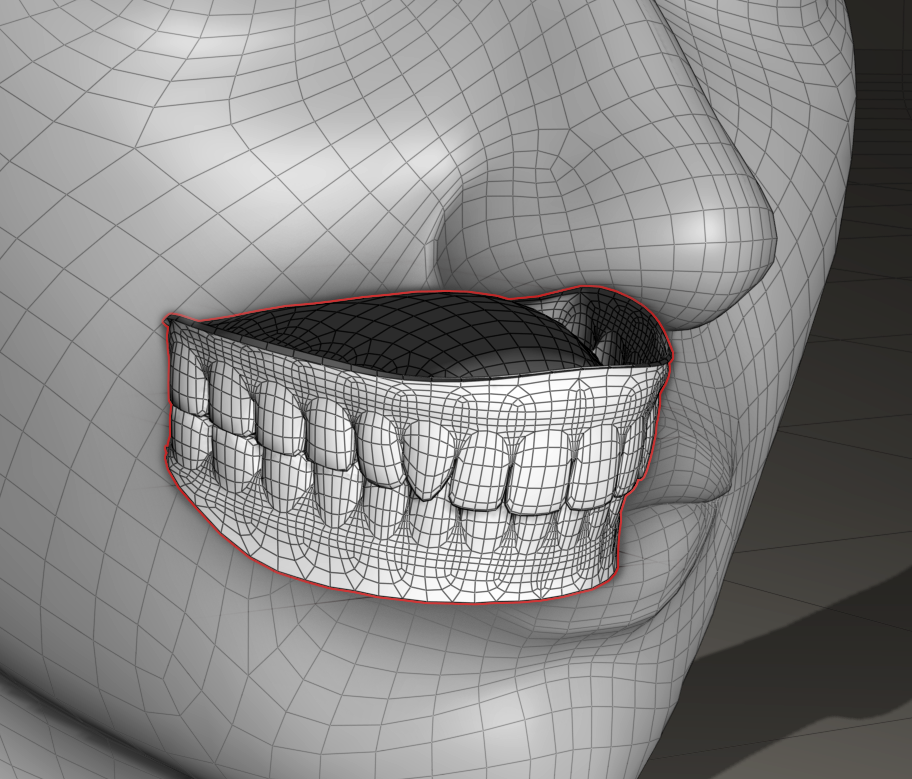
This leaves me with prop versions of both the upper and lower jaws with separate groups for the teeth.
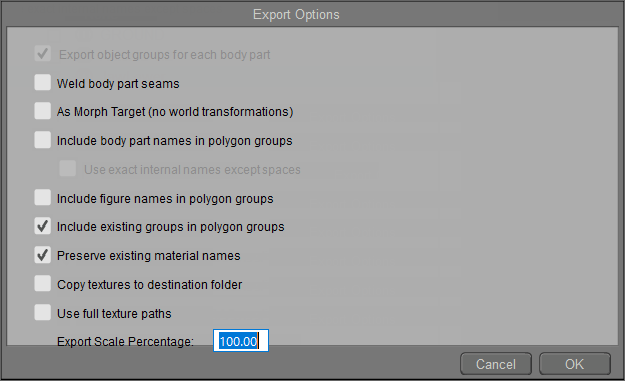
I want to export these out as obj to be modified in Mudbox and Wings3d...
I choose include existing groups and maintain material names. I can edit these obj files in a text editor to manipulate groups and material names and existence later if needed. But more on that when the rigging starts.
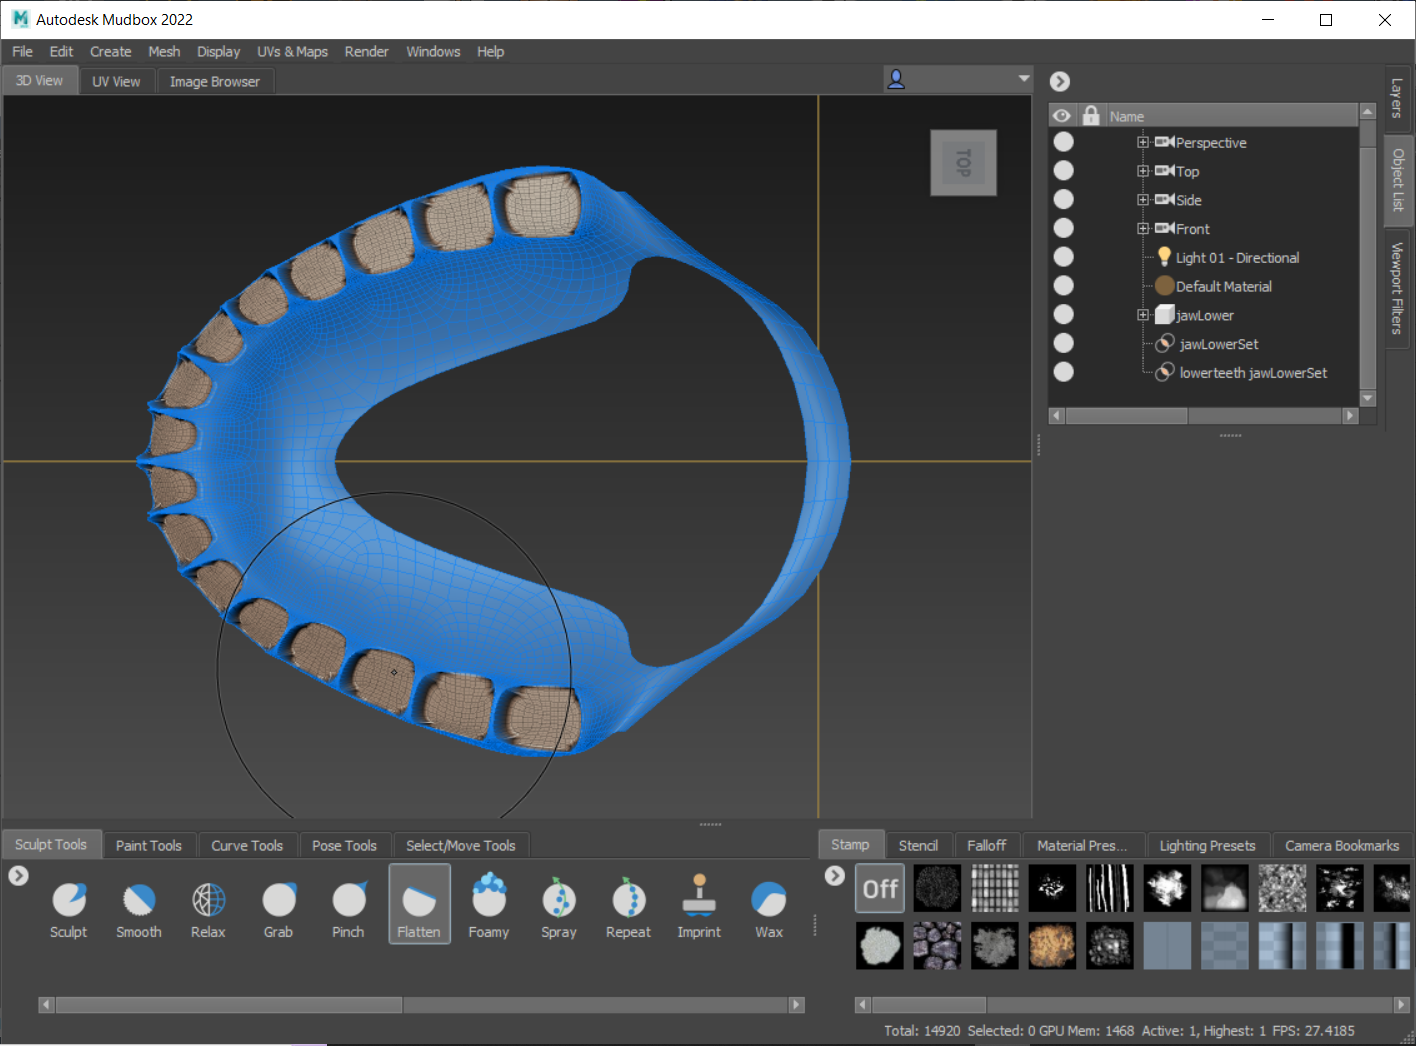
Now that I have my jaw props exported I need to do some sculpting. The idea is to completely flatten and sink the integrated teeth mesh parts down into the gums, neatly, so that there aren't big holes left after the teeth extraction. I'll use the sculpting tools in Mudbox for this...
Inside Mudbox I add a level of subdivision, freeze the gum group polygons (mask) so they're not effected by the brushes as I flatten the teeth polys. I use very large low intensity flatten and smooth brushes, alternating as needed, to do this... Frozen polygons shown in blue. I occasionally switch from base res to subdivision1 and back as I smooth the gum cavities..
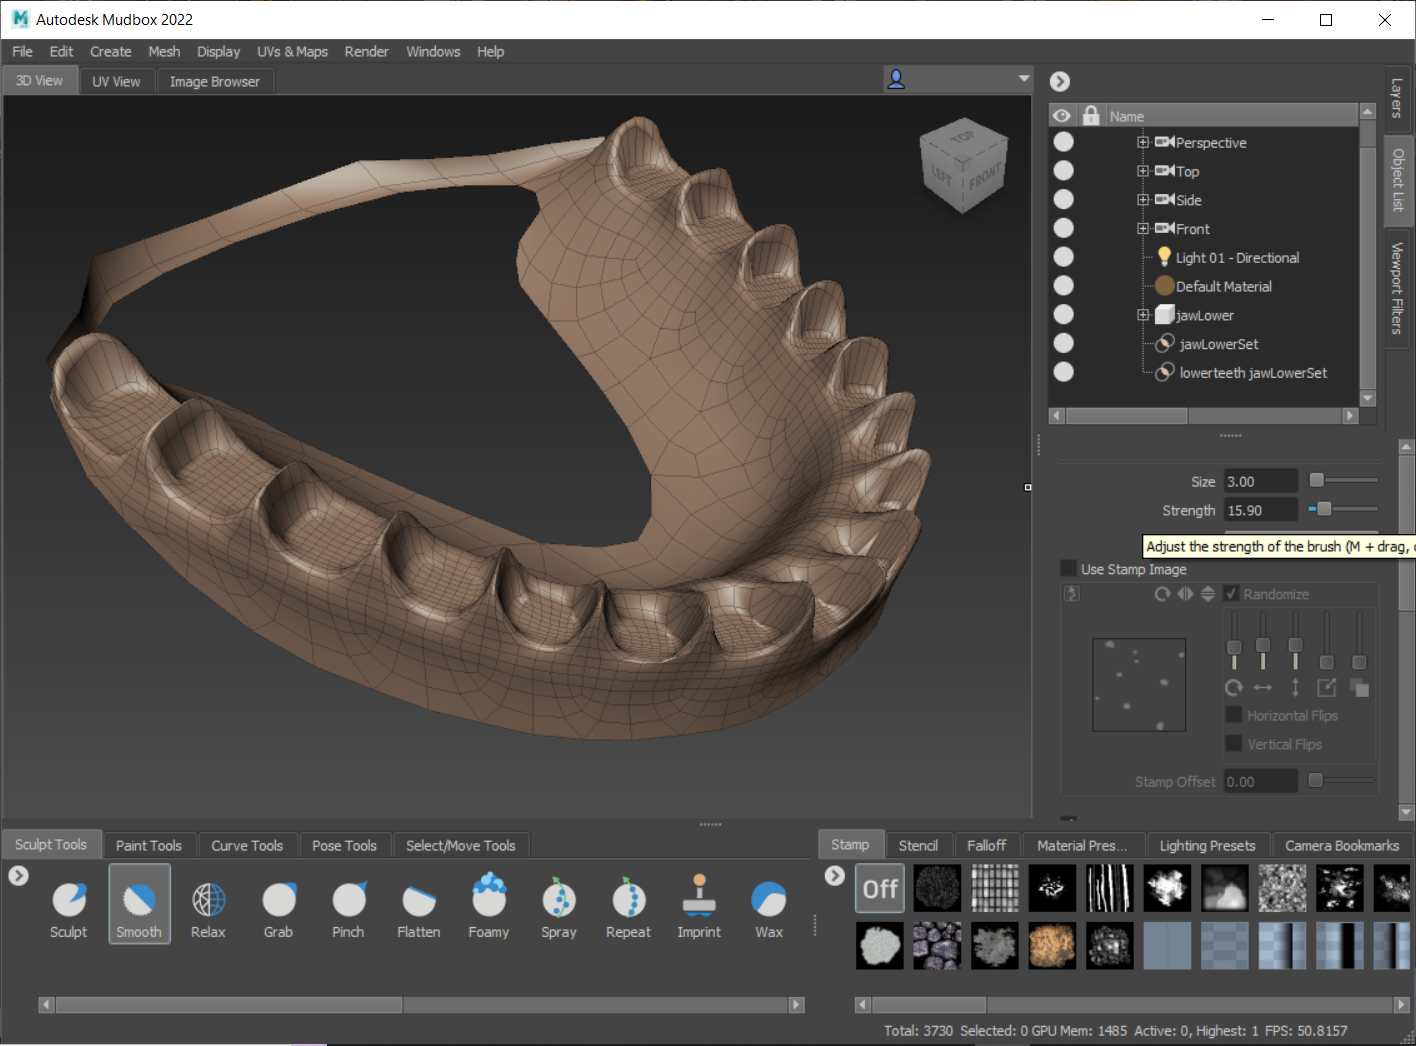
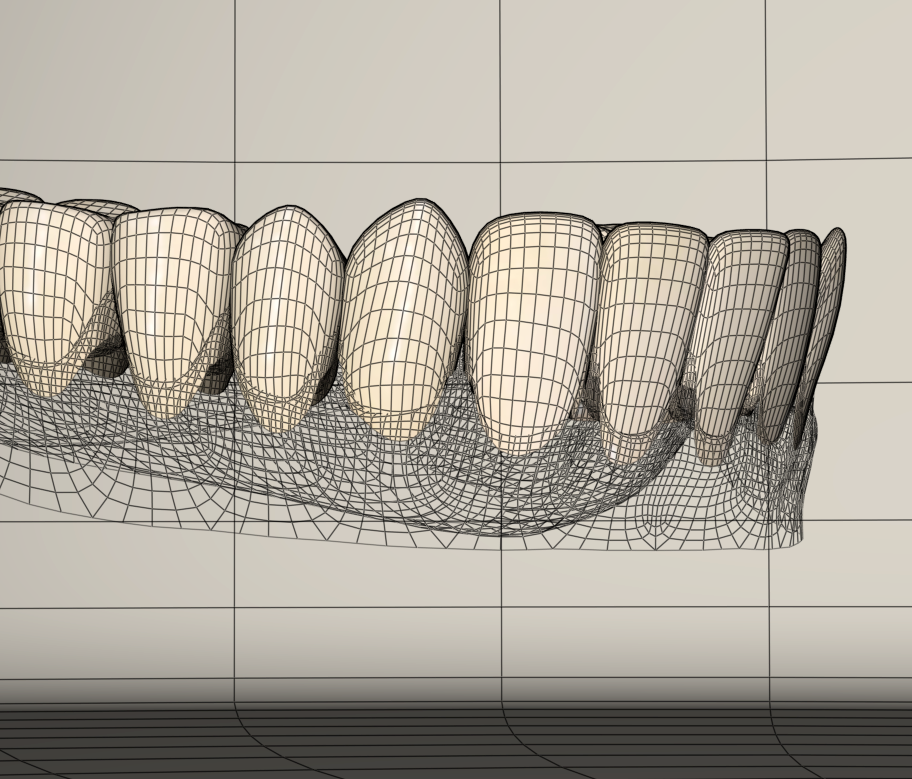
I repeat this process, on both upper and lower jaws, until I'm satisfied and export this out for import into Poser and Wings 3d. Here's the teeth flattened models in Poser. I'll give it a higher level of subdivision in the next steps, for now the base resolution is fine.

Now it's on to the teeth separation. For this I'll use Wings. In wings I want the original unflattened props to extract the teeth, lengthen the base of the teeth down into the flattened gums versions and export these out as joined objects for further sculpting. It's a bit of work. I'll just skip ahead all of this tedious stuff.
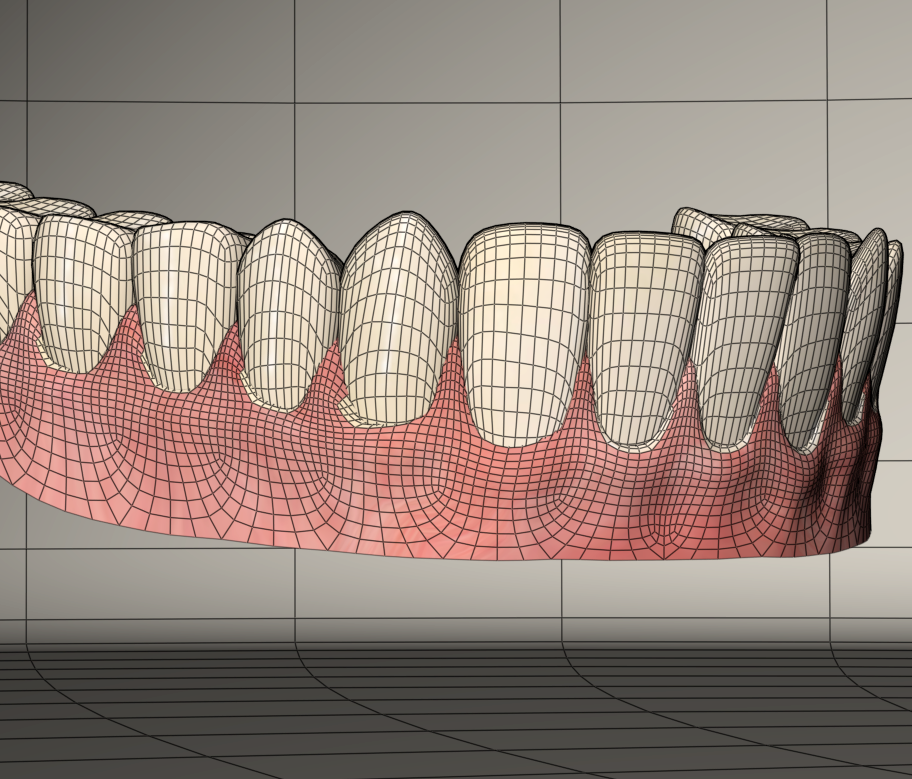
So what I have now is a completed lower jaw actor with separate teeth. UVs are intact, and I've increased the resolution by one subdivision level. I regroup the model, collapsing it to one group merged, by editing the obj text. I import this new lower jaw actor into Poser to take a look at it with existing textures applied. In this case I'm going to use Saintfox's textures that are included with Antonia. I have some other textures of my own creation but that will come later. The upper teeth/jaw actor still needs to undergo the process I just glossed over but that will be done once the lower jaw is wrapped up.
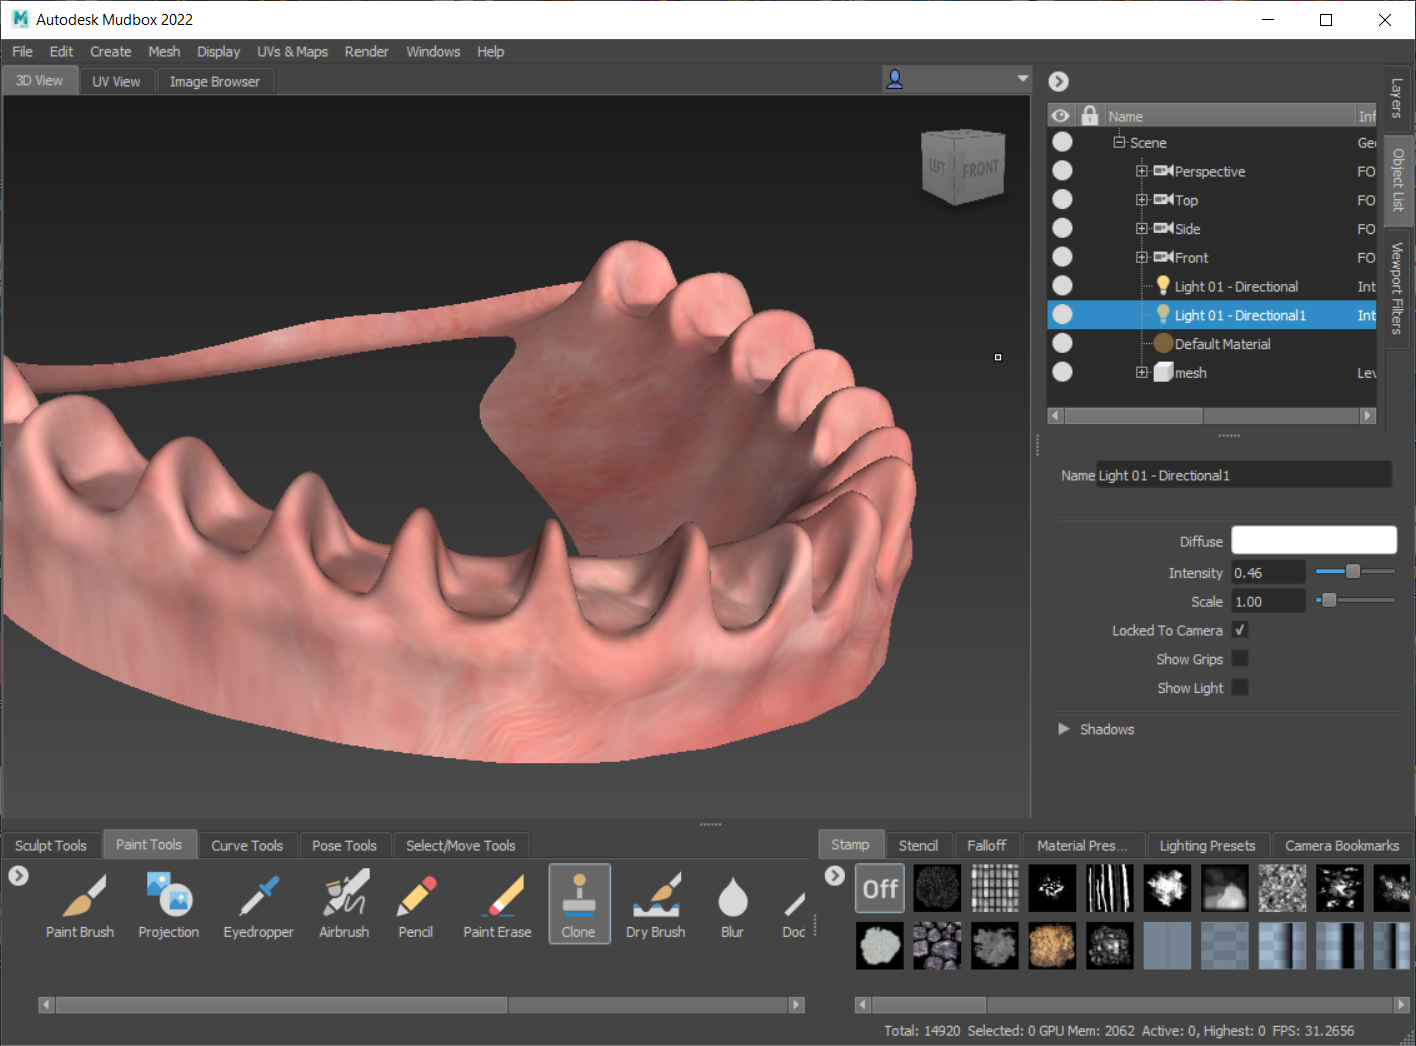
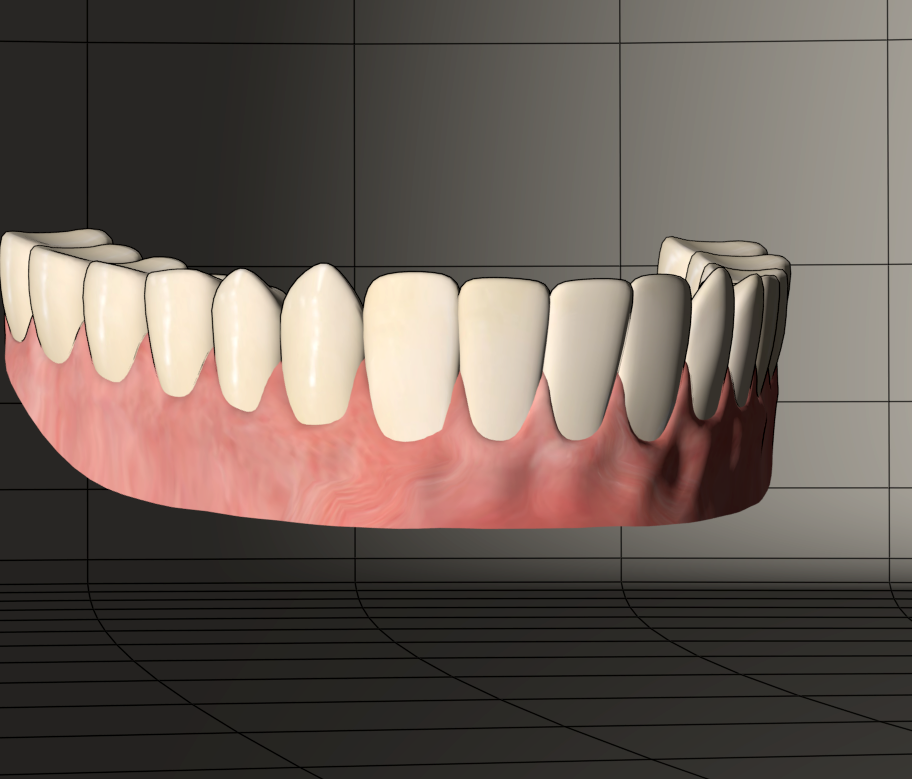
I'm already aware that there are some problems before I even bring the model into Poser. Nothing serious, it's about what I expected. The teeth material UVs are peeking a bit on the gums. Though I merged the original teeth material with the jaw/mouth interior material there's no escaping the original UV island placements... you can see the texture peeking on the gums here in this image.
I can fix this by taking another trip to Mudbox. I'll clone bits of the original texture over to another layer which will create a transparent overlay with the fixes which I can merge with the original textures. Here is the fix results...
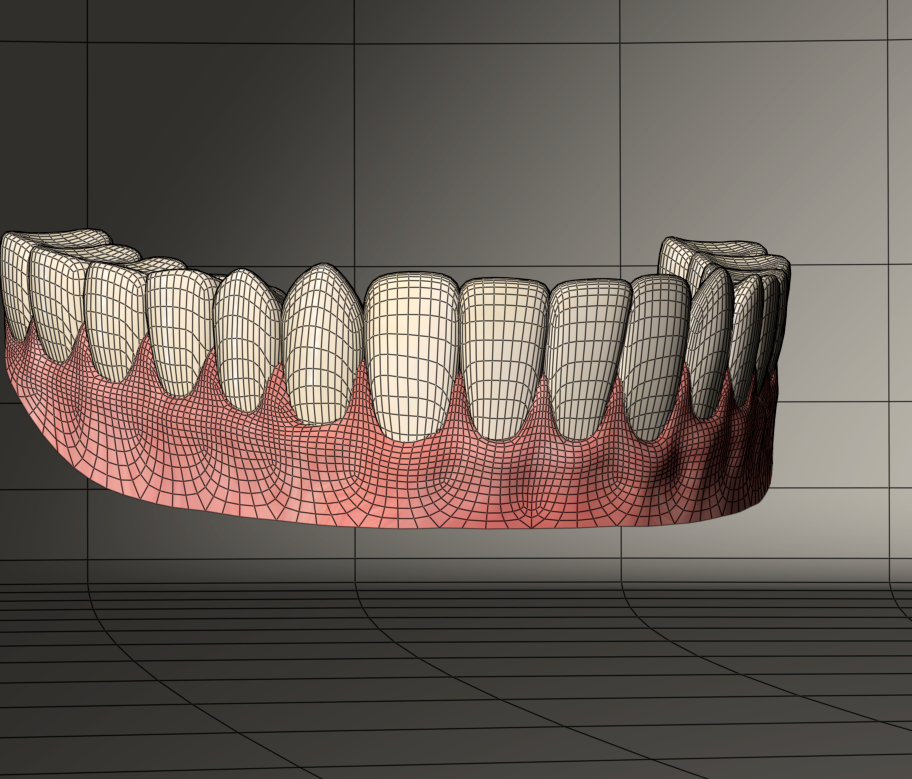
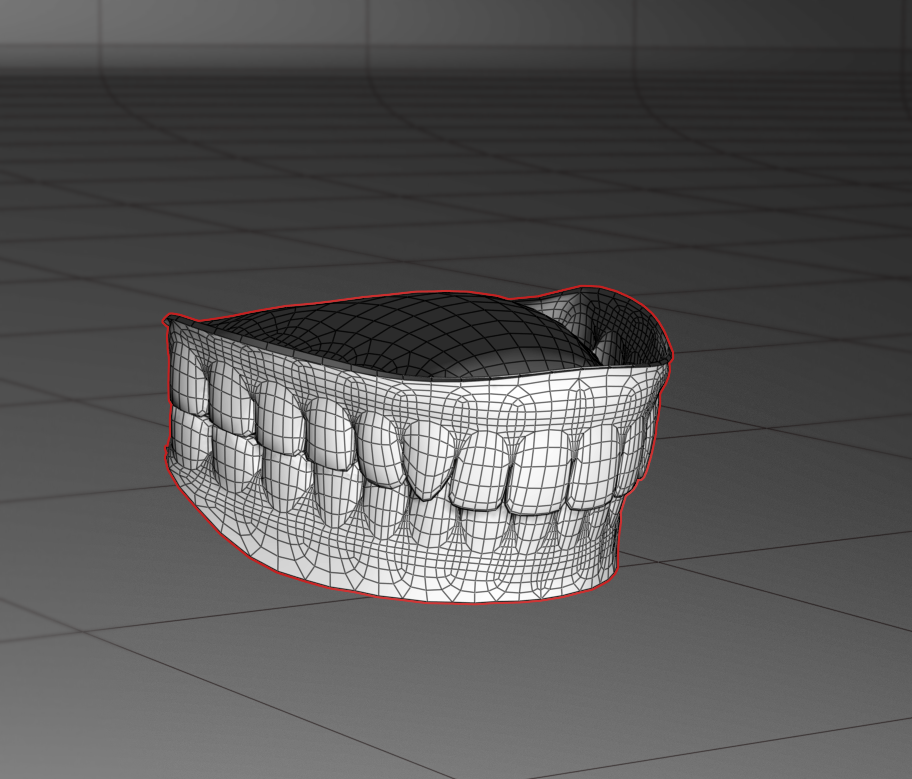
Wireframe showing the separated teeth recessed into the intact gums
To be continued tomorrow, wherein I'll finish the upper teeth, create donors for both upper and lower jaw actors and convert these props into conformers...