Renderosity Forums / Z Brush
Welcome to the Z Brush Forum
Forum Moderators: fly028
Z Brush F.A.Q (Last Updated: 2024 Aug 27 11:07 am)
ZBrush Areas @ Renderosity : Gallery - Tutorials - Freestuff
Pixologic: ZB 3.1 Overview - ZB 3.1 Demo -ZBrush 3.12 MAC - Gallery - ZBrush News - Interviews
ZClassroom - Docs - ZBrushInfo (Wiki) - Downloads - ZBrush 3.1 Overview
| Renderosity Marketplace | Gnomon ZB/DVD Training |

Subject: Poser V4 -> Zbrush 3 -> Poser Displacement Map tutorial

Ah, note this isn't tied to Victoria 4 really, and can be used for any figure or other object.


Holy crap Pjz...I've been trying to get the displacement working for ZBrush 3 for quite a while, thank you for sharing your process.
Have you tried this on a major morph, really altering and moving the mesh as opposed to just little wrinkles.
Don't get me wrong I'm not knocking the little wrinkles, just curious about how far this can go.
Also, have you tried to store a morph target on a mesh that has already been subdivided? What I mean is I've already taken a stock Poser head and morphed/subdivided it x3...do you think that
if I went to the 1st subdivision level and applied the morph target that it would work???
Thanks again, and thanks stone mason and abggins bill too!
Comitted to excellence through art.
If you subdivide and morph, and then store a morph target at a higher subdivision level, the resulting morph target is only applicable to the new geometry - meaning you cannot pass it back into Poser.
For morphing the whole body, Richardson's method of export all body parts to OBJ -> strip out the groups with UVMapper -> sculpt in Zbrush -> export again -> put the groups back in is very likely the best way to get this done, but I haven't got my head around the mechanics of HOW all that works procedurally yet. It's kind of beyond the scope of what I want to do anyhow; modifying the base OBJ that V4 is built from is enough for me. You might ping Richardson and ask for some more detail on how to get it to work.

Creator of PoserPhysics
Creator
of OctaneRender
for Poser
Blog
Facebook

Fantastic tutorial there!! I have ZB3 on the way so I was hoping for as many "Poser friendly" tuts as I can find. I'd like to do some new face and possibly body morphs for Apollo!! 
---Wolff On The Prowl---
We would actually need more tuts like this.
Zbrush is one of the greatest 3d tool on the market but the interface is so counter intuitive.
I tought learning photoshop was hard. I wish they would have done a make over for the interface in zbrush 3 but it is the same mess. You basically have to sit down and either figure it out which can take a while or get some tutorials like here.
There is another tool that is similar to zbrush that has a better interface but the program lacks a lot of what makes zbrush special. I just wish the pixologic guys would make it easier but i guess they do not so we have to live with it.
It would be nice of the author of this very good post to post more tuts like this. The only way to learn zbrush is visually it seems...
:)
*Zbrush is one of the greatest 3d tool on the market but the interface is so counter intuitive.
*And Pixologic keeps changing it. 3.1 seems to change a lot of essentially cosmetic things, while leaving some of the bugs from 3 alive and kicking. Trying to find the Tweak brush in 3.1 is fun...
Very good tutorial.
Here's the Apollo Robe by Connie with my first successful test!! WOOT!! So happy, so very happy!!
---Wolff On The Prowl---
Did you make sure you have the Edit button selected?
You may want to go over the steps again and see if you overlooked one!
---Wolff On The Prowl---
Select the head and neck and export that only using the dialog for the appropriate size. Uncheck most of the options since you just need the base obj files exported (so things like mtl, maps are not needed).
---Wolff On The Prowl---
Since you brought this up I've been, between clients, trying to get body parts exported from Studio using the Export : Obj options and you know I'm not sure that can be done? I did manage to get the Material list to export using the Silo export option. I didn't turn off the MTL options but I did turn off export maps and that's been fine. I find, for the best results, is to import in to UVMapper or UVMapper Pro your obj file and then go from there. Yea, Studio needs more options I think. Maybe with version 2 it will expand thing a bit more
---Wolff On The Prowl---
Weird results can mean quite a bit hon. Can you post a screen shot or explain a bit more??
---Wolff On The Prowl---

@pjz99: Thank you very much for this tutorial! That's really going to help! :D
@RAMWolff: There is a "Smooth UV" option in the displacement palette. But it is not active by default, you have to set that manually. It worked for me, only the grey base color was the problem. Not anymore, thanks to this tut. :)

The zbrush maps always look grey. It exports light grey on a grey background. That's why pjz99 explained that workaround with the node settings.
However, I've just found out that zbrush itself offers the possibility of adjusting the contrast so that the map gets white on black.
I'll post a screenshot as soon as I can; at the moment my PC is blocked by a huge pic that is taking ages to render ;)


Quote - I'll post a screenshot as soon as I can; at the moment my PC is blocked by a huge pic that is taking ages to render ;)
Wow, esha, that render really is taking a long time! Almost 5 months now? Is that 24/7?
Anyhow, not quite sure how I came across this at this late date, but nice post, pjz99.
(And I just thought I'd chime in and say I like ZBrush's interface :thumbupboth:. Well, mostly  . corleone1, Morgano, what's wrong with you guys? :blink:)

has anyone noticed that the grey in zbrush displacement map is not the same grey in poser?
the middle color should be the same right? well i made a displacement map in zbrush. and then i opened in photoshop. i also rendered a plane with middle grey in poser and then i also opened it in photoshop. it is not the same color. thats why it doesnt look good.
anyone have the same problems?
The grey in your render is influenced by the lighting. In the renders you practically never get the color you assigned in the mat room ;)
You should use the RGB values of the color you assign to the plane (press ALT while you click on the color node) to compare with the displacement map.
But it's true, the subtract 0.5 trick doesn't work well with higher displacement values. Let's hope some future version of Poser will fix this...


Privacy Notice
This site uses cookies to deliver the best experience. Our own cookies make user accounts and other features possible. Third-party cookies are used to display relevant ads and to analyze how Renderosity is used. By using our site, you acknowledge that you have read and understood our Terms of Service, including our Cookie Policy and our Privacy Policy.
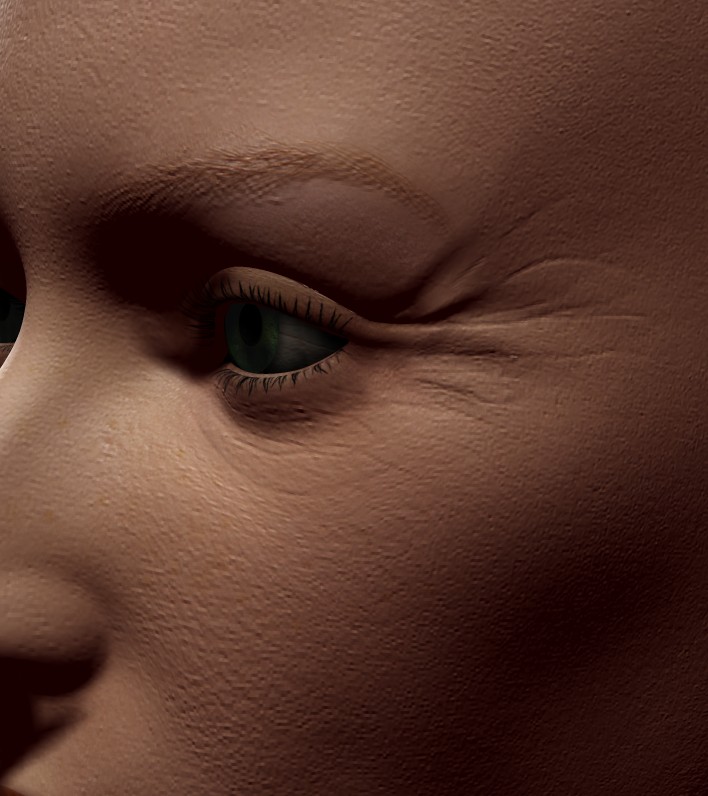
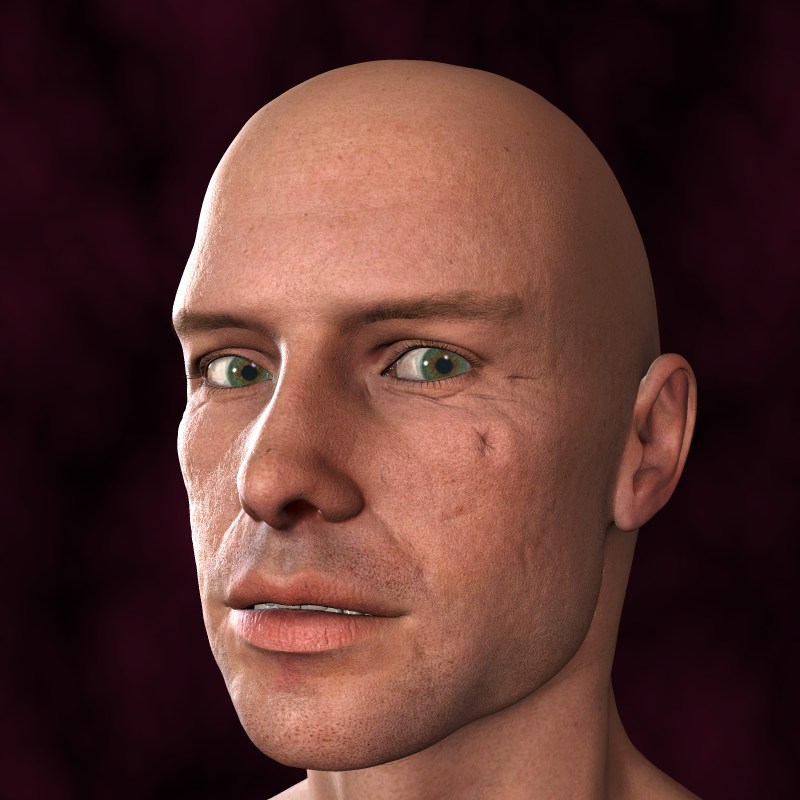
I've been wanting to add some fine detail to a certain V4 character's head for some time, and banged on this until I got it to work. If anyone's interested, here's the procedure.
1) From Poser, load your V4 and apply whatever morphs are desired, like so:

2) File Menu -> Export -> Wavefront OBJ -> Single Frame, and select only the Head from the Hierarchy Editor:

3. These export options work. Others might work too.

4. Supply some filename. For this activity, scaling did not cause me any issues, although be aware that for other tasks e.g. creating morph targets, you'd want to look into scaling the OBJ file up, and then back down on the way back into Poser.
5. Open Zbrush 3. Hit Escape and bypass the Quickstart menu. Preferences menu -> Importexport -> un-select iFlipY and eFlipY (again other options might work too).
6. From the Tool palette, click Import. Locate and open the exported OBJ file. Draw a copy of the head onto the document window, and press T to switch to Edit mode. The head will draw facing away from you; it's OK to rotate the view around to the front like so.

7. Open the Morph Target palette, and click StoreMT to store a morph target. This is crucial to allow Zbrush to separate the base mesh from the changes made when subdividing and sculpting. Note the location of the StoreMT button in the above screenshot.
8. Subdivide (Ctrl+D) as much as you like (I did 3 times). Sculpt, in this case with a very fine Standard brush with X symmetry turned on (hit X).

9. From the Geometry palette, switch back to Subdivision level 1.

10. From the Morph Target Palette, click Switch. This returns the bottom subdivision level to an un-morphed state, and allows us to make a displacement map. Stay at subdivision level 1! This threw me for a long time, because I kept thinking I should switch back up to max subdivision level, but don't do it yet.
11. From the DIsplacement palette, set options as you like; I set them like so. I'm sure other settings would work just as well or better.

12. Press Create DispMap. You should see the outline of the Displacement palette rapidly animate over to the Alpha menu at the top left of the screen. This should place a copy of your displacement map on bottom of the Alpha palette. Select your displacement map and make it the Current Alpha.

13. With your displacement map set as the Current Alpha, from the Alpha menu (not the palette, the menu at top left), click Flip V. This is because, by default, the displacement map is stored upside-down from how Poser expects to read it.

14. From the Alpha menu, click Export. Select a file format. TIF is fine, and can be converted to JPG on the way back to Poser to reduce size if desired. Zbrush seems a little inconsistent in this department; one session exported 4000x4000 at 31MB, and another one following the exact same steps exported at 259KB. I don't see any options to set file compression or color depth; this is a 16 bits/pixel image in both cases. Anyhow, let's bring it back into Poser now.
15. We have a small problem: Zbrush displacement maps consider the zero point to be 50% grey. Poser considers the zero point to be 0% (black). So we're going to subtract .5 from the color values of the displacement map (thanks Stonemason, BagginsBill). In Poser, switch to the Materials room -> Advanced view. Select the 1_SkinFace group. Click the plug next to Displacement on the root node and select New Node -> Math -> Math_Functions.

16. In the new Math_Functions node, change the Math_Argument parameter to Subtract. The Value_1 parameter should be set to 1.0. Change the Value_2 parameter to .5 (we're going to subtract 50% of color values from the image map, once we add it.).

17. Click the plug next to Value_1. New Node -> 2D Textures -> Image_Map.

18. In the new Image_Map node, locate and set your displacement map. You may also want to turn off texture filtering (I do).

19. Complete! If you like, you can save a Material, or Materialss Collection, that includes this setting; see Poser documentation for use of Materials Collections. We're now ready to render! But we need to tell Poser's render engine to Use Displacement maps. If you use another application for rendering, some more work may be required, see your renderer documentation.

20. Voila!

My Freebies