
Renderosity Forums / Poser - OFFICIAL
Welcome to the Poser - OFFICIAL Forum
Forum Moderators: RedPhantom Forum Coordinators: Anim8dtoon
Poser - OFFICIAL F.A.Q (Last Updated: 2026 Oct 14 3:45 am)

Subject: Antonia - Opinions?


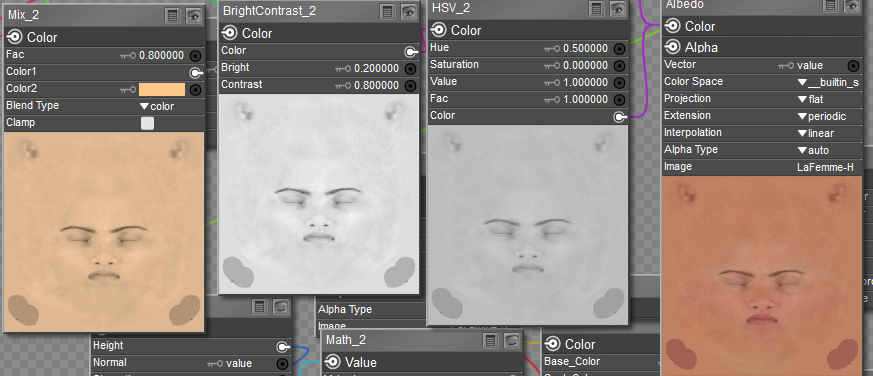
The easiest method is to put a BrightContrast node between the Albedo/Diffuse node and the HSV node. I have swapped out the HSV2 node for the actual Cycles HSV for practical reasons, to keep everything Cycles-related. The settings I use on the BrightContrast node are Bright = 0.2 and Contrast = 0.4. That should be the right combination, but you can play with the setting values to optimize the skin tone. Also, I eliminated the Cloud node connected to the HSV saturation and substituted an actual value (0.996). IMO, the node is not contributing to the shader; the Sky_Color and Cloud_Color channels are too close, yielding a general RGB of 254, 254, 254. Unless you can demonstrate that a vast difference between the 2 channels can alter the texture's behavior, it would be best to substitute a numeric value instead.

batch-applying materials .... Oh dear, you just mentioned a function I didn't even know about yet.
I’ve never really looked into it either. I’ll definitely take a closer look at it when I get the chance. It sounds like it could make things a bit easier :D
Thanks to both of you for the help. I’ve now used a different texture, and I think it fits much better again. I’m still tweaking the individual nodes a bit… the material really opens up amazing possibilities to make a character look more realistic. I’m honestly thrilled.
Thank you so much for sharing and for helping everyone :) You guys are great!
Content Advisory! This message contains nudity
You're welcome. Below is a recent Superfly render of La Femme with the present skin shader above applied. I made modifications to the arrangement, although I am not completely done with all the body zones. I always felt that if you are going to render in Superfly, might as well convert the light sources to Blackbody emission to add a little more realism.
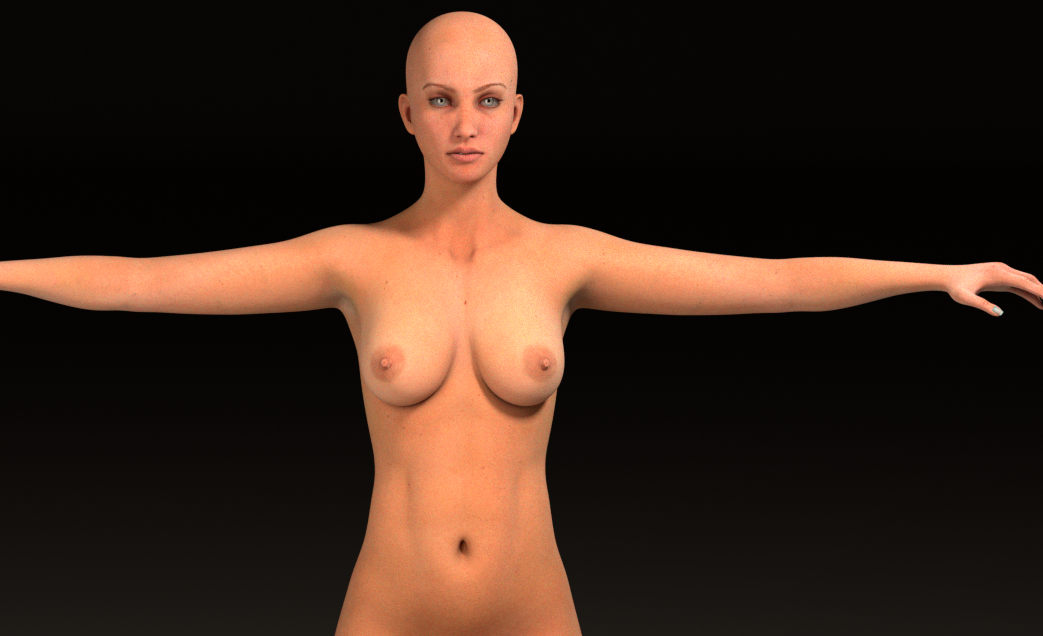

i used the odf shader here over a pale pinkish skin i've been working on. to me it's still a bit flat, needs some glossiness or more sss or something, haven't figured it out yet. but i love the extra details it adds & they really show up over the paler texture.
i find the default skin to be a bit too orangey for my liking without some tweaking.
oh, and check out the manual for a good explanation of how to use the Assign tab in the material room. one of P13's greatest features.
still lost in the wilderness
Poser 13 Superfly pretty much only these days
jancory posted at 7:23 PM Sat, 20 December 2025 - #4502436
This is the node arrangement for AO. Note the highlighted color chip on the Diffuse node; that controls the color of the shadows.i used the odf shader here over a pale pinkish skin i've been working on. to me it's still a bit flat, needs some glossiness or more sss or something, haven't figured it out yet. but i love the extra details it adds & they really show up over the paler texture.
i find the default skin to be a bit too orangey for my liking without some tweaking.
oh, and check out the manual for a good explanation of how to use the Assign tab in the material room. one of P13's greatest features.
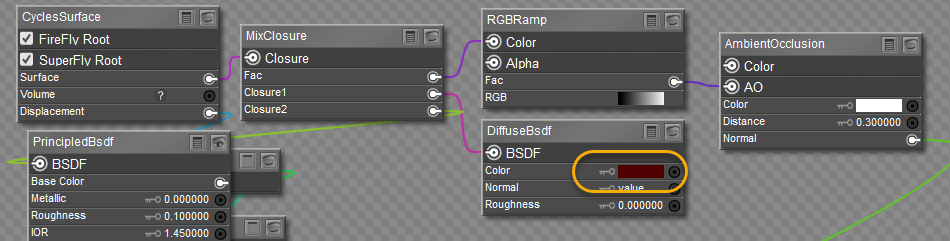
Be very careful when applying to the face/head; the eyebrows need to be hidden, otherwise they will pick up unintended shadows.
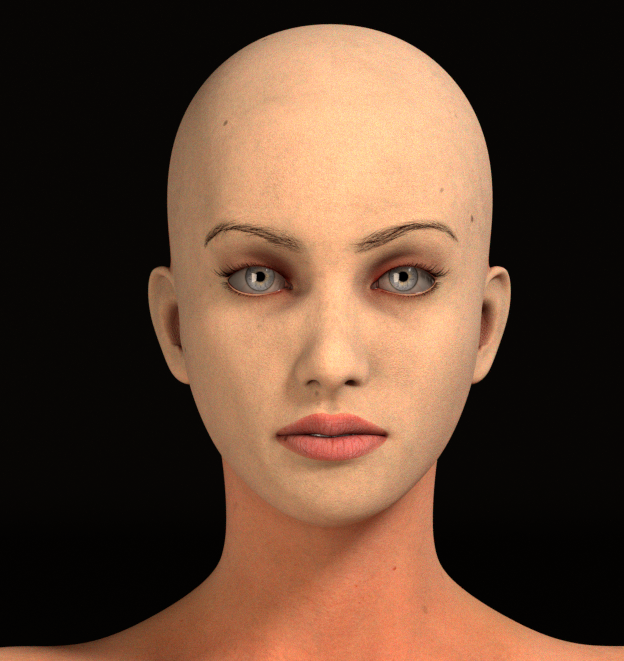
thanks, i 'll experiment with that. and i know about the eyebrow/transparencies problems w/AO but haven't found a good workaround yet (other than a morph to hide the brows inside her head). skull caps are another problem, they can cast some nasty shadows.
still lost in the wilderness
Poser 13 Superfly pretty much only these days
Content Advisory! This message contains nudity
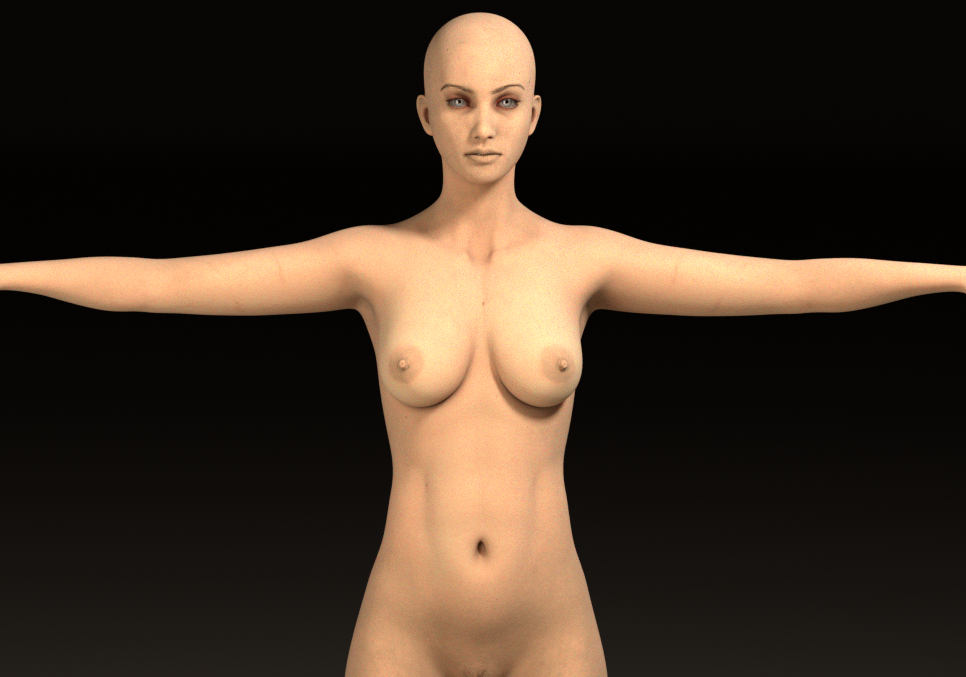
I think this is better.
hborre posted at 5:48 PM Sat, 20 December 2025 - #4502433
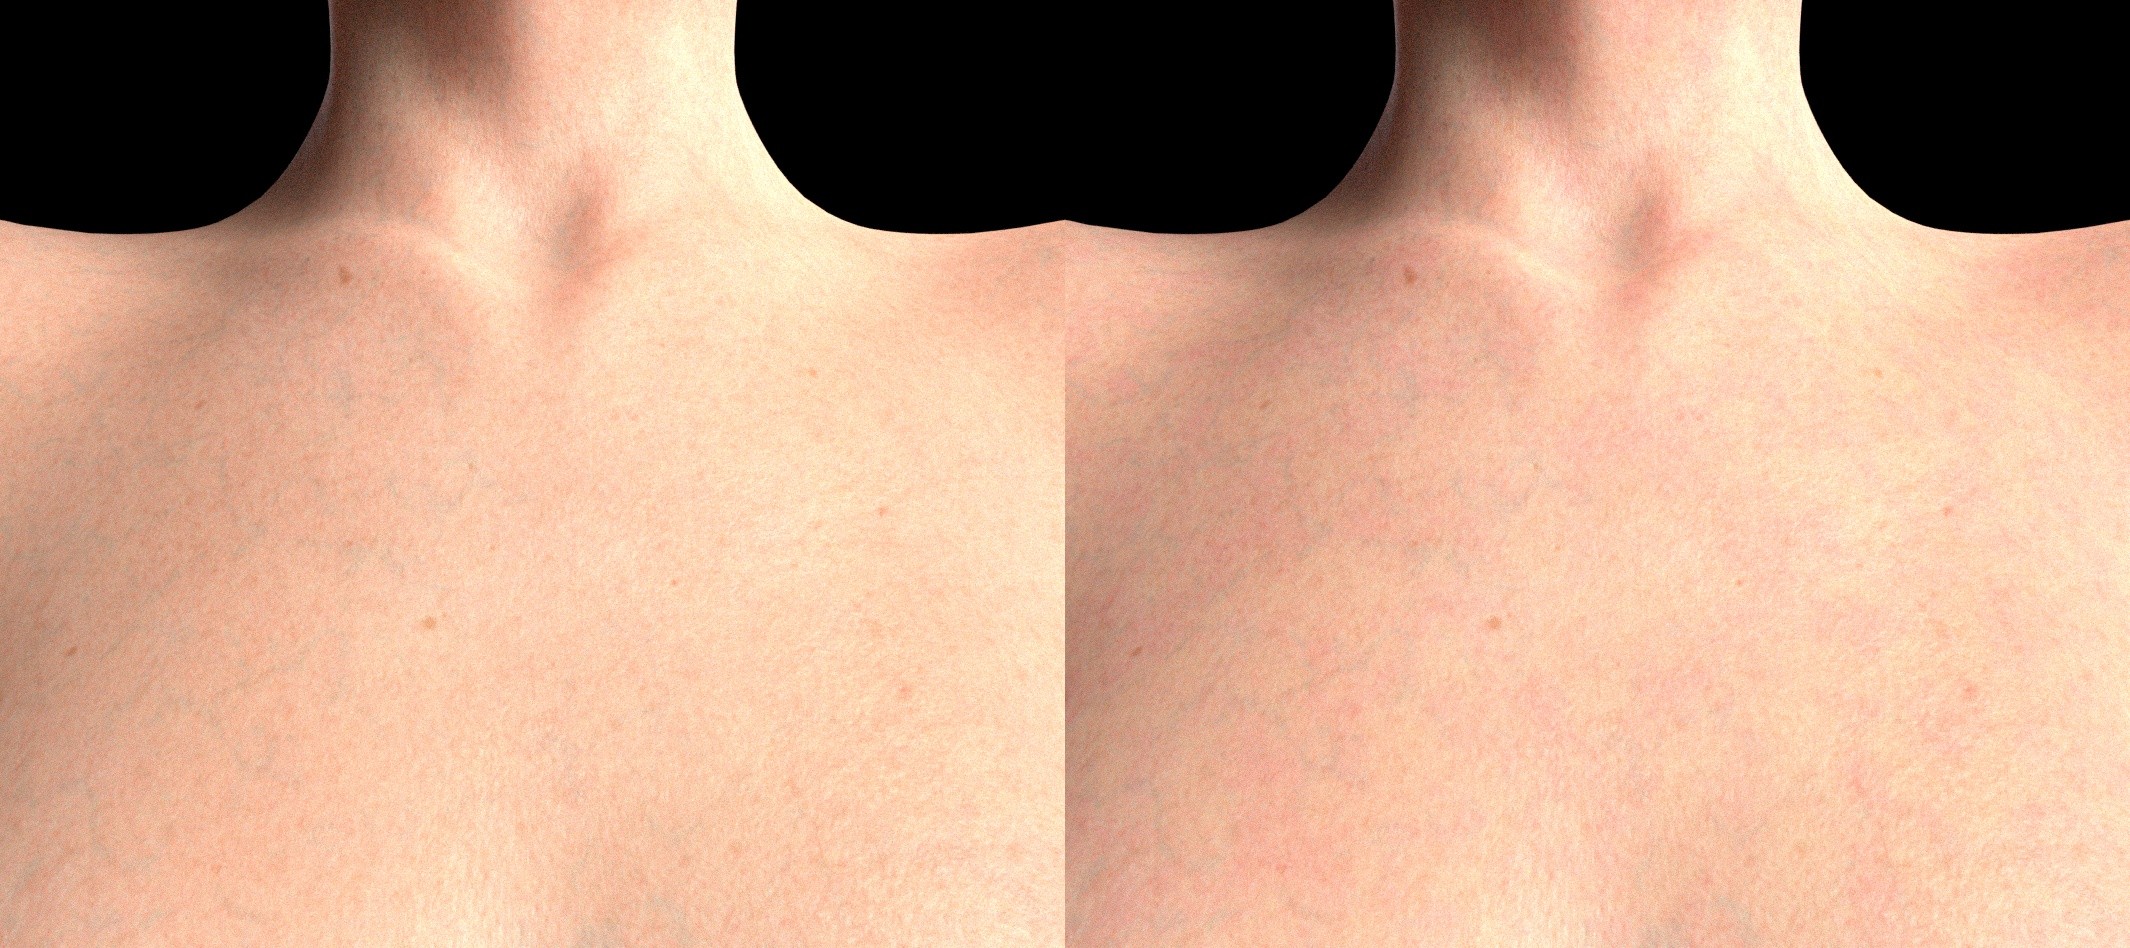
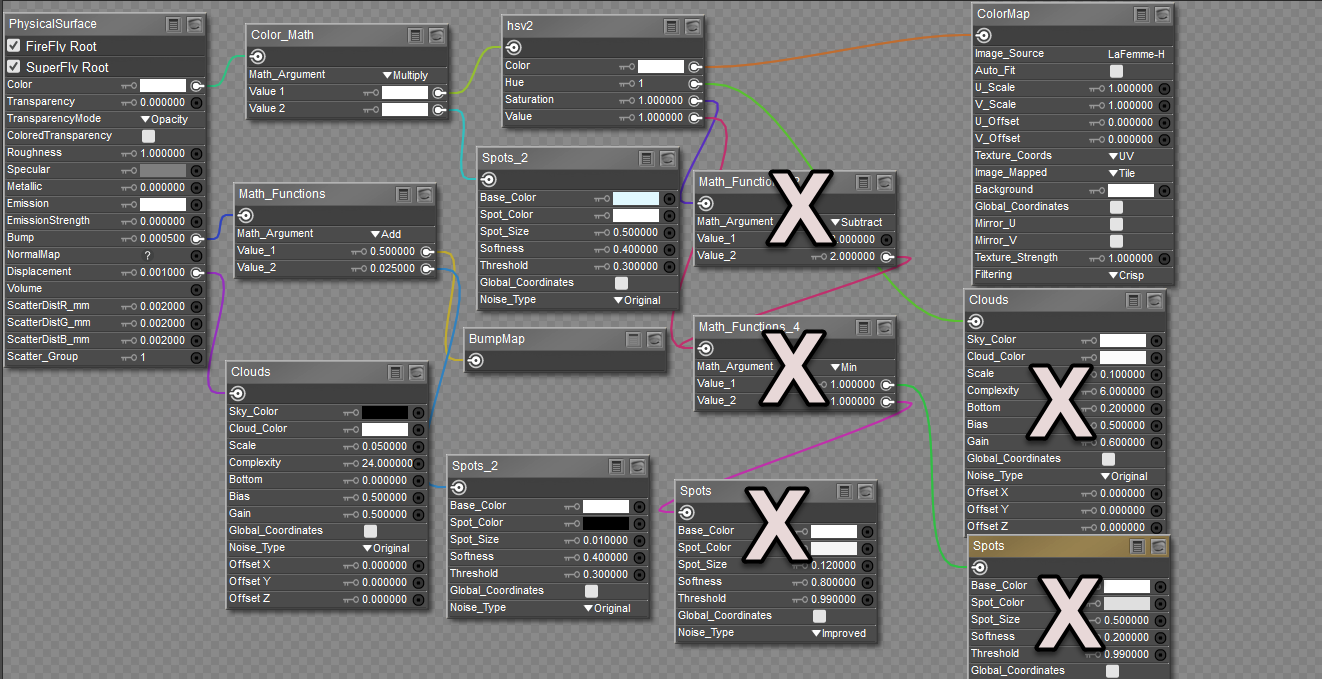
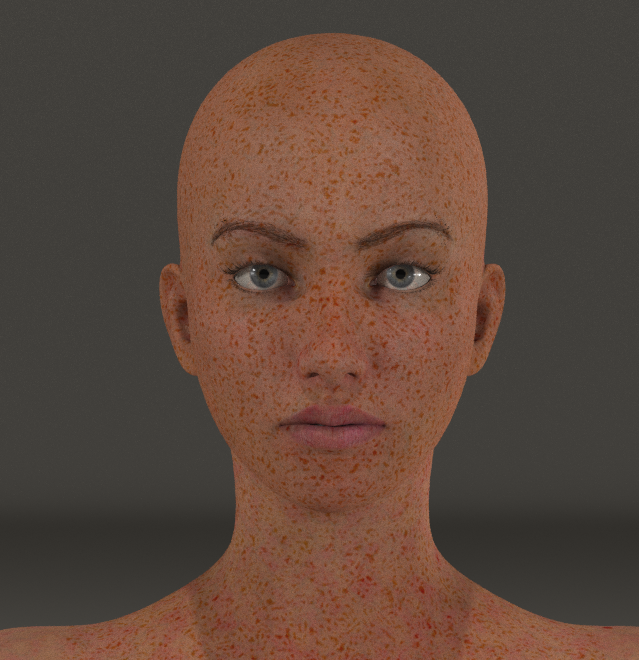
Do you mean the Cloud node connected to the HSV hue? That definitely makes a difference, as demonstrated below (constant hue 0.996 on the left, Cloud node on the right). Easier to see when flipping back and forth between the images, but I think it's clearly visible ever side-to-side. Whether you find that difference relevant is of course up to you, but I do.[...] Also, I eliminated the Cloud node connected to the HSV saturation and substituted an actual value (0.996). IMO, the node is not contributing to the shader; the Sky_Color and Cloud_Color channels are too close, yielding a general RGB of 254, 254, 254. Unless you can demonstrate that a vast difference between the 2 channels can alter the texture's behavior, it would be best to substitute a numeric value instead.
-- I'm not mad at you, just Westphalian.

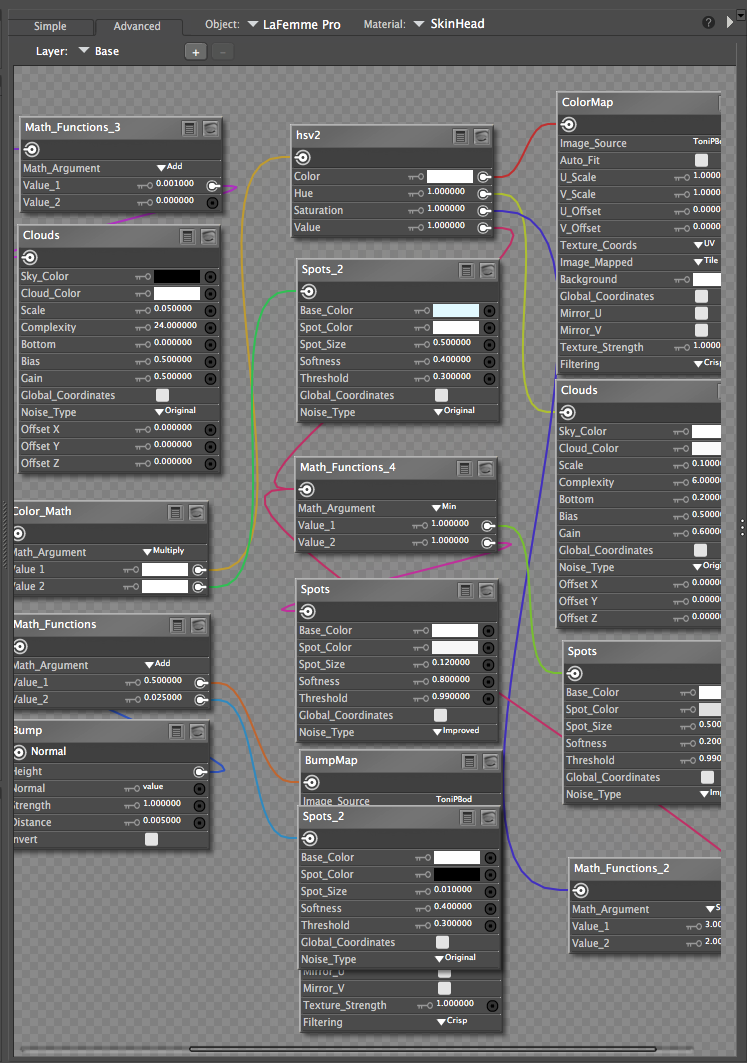
Unfortunately, you did not show the entire Material Room for the shader. You are attempting to use a shader that was created in Poser 13 in Poser 11. Poser 11 does not have the PrincipledBsdf node, which is what Odf has based his shader on. ATM, the figure is not going to render in Superfly as expected without rewriting the entire node structure. Just plugging the color node into Cycles will negate the specular and bump maps' involvement in the skin texture. We might be able to bypass the Cycles node and use the PhysicalSurface node for Superfly rendering, but there is a chance that it might not appear as demonstrated. I can tear this apart and reassemble it, but it will take time.
Oh, I didn't even think about the fact that this wouldn't work in Poser 11.
My bad, sorry @Anim8dtoon :(
Content Advisory! This message contains nudity
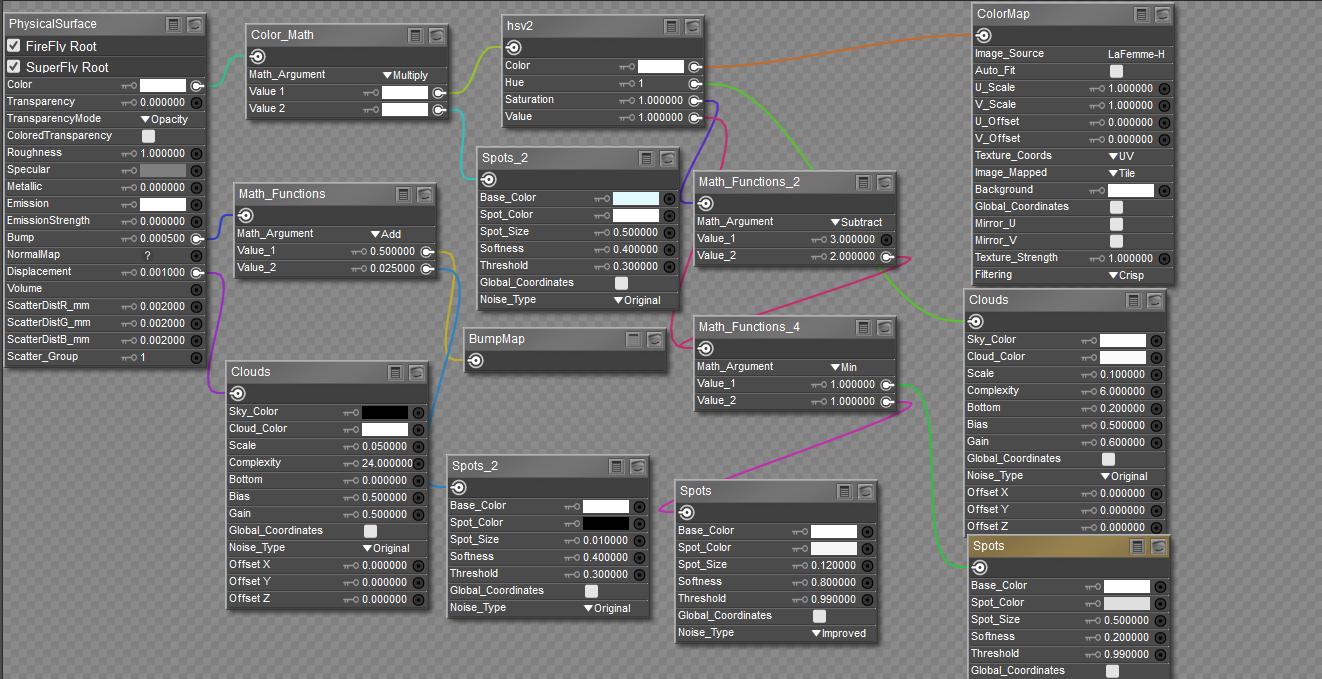
On the contrary, it will work in P11; however, if you want to take advantage of Superfly, you need to reroute the nodes to the PhysicalSurface root node. It is not impossible to do. Below is the modified node arrangement for Poser 11:
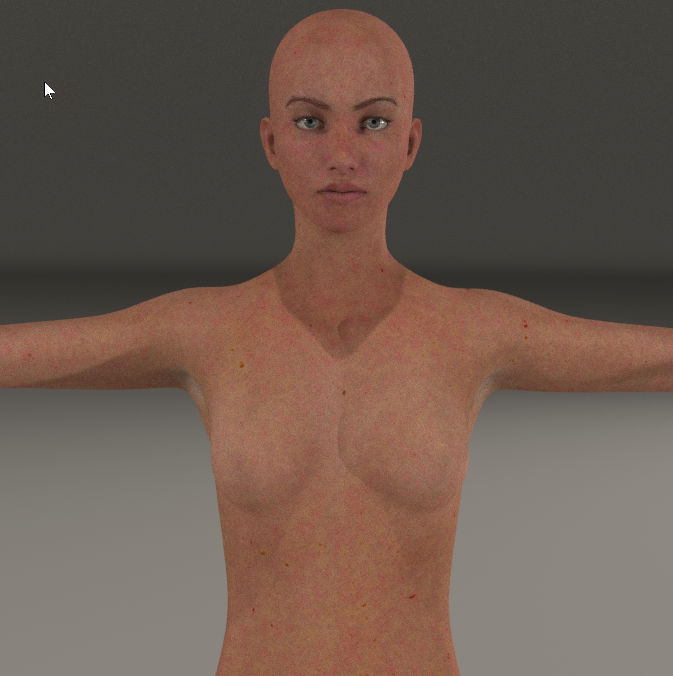
And this is my render of LF 1 in Superfly:
Yes, I'm aware of those features built into that shader version; I have to revisit that when I have an opportunity. I am not too comfortable with some of the node arrangements; they just don't look mathematically correct, and I have observed questionable arrangements in this version. I just uploaded the P11 version of the shader posted using the Physicalsurface root node with my modifications at the other thread. Everyone is welcomed to test drive it. If I'm so inclined, I might add ambient occlusion to it.
I thought I'd make a few quick comments regarding the skin "shader" that hopefully clarify some things.
1) It is absolutely true that the node setup is not ideal. It's something I cobbled together really quickly for personal use and then shared because some people liked it. So please, be very welcome everyone to point out its flaws and make it better.
2) This is probably not ideal as a shader. What it is to me is a collection of nodes that produce small variations in the skin to simulate things like varying pigmentation and small blood vessels. To me, the "shader" here is the PrincipledBSDF node which, fed with the right parameters and texture maps, should be able to produce a pretty good approximation of a basic skin material. In fact, I have a tendency to use too much subsurface scattering as well as specular reflection, i.e. too low a roughness value. So again, if you can improve on that, that's great.
3) The reason I prefer the PrincipledBSDF over the PhysicalSurface node is that it has a builtin Fresnel effect. For my clothing freebies, I have usually included Poser11 versions of the fabric materials that use PhysicalSurface, and if one compares the two versions, one with and one without the Fresnel effect, the difference is quite obvious. So ideally, a Poser11 version of the skin material should use a Fresnel node plugged into the specular channel (I presume) with appropriate settings. I'm not sure what these settings should be, so I never tried, but the experts will probably know.
4) As for the nodes that supposedly do nothing, I can see how that's a bit confusing, but remember that those pattern nodes (Clouds and Spots, respectively) get fed into channels that expect numbers, not colors. Whether those values, seen as colors, are visually indistinguishable from white is irrelevant. For example, the cloud node that pipes into the hue channel of the hsv2 produces values between roughly 0.985 and 1.0. For someone who can distinguish hues well, that produces a subtle but quite visible variation of the skin tone, which is exactly what I was going for. I admit that it would have been better to use maths nodes to modulate the strength of the effect instead of modifying one of the pattern colors, but that's leading right back into comment 1.
Hope that helps.
-- I'm not mad at you, just Westphalian.
Thanks for the clarification, Odf. I have seen those subtle variations within the skin textures upon rendering. I agree there is room for improvement and simpler modifications. The PrincipleBsdf node is a better alternative, although there have been changes to its settings since P12, which disrupts some of the node connections. I recreated the node arrangement for P11's PhysicalSurface simply because the PrincipleBsdf node doesn't exist. I'll keep an eye on the Fresnel effect. Thanks again.

If you're asking me, no. After Antonia 1.3, I decided not to do any more figure development until Poser had full unimesh support. But that's just a necessary condition, not a sufficient one.Any plans for Antonia 2 for Poser??
-- I'm not mad at you, just Westphalian.

Privacy Notice
This site uses cookies to deliver the best experience. Our own cookies make user accounts and other features possible. Third-party cookies are used to display relevant ads and to analyze how Renderosity is used. By using our site, you acknowledge that you have read and understood our Terms of Service, including our Cookie Policy and our Privacy Policy.
Error 40, lol! I hadn't heard of that one.
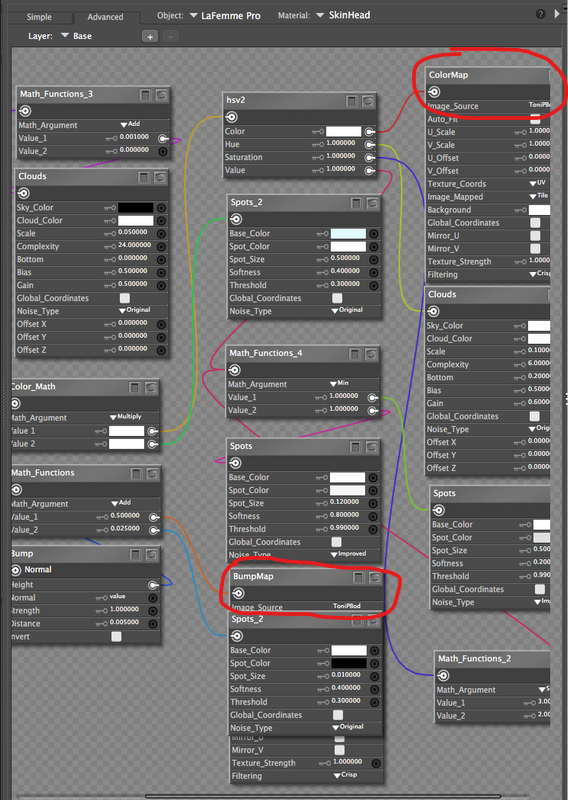
The material room has a tab for batch-applying materials. I would drag and drop the material from my runtimes into the field on the right, then check all material zones of my figure that I'd like to apply it to and hit the "Apply" button. After that, I'd go through the materials and select the correct image maps for all the ColorMap and BumpMap nodes.
General color correction can be done with the hsv2 node in the middle that has all the wires coming in. LF2's lighter image map is a bit too dark and yellow-ish if one wants a pale Norther European type, so I increase the value to something a bit larger than 1.0, and decrease the hue a bit to make it look more pinkish. Probably not the best and cleanest way to do it, but I'm no material room expert and it is just a setup I cobbled together for my own use.
-- I'm not mad at you, just Westphalian.