
Renderosity Forums / Poser - OFFICIAL
Welcome to the Poser - OFFICIAL Forum
Forum Moderators: RedPhantom Forum Coordinators: Anim8dtoon
Poser - OFFICIAL F.A.Q (Last Updated: 2026 May 27 6:09 pm)

Subject: Taking sweaty skin to the next level


Without seeing the sweat texture set my guess would be its only necessary to mod the bump and specular inputs not the diffuse. For example plug the sweat bump map directly into the PoserSurface bump and specular_value inputs and see what it does. If that works ok the next step would be to mix these with the existing bump and spec settings above.

Still, or animated? If it's for a still, load a second figure with the same pose parameters bute use the surfaces to make it invisible. Then you can make you bumps and sweat trail to your hearts content and put them as an alpha channel. Not only will they look more convincing,but if your renderer has the proper settings, they should cast a faint shadow which will add to making them more convincing.
mo·nop·o·ly [muh-nop-uh-lee]
noun, plural mo·nop·o·lies.
1. exclusive control of a commodity or service in a particular market,
or a control that makes possible the manipulation of prices
ironsoul posted at 10:27PM Mon, 01 January 2018 - #4321401
Without seeing the sweat texture set my guess would be its only necessary to mod the bump and specular inputs not the diffuse. For example plug the sweat bump map directly into the PoserSurface bump and specular_value inputs and see what it does. If that works ok the next step would be to mix these with the existing bump and spec settings above.
Tried this; here are the results.
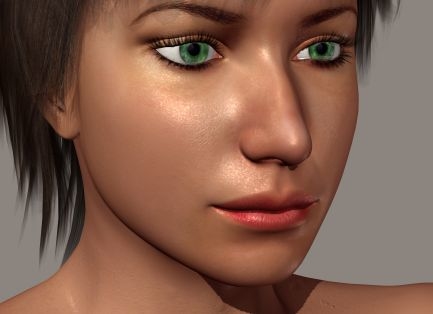
The original shader from before:
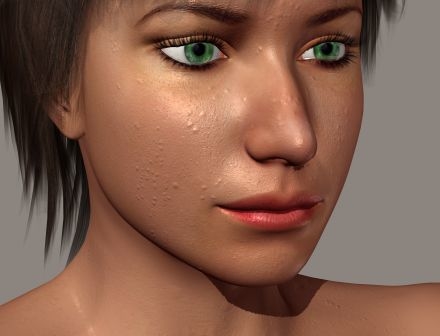
The same, but with the spec and bump replaced as described:
Increasing the spec value to 1 and decreasing the highlight size:

Changing the light to see if that had any effect:

This is getting there, I think. It just looks more like warts right now.
Joe@HFG posted at 10:46PM Mon, 01 January 2018 - #4321406
Still, or animated? If it's for a still, load a second figure with the same pose parameters bute use the surfaces to make it invisible. Then you can make you bumps and sweat trail to your hearts content and put them as an alpha channel. Not only will they look more convincing,but if your renderer has the proper settings, they should cast a faint shadow which will add to making them more convincing.
This sounds really plausible. I don't think my personal system would be able to handle it, though.
The highlight size is too big and of the wrong spec shading type for the water drops, could use a blend node to change highlight size for just bump parts but think it really needs to be fresnel to get the correct effect and intensity.
To extract the spec from the diffuse map one thought is to convert it to bw using the HSV node and then use the step function from the math node to filter just the higher values which hopefully will be from the reflection/refraction highlights and either blend with the existing spec using the bump map as a mask or plug into the alt spec input.
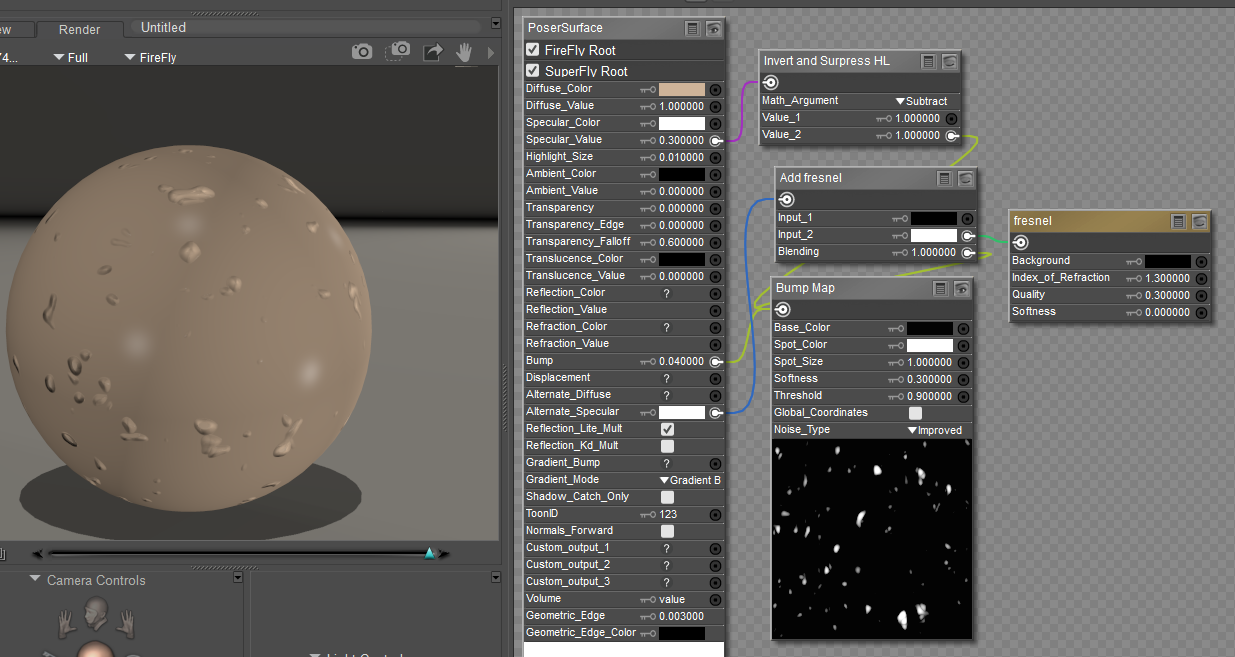


To me the major problem is how to fake a complex 3D optical effect involving two materials onto a single 2D surface, as you say the distribution needs to be looked at too. Whats missing is caustics, even if we add a second surface using Joe's suggestion Firefly doesn't generate this lighting effect so it has to be faked but that needs to be linked to the light direction. Taking the caustics from the reference diffuse map won't work as a general solution as the baked in spec is not linked to the light direction so may look odd if the lighting differs from the original too much.

Privacy Notice
This site uses cookies to deliver the best experience. Our own cookies make user accounts and other features possible. Third-party cookies are used to display relevant ads and to analyze how Renderosity is used. By using our site, you acknowledge that you have read and understood our Terms of Service, including our Cookie Policy and our Privacy Policy.
Hey all,
After following kfox's sweaty skin tutorial here on Renderosity, I ended up with a result I'm mostly satisfied with in Poser 8:
Simply by adjusting the highlight size and the specular value, anything from a light sheen (as here) or a high gloss is possible. So far, so good.
What I'm trying to do now is add actual sweat droplets to the skin. I have a texture set that comes with a bump map with sweat droplets, but I'm puzzled on getting it combined with the material I already have. Using Blender, Color Math, or Math Functions don't work at all or leave the skin way too gray or washed out; I'd like for this to work in any level of light, but especially bright daylight.
What I'm looking for, ideally, is to have the sweat bump map applied to the diffuse map like a makeup or a tattoo (not affecting the skin color), and to have the droplets raised off the skin.
Any suggestions?