Wed, Mar 25, 10:51 AM CDT

Renderosity Forums / 3D Modeling


Welcome to the 3D Modeling Forum

Forum Moderators: Lobo3433 Forum Coordinators: Digitell

3D Modeling F.A.Q (Last Updated: 2026 Mar 17 3:46 pm)

Freeware 3D Modeling Software Links:
Blender | Trimble Sketchup | Wings 3D | Anim8or | Metasequoia | Clara IO (Browser-based 3d modeler)

Check out the
MarketPlace Wishing Well, as a content creator's resource for your next project.

"What 3D Program Should I buy?" Not one person here can really tell you what's best for you, as everyone has their own taste in workflow. Try the demo or learning edition of the program you're interested in, this is the only way to find out which programs you like.


Checkout the Renderosity MarketPlace - Your source for digital art content!


Subject: Facial Parts practice - poly by poly


Teyon ( ) posted Fri, 19 August 2005 at 3:37 PM · edited Wed, 25 March 2026 at 10:51 AM

file_285452.jpg

Okay, so this is how I sometimes do it. If you looked at the tuts, you'll notice that everyone starts a little differently. Some like to start with the eyes, others with the nose, some with the mouth. I start with whatever looks like it'll be the most fun to start with and work from there. You'll notice in the image that I started by placing a single polygon in the scene and positioned it to math the drawing I have by changing it's angle and shape slightly. Mind you now: I don't always start with the lips...sometimes I start with the flesh surrounding the lips and then extrude the lips out from that. This time though, I didn't. No real reason.


Teyon ( ) posted Fri, 19 August 2005 at 3:38 PM

file_285454.jpg

Now you may all be asking yourselves, "Where's the image? Why don't you post it? I can't see the head!" Well, I will post it at the end, if you really want it but I should warn that it's not perfectly lined up for front and side viewing. Also, since we're concerened with just the mouth area, showing the entire head may distract you from your goal, which isn't what I want. In this image, you can see that I select an edge and extruded it along the path of the lips, altering the shape of the polys to match the image as much as I could. Sometimes all you have to go with is a front or side view,this time I drew both so we're lucky. In situations where you don't have both, use a mirror or feel your lips to get a sense of depth that may be lacking. You may be surprised what exploring yourself this way may teach you about faces.


Teyon ( ) posted Fri, 19 August 2005 at 3:38 PM

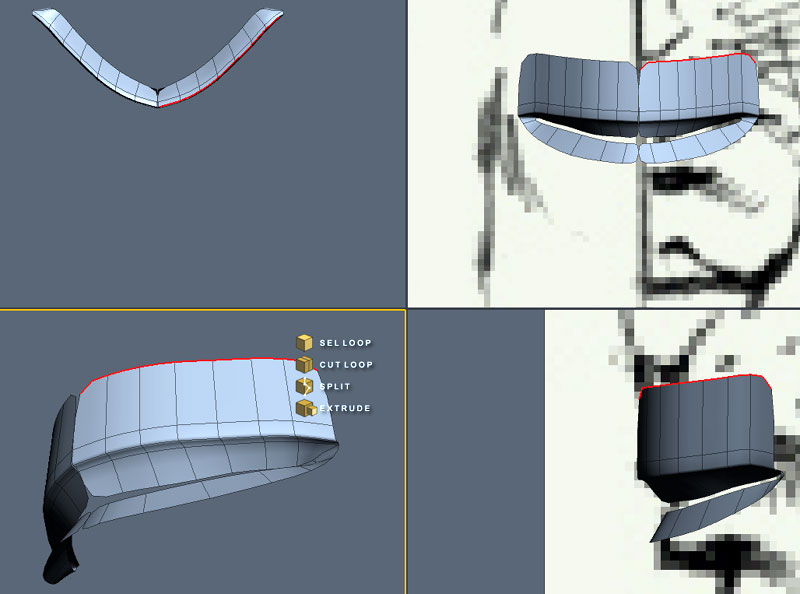
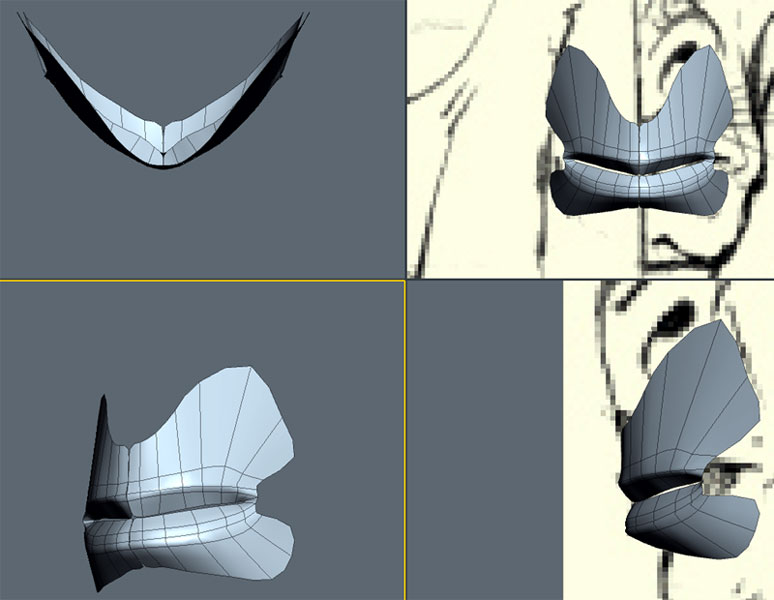
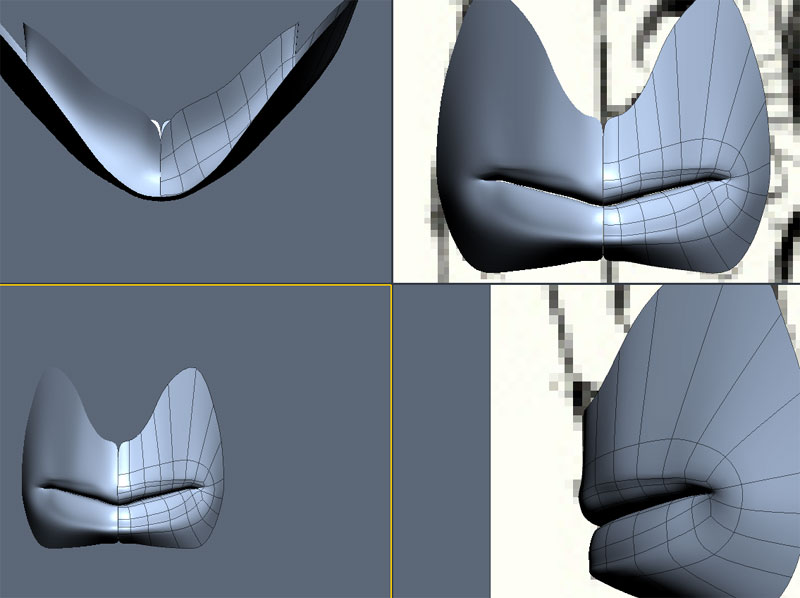
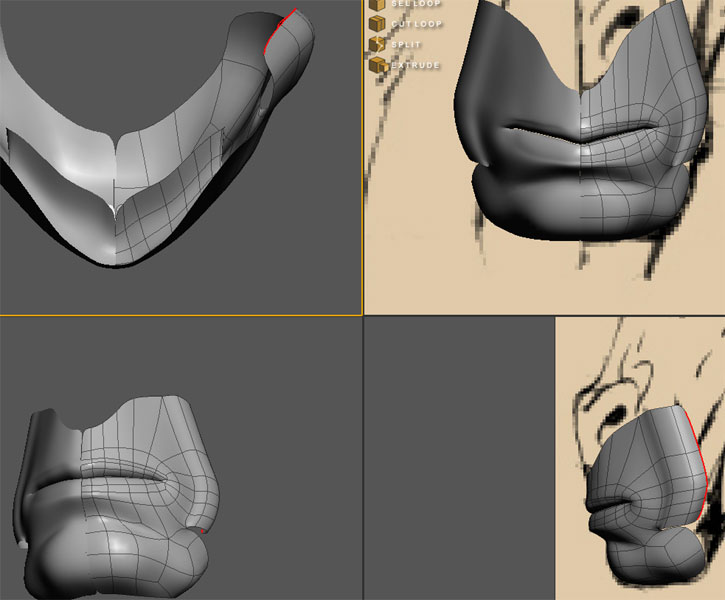
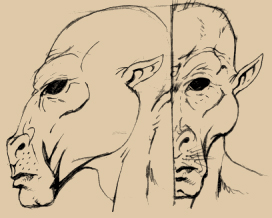
Before you go ahead and extrude all the way around the mouth, stop and take a look at what it is you're doing. If both images lined up well and were drawn by someone who did this kind of thing every day (ie., not me) then you'd probably be able to just trudge along with no worry about odd shapes happening as you model. However, I'm no expert at turn-around images, so if you were to just continue on following the lips in both drawings, you'd end up with a very point mouth. To get around this, I'd suggest concentrating the bulk of your modeling the mouth in the front view. This will force you to spread the mouth out a bit until you reach the corners, which would be desirable.


Teyon ( ) posted Fri, 19 August 2005 at 3:39 PM

file_285455.jpg

To test if your model is getting too pointy wehn viewed at any angle other than the side and front, make an instance mirror. If it's looking too pointy, just adjust it by moving the pushed back edges foward some. Once you get to the corners of the mouth, be sure to turn the edges a bit and pull the points for the corner inward. Hopefully the image provided will illustrate a bit better what I just described...


Teyon ( ) posted Fri, 19 August 2005 at 3:39 PM

file_285456.jpg

Extrude the lips up a bit as shown. You can do this extrusion twice or you can do it three times to add a slight edge to the lips. I did it 3 times. Then you have to reshape to match the shape of the upper mouth area you are making. take into account frown lines as a guide for the shape. I will show what this looks like in the next post.


Teyon ( ) posted Fri, 19 August 2005 at 3:40 PM

file_285457.jpg

Example of adjusting the upper lip area to fit the face more and minor tweaking to the lip itself.


Teyon ( ) posted Fri, 19 August 2005 at 3:40 PM

file_285458.jpg

Doing the same for the lower lip. Please note that I'm ignoring the corner of the mouth at the moment. Again, I'm doing it three times so that I can capture a slight ridge as the lower lip falls into the chin area.


Teyon ( ) posted Fri, 19 August 2005 at 3:41 PM

file_285459.jpg

Here, I've re worked the extrusion so that it follows the puffy flesh under the lip as described by the drawing. Please note that not all faces have this or at least, not as defined as this seems to have been drawn.


Teyon ( ) posted Fri, 19 August 2005 at 3:41 PM

file_285460.jpg

Okay, now we select the ignored edges of the corner of the mouth and extrude those. I like to add a little puffy area as I extrude out, to help push the corner of the mouth into the face.


Teyon ( ) posted Fri, 19 August 2005 at 3:45 PM

file_285461.jpg

Once you're corner is extruded, merge the verts to their corresponding sections on the rest of the model as shown.


Teyon ( ) posted Fri, 19 August 2005 at 3:46 PM

file_285462.jpg

Now select the edges that make up the inside of the mouth and extrude them inwards once or twice. I did it twice.


Teyon ( ) posted Fri, 19 August 2005 at 3:46 PM

file_285463.jpg

Now add a new loop in the lips. This will be used to add some thickness to the upper lip and can also be used to fatten the lower lip if so desired.


Teyon ( ) posted Fri, 19 August 2005 at 3:53 PM

file_285465.jpg

Here I've decided to not only fatten and adjust the upper lip but to fatten and tweak the lower one also. I went ahead and got the lips as closed as possible without actually having the surfaces overlap. Normally, for animation, it's easier to rig a face that is in a more relaxed pose with the mouth slightly ajar. For the purposes of this learning experience, however, the mouth can be open or closed.


Teyon ( ) posted Fri, 19 August 2005 at 4:03 PM

file_285468.jpg

Here we take some of the edges of the fleshy part below the lip (I took three)and start extruding out, down and around to make the start of a chin.


Teyon ( ) posted Fri, 19 August 2005 at 4:04 PM

file_285469.jpg

Now, in order to stay true to the image, I'm going to do something I don't normally do. I am going to extrude some edges out but first, I merge a point of the chin area to a point of the fleshy part, making sure it stays quads (quads are important for smoothing in animation). So once those are merged, I extrude the edges as I mentioned before and then select two of these edges and extrude them toward the chin as shown. I will then merge these to the chin, creating whatever weird flesh thing is going on there that I drew....lord what was I thinking. Note that sometimes it's okay to deviate from your ref if it means keeping the anatomy realisitc.


Teyon ( ) posted Fri, 19 August 2005 at 4:06 PM

file_285470.jpg

This is the result of the above description...


Teyon ( ) posted Fri, 19 August 2005 at 4:06 PM

file_285472.jpg

Now normally, I save this part for the nose sequence but since we're here and all.... Ahem, so I select the remaining edges on the side of the mouth area and extrude them about three times as shown. This will help make the frown lines once we do the nose next week. I then merge the vertices at the bottom to that weird puffy thing on the side of the chin. Keep them quads happening folks!


Teyon ( ) posted Fri, 19 August 2005 at 4:07 PM

file_285473.jpg

And That's it folks. Job done. Hope it helped. I wouldn't use this as the be-all-and-end-all of mouth making, but with the other tuts I will post, it may help get you going. See ya soon and get to work already!


Teyon ( ) posted Fri, 19 August 2005 at 4:10 PM

file_285475.jpg

Here's the reference image.


Teyon ( ) posted Fri, 19 August 2005 at 4:12 PM

I will post the link to the tuts you may find useful for poly by poly work in a second.


Teyon ( ) posted Fri, 19 August 2005 at 4:21 PM

http://www.krisart.co.uk/ear.html http://www.3dcm.com/facemodeling/tutorialfacemodelingIndex.html http://67.15.36.49/ffa/tutorials/max/joanofarc/head1.asp http://www.nevercenter.com/tutorials/html_tutorials/user_tutorials/character_modeling/


ysvry ( ) posted Sun, 21 August 2005 at 10:20 AM

nice insight in how you work tey, thx

for some free stuff i made
and for almost daily fotos


Teyon ( ) posted Sun, 21 August 2005 at 10:37 AM

Thanks. So my idea is we do this sort of thing as a challenge. Facial parts and then combine them.


BazC ( ) posted Mon, 22 August 2005 at 3:32 AM

Nice tut Teyon and an interesting idea for a challenge. I've never done any poly by poly modelling so it would be a good learning experience for me!


Dann-O ( ) posted Tue, 23 August 2005 at 9:32 PM

Of course if you are really good at poly by poly then you might want to change to a patch modeler Hash anyone? I get lost without an idea of the big picture in front of me.

The wit of a misplaced ex-patriot.
I cheated on my metaphysics exam by looking into the soul of the person next to me.


Cheers ( ) posted Fri, 26 August 2005 at 6:45 AM

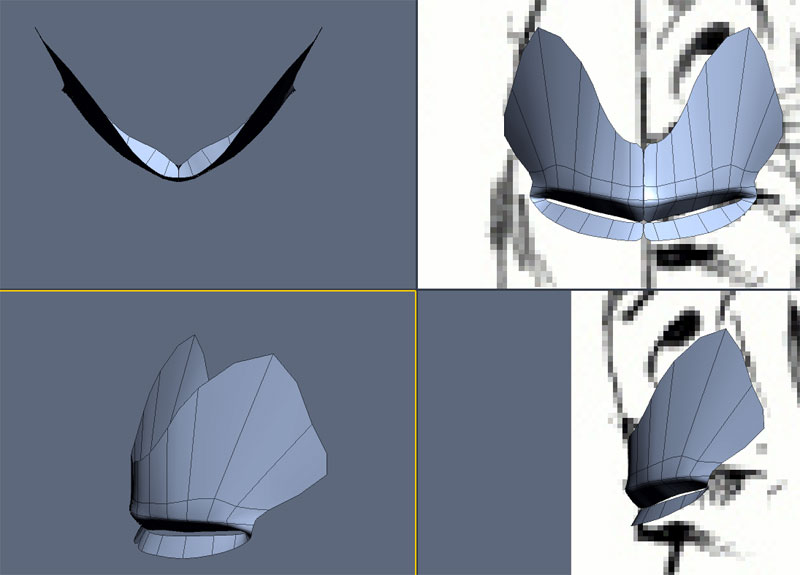
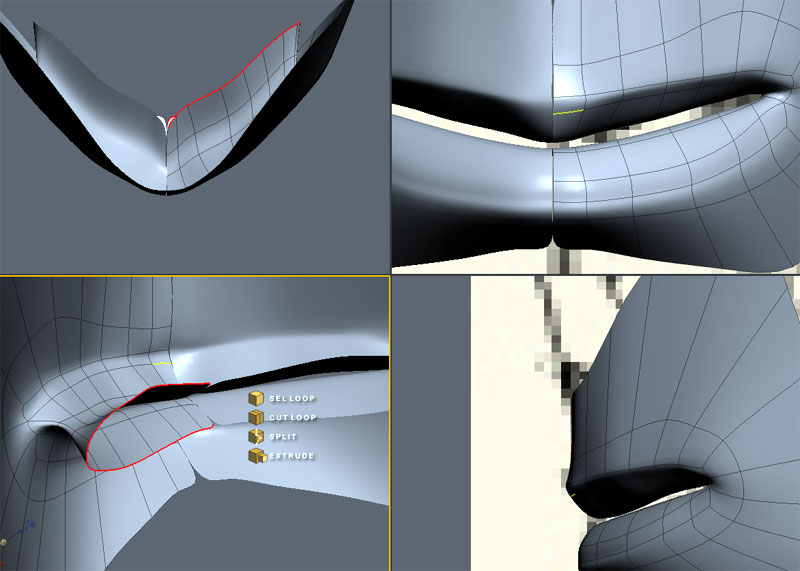
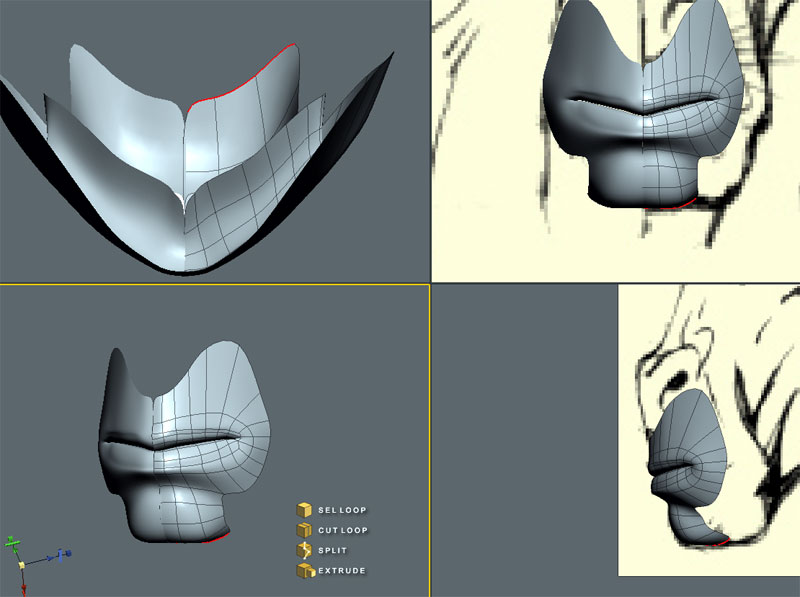
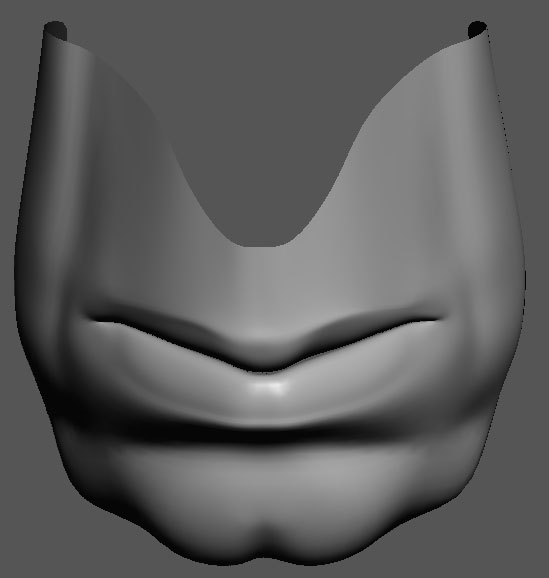
Hey, great work Teyon. As you mention, you loose the loop a little at the side of the chin, but it still seems to flow nicely in the final screen grab...a very clean bit of modelling :) It's great to see how others model and it would freak me out to start at the mouth. I find I can follow the flow of the muscles better if I start from the eye. Whenever I start from the mouth I usually end up with Tri and N-Gon city LOL! Then spend the next month trying to clean it up! Cheers


Website: The 3D Scene - Returning Soon!

Twitter: Follow @the3dscene

YouTube Channel

--------------- A life?! Cool!! Where do I download one of those?---------------


kenmo ( ) posted Tue, 06 September 2005 at 9:27 AM

What modelling app are you using...???


InfoCentral ( ) posted Fri, 16 September 2005 at 8:21 PM

I believe he is using Rhino.


Cheers ( ) posted Sat, 17 September 2005 at 3:52 AM

I dont think it is Rhino, I'm almost sure that Teyon uses Silo...certainly looks like the Silo interface in this thread. Cheers


Website: The 3D Scene - Returning Soon!

Twitter: Follow @the3dscene

YouTube Channel

--------------- A life?! Cool!! Where do I download one of those?---------------


Privacy Notice

This site uses cookies to deliver the best experience. Our own cookies make user accounts and other features possible. Third-party cookies are used to display relevant ads and to analyze how Renderosity is used. By using our site, you acknowledge that you have read and understood our Terms of Service, including our Cookie Policy and our Privacy Policy.
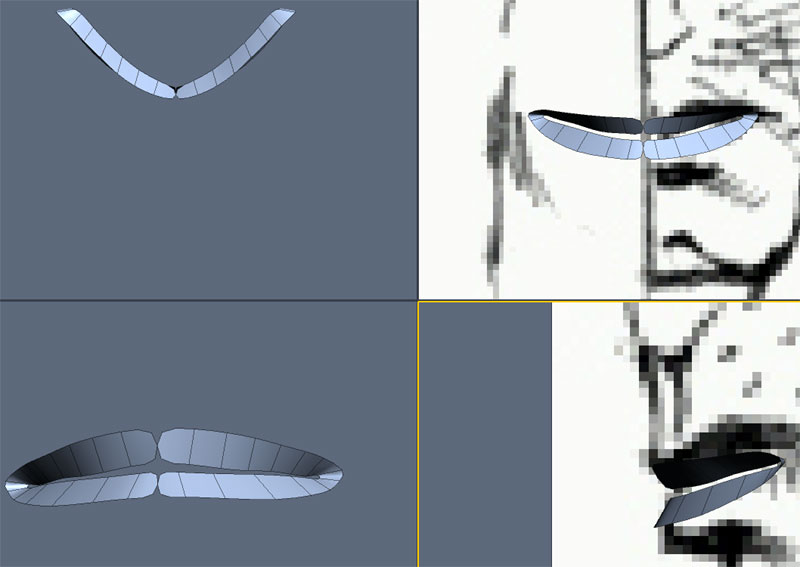
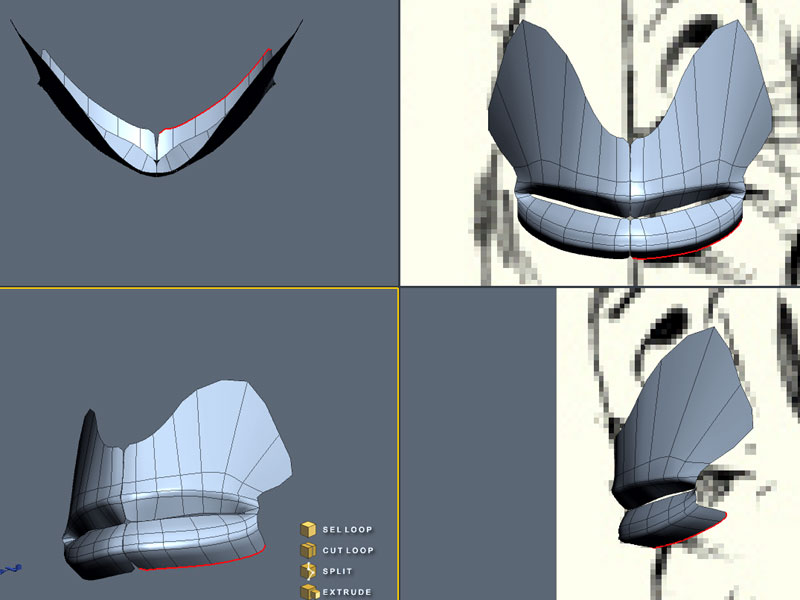
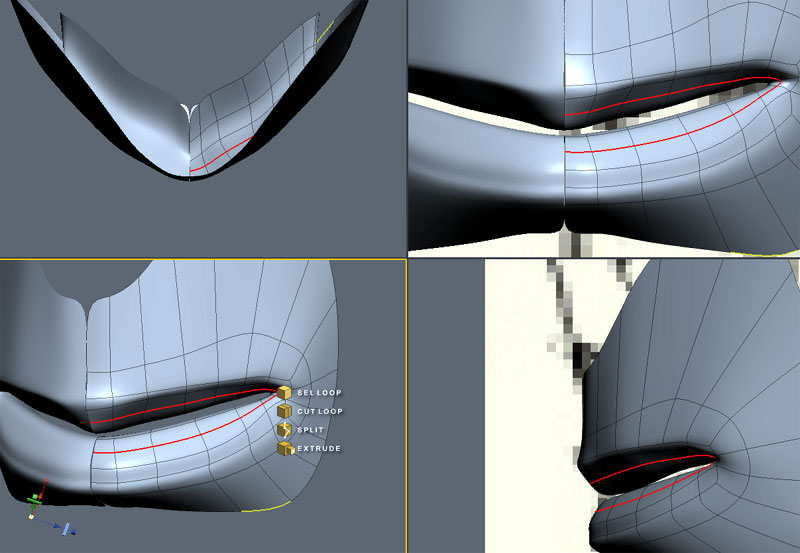