Renderosity Forums / Carrara
Welcome to the Carrara Forum
Forum Coordinators: Kalypso, Anim8dtoon
Carrara F.A.Q (Last Updated: 2026 Jun 30 12:55 pm)
Visit the Carrara Gallery here.

Subject: Creating a wake behind a boat ?

Hi DocMatter,
There are two ways to handle that.
-
create a plane with a wake on it using an alpha map to hide extra space and place it slightly above the water surface.
-
Use Digital Carver's Guild Terrain Tools as covered in this link.
Option 1 can be an animated shader or still image. That is how Mark R. did it for the boats at this link with Carrara.
Option 2 is better for still images because it literally will follow the boat around the water surface, but it may not be the look that you want.
Mark
Thanks for the info and link, but I'm still hopelessly in the dark.
I've got Terrain Tools and I've tried setting it up like in the link you provided, but all I see are evenly spaced waves with no foam or turbulance whatsoever.
To be truthful, I don't know what I'm doing with Terrain Tools since there really are no directions I can find that tell me what all the setings are for.

Don't worry about not 'getting it'. This is one of those things that you'll finally slap your head when you understand it and wonder why it took so long. It's not real obvious so don't feal bad.
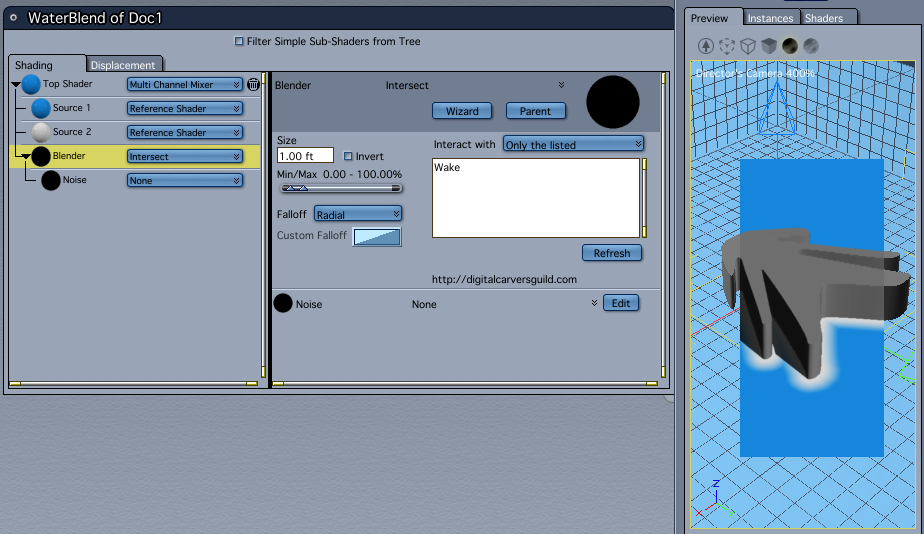
For my simplified example, I have three shaders: Blue, White and WaterBlend. The Blue is for the water, White for the Wake and WaterBlend for getting the two shaders to play together for the wake.
The WaterBlend shader is a Complex Shader that uses Carrara's Reference Shader ability to subscribe to the two colors. The WaterBlend shader is applied to an infinite plane I have in the scene that is the geometry for the water.
I have another object in the scene called Wake. It is a spline object but it could also be a vertex object – it doesn't matter. However, this object is visual shape of the wake we will make on the water. The object can have it's Visibility turned off and it will still create the wake pattern thanks to Terrain Tools.
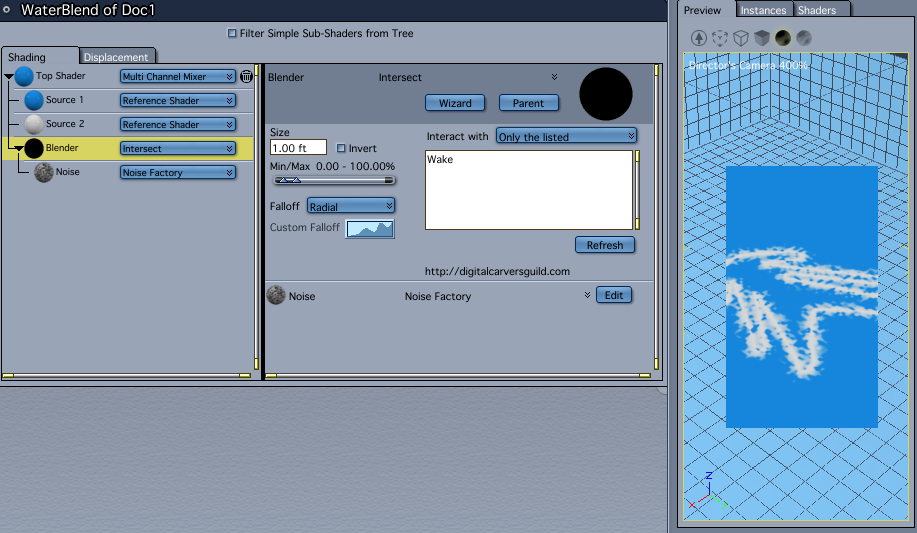
Now, in the Multi Channel Mixer, I reference the Blue, then the White and blend them with the Terrain Tools Intersect function. **Important: you have to tell the function what it should interact with so I've typed in the word Wake which is the name of the spline object. If this is not typed perfectly to match the name of the object, it will not work.
I set the size for 1 ft and didn't add any noise or modify the radial falloff. You can do that later to suit what you want to see the wake turbulance to look like.
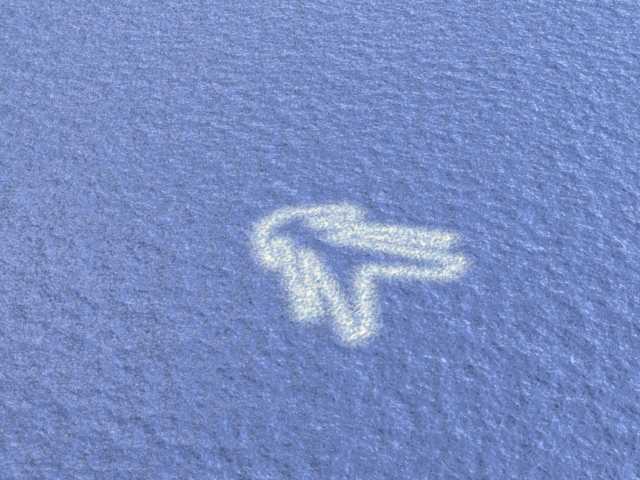
To implment this, you then make the Wake object a child of the boat in your scene and turn off the visibiltiy of the Wake object. Now, wherever your boat goes on the infinite plane, the wake will follow.
To make it look more realistic, the 'blue' shader can be swapped for a water shader. I just use simple colors to start to reduce preview and render times.
Hope this helps.

Here's another way Noviski used. You'll have to experiment using 2 fire primitive objects. He gives the settings in the comments section below the video.
http://www.youtube.com/watch?v=SXmJQSc8LXM
Kevin
Privacy Notice
This site uses cookies to deliver the best experience. Our own cookies make user accounts and other features possible. Third-party cookies are used to display relevant ads and to analyze how Renderosity is used. By using our site, you acknowledge that you have read and understood our Terms of Service, including our Cookie Policy and our Privacy Policy.
I have a feeling it has to do with modeling the ocean surface and then using the terrain shader, but I have no idea where to start or if that's even the only way.
If there's an easier way, I'm all ears!