
Renderosity Forums / Carrara
Welcome to the Carrara Forum
Forum Coordinators: Kalypso, Anim8dtoon
Carrara F.A.Q (Last Updated: 2026 Jul 11 2:50 am)
Visit the Carrara Gallery here.

Subject: Help??


Hi AnnieD,
Try out the freebies for Carrara here: http://www.markbremmer.com/3Bpages/tutorials.html
While they aren't specific to Express, Carrara is the big brother to Express and all of the tool sets that Express has are in Carrara 5 and 6.
Mark

the tutorials i found that helped me were the ones from VTC but they are not free. i was lucky enough that one of my rich chicks had bought it, then gave up and let me give it a try. i came from using crappy poser, and all the features in carrara made my head spin lol. i think it is best if you concentrate on one aspect until you have it down good. i went through the movies in two days eager to dive in and didnt really absorb much, so trying again. got the metaball and spline thing down cold, now working on modelling in the vertex. i searched for about a week online for free tuts, although there are many with useful tips, vtc one is the only one that took the time to explain and demo every tool, and in a well thought out order. it really helps to actually see a pro using a tool and explaining what they are doing as they do it. hope that rambling was of some use lol.
Yes...thanks killerdragon lol
Mark I love the tutes you do...I can't afford to buy them right now..and I am going thru the free chapters at this moment. I was hoping for something I could download or save to my pc and take some time late at night when everything is calm and quiet... and I didn't have to be online :D
I do want to learn a little at a time until I'm familiar with the tools, etc...then I will experiment and think I can learn from everyone else here if I get stuck.
thanks for your help.
“For those who believe, no proof is necessary. For those who don't believe, no proof is possible.”
[Stuart Chase]


http://tigme.net/home/?dirname=html_docs/00000home
This, also, is a good site for free Carrara tutes.
Especially recomend downloading the full set of the 3dExtract Enzine Magazines.
Brian
bwtr
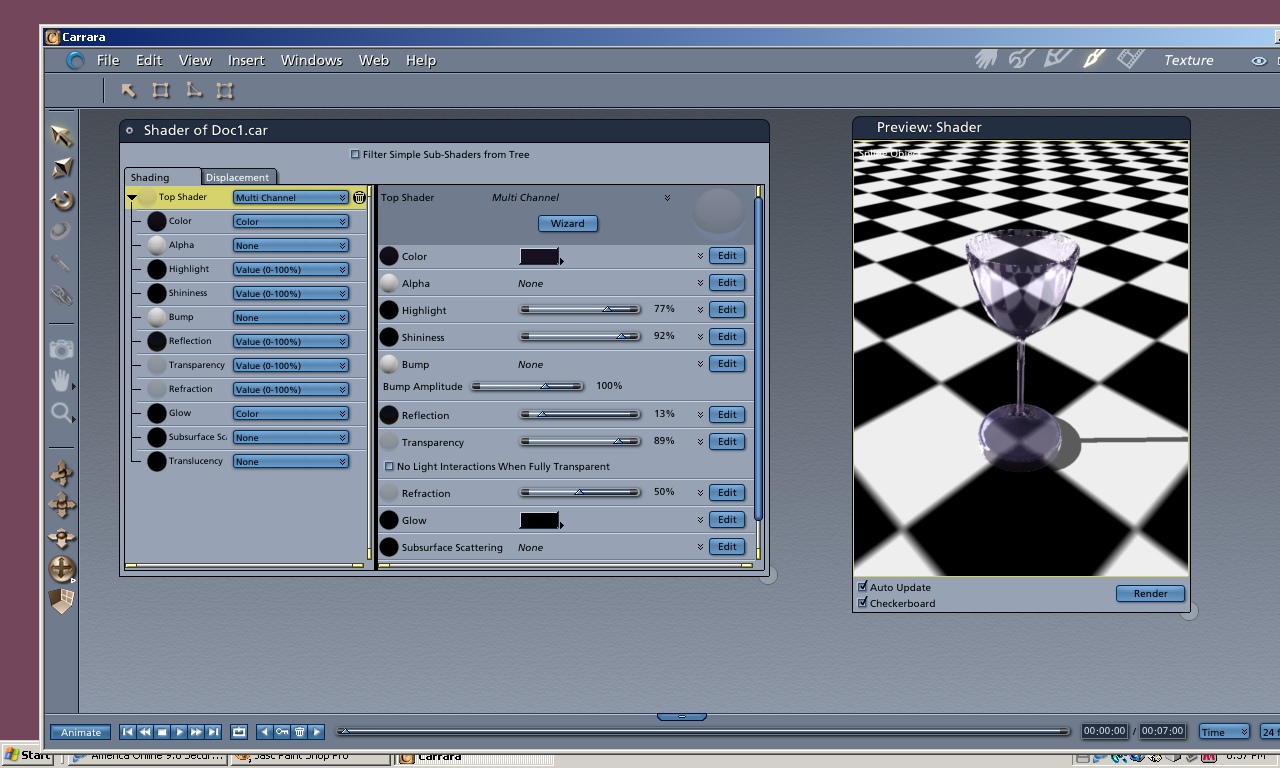
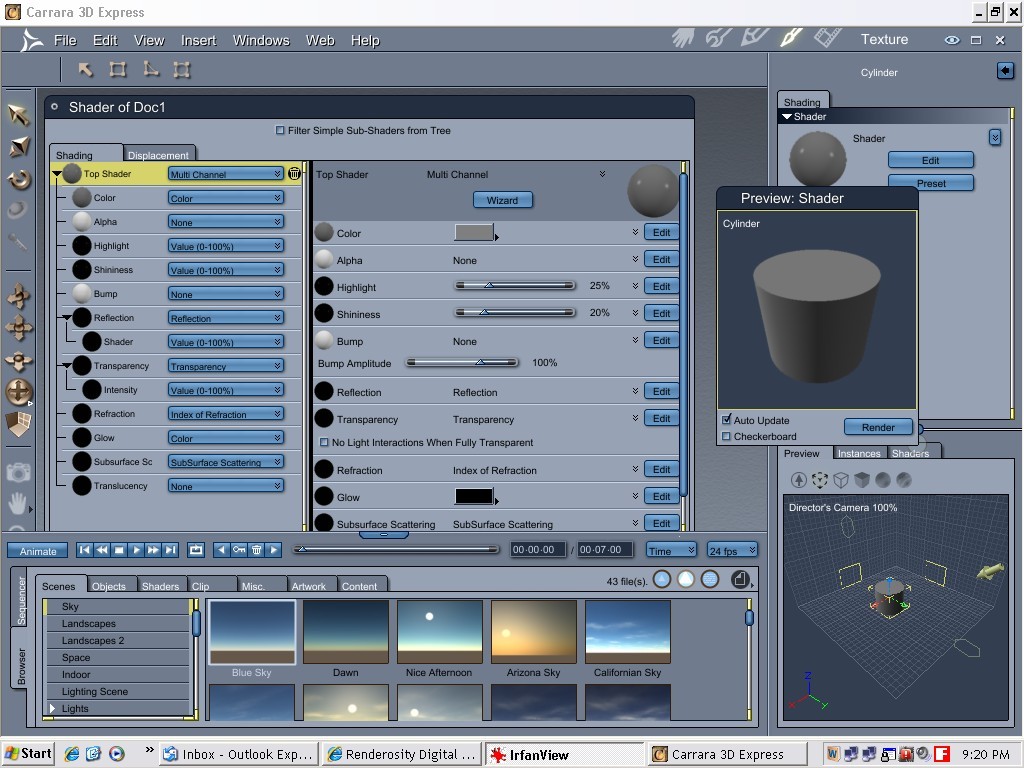
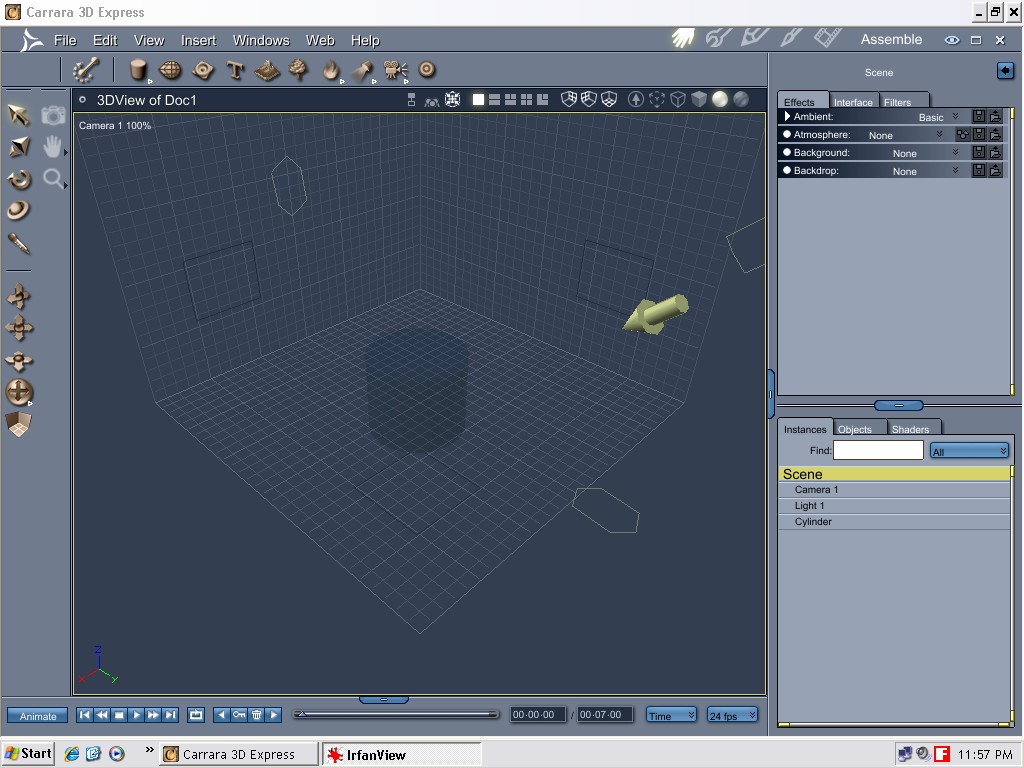
Annie, click on Wizard, click on glass, select one of the choices, the program will do everything else. You now have a cube of glass. Note the settings for each channel, those settings can be changed to your liking. However, that's down the road a bit. You now know how to get something into the assembly room and then transfer it to the texture room.
Lets go a little more: From the assembly room lets open the spline room.
The spline room is that little goblet icon click and drag it to the assembly room window.
That will open the spline room. There look for the icon that has a circle on it, just to the lower right of it is a tiny arrow click on it and select the circle, then place your cursor on the screen hold down the left mouse button,move the mouse you will see a cylinder forming (if nothing happens, hold down the right mouse button and try again). When you have it, give me a screen shot.
Next step will be "lathing" a wine glass: Tomorrow, I'll prepare a tut for you to use-once I see that cylinder. Jan

“For those who believe, no proof is necessary. For those who don't believe, no proof is possible.”
[Stuart Chase]
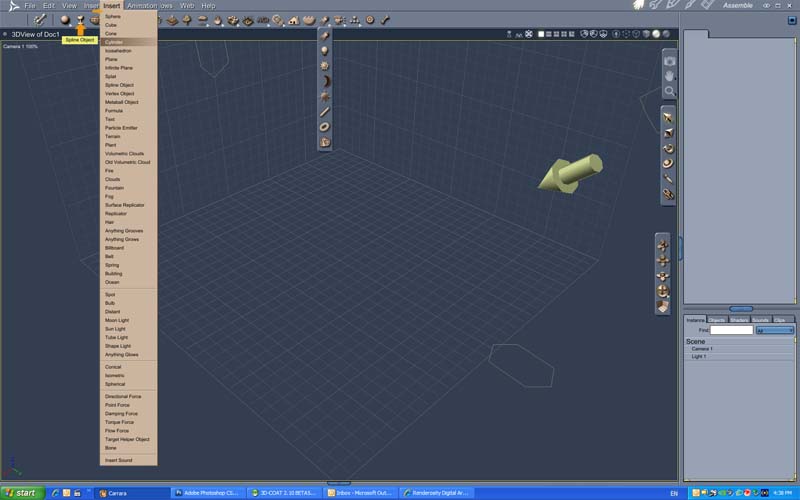
Click on EVERYTHING to find out whats there.
Two ways to start with entry of the Spline. Room.
Either drag the Spline symbol into the working screen or click on Spline in the insert menu.
Brian
bwtr
Hi Brian,
I guess because I'm using Carrara Express...I don't seem to have it...or some of my tool symbols are turned off and I can't find anywhere to turn them on again?
If yu look at my assembly room shot above..you can see the tools I have to pick from. I've clicked on everything I have access to..and there isn't a choice in the insert menu for spline either.
“For those who believe, no proof is necessary. For those who don't believe, no proof is possible.”
[Stuart Chase]
Hi Annie, darn it!! Okay phase two, the vertex room. Thats the little puppy (meshie thing) next to the Cylinder Icon. Click and drag (meaning click and hold down the left mouse button). Get used to Click and drag, its how things get done in Carrara. That will open ye olde vertex room. Then explore the various menus while I work on the tut for a goblet in that room. A little more involved--give me a screen shot of the vertex room so that we will be on the same page as it were. Jan
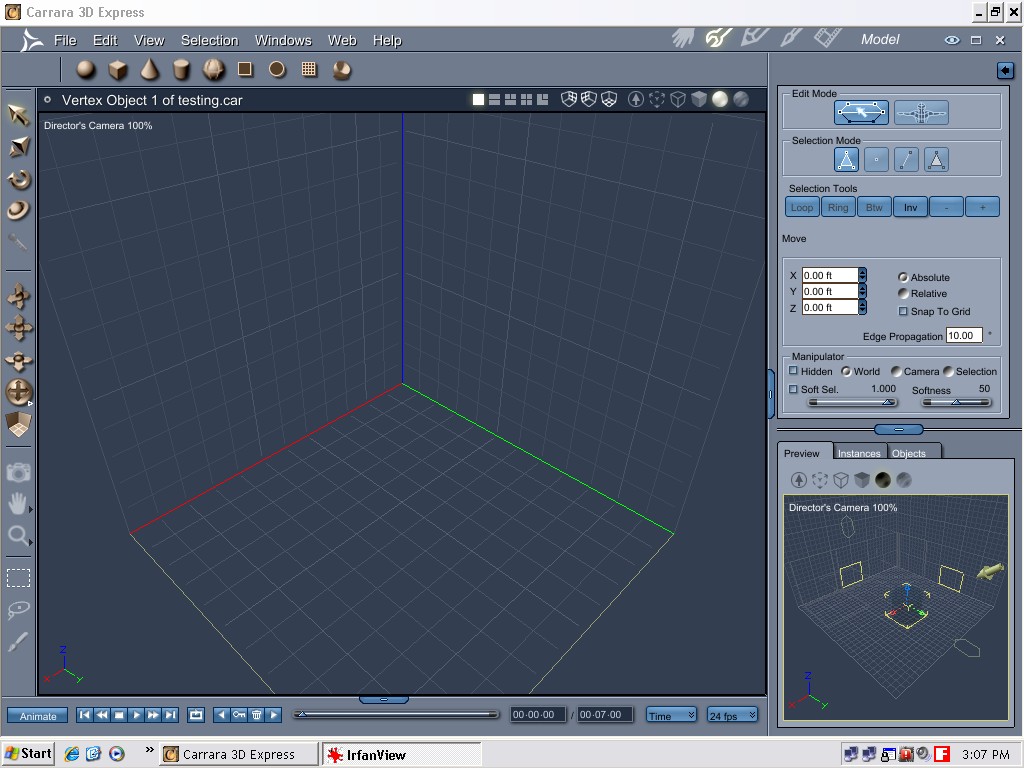
I still feel like I'm in a foreign country..lol
Click and drag is not a problem...I'm just glad its that easy.
Here's my vertex room...and again, thanks for helping.
“For those who believe, no proof is necessary. For those who don't believe, no proof is possible.”
[Stuart Chase]
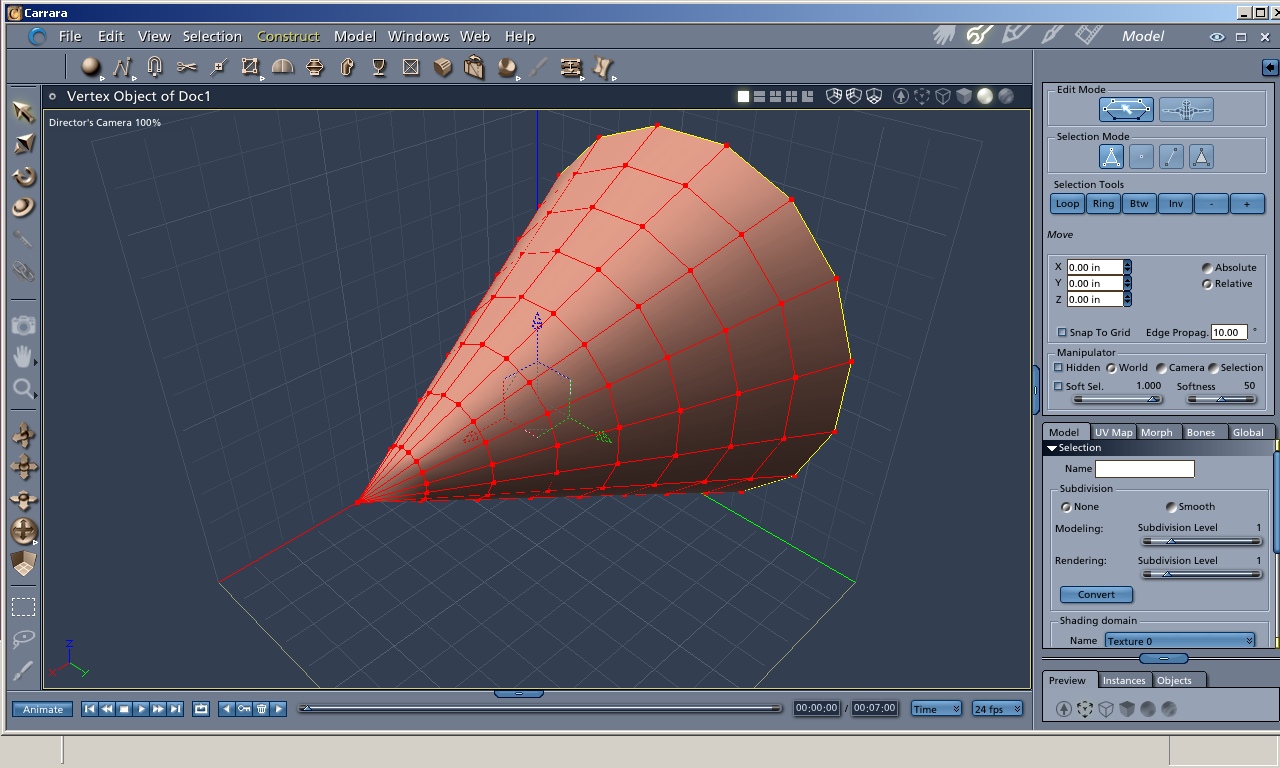
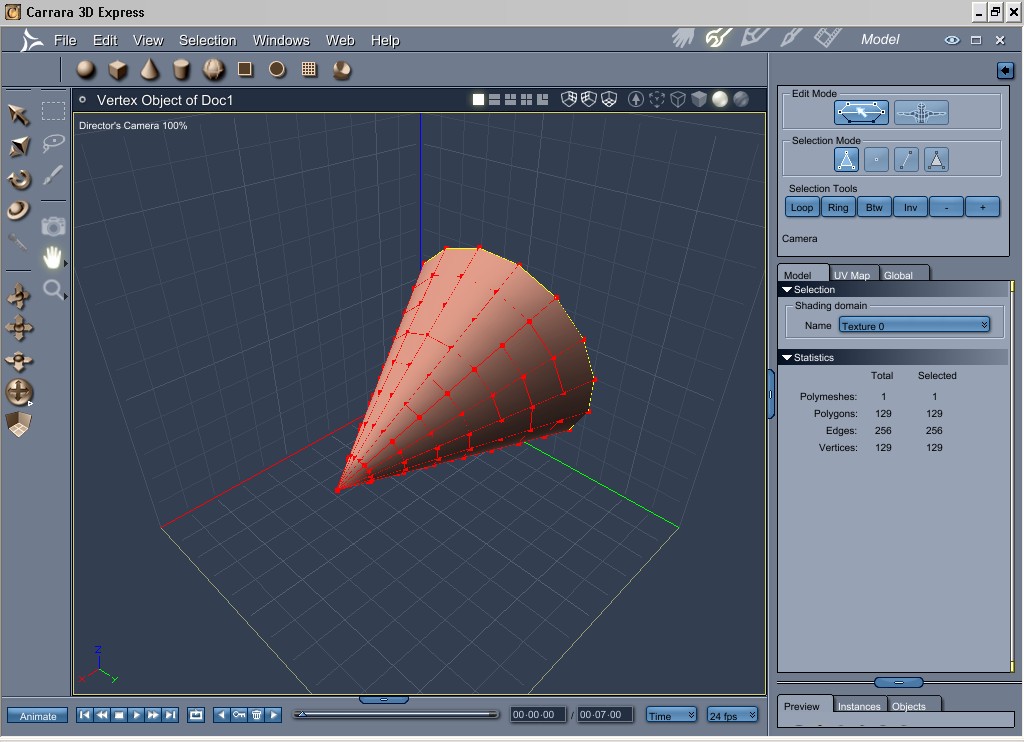
Hi Annie, sure does. Now we can get to work:
Here is the plan of action:
-- Make the profile round like half a sphere
--Duplicate it for the wine inside
-- cut off the top of the original to hollow it out
-- Move the duplicate back to the original and resize it to fit inside
--Make stem using a cylinder
--Make a base using a another duplicate of the original
--Fit them together and group them
_Then texture them
--Set up a little scene
--Set up the rendering perimeters (screen size, fidelity, type (.jpg, .tiff, etc)
--Render it
Step ye olde profile : Each one of those dots I call a node, you can select one or a string of them
What we are going to do is to select several strings at a time using the second icon down the scaling tool (left side of screen)
Step one: top of screen where it says Vertex Object of Doc 1, you have several little squares, select the one that is separated into four part. What that does is bring up four little screens, Top, Director camera view, left, and front views.
Now to active one of the views, just place your cursor on that screen and click on it-you will see the perimeter highlighted.
Use the little magnifying glass to enlarge each one to taste: If one gets too large, simply hold down the alt key when clicking on the mouse (notice the magnify icon changes to a little minus sign, that reduces the screen size of what screen you are working on.
Lets start with the left view, select the top Icon and form a rectangle around the middle string, You should see just those highlighted if more strings are place the cursor outside the object and click, that will remove all high lights.
With the one string selected, select the second icon and move the arrow outwards (you will see that portion of the cone expand, do the same with the front view, check the top view to ensure you have a circle forming.
Do the same thing with the other node strings until you have a nice curved profile.
Do a screen shot for me: Jan
Thanks Jan...
this will take me some time to figure things out and find everything...I know absolutely nothing about modeling so if you show me how to do all of this...and I can follow it...you will be a miracle worker...lol
I will be back when I have something to show...thanks again and have a little patience.
“For those who believe, no proof is necessary. For those who don't believe, no proof is possible.”
[Stuart Chase]
Jan...could you give me a screenshot of the actual node/string selected? I'm not sure if mine is doing the right thing since I don't really know what it does yet...lol When I open the four way window three of the model views have a dark square on them that covers most of them...?
Also...a shot of the "half sphere" as its supposed to be when finished in these steps?
“For those who believe, no proof is necessary. For those who don't believe, no proof is possible.”
[Stuart Chase]
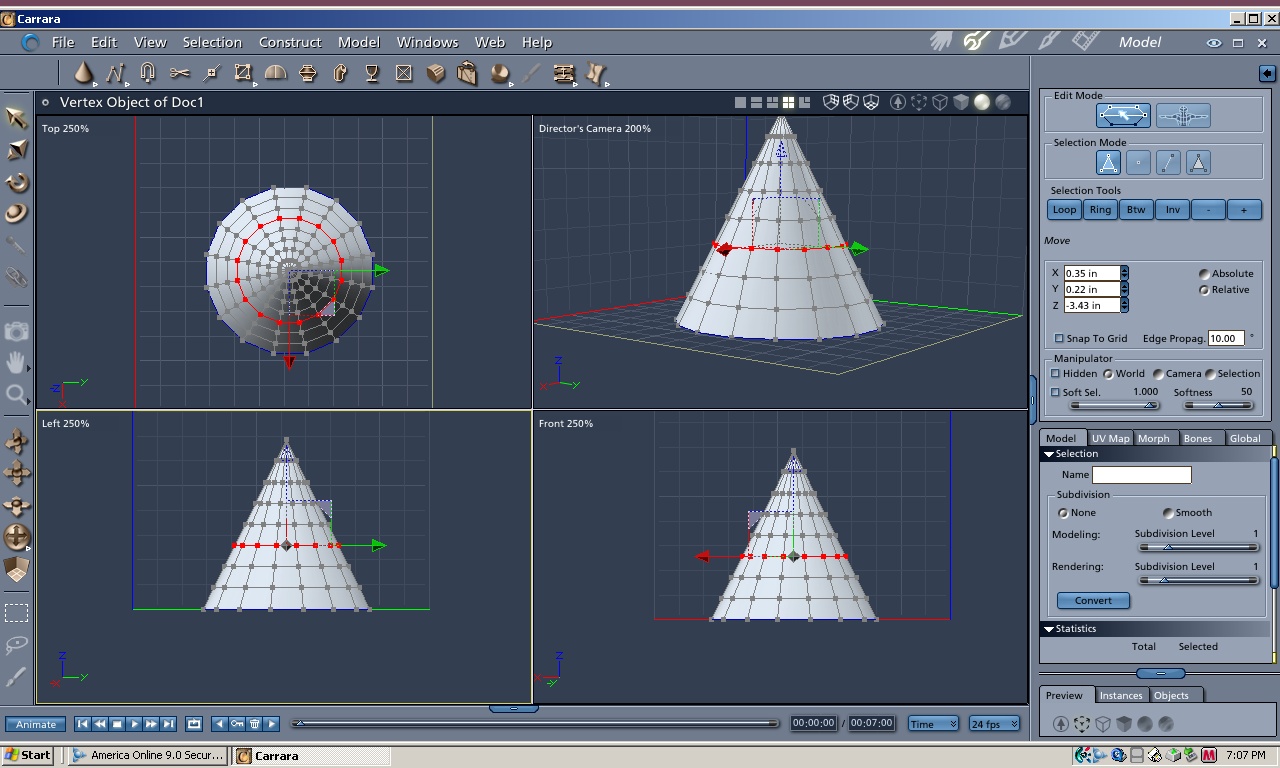
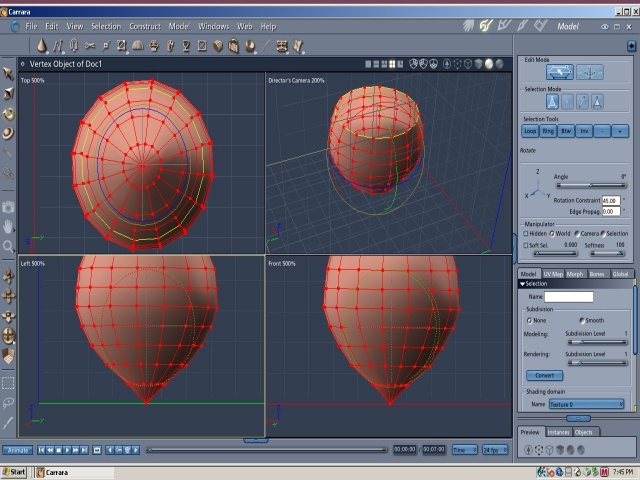
Hi Annie, this is "finished" half sphere still in the vertex room: Note that the top of the sphere was deleted (just select the top most string and hit delete--Since your Carrara Express doesn't support glass wall thickness-its the best you can do att. Before you do your cut, duplicate it, move it to the side- That will eventually be the fluid for the glass. Jan
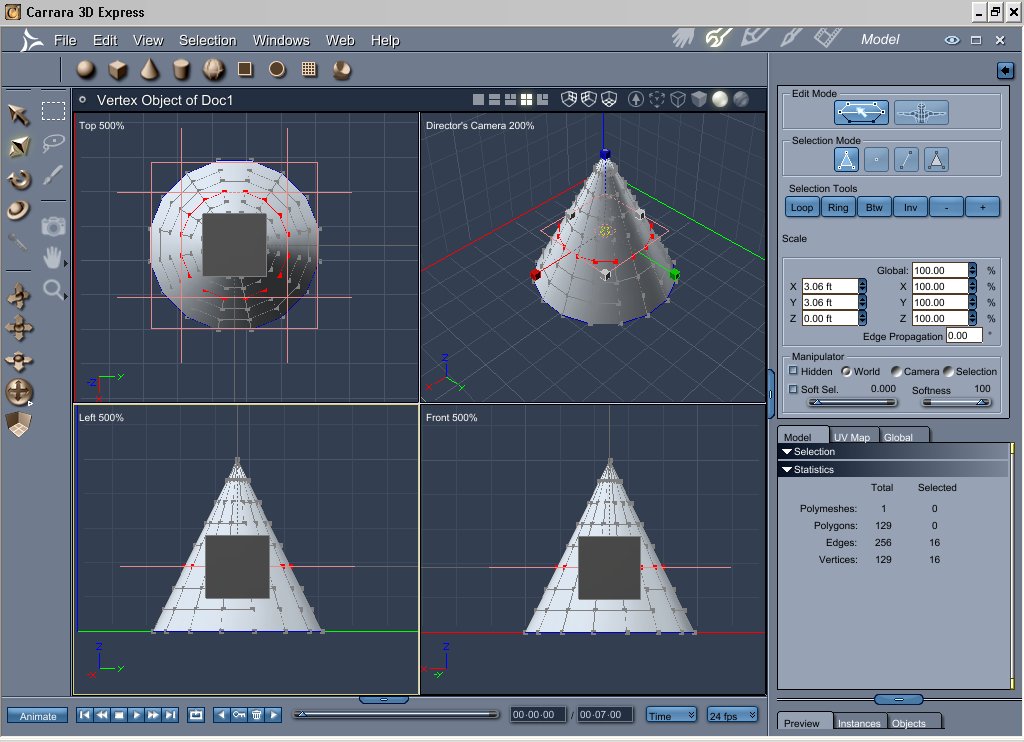
Hi Annie, ah instead of arrows you have tiny cubes. Click and drag one of them in your Director's camera view, look at the other views and see what happens. I don't know what those grey squares are. However, I guess that they are the little squares that you click and drag which you (I think) do in the perspective -Director's camera- view.
I see that you have UV mapper. If you want to, we can use that puppy to put a name or two or a decal on your goblet.
What you are doing now is the hardest part by far, the rest is fairly easy-including the UV mapper.
You probably realize now that there is an easier way to get a half sphere for your goblet. However manipulating portions of an object opens up more creative forms etc.
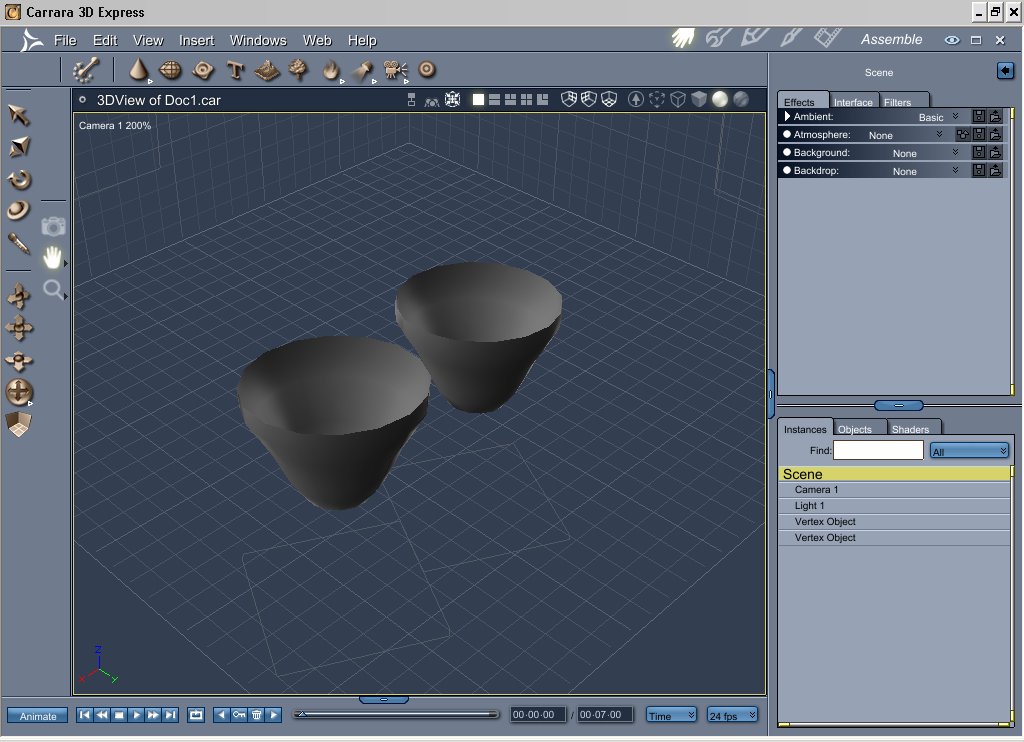
Remember, once you get a fairly round goblet, duplicate it immediately in your assembly room-that is going to be your blueberry, red, or what ever flavor wine you want.
Do a screen shot so I can see it. Jan
“For those who believe, no proof is necessary. For those who don't believe, no proof is possible.”
[Stuart Chase]
Whew, you are over the hill now, now select other strings and balance them from this one. You will probably need to go back and forth in order to get a nice round profile:
Then when you are through perfecting the profile, duplicate the revised one in the assembly room again (of course delete the present one) . You will now have two vextex rooms, one for your original and one for the duplicate.
One thing I found out--if duplicate it in the vextex room when you go to your assembly room, the two is treated as one object even though split apart and what ever you do to one of them is done to the other including shading eg color one red the other one is red too, resize one the other resizes too. So for now use the assembly room for dups.
Annie you are doing great, when this portion is done, simply make another duplicate of it, rotate it 180 degrees and resize the height for your base.
For the stem just grab a cylinder primitive resize it and put the four pieces together, the wine, goblet, stem and base (group the wine by itself and adjust it to fit inside the goblet, then ungroup it and reduce the height.
Show me what you got at this stage.
Why group, you reduce the height, width and depth at the same time
Ungroup it again so you can change the height and not affect the rest.
(Just a new trick) Jan
One last thing Annie, your bottle of Excedrin, got enough in it? Jan
Lol...excedrin all gone since last night..
Ok...can you tell me how to group and ungroup or is that something I need to look for in the program I'm using...? BTW I found out the hard way about duping in the modeling room. :)
Have I told you what a nice person you are?? :thumbupboth:
“For those who believe, no proof is necessary. For those who don't believe, no proof is possible.”
[Stuart Chase]
Annie, simply click on the item (you'll get the familiar rectangle around it and it will be highlighted on the right side menu too (sitting in a car passenger side thing).
Then go to the edit drop down menu and select group:
May be a good point now to add some more info to your tool box, If you hold down the shift key and begin clicking all your objects - highlighted on the right side menu-those can be grouped together as in goblet, wine, stem, and base. Then when you move one everything moves as a group
When you are through, go back to the edit menu and ungroup.
This may be a good time to begin labeling stuff, like the portion that is wine, wine, the cylinder-stem, the vextex object that will be the goblet, goblet and base.
COL: Ye olde found out the hard way: Yep, been there--well, in fact, still there
Thanks for the compliment Jan
I have the pieces and I'm trying now to put them together the way they belong and get them saved. I'll post a screenshot as soon as i can..
I have been interupted twice with my pc freezing up and I'm not sure what's causing it. I think it has something to do with my graphics card so if I don't show up for a little while you'll know what's going on.
“For those who believe, no proof is necessary. For those who don't believe, no proof is possible.”
[Stuart Chase]
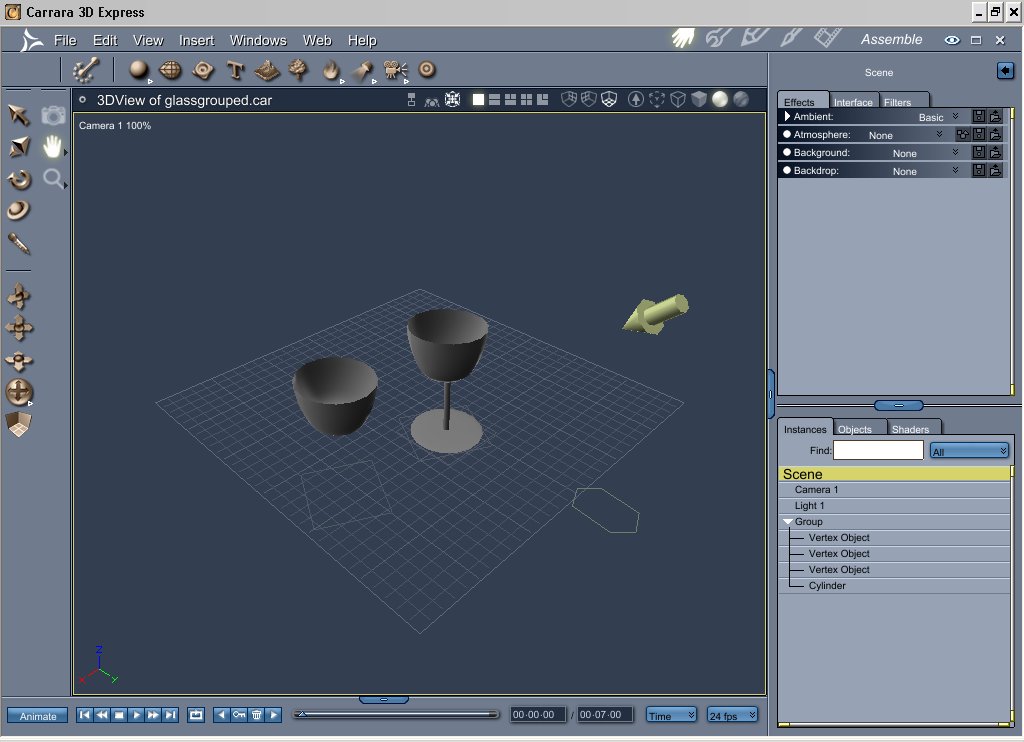
Annie, great work so far. Now, after you take a hammer to your computer (got to threaten it), we need to start naming parts-click on one of your vertex objects, that will change the menu, go up to the name and type in what it is, do the same for the rest.
Then click on the one that is going to be your fluid, open the texture room, it will be there (you will have a different texture room for each of your objects). For now, make it a different color-click on color or the tiny arrow head by the little grey box (that will open the color wheel-select say red do the click thing and the object will turn red.
Why red-doesn't matter, going to change it again anyway-just need a contrast against the gray.
In the assembly room, move it to the goblet and stuff all of it inside (no red sticking out) and reduce the height to taste (expensive wine, very little in goblet-wine by the gallon or box wine just so it doesn't spill.
Now play around with ungrouping and regrouping-that will come in handy when you begin making complex stuff with several hundred objects. Here is how, click on one of the objects say the stem in the right hand menu and drag it to scene-it is now outside the group, now if you click and drag it over say the base, it will be under the base and is called a child of the base.
These words are famous in 3D. Parent and child. Presently you have one parent - group- and four siblings-the three vertex objects and cylinder-each sibling is call a child.
Children can also have children-in the above example, the the stem is a child of the base and the base is a child of the group--did you buy the economy size Excedrin bottle yet.
I know that you are anxious to make that final rendering of the goblet with neat textures--that's coming-we just have neat tools that are good to learn along the way.
Once you are familiar with the above, we can go on to the texture room and begin to play around in there. Jan
“For those who believe, no proof is necessary. For those who don't believe, no proof is possible.”
[Stuart Chase]
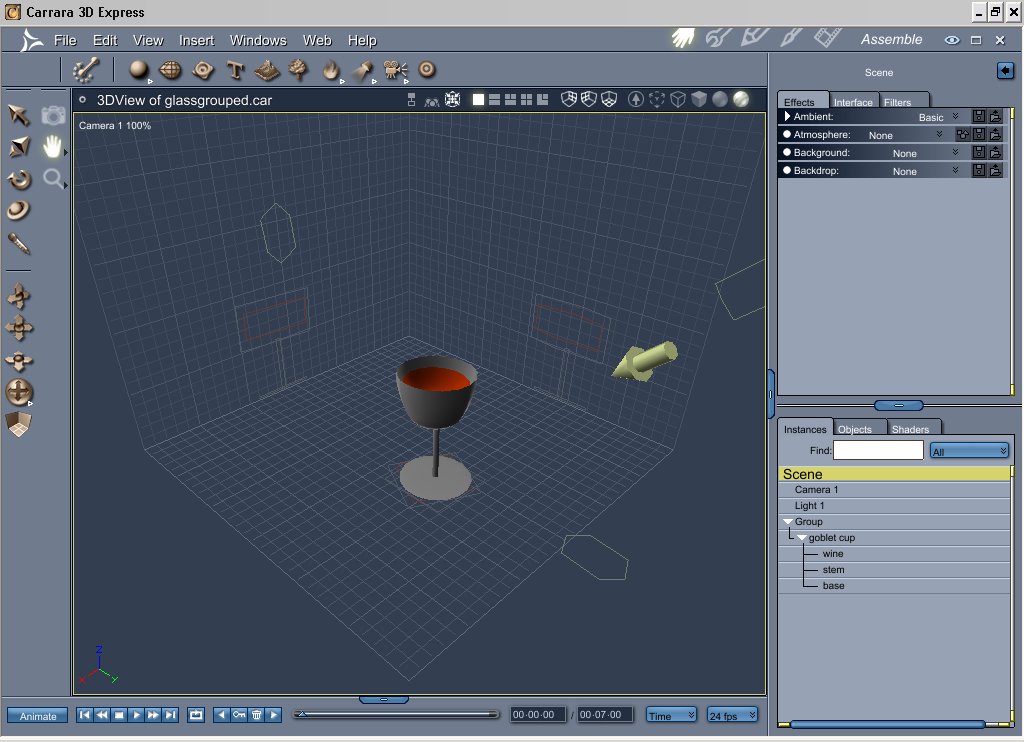
Hi Annie, you nailed it!! Next couple of steps: Resolve that link problem, get more sleep and then:
Ye olde texture room: Once you select the glass type from the wizard menu and apply it to your goblet that shader will now appear in your list of shaders, Presently you have red, and the default grey shaders located there (the shaders' menu is located in the assembly room right pull out menu (the one you have posted). Note their names and what they are assigned to-the shader will list what objects they are assigned too.
In the assembly room (here we go again with Ye Olde click and drag), click on your glass shader and drag it to the screen's stem and base-now you will have that glass shader on the entire goblet.
Once you got that done-we will want to do a quick preview render:
That will require an atmosphere (unless you want to go through gyrations with the lighting).
Click on Scene>two little down carats and select sky (not realistic sky)-In edit you can rotate the sun any where you want, change its color etc. back out -see where it says ground, drop that puppy to around -33 inches. That ground plane is a pain in the meta physical peanut butter (substitute for a three letter word).
Another tool great to know now, see where it says ambient, when you open that thing up, you will see a brightness slider--that controls the intensity of the objects' shadows. A setting of 0 means that the object is on the moon, maximum shadow, no air, vaccuum. A maximum setting indicates that the object is on Venus, no shadows cast--extremely heavy atmosphere. The setting on Earth would be around 30 percent. For now set it to zero-we'll adjust it later.
Now for the quick render. In the assembly room select that camera icon and drag a rectangle around the goblet-that will start your rendering--may need to move the camera angle to get what you want. (sky recommended for now).
Give me a screen shot:
Next step, putting the printing or decals on your goblet--means selecting your goblet, opening the UV mapper, box mode, six sided display and exporting that .bmp to your PaintShop Pro, creating two more layers, writing, printing, and importing various designs, saving the resulting stuff as a .jpg-pulling it up again in your texture room-color and bump channels and doing a semifinal rendering of your master piece.
I'll go through the above process with you step by step, when you are ready.
Finally, building floors and walls for the goblet's simple scene-
Next project: you decide: table and chairs, a steriling tea service-- tea pot, sugar and cream cup on a platter, lamps-air or space craft--
It might be a good idea now (if you haven't done so)-download some of the neat materials stuff for Vicky, Victoria in Rendo freebie section--just because it was made for the model doesn't mean you can't use it for other stuff--Google wood, metal, organic textures--ask Acadia for neat stuff-heck ask her first and save time. Jan
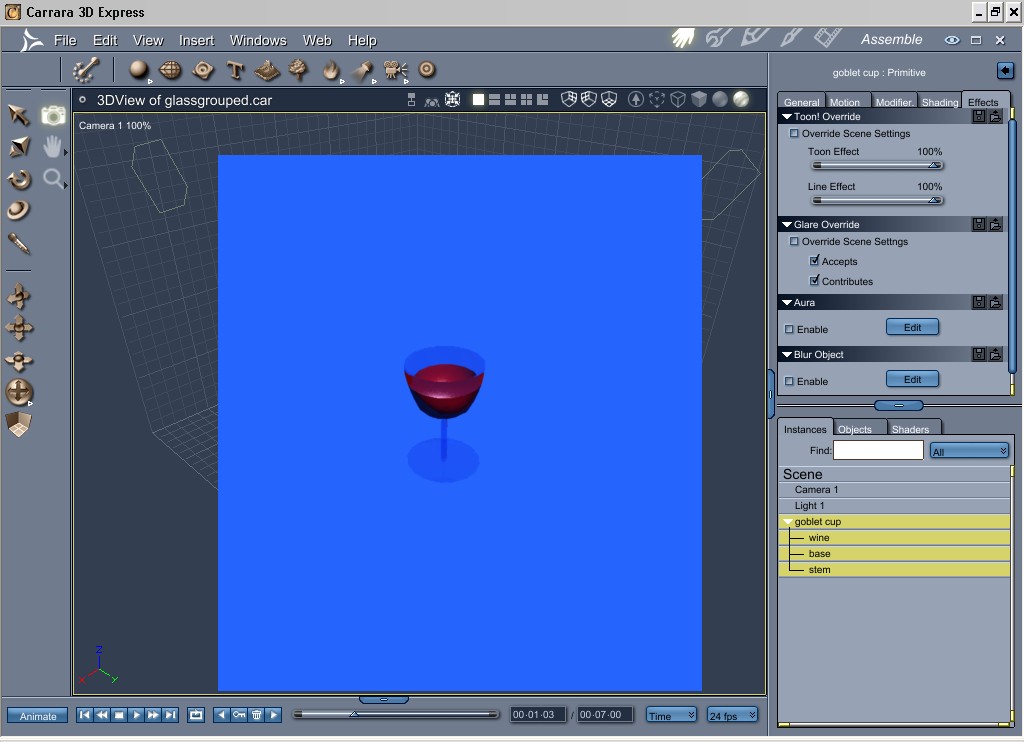
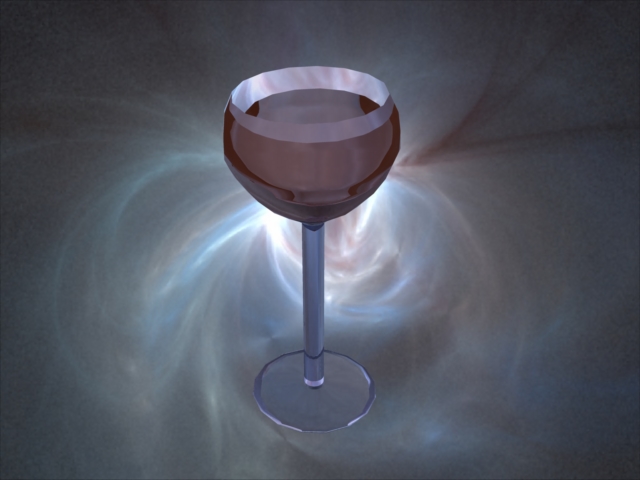
Here is a screen shot of the test render after applying the glass shaders...it took forever because my pc keeps freezing up from time to time...something isn't working right and I'm still trying to narrow it down. I replaced a couple of things but not the right one yet...lol When I look at the events all it says is a device attached to the computer isn't functioning right... sigh
Anyway...here's what i have so far.
“For those who believe, no proof is necessary. For those who don't believe, no proof is possible.”
[Stuart Chase]
Hi Annie, the shot looks great. Now you may want to play around with various refraction indexs. That is how light bends when entering a different media such as water. You may want to try alcohol. Also tune up the transparency and reflection channels (I like to have the total of both equal to 1 eg if you set the transparency to 80, try 20 as the reflection -what doesnt go through bounces off, some is probably absorbed so the two may not total exactly 1 in real life.
That goes for the glass too and try the frescal effect on the glass (need refraction values for that too) and raytrace activated on your lighting plus some walls and flooring (something to plant our goblet on).
Now for your computer problem: Here is some stuff to try:
Clean your registery, temp files, history folders, cache etc with a good cleaner like McAfee using its default settings.
then use the come with your Microsoft software Cleanmgr to rid yourself any bodies left over.
then defrag your computer (a couple of times).
Run a virus check using your updated antivirus program.
Shut off your computer for about 10 seconds and bring it back on line
See if that cures stuff
If not, disconnect everything except your keyboard and mouse--if that doesn't work, you may have to reload drivers )go on the internet and get the latest update for the respective device.
If that doesn't work-start another thread specifically for your computer and ask Rendo's experts or go Google say computer problems, see what they say-reformat as the extreme last resort-that drastic action involves days of getting everything back and several bottles of Excedrin and many why me's and or condemning the computer to the very depths of double hockey sticks. Jan

Privacy Notice
This site uses cookies to deliver the best experience. Our own cookies make user accounts and other features possible. Third-party cookies are used to display relevant ads and to analyze how Renderosity is used. By using our site, you acknowledge that you have read and understood our Terms of Service, including our Cookie Policy and our Privacy Policy.
I have had Carrara 3D Express for a long time and put off learning it. I can't seem to get the hang of it...soooo, can anyone point me to a couple of free tutes that will just walk me thru the basic tools and rooms and what they do and maybe a test project tute? It's time I learned it.
Right now I use DS and Bryce but am no expert in either...no photoshop.....PSP instead.
thanks
“For those who believe, no proof is necessary. For those who don't believe, no proof is possible.”
[Stuart Chase]