Renderosity Forums / Cinema 4D
Welcome to the Cinema 4D Forum
Forum Moderators: CHMedia Forum Coordinators: Kalypso
Cinema 4D F.A.Q (Last Updated: 2024 Aug 27 11:07 am)

| C4D Gallery | Speed Modeling Sessions | C4D Freestuff |

Subject: Need Help to Unwrap a Sphere


In 3D view select one polygon and use select connected to select whole shet, move it to side and repeat with the rest. After that simply snap the shets on correct seams :)
Relax "Pin border points" have help also :)
Tihomir
Open your mind and share the knowledge!
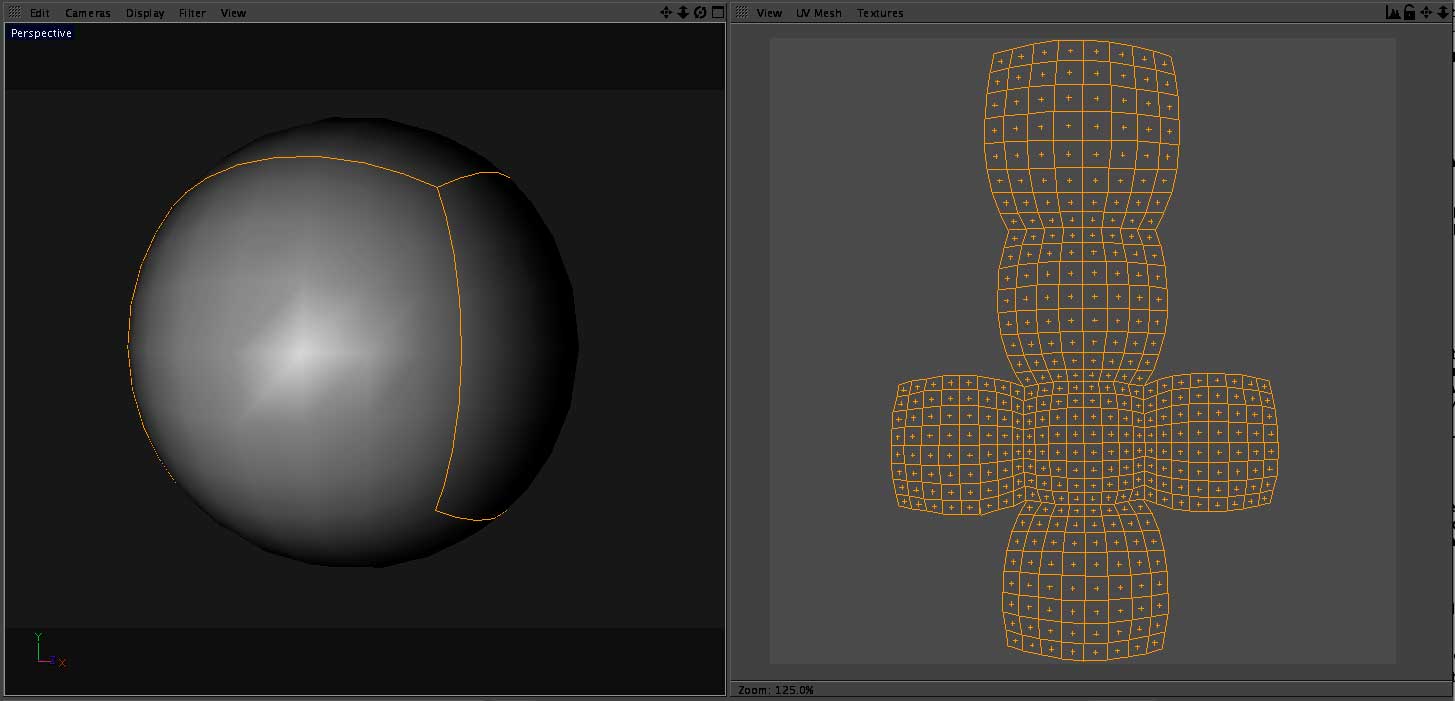
tantarus, Thanks for the reply, but I want to cut the areas in red so I can learn how to do this. I am just trying on this simple sphere before I try on a more complex object like a head for e.g. Can you explain this in simpler step by step? andyvxaraya, Thanks for the link. That is a great tutorial by Kai Pederson but for a newbie like me it skips a bunch of steps like how to define seams on mesh and a buch of others. What I would like is a step by step of how to do that from modeling in C4D to final UV in Bodypaint. Maybe Kai Pederson Could help me. Do you know where I can contact him? Thanks

For a simple model like that I would select the first group of polygons and use Cinema's set selection. Repeat for the remaining groups. Use Cinema's UV interactive mapping to map the various polygon selections. Adjust positioning of the individual selections and scale as needed.
Getting to grips with using polygon selection tags will save you loads of time on more complex models.
All the above is not really needed for a simple sphere though - a texture ratio of 2:1 will suffice and when applied to the sphere will map ok.

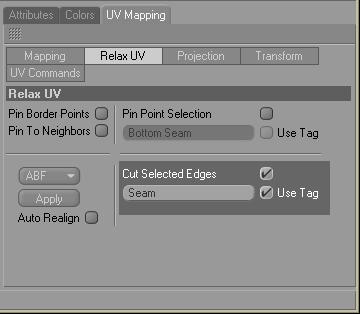
Step by step: Define seams using edge select in the modeler, select all the edges you want to be your seams. switch to uv editor select all polys that you want to map, go to uv mapping tab, Relax UV subgroup. check the Cut Selected Edges checkbox and hit apply. Pretty simple once you get the hang of it. 10.5 adds a new unwrap method which is supposed to be more accurate which uses the same steps.
Quote - Step by step: 1. Define seams using edge select in the modeler, select all the edges you want to be your seams. 2. switch to uv editor select all polys that you want to map, 3. go to uv mapping tab, Relax UV subgroup. 4. check the Cut Selected Edges checkbox and hit apply. Pretty simple once you get the hang of it. 10.5 adds a new unwrap method which is supposed to be more accurate which uses the same steps.
- Ok I did this using the "Polygon Edge" tool. 2. I selected the "UV Polygon Edit Tool" and selected all of the polygon's I wanted to UV. 3. Now Thanks
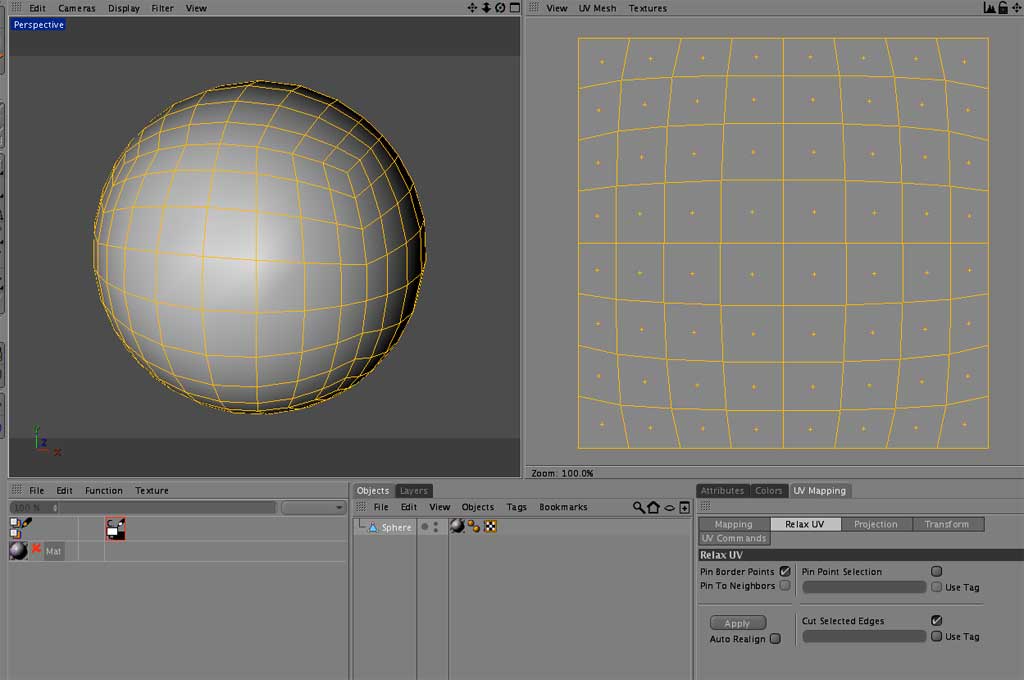

Step by step: 1. Define seams using edge select in the modeler, select all the edges you want to be your seams. 2. switch to uv editor select all polys that you want to map, 3. go to uv mapping tab, Relax UV subgroup. 4. Deselect "Pin Border Points" then check the "Cut Selected Edges" checkbox and hit apply. ___________________________ Q. OK so I added the "turn off pin border points" but what do you mean "first you want to flat map your UV before you do any of the rest of the stuff." Sorry this is quite vague could you explain? Q. Shouldn't the map look something like my diagram? Thanks
the issue is that right now your mapping is split up in 6 overlapping pieces based on sphere type you picked. basically its mapped like a cube is, so in order to do an unwrap you first have to start with the uv map as one continuous mesh, thats why you need to flat map it first. dont worry about the fact that you are just pancaking the uv map, only after you do this can you do the unwrap steps. the others are right though that a sphere will not unwrap really accurately, but I agree this is good practice for doing a head or something rounded like that.
for the unwrapped map to look like in your diagram, you must select correct edges first - i think you're not doing this right.. admittedly selecting the correct ones is slightly more complex than in your first example.. lets see.. your last diagram has 14 sides/edges (3poys in each, say).. divided by two (when they are 'stitched' in real model) means you have to select 7 edges in total but (in your first picture) you're only selecting 4 and the top-middle one doest look right!! so the question is: where are the rest? :) find them, select and then you would have solved the puzzle :)
Oh I understand. So what I see in my above image is a UV of one side of the 6 sides. That makes sense. So please help me. You say i need to start with the UV as one continuous mesh. So When I cut the mesh at the beginning that shouldn't have beend one yet. Your instructions said to "Define Seams using edge select" where I want my seams so this should come later. Q. So would I be correct in saying I need to flat map it first. Should flat mapping come before step #1? Q. Could you please explain how to flat map the sphere? and after I flat map the sphere what is the next step? Thanks

OK, thanks for the excellent help. I am at the point of selecing the edges. Do I select edges in Bodypaint UV edit and if so how do I select the edges in there? I seem to be able to select whole polys only in BP UV edit. or do I go back into modeling mode and select the edges there? It would be nice to be able to select the edges in Bodypaint if possible. Does it matter? Thanks
its easier to select the edges in the modeler simply becouse those buttons are already there, and edge mode is easy to select. But saying that, it is important to note that C4D is probably the most customizable tool on the market and pretty much all of the tools are availible to you in any layout you are in. since I use edge mode a fair amount in uv edit mode, I added edge tool buttons to the interface. but you don't even have to, you can switch to edge mode under Tools - c4d tools. then you can select edges, no problem. and all the advanced tools like Loop, Ring and Path selection are under the Select Geometry tab.

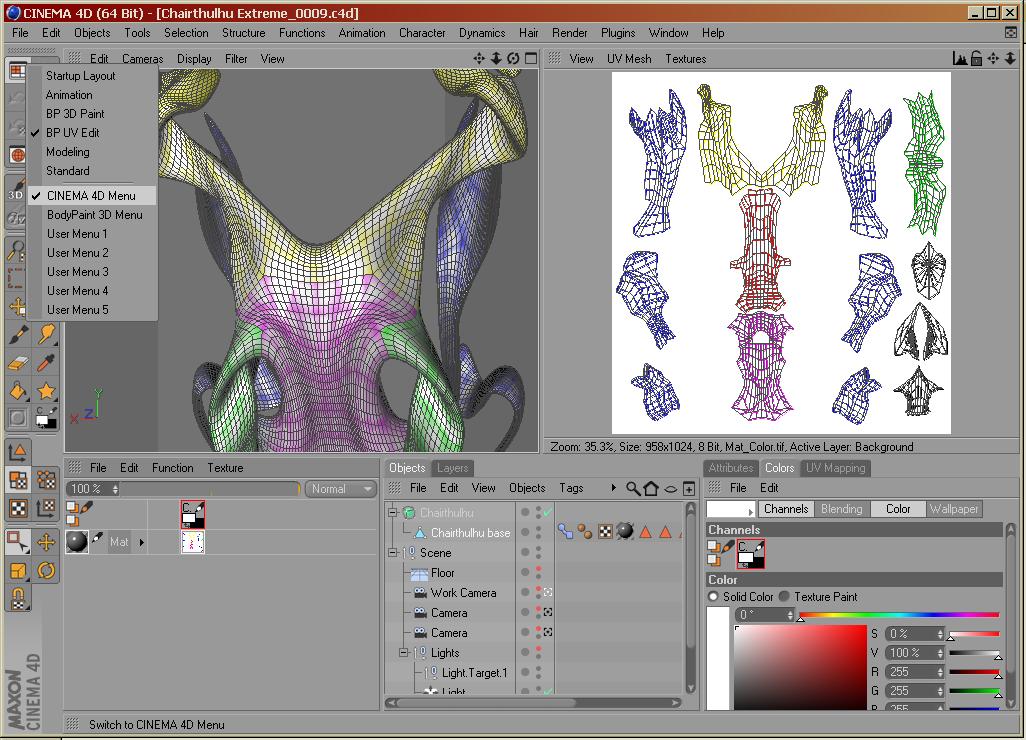
I don't think anyone has spelled this out, but it may save you some work in the future to be aware of this: when you're doing subdivision modeling, it is much, much easier to UVmap at a lower resolution, and also making polygon and edge selection groups; they will all be retained when you convert the HyperNURBs container + base polygon object to a high-poly form.
Quote - I don't think anyone has spelled this out, but it may save you some work in the future to be aware of this: when you're doing subdivision modeling, it is much, much easier to UVmap at a lower resolution,
One thing I need to note if you are doing your mapping at a lower resolution is that the mapping doesnt take the sub-d into consideration so if you don't do a relax after final subdivision you will get some distortion in your map. This issue with uv mapping and sub-d is an unfortunate side effect of having subdivision as a seperate "Object" rather then just a mesh setting like some other modelers. this is one of the reasons I like Modo so much it automatically adjusts the map for subdivision, I would love to see this added in C4D.
Oops, that's a good point, sure enough. All the more reason though to make polygon and edge selections at the start, as Becco first pointed out, so that it's easy enough to redo.
wdupre, Ok I am totally lost again. I was following your steps above. Is this correct. Please add or delete any wromg steps and i am going to do it from scratch again. Thanks Step by step: 1. Create a flat map. 2. Define seams using edge select in the modeler, select all the edges you want to be your seams. 3. switch to uv editor select all polys that you want to map, 4. go to uv mapping tab, Relax UV subgroup. 5. check the Cut Selected Edges checkbox and hit apply.


Incidentally I highly recommend this video tutorial on C4D 10.5's improvements to UV relaxing:
http://www.cineversity.com/tutorials/lesson.asp?tid=925
Well, the way I do it is I hand it to a texturer, and if they try to hit me or spit on me or things like that, then I reckon I got it wrong. I think there's a more accurate way though.
Attached Link: http://willsmind.com/images/UVGrid.jpg
I load a grid as my texture this does two things, first alows me to see the best virtical and horizontal alignment right on my mesh, and second see exactly where the distortion is, so I can go in with the magnet tool and manually adjust areas where I see distortion. here is a basic Grid Map.
Quote - Well, the way I do it is I hand it to a texturer, and if they try to hit me or spit on me or things like that, then I reckon I got it wrong. I think there's a more accurate way though.
That's funny! I only wish I had a texturer a modeler a rigger and an animator to do all of my grunt work and I could be the art God who gave all of the orders and received all of the praise, but that's not going to happen any time soon and besides as much as I don't like being stuck I like the feeling I get when I finally figure something out! So I guess I'm the grunt right now!. LOL.
wdupre, That sounds like an excellent idea. So I'm not sure how i would use this grid though. Do I load the grid as my texture in C4D modeling mode before I go into Bodypaint. Should I use the "Magnet Tool" on my mesh above? Another question: How do I see the vertical and horizontal alignment on my mesh? Sorry I don't understand how this works. AAARGH! I'm such a newb when it comes to Bodypaint! Please explain! Thanks
Attached Link: http://www.c4dcafe.com/ipb/index.php?
no you can do it right in the uv view, see the little ball that says mat in the column just to the right of the object menu thats your material, double click on it and you will open up a material window, in the color channel you will see a line that says texture click on the little arrow next to that and select Load Image. and navigate to your image. the texture will show up on the little ball and if the material is assigned to your sphere it will show up on the sphere as well, if not, just drag the ball over the sphere and drop it on. No offense but a lot of this is basic stuff which you should really learn more about by reading the manual. there is just no way that all you need to know about c4d and bodypaint can be answered in the forums, the manuals are quite good and cover everything in depth. also go to c4d cafe and just start watching all the video tutorials.
Quote - That's funny! I only wish I had a texturer a modeler a rigger and an animator to do all of my grunt work and I could be the art God who gave all of the orders and received all of the praise, ...
Hmm, so do I.
Privacy Notice
This site uses cookies to deliver the best experience. Our own cookies make user accounts and other features possible. Third-party cookies are used to display relevant ads and to analyze how Renderosity is used. By using our site, you acknowledge that you have read and understood our Terms of Service, including our Cookie Policy and our Privacy Policy.

I am using C4D R10 and I want to be able to cut the sphere where the red marks are to create a flat 1 piece UV map. I have looked everywhere for a simple step by step on how to do this but have not found anything. Could someone please explain how to do this? Thanks