Renderosity Forums / 3DS MAX
Welcome to the 3DS MAX Forum
Forum Moderators: wheatpenny
3DS MAX F.A.Q (Last Updated: 2024 Aug 27 11:07 am)
Welcome to the 3DS Max Forum!
Considering 3ds Max? Download the FREE 30-day trial here

Ready to purchase 3ds Max? Go here
Renderosity maintains a zero tolerance policy concerning the trading/use of illegal software.
Refer to the Terms Of Service for the lowdown concerning warez.
POSER/MAX FAQ - This covers MANY of the issues involved when using Max in conjunction with Poser.
Take the time to look over this post before starting a thread in the forum.
Checkout the Renderosity MarketPlace - Your source for digital art content!

Enjoy your stay and keep coming back!

Subject: Glowing Eyes


I think that youi would have to make the eyelids a seperate materil zone from the face, to accomplish what you want.
STOP PALESTINIAN CHILD ABUSE!!!! ISLAMIC HATRED OF JEWS
That shouldnt be a problem. What kind of material would be capable of receiving the ambient value from another texture to act like a light source?
The skin uses Mental Ray Subsurface Scattering Fast Skin texture so there is the backscattering effect if the light source is behind the skin so the eye lids would probably glow slightly if the eyeball texture itself actually gave off some kind of light source for the SSFS to take advantage of. I just don't want to actually use a light source.
Not sure how you would do it in Max, but in Poser I's set the ambient to being brighter than the diffuse color. Howerer in Max, I do believe that there is an illumination value in the Material setup.
dph
STOP PALESTINIAN CHILD ABUSE!!!! ISLAMIC HATRED OF JEWS


tried setting translucency on the eyelids ? (probably you have but it's the only way I can think of)
My Freebies
Buy stuff on RedBubble
Thanks.
Unfortunately the only option seems to be using a lightsource - or - a combination of light source and Extra Lighting channel map on the face - that would probably be the better option. I can get a general glow off the extra map and use the lightsource as the center point which will move around to give the impression of the hotter iris behind the eyelid.

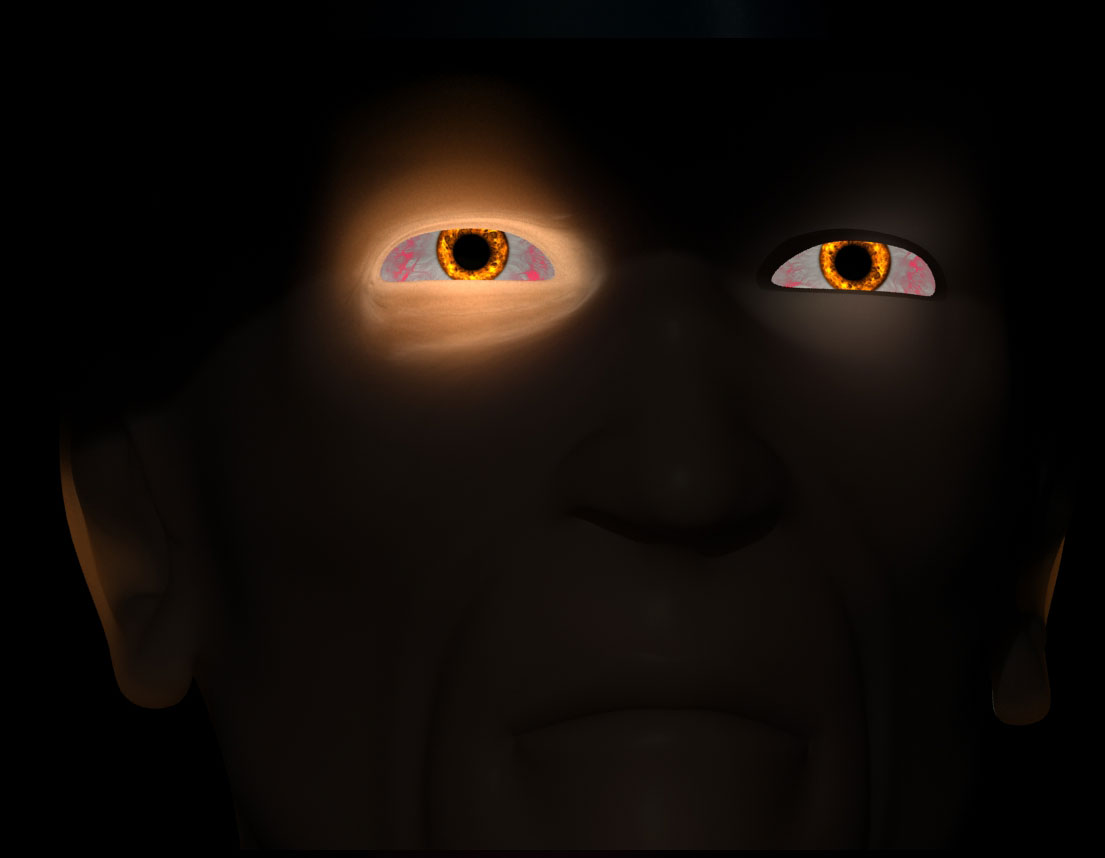
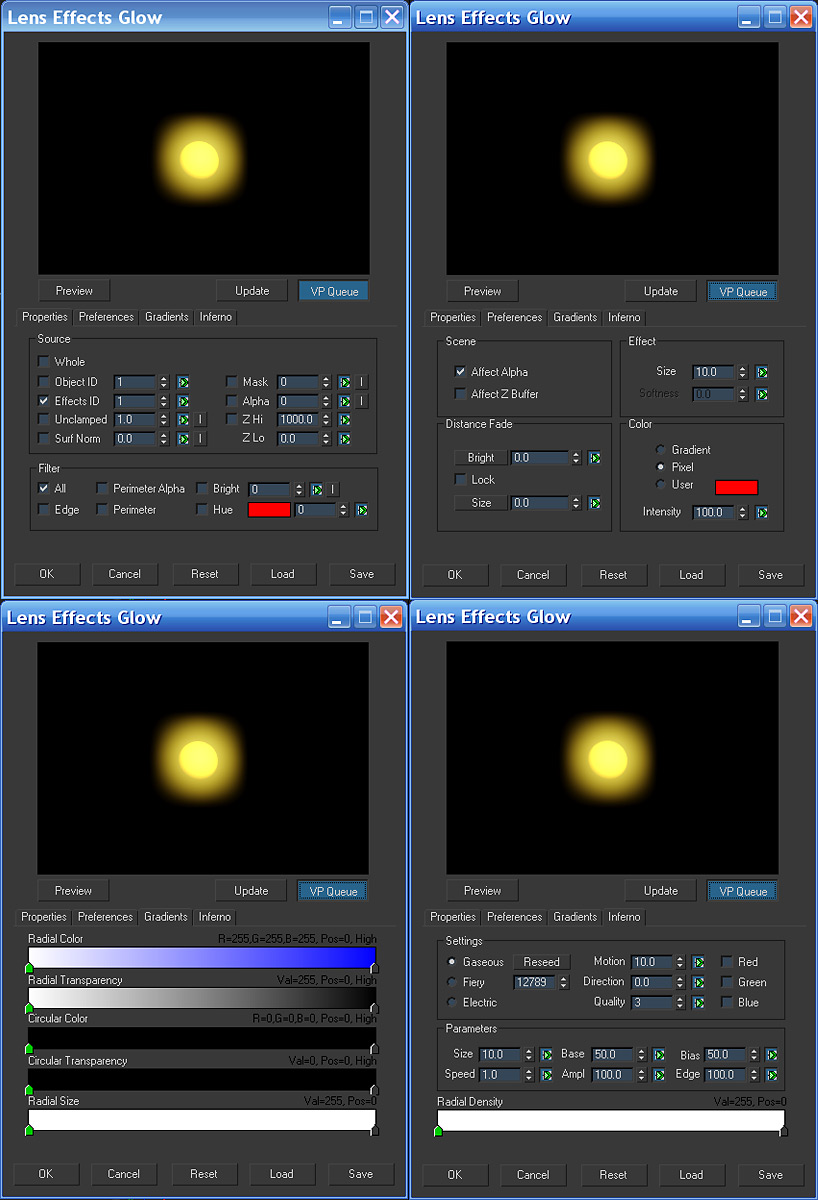
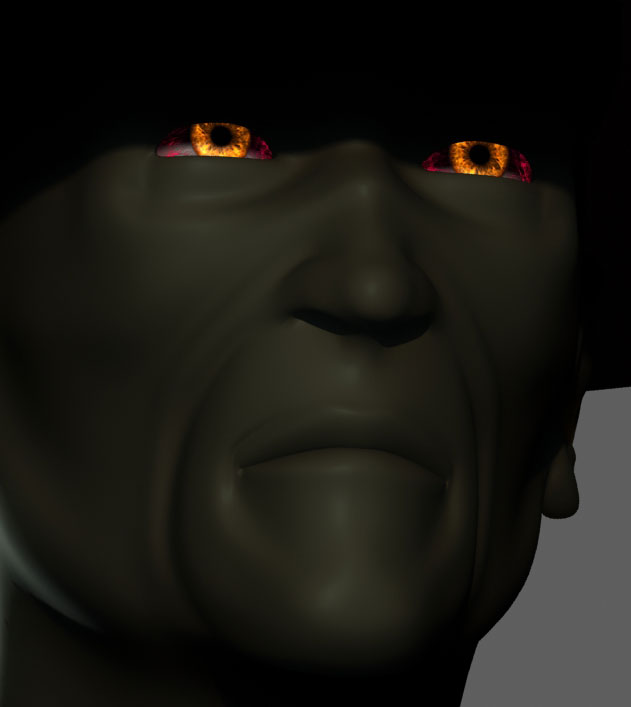
Here’s an attempt using video post Lens Effect Glow. Is this what you’re interested in? If so, I’ll describe the procedure. BTW, the model was supplied by Mathias Verhasselt which can be gotten for free here: http://www.3dtotal.com/pages/meshes/meshhuman_a2.php

My idea on this is to use Max's Lens Effects and create two glowing spheres that you then place on the object or picture's eyeballs. This method will allow you to "glow-up" not just an object but also a non-object face picture/background as well
Or you may want to use your characters eyeball objects directly instead of the Spheres. But I'd suggest try the Spheres way first.
So..Create two smallish Prim Spheres and move them to just in front of the eyeballs.
They can be smaller than the eyeballs. Try small ones first
Set the Material of these "GlowSheres" to Transparent and high Specularity.
These Material settings can be mucked about with later...
Don't worry about the Color of these Spheres. Your "Glow" colour will be set in the "EFFECTS" options.
Now: With one of your Spheres selected Goto "Object Properties" (Main Menu Bar/Edit/Object properties,) Under "G-Buffer" give the selected Sphere object a number, (say,1) in the "Object ID" box. Do the same for the other Sphere and use the SAME ID number.
Quit "Object Properties:
Goto "Rendering/Effects and click on "Lens Effect" Click OK.
In the "Lens Effects Parameters" box, click on "Glow"
Click the little arrow to move "Glow" to the small window to the right.
Further down the menu you will see "Glow Element"
Click on "Options and then click in the "Object ID" box and set the number to be the same as you gave to your "GlowSpheres"
Remove the check in the "Lights" box. Make sure "Image" and "Image centres" are checked.
Ok, nearly there:
Now, under the "Glow Elements" option click on "Parameters"
For now set the "Size" option to 1 and then change the "Radial Color" to your choice.
Try a bright colour for the first box and maybe white for the other one.
Set "Intensity" to 150 for now.
Now RENDER to check results.
Depending on the size of your glowspheres and your actual object you may need to experiment with these figures/colours .
Now you can try all types of combinations to get various outcomes.
It may seem complicated? But once you've done it a couple of times it very quick and easy. :)
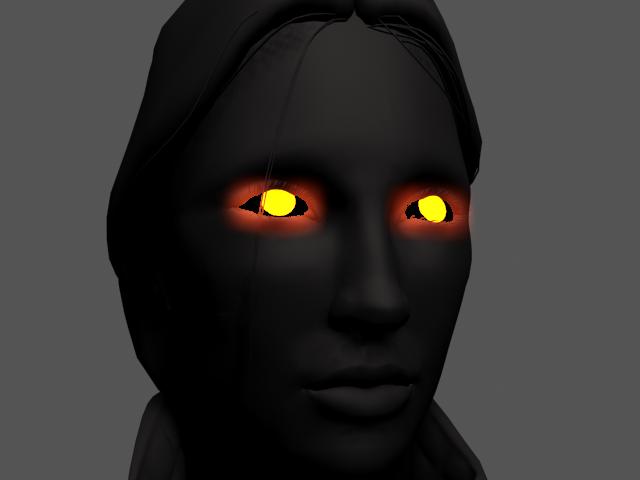
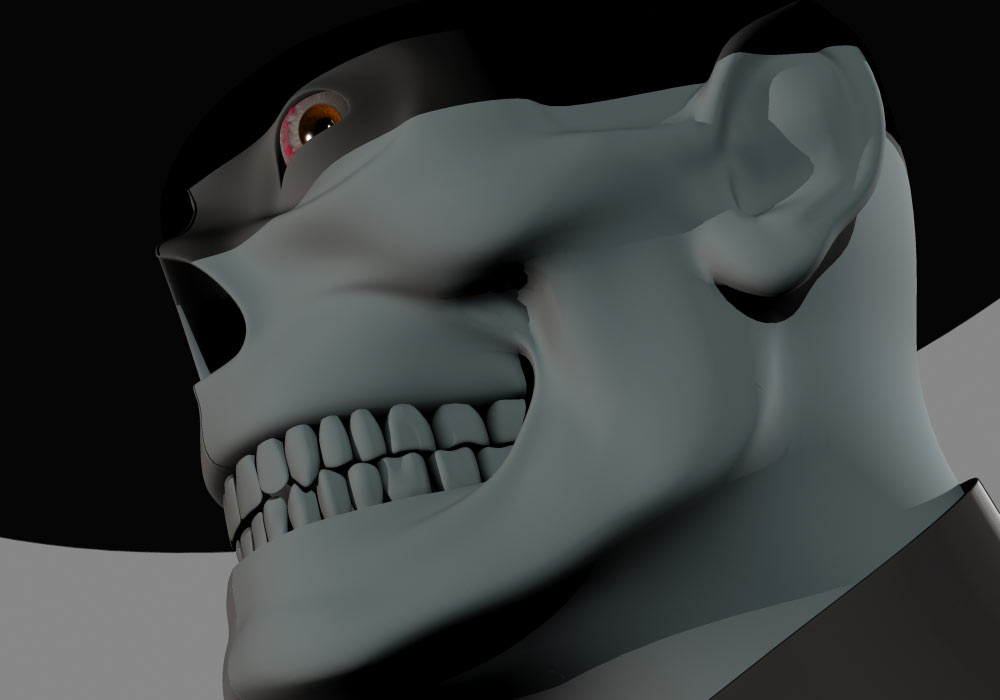
I think I have a workable mockup. Using a combination of an omni light in the eysocket cavity (closed with inner-facing faces) and a glow map (white glow on black bg) on the Extra Lighting map channel is giving me some decent results.
It's a little hot and far from perfect but it's just a mockup of settings and maps to, at least, get some kind of result. I also used a diffuse texture to help break-up the solid scattering effect with some wrinkle details. The glow map is used to up the effect in certain areas.
(I intensified the scatter effect just to get something more noticable - I guess the final version would be a little more subtle)
Thanks for the feedback, Twisted !
You also have choices as to the glow effect affecting the perimiter (sic) or alpha channels or edges etc or various other combinations as well.
It's a quick and easy way of achieving a glow effect.
It is however very camera/ viewpoint/ distance/angle dependent.
Quest's way is most probably very more professional by using Video post but I've always found Video-Post to be annoying to setup. :)
And Twisted.. could you keep us updated with your fine project, please ?
What you are using and tools you use and etc etc?
Thanks !!
The original post said that it wanted; “a backlit glowing effect on the eyelids without using lights or ambient textures on the face”. Thus you will note in my illustration if you look closely at the character’s eye lashes you will see that the illumination is coming from behind the eyelids and not shining on the lashes. You will also note that the cornea (ordinarily the white of the eye which in this case I made black) also has no light illuminating on it…thus the use of Video Post to affect only the edges of the eyeball texture and not the eyeball object itself and no new objects had to be added to the scene.
Again, if you find using something in 3DS Max annoying it’s because you’re not familiar with the operation of the procedure. Actually Video Post opens up a whole new world to the 3DS Max package which is not obtainable otherwise and is well worth looking into. Learning it is essential to any serious 3DS Max artist/hobbyist especially after having spent the $3,000 price tag for the package. It also offers vastly more parameter options then the regular glow effect in the “Effects” dropdown, allowing for more control over your outcome as my screen grabs illustrate. Using Video Post is really quite simple once you know how. But if the easy way out is good enough for your needs then by all means go for it. I’ve been using 3DS since its DOS platform revision 3 and I haven’t stopped learning from it since.
Nice post ,Quest.
Using the Effects/ glow will do it also. And much easier and with more faster feedback
There are many options available as to where the glow is actually renedered.
Also the effect desired can be assigned to the eye object or the eyelid object or to some object behind the eye etc etc.
The glow can be restrained to function on the edges of the object or the whole object or around 16 variations of all this. It can be easily modified as to colurs and as to strength and other things. No special lighting required.
Being very,very, very familiar with "VideoPost" has made me shy of using it. :)
It's very 1980's now and hasn't changed much since then.
I believe there are better options for this effect from within Max
But each to her own.
Like I said; "if the easy way out is good enough for your needs then by all means go for it". And not to be misunderstood, given the OP requirements I merely offered what in my opinion I felt would best fit the bill. And although you might think that Video Post may be too 80"ish" for you, there's obviously a reason why it's been kept as part of the package.
The Video Post Glow was originally what I was going to do. I have experience working with max's video post so it was naturally the first idea. Of course, I started overcomplicating things when I moved into MRFastSkin and tried to take advantage of the mat's backscattering effect to get that 'behind the eyelids glow' rather than a 'glow covering'.
Both options outlined above are a great way to get glowing effects - different way to get to the same point; each with their own features. Sorry Quest, I didn't mean to skip over your contruibution. spanks self
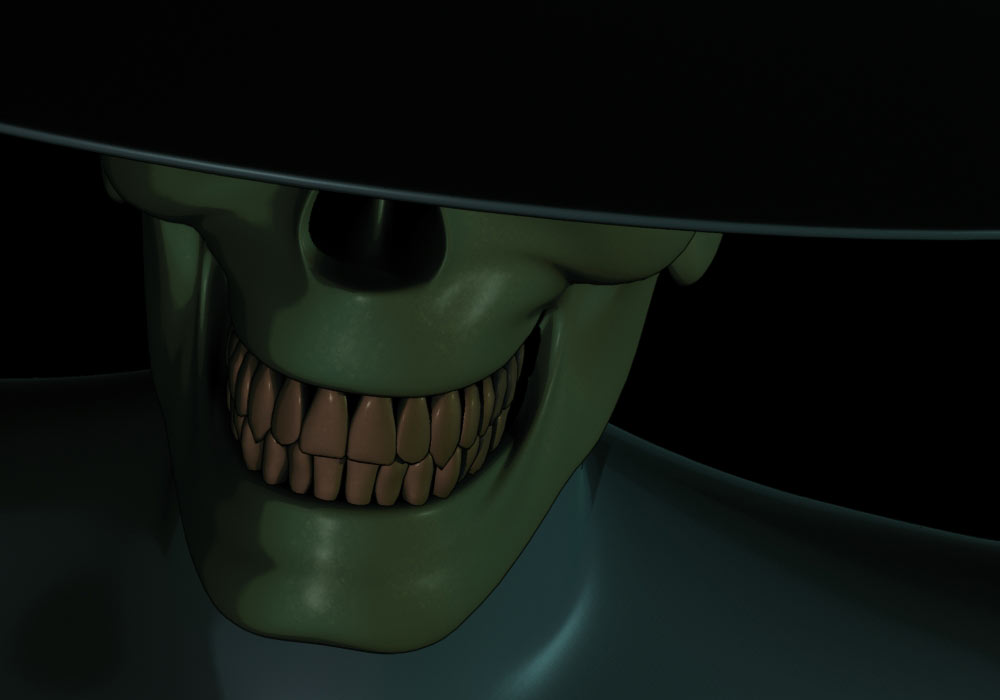
I like what I came up with - mainly because it uses the mat's native backscattering effect - it opens up a few options like having the texture details (wrinkles, pores, what-have-you) and the ExtraLighting channel be part of the effect rather than covered up by it - also - the glow is easily animateable(sp?) since it's an omni light that I can attach to eyeball motion, which was key.
At some point I will visit both options above to give the eyes an extra layer of glow - in my pic posted above you can see how flat the effect is and it has no influence on the eyeball itself so I think a combination of what I came up with along with a subtle over-glow effect is what will work.
LOL…don’t spank yourself too hard Twisted_Symmetry…you may draw blood, it’s no big deal that my suggestions are passed over. After all, you ask for help and we offer possible solutions depending on how we interpret the question. But it is nice to be acknowledged for your efforts, something that doesn’t happen too often around here.
Yes, for those who are nobbies or not familiar with it, Video Post is the post-production module in 3DS Max, with it one can composite in layer combinations, add animated and still images to scenes, splice movie segments together and add transitions between scenes. You can link output from Video Post to other packages like Photoshop, After Effects or Adobe Premiere and add effects and 2D filters from those packages and have them link returned and composited back in Video Post. Video Post can also be used for image batch file rendering and allows for Render Elements composition which many production houses use to composite their final images using; Alpha, Atmosphere, Background, Blend, Diffuse, Hair and Fur, Illuminance HDR Data, Lighting, Luminance HDR Data, Material ID, Matte, Object ID, Paint, Reflection, Refraction, Self-Illuminance, Shadow, Specular, Velocity and Z-Depth as layers. And, as already mentioned it is capable of providing post-processing effects such as glows and blurs like those offered in Render Effects submenu except with much more control capabilities and possibilities and allows for backdrops and starfields to be added to the output file.
Over the years powerful standalone 3RD party software packages have dominated the post-production scene and there are some very good ones out there but in a pinch, Video Post will suffice nicely. It is a powerful tool and should not be trivialized or pooed-pooed.
Looks very interesting Twisted_Symmetry and nice work so far.
Thanks Quest.
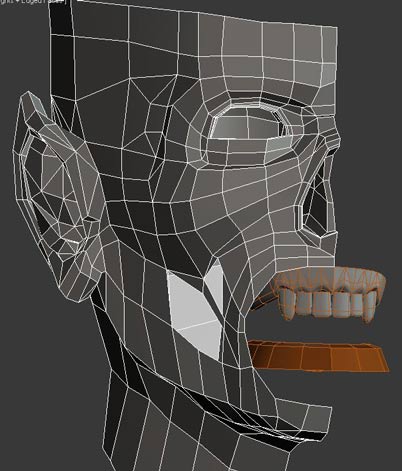
I'm doing mostly edge modeling now. I used a base face I modeled a long time ago (you can see it in the original posts above) then just retopologized it in the direction I wanted to go. I do work with a mirrored version - usually working on the left, mirroring an instance into the right side.
I'm trying to keep the poly count low so the turbosmooth modifier doesn't over complicate or distort the mesh too mush when applied - so, ya, I'm modeling the base mesh with a turbosmooth modifier on top which will be used for the renders.
It'll be rigged but I'm doing static images so it won't be animated so much as posed - however i'll be doing IK for the future should animations be something I want to try out.
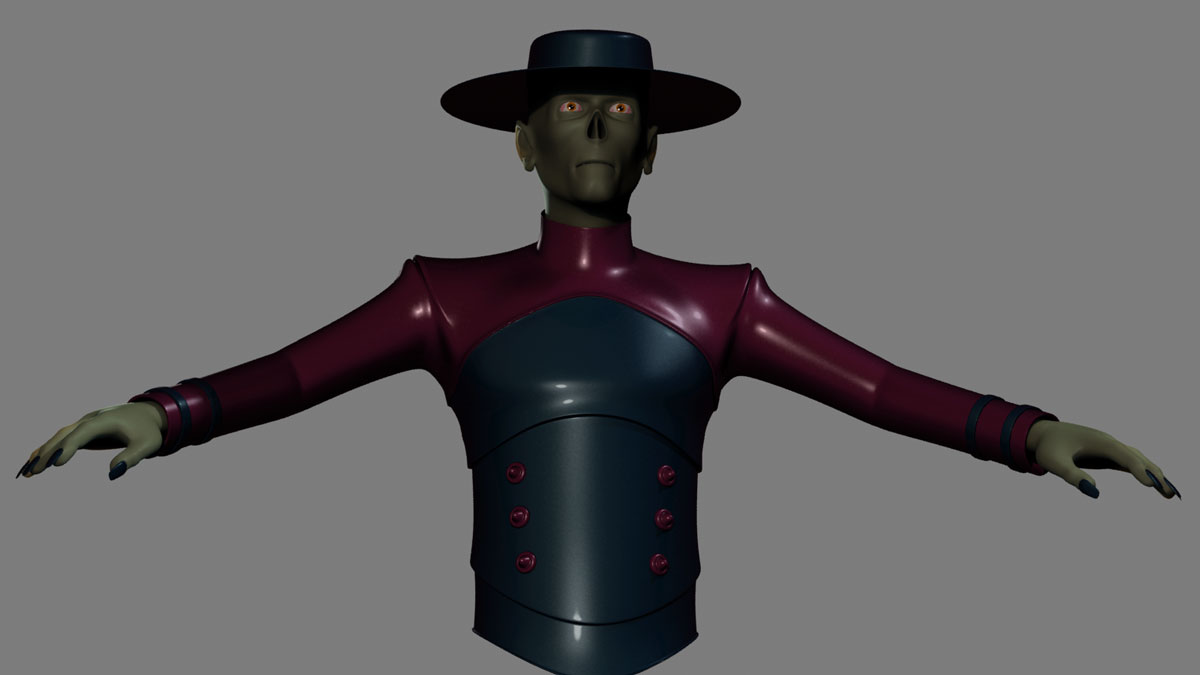
Here are some parts without the turbosmooth
It's not perfect, of course, I'm sure I can still optimize it more but I'm not necessarily going for 'low poly' in the strictest sense of the term.
I've been poking at max since v5 but only in recent years have I learned enough to make it through some ideas. It's all still very much a process for me but it's moving forward, which is key (:
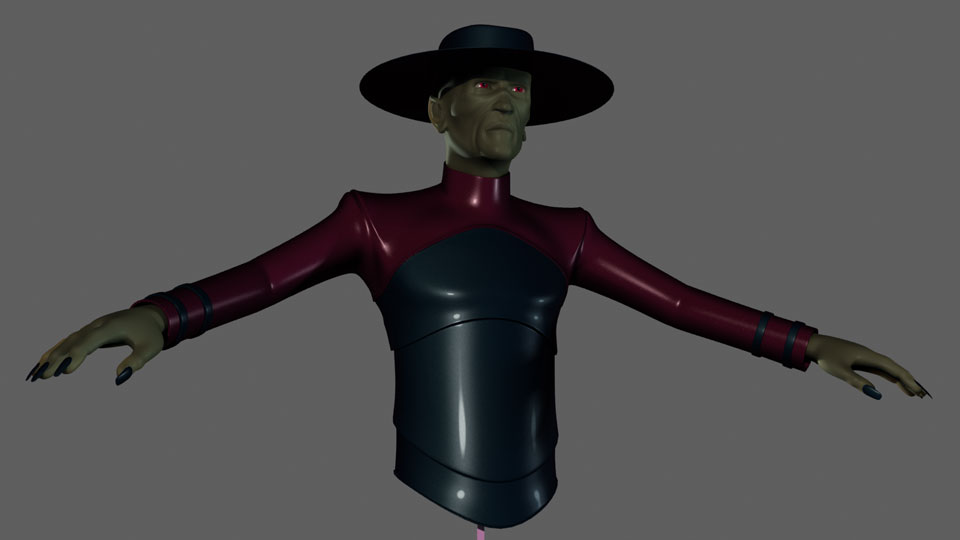
The project is a comic - I've opted to go with the 3d look but with a touch of 2d cell and outline. My thinking was that going with rigged 3d characters would, in the long run, be more efficient for me as I could easily pose and get more dramatic lighting and angles while maintaining a high level of character consistency and complete a given panel or full comic in a shorter amount of time that it would take me to actually hand-draw character poses over and over again etc. Plus, and this is purely a visual thing, I like 3d and want to give the style of the comic something more than 2d could give me.
So this is the first character - I have 3 more main characters to build [and rig] then some background characters and the equivelent of a DAZ unimesh so I can pull several characters from a single mesh.
Lot's of work ahead of me.
Funny, unlike you I usually mirror my models from the right. But I do this using the Symmetry modifier placed at the top of the stack which can be shut off and on using “show end result toggle button” underneath the stack window (looks like a little test tube next to the thumbtack icon). But Edge modeling is my preferred form of modeling also.
Some people don’t like the TurboSmooth modifier because even at default levels it can be a bit too much like you say and prefer the MeshSmooth modifier (not the Smooth modifier I erroneously stipulated above). Another smoothing modifier that comes in handy is the HSDS modifier. You can also place your smoothing modifier of choice near the top of the stack and shut that off the same way with the toggle so that you can view your character while in the process of building him without going through all the motions of deleting and reapplying the modifiers intermittently.
I understand your goal of trying to keep polygon count down but fortunately with still images polygon count isn’t as important as with moving images where high polies can really slow down production. You may also want to consider baking your high poly models to textures so that they can be placed over low poly models for fast rendering as is done in gaming and still look heavily detailed.
I have contemplated the comic idea myself and I think it’s brilliant what you plan to do. All the work with design and rigging would be up front and in time the characters will be ready for the next episode in no time at all.
Great project, keep us posted.
Quote - Funny, unlike you I usually mirror my models from the right. But I do this using the Symmetry modifier placed at the top of the stack which can be shut off and on using “show end result toggle button” underneath the stack window (looks like a little test tube next to the thumbtack icon). But Edge modeling is my preferred form of modeling also.
I'm not sure why I never went that route. It's definitely a pain in the ass everytime I want to colapse the stack or want to check the full model - I have to remove the old instance, make a copy then weld all the center X verts which is tedious.
Quote - Some people don’t like the TurboSmooth modifier because even at default levels it can be a bit too much like you say and prefer the MeshSmooth modifier (not the Smooth modifier I erroneously stipulated above). Another smoothing modifier that comes in handy is the HSDS modifier. You can also place your smoothing modifier of choice near the top of the stack and shut that off the same way with the toggle so that you can view your character while in the process of building him without going through all the motions of deleting and reapplying the modifiers intermittently.
Again, another something I really never experimented on. I've always used turbosmooth - not sure why - the MeshSmooth modifier definitely has more options.
Quote - I understand your goal of trying to keep polygon count down but fortunately with still images polygon count isn’t as important as with moving images where high polies can really slow down production. You may also want to consider baking your high poly models to textures so that they can be placed over low poly models for fast rendering as is done in gaming and still look heavily detailed.
My main reason for keep the polycount low is mainly for rigging. I've put myself in the corner and made more work for myself in the past by modeling high poly then having to rig. Since I don't rely on envelopes, I manually weight my verts, having higher poly items makes that process unbearable to say the least. If I keep a give object's count low and just have enough verts in the right places to accommodate good morphing and joint movement/positioning then I let turbosmooth deal with the in-betweens.
Quote - I have contemplated the comic idea myself and I think it’s brilliant what you plan to do. All the work with design and rigging would be up front and in time the characters will be ready for the next episode in no time at all.
That was my thinking too. The startup workload is huge but I'm hopeful that in the long run it will pay off in time saved, style and consistency. Also, since it's a huge effort for one person, it brings up the option of sharing assets with others [who might be interested] so they can pose/render/build assets for compositing we could all maintain a high level of consistency and style.
“I have to remove the old instance, make a copy then weld all the center X verts which is tedious.”
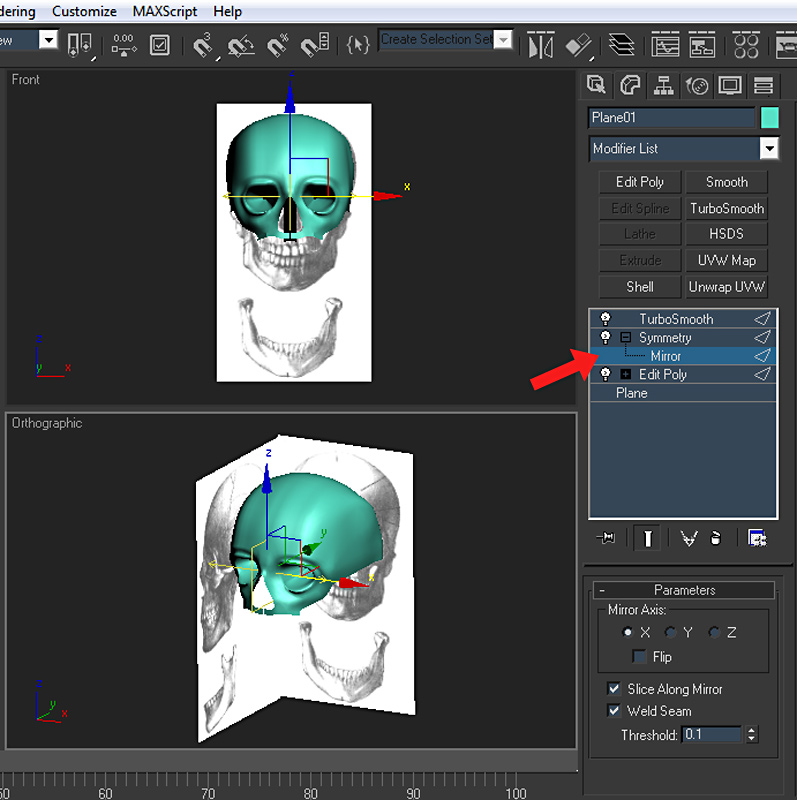
Just remove the instance then apply the Symmetry modifier to the top of the stack. In the subobject select mirror then move the axis so that the mirror instance lines up with the original. No vertex welding needed until you’re finished with your creation and collapse the stack.
“Again, another something I really never experimented on. I've always used turbosmooth - not sure why - the MeshSmooth modifier definitely has more options.”
Give the HSDS modifier a shot too. See if you like it. Put your smoothing modifier of choice above the symmetry modifier as I show in the illustration.
Another trick I use that you may also find useful and make things easier when modeling is when I use blueprints or line art layout maps on back and side panels in the material editor I set self-illumination parameter to 100 and on the plane objects that will hold the maps I set the object properties set with Backface cull checked on. This way the plane’s don’t get in the way of my visual inspections while creating and rotating the model. Here the plane’s object backface cull are unchecked.

Thanks guys, hope you find them useful.
On reread of the toggle switching operation posted above I feel there may be some confusion regarding its use and requires some further explaination for clarity sake.
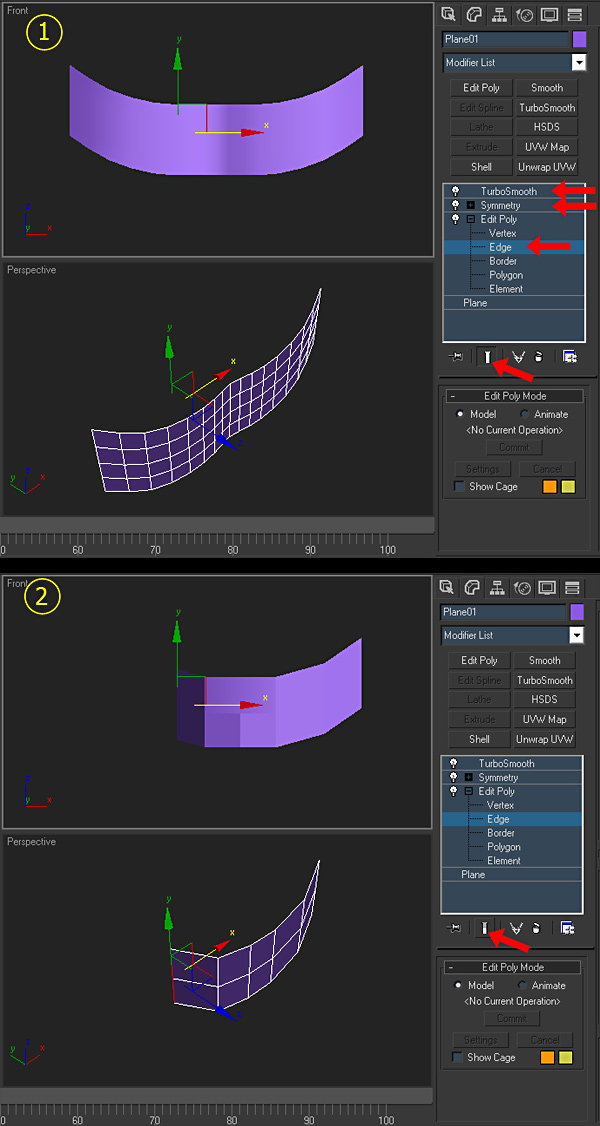
You’re still working on your model using edge modeling at the subobject level #2 (edge) and you’ve already applied the Symmetry modifier and your smoothing modifier of choice…in this case TurboSmooth to the top of the stack as shown in illustration #1.
Illustration #2: With the subobject level selected, if you toggle the “show end result” switch at the bottom of the stack it will allow you to work on your base model not showing the results of the modifiers. You can then view the progress by toggling the switch again to see the results of your work up to that point.
As a sidebar, say you don’t want to see one of the modifiers when you toggle on/off for whatever reason. Then you can click on the little light bulb to the left of the corresponding modifier to shut it off. Later on you may want to see how it affects the end result again, you simply mouse click on the light bulb again.
Privacy Notice
This site uses cookies to deliver the best experience. Our own cookies make user accounts and other features possible. Third-party cookies are used to display relevant ads and to analyze how Renderosity is used. By using our site, you acknowledge that you have read and understood our Terms of Service, including our Cookie Policy and our Privacy Policy.
Does anyone know how I can get these eyeballs to have a backlite glowing effect on the eyelids without using lights or ambient textures on the face?