Renderosity Forums / Carrara
Welcome to the Carrara Forum
Forum Coordinators: Kalypso, Anim8dtoon
Carrara F.A.Q (Last Updated: 2026 May 31 3:03 am)
Visit the Carrara Gallery here.

Subject: John Harris Building of the FTL1, Hold on to your bat boots!

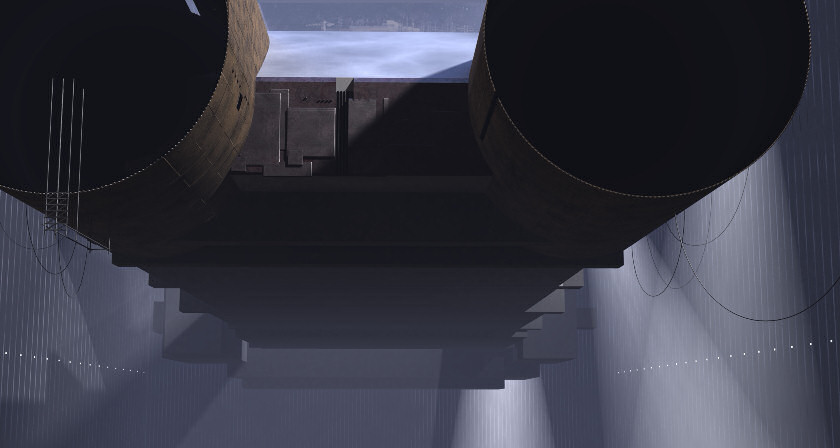
Started a little bit of the texturing and added several more lights. Did some more adjusting and scaling (not obvious but I moved over half the objects in this scene).
I'm now in what I call "stare" mode. I go through this a few times on a project like this. It's a phase where I just have to stare at the source image and think about how I will do all of the parts, which parts should go first, how parts should fit etc..
This project has so much depth in it that it's hard to get a grip on it. As I've been sifting through the source image, I think I've ID'd two humanoids in it. Not sure really but I'll put in two dudes in space suits just for my own fun (we'll see you you all can find them).
I discovered a SUPER whacko bug. When I render with the primivol fog primitive showing, Carrara won't utilize my computer 100% (REALLY weird!). I've never experienced this bug in any incarnation ever before (whacky!). The image I've put here replaces the fog using the realistic sky and now my computer is back to rendering 100%. Just flat out messy weird!
Anyway, this is going to take a while but the journey will be cool.
-Kix


I've done CG versions of John Harris' artwork. They are fun challenges, getting the CG to match his paintings.
www.youtube.com/user/ShawnDriscollCG
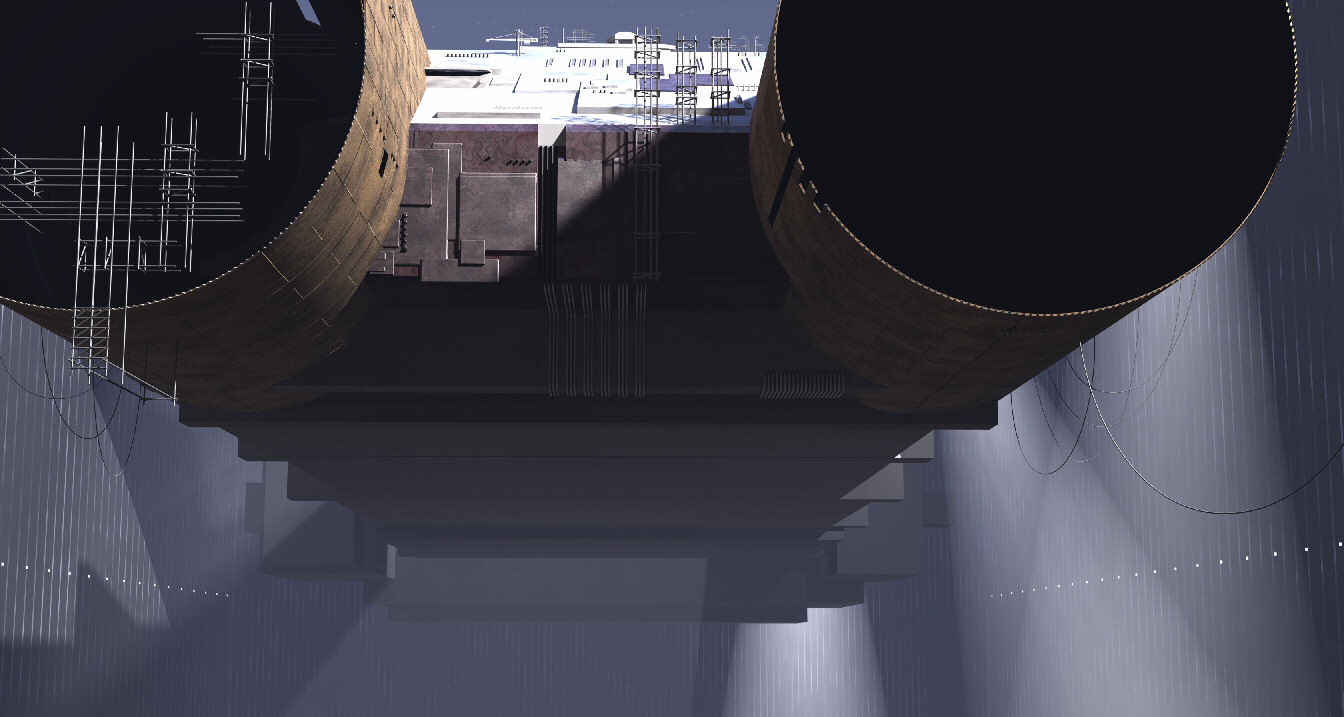
I have the original source image as my wallpaper at work right now so I can study the beast. Today, I figured out a lot of stuff and I'm getting pretty close to knowing how I'm going to do pretty much everything.
It's sort of strange how I require time to get an image into my head. This particular image has so much stuff in it! I keep finding little details all over the place! It's cool to find things but it's sort of scary because every stupid thingy I see in the original becomes a thingy I have to recreate somehow.
The original painting is truly impressive and trying to match it with textures is a whole nightmare unto itself. A lot of the original image carries its weight in the surface textures. I will not be able to reproduce a lot of it but I will give a pretty good shot.
This version that I'm posting here has a lot of changes from the previous image but it's not really obvious. For example, Harris has a strange distortion in the left engine pod along the top edge and I originally thought I'd just ignore it but after staring at the thing for several days now, I decided to hack a way to get the distortion into my version.
Well, I did that and it messed up the whole white structure between the engine pods along the top. That also stuck the mesh up into some of the lighting that I'm using for other things so I had to add planes to "shade" lights from interacting with things they shouldn't. Then I discovered other blocks sticking out where they shouldn't so a whole bunch of stuff had to get moved and scaled.
For you the audience, it probably looks essentially like the same image with just a few thingers here and there but it's not. Laying the foundation at this point is crucial so that when all the extra dinky details start going in, it will all fit together like a perfect puzzle.
That's why staring at the original for a few days actually pays off big time.
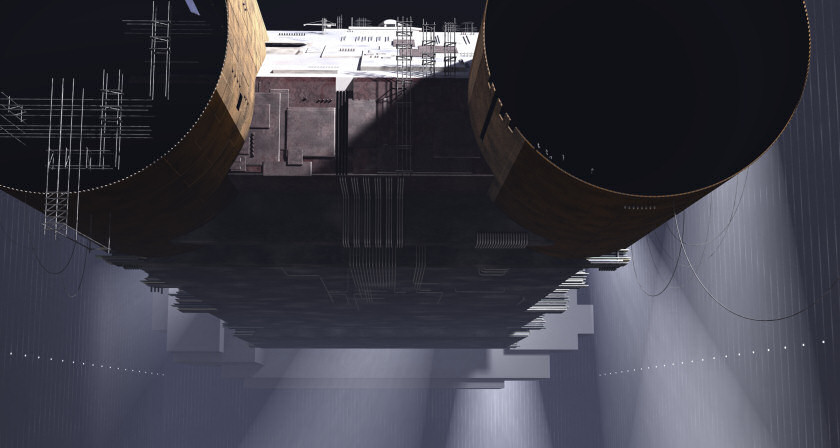
As another example, I decided there are actually seven humanoids in the original image hidden here and there. Ok, some of the things in the original that I will be making into humanoids are actually sorta undecipherable blobs in the orignal but hey, that's just how it goes with this kind of work. The point is that now I know where the smallest humonoid in the image is which means that I can put the first one in, scale it and then all the other structures which have humanoids will then use the scale of the first one and that will make all kinds of things fit together.
I figure there are 15 little support ships in the original. Since a few of them have humanoids, that means that now I know how big all those little ships are! That means that building them and getting their shapes and perspectives correct will be a LOT easier to figure out now.
All that stuff has to be figured out one way or another and for me, getting it figured out ahead of time saves a bunch of effort later. I still get trapped on some stuff (you just can't figure it all the first time) but staring at something for a while makes a big difference!
Stay tuned!
-Kix
A lot of dialing on everything. As I build things, I see flaws in it. So, half of what I do is fix what has been done, then add.
It's coming along though. I'm not happy with all the scaffolding yet. It's a part of the original image is sort of hard to guess.
It's coming along though.
-Kix
I've been playing around with the textures (as you can see) on the engine tubes some. There's some work here to do to get things figured out (not sure how I'm going to resolve that just yet).
I'm basically done with the modeling on the "ship". There's the big gray structure way in the back which is next. Then, I will build all the little floaty ships (there's a bunch, around 17 or so).
After modeling, then I will finish the texturing. It's goign to be a big task in itsel. I've clearly done some of it but there's more.
I've been fussing with the texturing so far because I've also been playing around a lot with the lighting. The lighting in this image is really messy. Lots of things in the dark, and the light, and gobs of weird lights all over the place! It's coming along though.
I'm enjoying the process.
Stay tuned!
-Kix
One of the "bummer" aspects of this image is that every day when I sit down and stare at the original painting, I see something I've missed or did wrong. That's been sort of a pain in my neck! I have to keep re-working things that I sort of thought were done or add some things that I missed.
The lighting for this image is flat out plain and simple impossible. If you look at the original painting, the back of the ship is all lit up but the shadows are all cast toward the viewer. All the little ships are lit using rim lighting (which again aligns with the shadows) but none of that fits very well with the global lighting of the big ship. Harris put a lot of details in the dark parts but if you review the original image, there are dark parts which are DARK and then there are dark parts which have lots of structure showing up. Trying to get some objects to show up in areas where there's no light is not so easy.
I have several of the little "modules" or mini ships in the image finished now. There are several "floaties" out way in the back which I've put in as blocks or another capsule shape I built. With only one or two hours a night to work on it, I can only build one or two of these little ships a day. It's slow. I really want to get done!
However, I'm running out of the more detailed ships and I'm starting to get to the "what in the blob is that" versions. The blob versions will be quite easy and I might be able to bash them out in one evening.
I have to figure out how I'm going to do the textures on the engine tubes still (I just haven't made up my mind yet, I have several ideas). They're such a BIG component to this image and it really needs to look right. I'm thinking what I will end up doing is setting up two different shaders for colors and mixing them using a hand painted map to get the transitions to work right. That's a pain but I think it's the only solution that will really work. Right now, I have two shader domains but it's just to harsh.
Then there's the whole lighting deal. I'm getting closer every day but it's not a good idea to dial too hard on it until I get all the modeling done. The texturing, lighting, and modeling all has to snap together in one big coinciding puzzle all at the same time. I've been working on the modeling and most of the texturing as I go and I've beat on the lighting.
Until I get ALL the modeling done, then I can start dialing on the rest. Modeling is almost always the one thing that is independent of lighting and texturing. Finishing the modeling removes a degree of freedom to dial in the other two so that's always my initial push.
One of the other main modeling things that I have on my checklist is to re-adjust all the "shelves". I want to mix up the thicknesses a little more and I need to extend some them out more to provide more shadows and more depth. The shelves on the back area (way out there) are much better than the ones closer. I just need to mix the closer ones up better and it will make a big difference.
There's a bunch of "ropes" in this image. I don't know if you've ever tried to model ropes much but they are very clumsy! You either have to fuss with the 3D sweep path in the spline modeler or fuss with some sort of sweep path in the vertex modeler and it's one of those weird things where working in a 2D environment (a flat computer monitor) makes it tricky when building a 3D object. It's really clumsy.
I've discovered that if I increase the contrast post render that this thing looks a lot better. So, it seems that I will be doing a significant amount of post work. It will include,
Increasing the contrast (and the associated brightness).
Adding noise.
Softening it a little bit.
I have a procedure for adding noise which I like and it seems to work pretty well. I think it adds a lot of depth to the image and makes it look a lot less CG (weird).
This is going to be my last developer post to this thread. My next post will be to just announce the final. I hope that will be by the end of this weekend.
Stay Tuned!
-Kix


Quote - I'm done! I've posted the final image in the gallery.
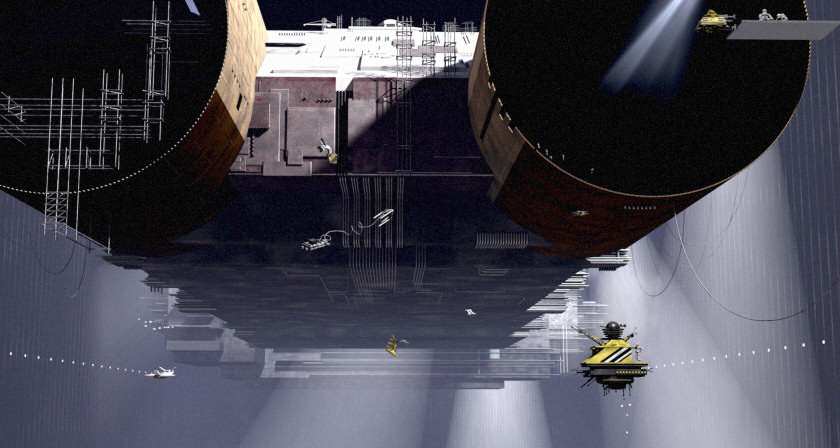
Attached is an interesting render of the scene from a different point of view that I thought would be cool!
Time to take a little break now!
Your scene setup makes me think of the forced perspective trick employed in filmaking where they would build a set that tapers to fool the viewer.
Privacy Notice
This site uses cookies to deliver the best experience. Our own cookies make user accounts and other features possible. Third-party cookies are used to display relevant ads and to analyze how Renderosity is used. By using our site, you acknowledge that you have read and understood our Terms of Service, including our Cookie Policy and our Privacy Policy.

In February, Drawbridgep posted a couple of images which I was rather impressed with. One was his version of the building of the FTL1. John Harris is the original artist who painted "The buiding of the FTL1" (at least I think that's the title).John Harris is an artist which I very much dig. His style commonly depicts scenes of great size, detail, and depth. I don't know how Harris' mind works but I appreciate how his visions have been shared with us on his canvas.
The building of the FTL1 is a particularly impressive painting for me because I want to actually be there seeing this big ship built in real life! Consequently, I wish I had a big version of it for myself to hang on my wall someday. I don't know if I could ever be lucky enough to find a big print of it.
In any case, building my own version of it in C is a really great big huge fat challenge and should be a lot of fun. The modeling for such a project is not for the faint of heart. The lighting and texturing is also not something that can be achieved without some serious energy.
To be honest, I don't know if I have the skill to pull this off but if I don't try it, I'll never know. I've been stewing over trying this project ever since Drawbridgep posted his version of it and also his image "500". The color and lighting in "500" is also something I'm really impresed with (not sure why, just am, who knows how art works? not me).
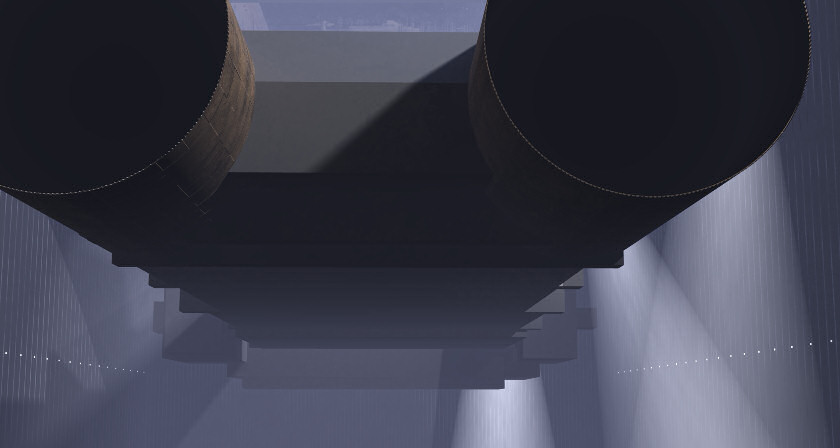
Building an image off a painting is starting to become an art form unto itself that I'm sort of becoming skilled at. FTL1 though is particularly hairy as the scale of the thing is sort of beastly! Here is my first shot at just getting the super big basic pieces in. This took about three hours to figure out (NOT EASY!).
Everything you see in this image is made of planes, cubes, or two other super simple splines I made. I have six lights in the image so far and one primivol fog object (primivols are really great for atmosphere stuff like this). No texture or color yet. The main thing so far is just to see if I could even attempt such a project. Looks like it's feasible.
Sometimes, a painting has geometry or lighting or something that makes it basically impossible for me to attempt. Based on these results though, I think I have a chance.
There was a lot of playing around with camera angles, camera focal length, and scaling of stuff to get this image to this point. As I said before, reproducing something is an artform all by itself. The process I have used so far is just out of my own head. I've never really read or heard of a process which explains how to do this sort of thing.
This particular scene was a little more tricky than others I've tried. With some patience, I think it's coming along.
Stay tuned as I beat on this thing. I can already tell there's 1000's of objects in my future!
-Kix