
Renderosity Forums / Carrara
Welcome to the Carrara Forum
Forum Coordinators: Kalypso, Anim8dtoon
Carrara F.A.Q (Last Updated: 2026 Jun 30 12:55 pm)
Visit the Carrara Gallery here.

Subject: Star Destroyer 2011 Symnopsis

-Kix
Star Destroyer 2011 DAY TWO
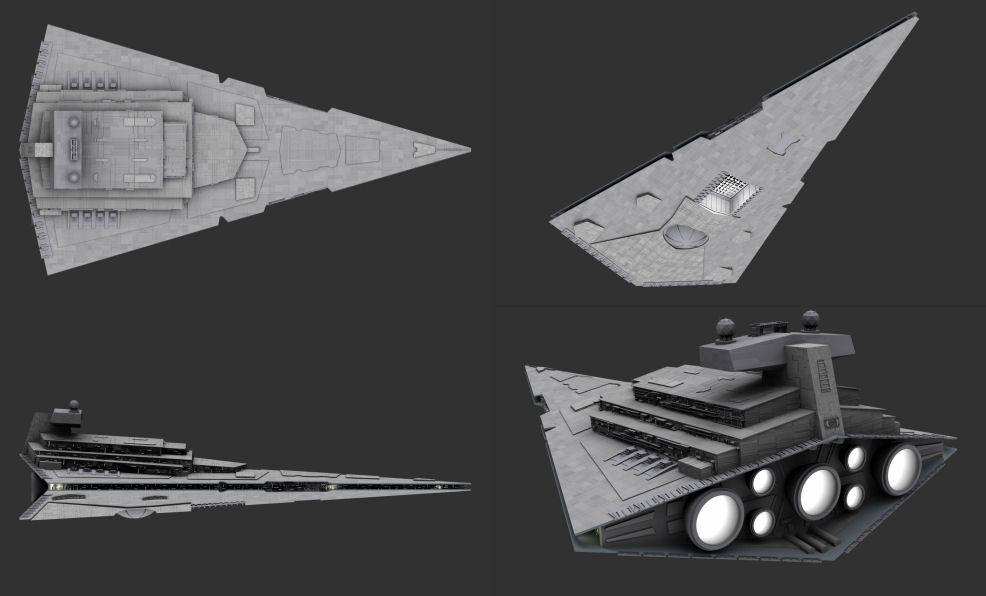
Today was spent finishing the major shapes and details. A lot of fitting was done today. Several components were added and the greebling on the bridge section was started.
In addition, the top and bottom were moved closer together. It was decided that the gap between the two was too large and needed to be sinched up a little bit.
The greebling plan is to build psuedo ordered components and build sections out of those. We'll see how it works out.
Star Destroyer 2011 DAY THREE
I'm still not up for all the greebling work so I turned towards surface texturing. This is not complicated but it is tedious. One basic texture is used and one specific. I can see that I will need to alter the specific texture some and dial all of it to get it to have some harmony.
A few basic modeling things were done but not much. I think what I'll do is build the greebling for the long main section so that I can parse it out onto other parts of the model.
Star Destroyer 2011 DAY FOUR
Today was a day of greebling. Not a whole lot more to it than that. After tomorrow, I will be able to start a final list of things to do to finish the model.
Here's the list I have so far.
1. Rebuild the top deck (it's a poor spline model that needs replacing.
2. Rebuild the top deck surface detail (clearly damaged objects from Raydream).
3. Fix the light in the dock.
4. Fix the bottom front dock.
5. Add the final surface detail on the bottom.
6. Finish the greebling.
7. Re-texture the top deck fills to get the back details correct.
8. Texture the final surface features and add lights.
9. Add the lights in the greebling sections.
10. Build the gun turrets.
11. Build the final details for the back end of this beasty.
Star Destroyer 2011 DAY FIVE
Today was another day of greebling and adding lights. I've also added some form of surface texture to almost every object on model today. That means that basically the model is almost complete and the kinds of things that are left are dialing instead of building (easier).
Review the checklist.
1. Rebuild the top deck (it's a poor spline model that needs replacing. - Did not get to it today.
2. Rebuild the top deck surface detail (clearly damaged objects from Raydream). - Did not get to it today.
3. Fix the light in the dock. - Fixed
4. Fix the bottom front dock. - Fixed
5. Add the final surface detail on the bottom. - Did not get to it today.
6. Finish the greebling. - Finished!
7. Re-texture the top deck fills to get the back details correct. - Partially completed.
8. Texture the final surface features and add lights. - Lights have been mostly added (actually too many lights exist now). All surfaces are textured but need to be significantly adjusted.
9. Add the lights in the greebling sections. - Done (but needs adjustment).
10. Build the gun turrets. - Did not get to it today.
11. Build the final details for the back end of this beasty. - Did not get to it today but did fix the surface fidelity on the nozzles so they actually look round.
Star Destroyer 2011 DAY SIX
Today was spent building final components and working on textures. Let's review the checklist.
1. Rebuild the top deck (it's a poor spline model that needs replacing. - Done.
2. Rebuild the top deck surface detail (clearly damaged objects from Raydream). - Done.
3. Add the final surface detail on the bottom. - Done but needs some adjustment.
4. Re-texture the top deck fills to get the back details correct. - Partially completed.
5. Texture the final surface features and add lights. - Mostly done (a little more to go).
6. Add the lights in the greebling sections. - Adjusted.
7. Build the gun turrets. - Done.
8. Build the final details for the back end of this beasty. - Don't know what we're going to do for this but it's not done yet.
-Kix



Privacy Notice
This site uses cookies to deliver the best experience. Our own cookies make user accounts and other features possible. Third-party cookies are used to display relevant ads and to analyze how Renderosity is used. By using our site, you acknowledge that you have read and understood our Terms of Service, including our Cookie Policy and our Privacy Policy.
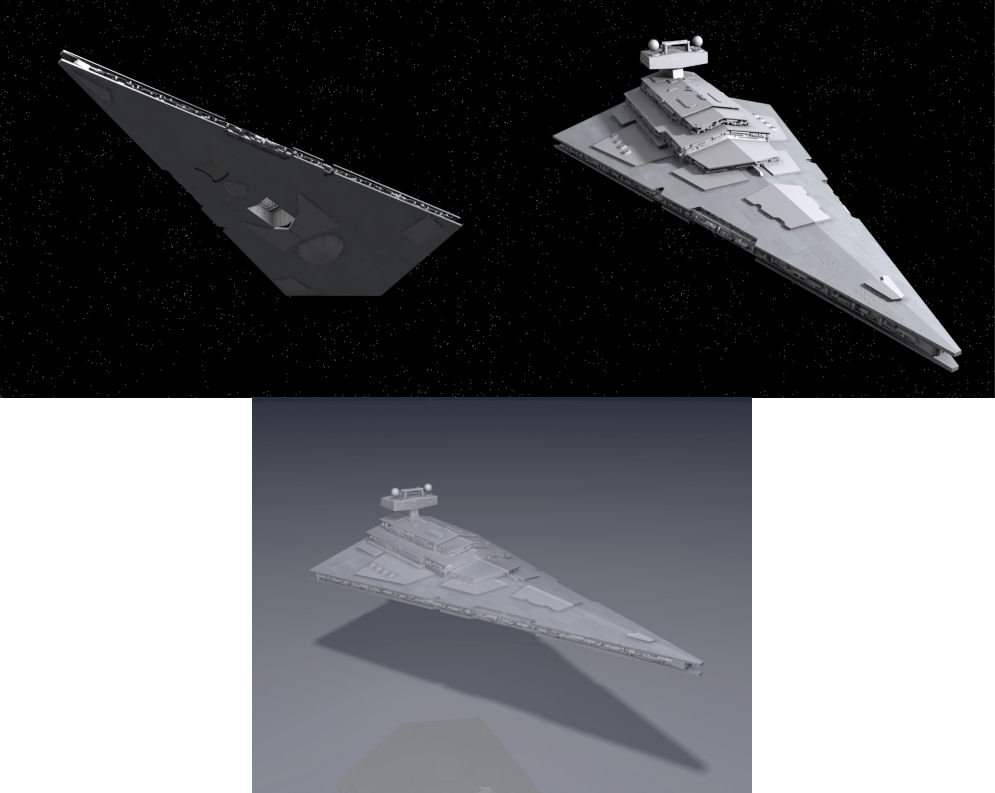
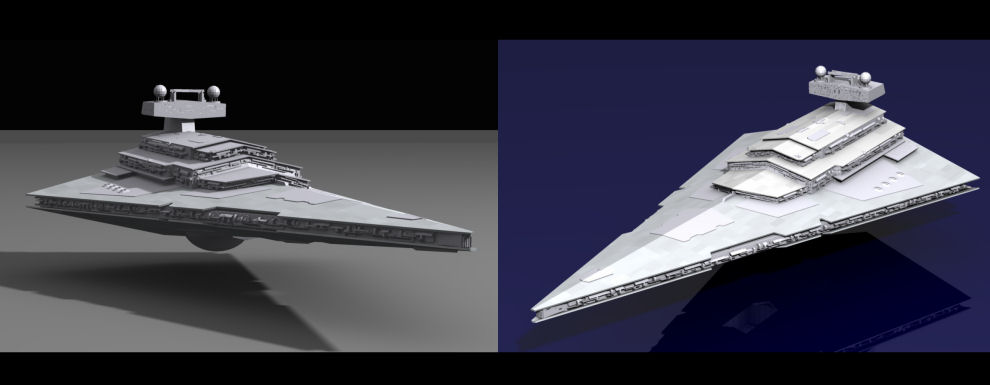
Here is a brief synopsis of my development of my new Star Destroyer model. It's nearly done. When I'm happy with it, I'll post in the gallery.The beginning.
The starting point for this model was made in Raydream a LONG time ago. As is obvious, Star Wars models commonly have an insane amount of surface detailing. Such amount of detailing is dificult to model especially in Raydream given the limited power of the software and the computers that I was using then.
The original model was designed to be rendered from a distance with large details. The main thrust of the model was to have excellent proportions so that it would be very recognizeable and functional.
The Raydream model was able to provide that. It has all the major components with rough surface details and the scaling is quite good.
-Kix