Renderosity Forums / LightWave
Welcome to the LightWave Forum
Forum Moderators: CHMedia Forum Coordinators: Kalypso
LightWave F.A.Q (Last Updated: 2024 Aug 27 11:07 am)

Subject: Progress of a dodgy model
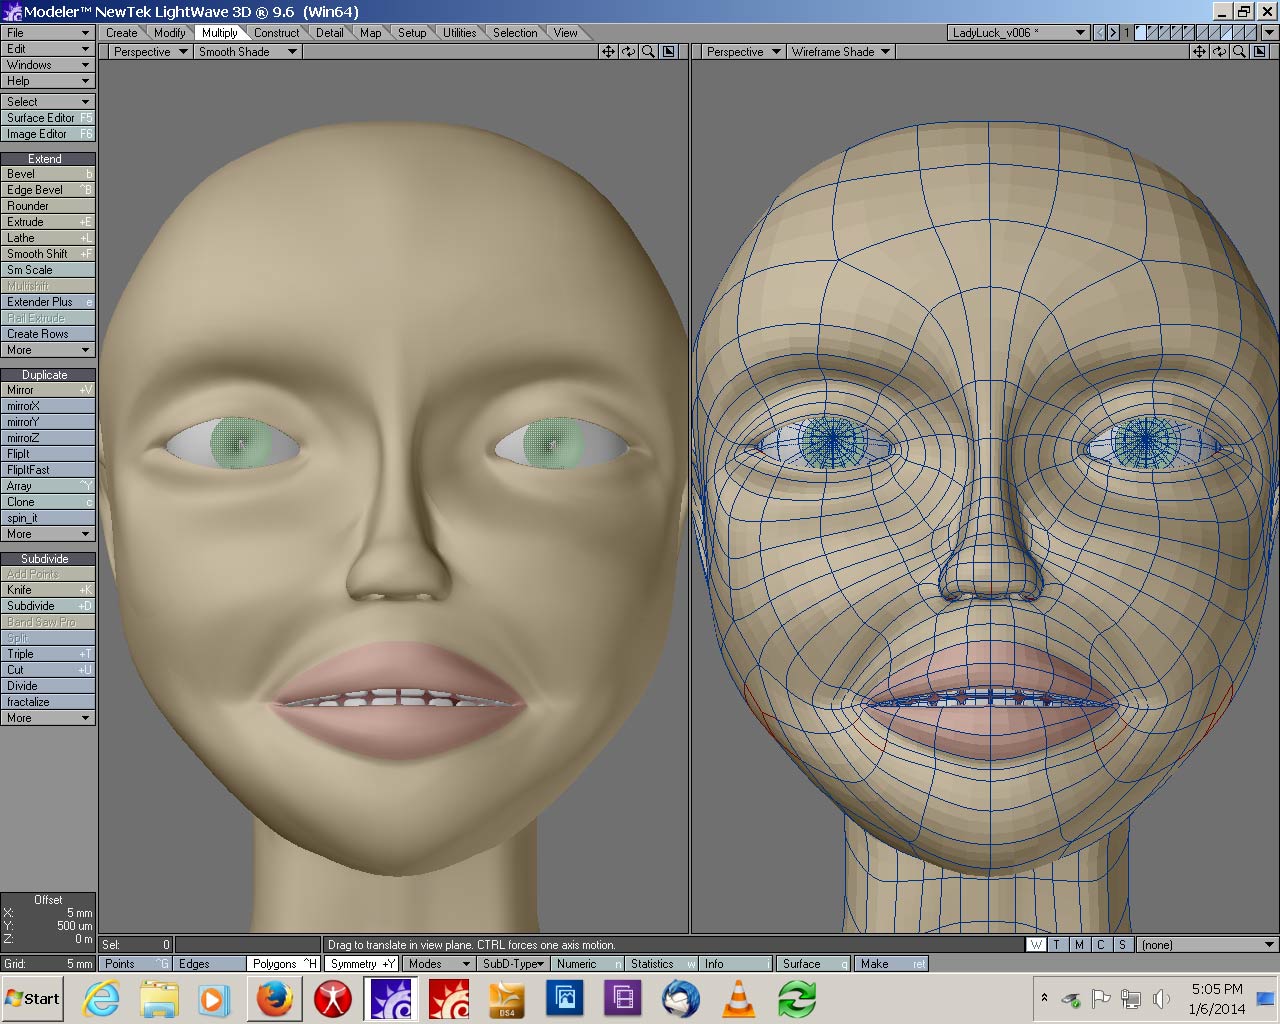
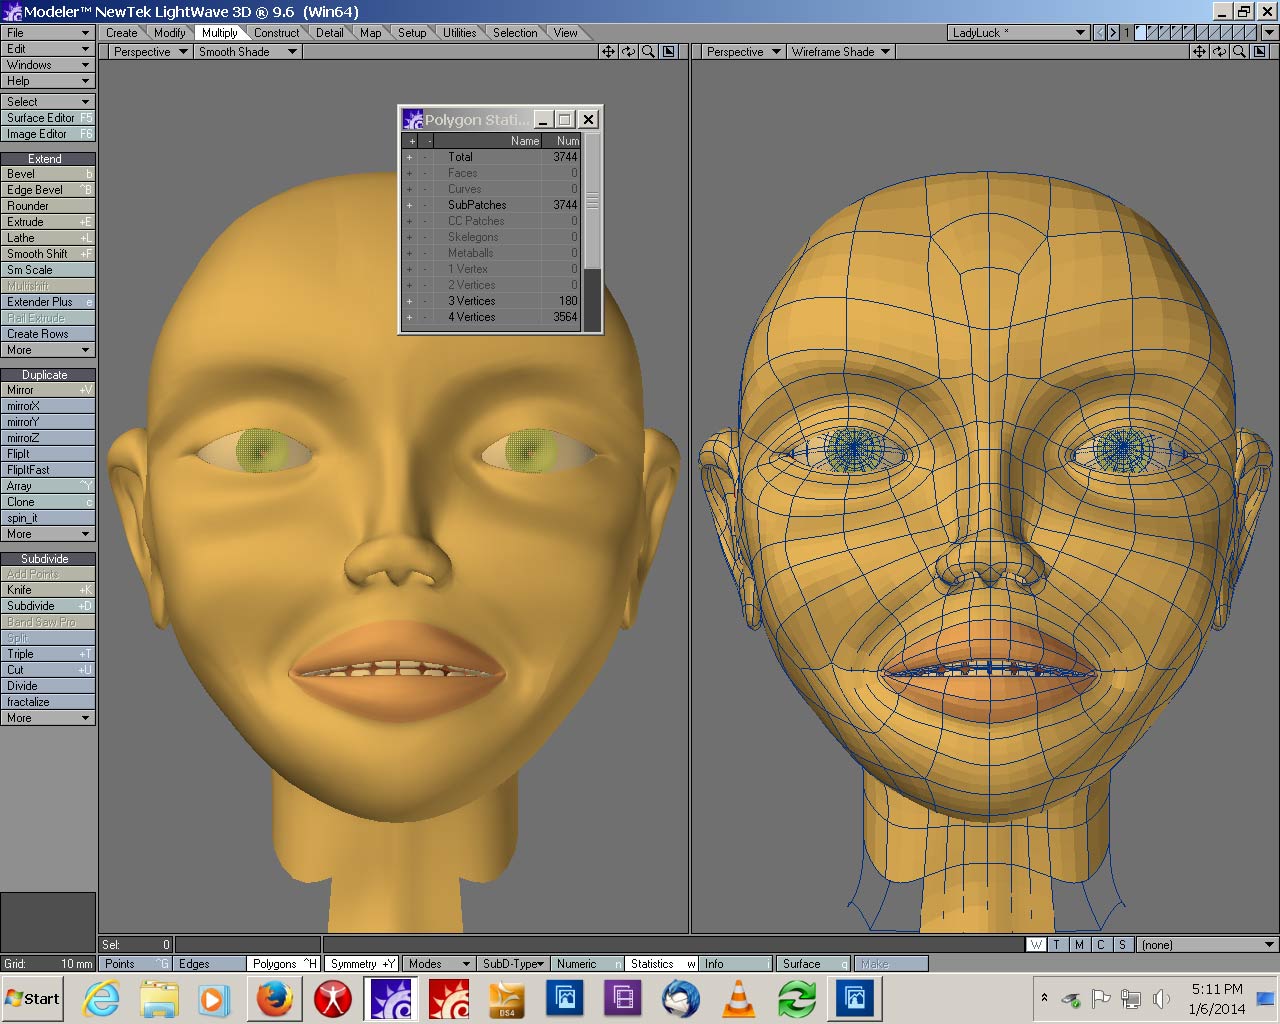
Tried to clean up the geometry a lot.
One thing I did was work more in non-subpatch mode, I used to work with the model subpatched all the time. As I understand it, if it's radically different subpatched from faces, I am doing it wrong.
More lines in the cheek area, some rework of the jaw area, what I hope is a large improvement of the brow area.
Both the shots are done with the SAME surface settings, for some reason, my LW is being a real pain about open GL. To really tell color I kinda HAVE to work in Layout and render. Do not know why.
So tell me what you think needs changing. Any advice on how I can get the flow better, I am open. (I know how to use SpinQuad, I use it, but a lot of time I end up with better flow in one area and weirdness all around it)
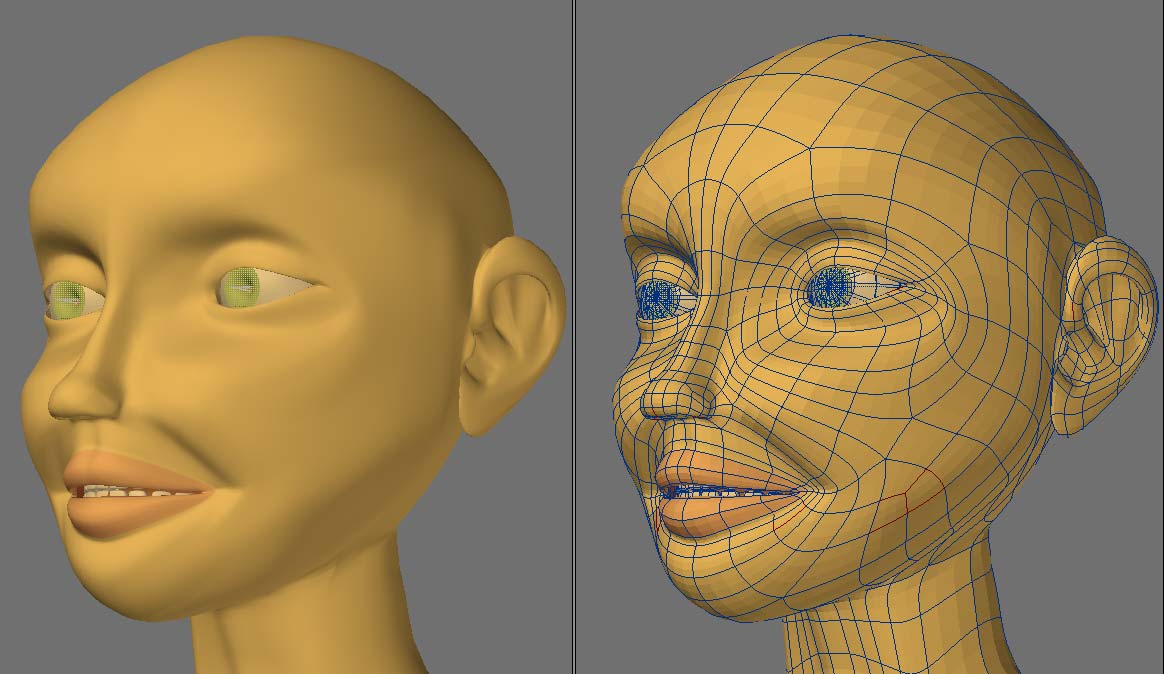
I have done some work on the ear area, more on the cheek, a bit on the lips.
I pretty much removed most of the earhole area and remodeled. I like the shape, but the 2 big stars bother me. Can't think of any way to alieviate that without all sorts of extended bandsaws that will loop all the way around the model.

I wanted a semi-realistic ear. (I have done very realistic ones before, but this is supposed to NOT be poly heavy) I wanted at least the FEEL of all the right shapes. I think my lobe is too thin, but that won't be too bad a fix, I am trying to straighten geometry now, tweak shape more later.
The sad part, I am doing all this work on an ear that will certainly be covered (at least in this planned use) by hair.
Again, those 2 stars bother me.

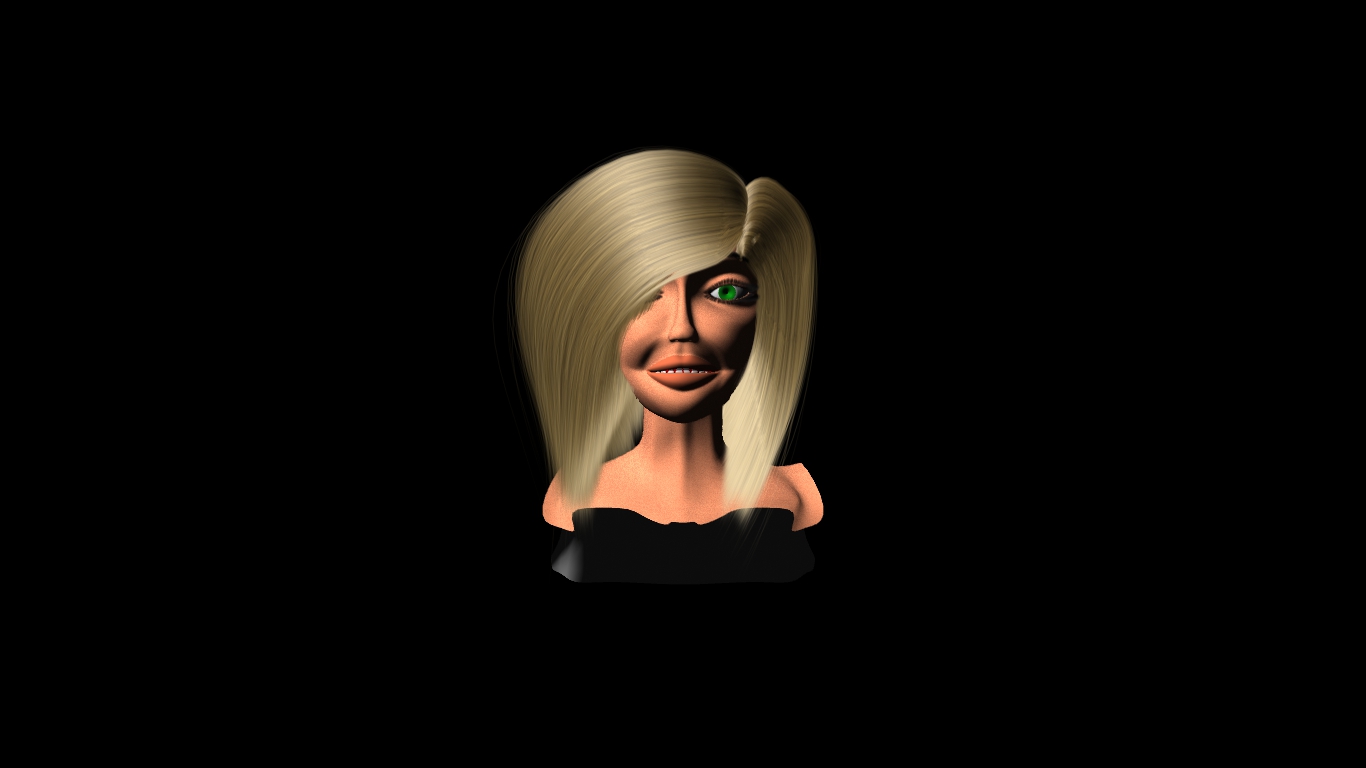
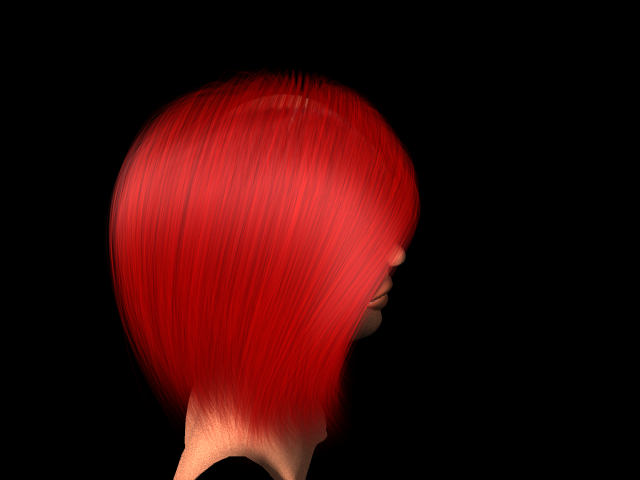
I have a better wig that I have changed the color on. (MY Lady Luck is a redhead) But that I only have easy upload for a short movie with a 360 of the head.
(Yes, I know this has disturbing resemblance to 'mystique' from the Incredibles, the default color for FiberEffex seems to be ash blond)
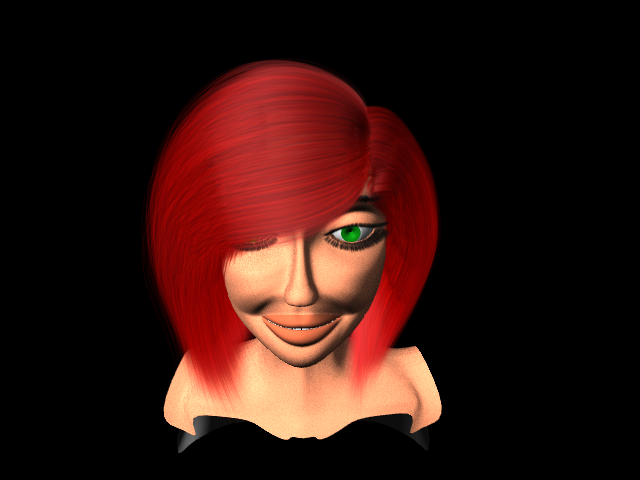
The red hair mat go a bit darker, less vibrant, but I will stick with red, and I think the hair guides are where I need them. I may have more than I need, but it seems to work, so I will move on from here
Don't know how much better it may have gotten.
I am using very much the same techniuqes I used with SasLite. I model a strand with splines, move and edit it a couple times to make a group, move the group around the head to make the outline, then make splines from the first group around to rail clone. All in all, very hit and miss for me.
THIS time, I modeled the outside outlines as a subpatch surface, then when I got that where I liked it I copied that, moved it down and made a second surface that gave me a 'range'. The end result was the same as before, the hair ran the same way, but because I started with 2 patches, I could edit in extra lines where I needed, change the shape, and when it came time to make the rails I had a UV mape that made it fast. So I STILL did a cycle of change, make rails, clone strands, test render, repeat, but it was a FASTER cycle, and the surfaces were easier to edit.
Attached Link: http://www.rebelhill.net/
Above link is good stuff, more about it later
Having just said things that made it look like I knew what FiberEffects was doing, I just started trying ti edit the eyelashes. (Have to get the guides moving with the eyelid morphs, else it looks silly)
Learned things.
-
Strand Maker makes a usable hair strand on Splines, but NOT on poly chains. Poly chains get doubled polys and weirdness that will cause crashes.
-
Splines LOOK nice AS splines, but when made into strands they have a knot for each knot. This means you make your splines with many knots to begin with (hard to edit) or make them, then use the extrude trick to make poly chains.
2 B. Poly chains make WEIRD strands, with hair growing as seperate fibers for each seqment, so chain must be made into a spline, THEN made into a strand.
2 C. If you make poly chains, rail clone them, you have lots of polys to convert to splines to convert to strands.
- Unless someone made a plug in for turning poly chains to spline, you START by making the splines, convert THAT to a strand, then rail clone your strand. (In my case twice, once for a lock, then the second time for making the locks flow around the head.
Stuff on the webs suggest you should make a short 'fur' type to cover the scalp so your long strands don't need to be as thick.
All this experimenting was nice, but not getting my eyelashes morphed.
On other topics, now that I am starting to rig again, I took something I recently learned to the test. Somje time ago, I learned much about rigging from Rebel Hills series (the first one actually) and ran into trouble because for some reason I could not get the IK/FK switching to work. I learned to rig with 2 seperate bone chains to get past that. Watching his later 'intro to rigging' series, I caught a mention that some of LW's tools do NOT work unless you have Auto Key on. "I" almost never have Auto Key on, I like to test move things and if I don't like it just move a frame and back and all is forgiven. By now you have guessed, THAT is why I could not get IK blending to work right! It requires AutoKey.
So now I have a choice, rig with my extra bones, or get used to AutoKey.
Side side note, ANYONE who wants to learn about rigging should check out his vid series. Not only does he know what he is talking about, he actually TEACHES it. Not "do this this way", but "If you do this this way, it will do this, because that" I don't slavishly follow his system, but that's ok. Once I start animating I am likely to find he was right and I made a poor choice. Or I may find I didn't need the extra functionallity because I never do such and such, so all is right. I at least know WHY I am making that choice, right or wrong.
I posted a link to his site, becuase good teachers are hard to find. (I should know, I taught in the Navy for a good 12 years)
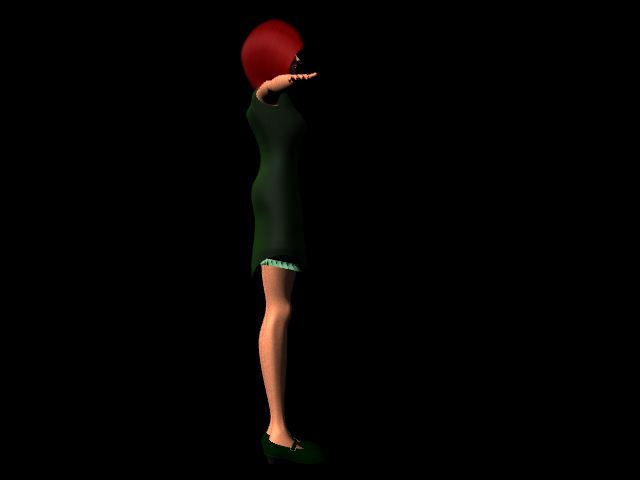
Well, progress has been slow, but I have never before tried to do much with dynamics, much less do it in an organized fashion. I have gotten the dress to react properly. Not as much info out there in the interwebs on cloth dynamics, and a lot is contradictory. What I learned for sure is :
Cloth points are checked against collider polys, so poke through needs a denser cloth mesh, not a denser collider mesh
Prolly best to set the collider collision distance to 0 and adjust with the cloth if you need more.
If you set subvide to last, you are only doing colision test on the cage points, changing the display patch level does not change anything. If you set it first, you can control the mesh density by changing the subpatch level on a per object basis.
If you calc you dynamics at one level, then save the motion to an MDD file, then change the subpatch level, it will generate errors, either way you change it, up or down. This means you may be best of with a cloth object to do the dynamics calc, the actual cloth object you use as a child of that with meta link to take the motion of the first object. This way you can do the calcs on the one object (lower level, just enough to 'collide' right) and have that control the actual displayed cloth.
Hair dynamics worked all right by using the Strand Weight map that strand maker creates to do a hold structure. I expect I will need to make a head proxy object for the hair to 'collide' against, but only the parts of the hair already outside the head, so I will need a point set to limit colision.
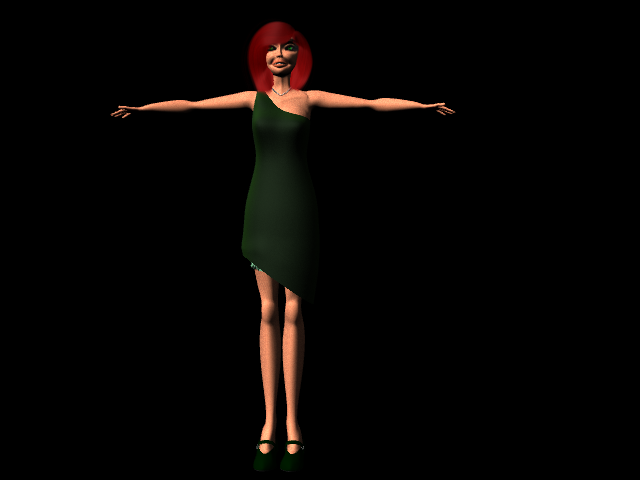
The pearl necklace was more dificult than I thought it would be. I expected it to be easy, I made a pearl as a tesalated sphere, Rail Cloned it along a spline. Then I made a copy of that in another layer, selected each pearl, welded points average. This left me with a point for each pearl. I used the points to make a 2 point poly chain which I figured I could use cloth dynamics to lay it against the neck area. This ran into several problems. First, the 2 point poly chain seemed to strech uncontrolably no matter what setting I used. I had to go into modeler, extrude the chain up a millimeter or so to make a real poly that I could keep from stretching. Then I had to give it more weight so the bounding force didn't just throw it up madly. I eventually got it right.
I worked this all with a sort of curtsey/bow move that isn't very realistic, but DOES give me motion enough to check the dynamics and get setings working.
I would LOVE to post the video, but I have no way to do that here, and have no where I can host it except facebook.
Privacy Notice
This site uses cookies to deliver the best experience. Our own cookies make user accounts and other features possible. Third-party cookies are used to display relevant ads and to analyze how Renderosity is used. By using our site, you acknowledge that you have read and understood our Terms of Service, including our Cookie Policy and our Privacy Policy.
Well, as Pete mentioned, it has been quiet here, as this is not good.In the interest of A: getting some trafic going and
B: improving my work and
C: keeping recent life problems from stopping my progress, I am posting my current work, and what I am doing, and looking for CONSTRUCTIVE critisisum. (spelling not count)
This is the face from a model I did rather a while ago, which I am trying to revamp with what I have learned since, and repurpose. What I am going for is Lady Luck. In specific, the Lady Luck that Sky Masterson is singing to in the song "Luck be a lady tonight"
With that in mind, I have a good idea how she will be clothed and haired. Very like a flapper, short hair, flapperish dress, hat, and a lot of luck oriented embellishments. But for now, I am focusing on getting her face somewhat decent.
Now the 'style' I am working is still rather cartoonish, and a bit anime inspired, so the larger than needed eyes are PART of what I am going for.
Here is the earliest version of the head