
| Wrapping objects with Displacement Maps in Photoshop Displacement maps seem like such strange and difficult animals until you learn to tame them. In this long overdue tutorial, I will teach you what you need to know about displacement maps in plain English, so that you can take advantage of the stunning effects that can only be created by using these maps. INGREDIENTS:
ÂÂ 1
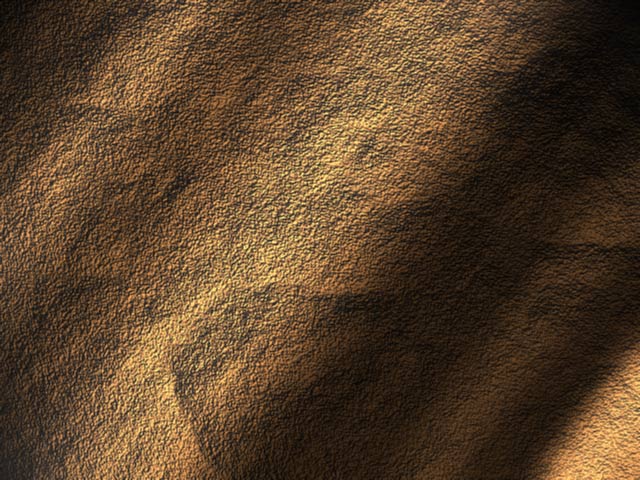
 Begin with a texture, you must be in RGB mode. I have another tutorial under textures that shows you how to create this rock surface. You can also just download it if you wish. Â2
ÂÂÂÂÂÂ3
Under destination>document, choose new. Click ok 4
ÂÂÂ5
We have now created our displacement map for use later on. Â6
ÂÂÂÂÂ7
ÂÂÂÂ8
Filter>Distort>Displace Â9
Click ok ÂÂÂ10
Navigate to the desktop and load the image we created at the beginning of this tutorial. Â Click open ÂÂÂÂÂÂ11
Lets jazz it up a bit. ÂÂÂÂ12
Duplicate the distorted layer to add a bit more strength to the effect. ÂÂÂ13
See how the color blends in with the texture. ÂÂÂÂÂÂ14
I added an inner shadow layer style to the top layer and dropped the opacity of the second layer to 30% I hope you had fun with this tutorial and learned a lot. See you at the cafe! Â Â Â Â Â More Great TutorialsPhotoshopCAFE home Colin Smith is a
best-selling author, trainer, and award-winning new-media designer
who has caused a stir in the design community with his stunning
photorealistic illustrations composed entirely in Photoshop. He is
founder of the world’s most popular Photoshop resource site,
PhotoshopCAFE.com, which boasts over three million visitors. Colin Smith is a
best-selling author, trainer, and award-winning new-media designer
who has caused a stir in the design community with his stunning
photorealistic illustrations composed entirely in Photoshop. He is
founder of the world’s most popular Photoshop resource site,
PhotoshopCAFE.com, which boasts over three million visitors.More... |
 This
is the technique that will wrap your art around objects and
(seemingly) magically make it hug every contour
This
is the technique that will wrap your art around objects and
(seemingly) magically make it hug every contour Click
on the Channels palette and click on each channel until you find
the one with the most contrast (dark to light). In this case it is
the Red channel.
Click
on the Channels palette and click on each channel until you find
the one with the most contrast (dark to light). In this case it is
the Red channel. We
need to make a new document out of the channel.
We
need to make a new document out of the channel. You
will now have a new document. This will become our displacement
map. Apply a 0.7 Gaussian blur (Filter>blur>Gaussian blur) to
lower the sharp detail a bit. This will make for a smoother image
in the end.
You
will now have a new document. This will become our displacement
map. Apply a 0.7 Gaussian blur (Filter>blur>Gaussian blur) to
lower the sharp detail a bit. This will make for a smoother image
in the end. Save
the document as a .psd, Any name will work, just remember it and
the location. I put mine on the desktop.
Save
the document as a .psd, Any name will work, just remember it and
the location. I put mine on the desktop. On
our original document, click on the "RGB" to restore the
default channel display.
On
our original document, click on the "RGB" to restore the
default channel display. Open
the layers palette and add your artwork or text on a new layer.
This is the content that you want to warp. Make sure you have
everything you want to warp on one layer. If you have text,
rasterize it now. (Right click on the layer palette next to the
name and choose "rasterize layer" from the pop up
menu.
Open
the layers palette and add your artwork or text on a new layer.
This is the content that you want to warp. Make sure you have
everything you want to warp on one layer. If you have text,
rasterize it now. (Right click on the layer palette next to the
name and choose "rasterize layer" from the pop up
menu. Now
lets apply the displacement map...
Now
lets apply the displacement map... Use
the settings shown here when the Displace palette opens.
Use
the settings shown here when the Displace palette opens. You
will now see a browser asking you to choose a displacement map.
You
will now see a browser asking you to choose a displacement map. You
will now see your artwork distort to hug the texture of the
rock.
You
will now see your artwork distort to hug the texture of the
rock. Choose
Overlay mode to add some realistic blending.
Choose
Overlay mode to add some realistic blending. Here
is the result on the blending mode.
Here
is the result on the blending mode. Here
is exactly the same image but with a variation.
Here
is exactly the same image but with a variation.Featured Products from photoshopcafe
 |
 |
 |
 |
Check out more products from photoshopcafe's store in the Renderosity MarketPlace!


Comments