
Renderosity Forums / Poser - OFFICIAL
Welcome to the Poser - OFFICIAL Forum
Forum Moderators: RedPhantom Forum Coordinators: Anim8dtoon
Poser - OFFICIAL F.A.Q (Last Updated: 2026 May 26 6:08 pm)

Subject: how to make bump maps?

- 1
- 2

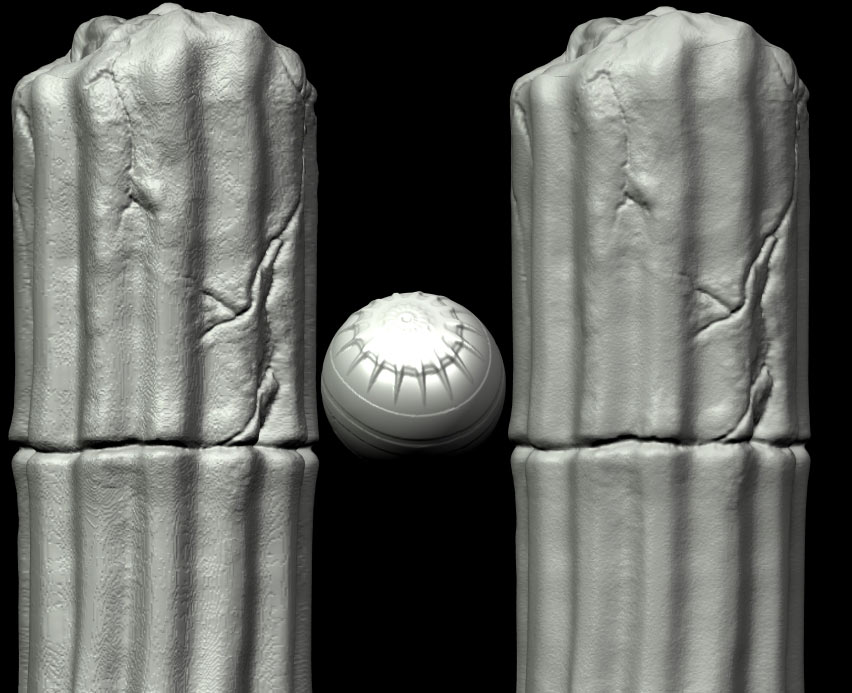
http://home.xtra.co.nz/hosts/polycount3d/HellColumn03_B_P6.ZIP
this one only uses one image
attached image shows the old one on the left
I'll attach the node setup in the next post
the sphere in the middle is from this thread where we figured out how to get the maps from zbrush to poser,that renders even smoother than the column
http://forum.daz3d.com/viewtopic.php?t=25013&postdays=0&postorder=asc&start=0
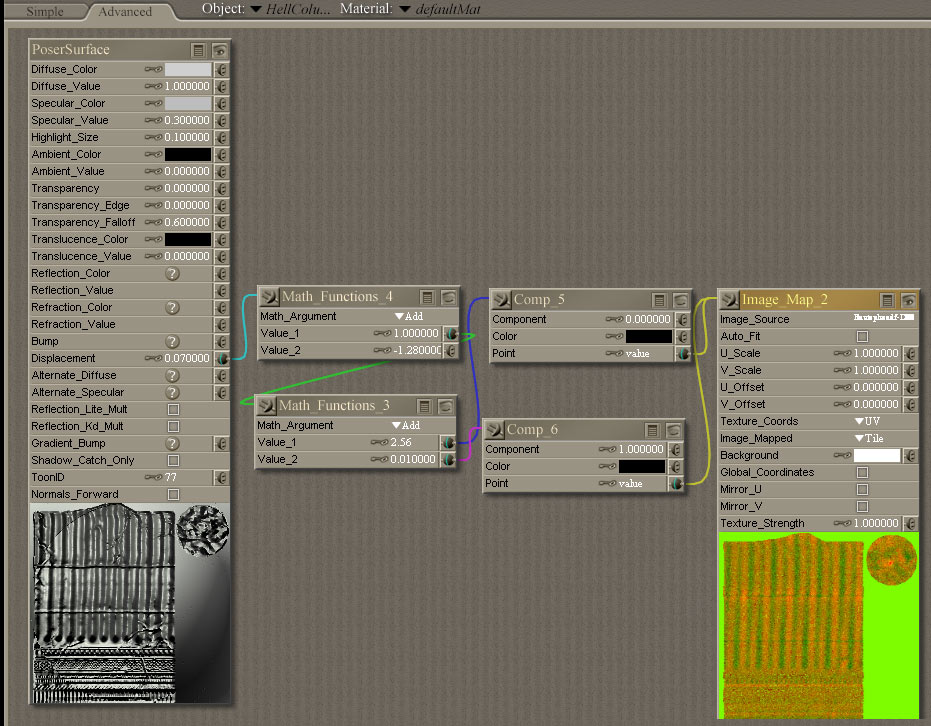

I understand whats going on with %50 Grey, but do'nt have time to illustrate. I'm hoping we get this; but I may get a chance to do a couple scrnshts, on request, tomorrow or Monday.
At first I did'nt have much problem with Displacement, but then I noticed weird cracks on V3's face. Today I happened to be poking at my P7 manual, and read the cracks were from too small a DIsplacement Value...more on that later.
The amount of Displacement is a product of the Displacement Value, multiplied by the shade of the Displacement map. Theoretically, when using %50 Grey, you would also always use a Displacement Value of 0. By changing that value, and then using %50 grey, you're still driving the node.
So, how do we avoid using the Grey part, of the image I posted, in my Material Room screenshot? The answer is with the Blending Value of the Blender node, and a Transparency Map(To block the %50 Grey part,) as illustrated in the first srcreenshot of that link I'd mentioned.

- 1
- 2

Privacy Notice
This site uses cookies to deliver the best experience. Our own cookies make user accounts and other features possible. Third-party cookies are used to display relevant ads and to analyze how Renderosity is used. By using our site, you acknowledge that you have read and understood our Terms of Service, including our Cookie Policy and our Privacy Policy.
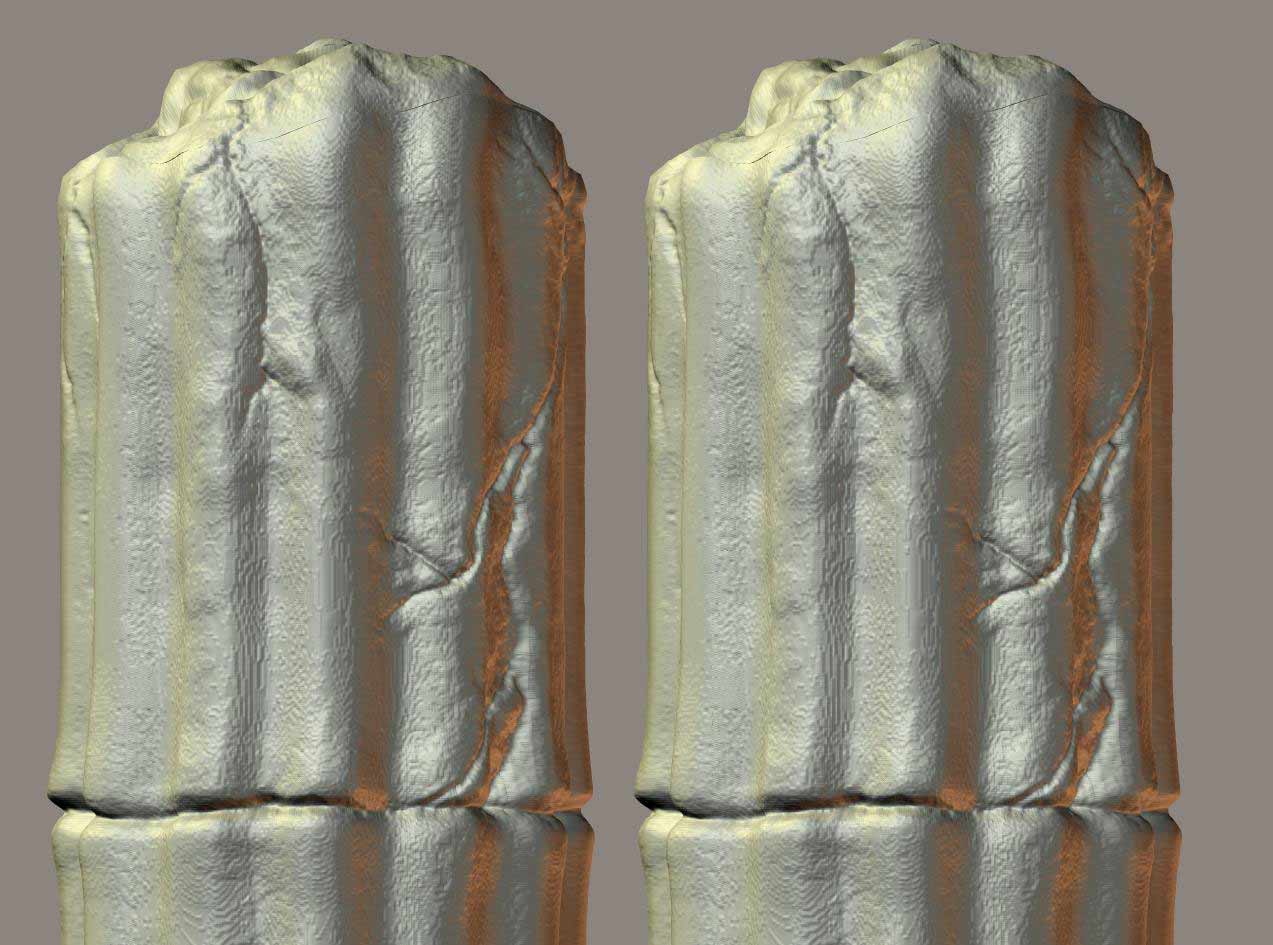
Left column is the HellColumn3 with the original displacement solution Right column is the HellColumn3 with a single displacement map.I made the map by dropping the major8 displacement map into the green channel of an empty Photoshop file and copying the minor8 displacement map into the red channel.
Saved as TIFF, with only red and green channel enabled.
I stripped out everything except the displacement entry. Rendered in Front view.
I don't see a difference.
The pen is mightier than the sword. But if you literally want to have some impact, use a typewriter
My gallery My freestuff