
Renderosity Forums / Hexagon
Welcome to the Hexagon Forum
Forum Coordinators: thomllama
Hexagon F.A.Q (Last Updated: 2024 Aug 27 11:07 am)

Subject: Hexagon, full and partial body morphs to Poser tutorial.

Or? When you want to morph with textures you can copy Alysons textures to this Wendy folder and “optionally” rename them to Wendy textures. => It is safer to do so, and see the next tip on memory load if you are low on RAM.
Tip: If you are low on memory but still want to morph in Hexagon with the textures, resize Wendy’s textures to 1024x1024 pixels. => You can go as low as 512x512 and maintain visual control in Hexagon.
=> Goto your texture folder (optional) and copy/rename/resize the textures you want to use on Wendy in Hexagon in the Wendy’s folder in your library.
CAUTION; only use these SMALL textures for morphing in Hexagon.
Hint: never-ever work with original files. Always work on a copy, which is what we just did here.
Open Hexagon.
File Import, select Wavefront Obj (obj)
And import the Wendy.obj file from the Wendy folder.
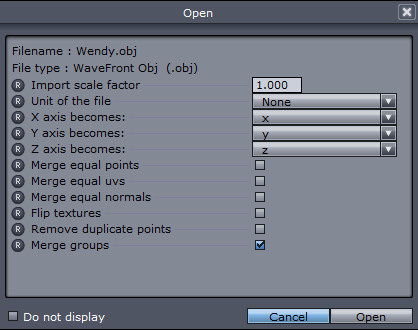
A popup window will come see screengrab for the settings.
ONLY “Select Merge groups”. Leave all the rest “as is”.
SCREENGRAB2
Poser 1, 2, 3, 4, 5, 7,
P8 and PPro2010, P9 and PP2012, P10 and PP2014 Game
Dev
"Do not drive
faster then your angel can fly"!
STOP
WARNING!!!!!!!!!!!!!!! DO NOTHING!!!!!!!!!
Take a paper and write down the numbers from the upper right hand window!!!!!!!!!!!!
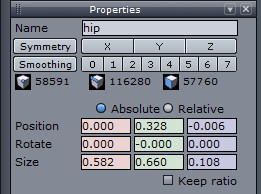
In Properties window See position?
When absolute is selected?
Write down these 3 numbers
For Alyson I got: 0.000 0.328 -0.006
When relative is selected all is at 0.000
SCREENGRAB3
Poser 1, 2, 3, 4, 5, 7,
P8 and PPro2010, P9 and PP2012, P10 and PP2014 Game
Dev
"Do not drive
faster then your angel can fly"!
You can select Symmetry ON in X => takes some time in Hexagon on low end systems and hi poly figures.
Ok, time to move on. The dangerous part is over.
NOW, you are ready to morph.
In the left colon/window(select the little arrow), you “can” import the textures in the material zones.
Problem! Textures in Hexagon load inverted. You will have to flip them vertically. A known Hexagon bug.
You know Hexagon, so you can start morphing your Wendy.obj until you are satisfied with the result.
When satisfied with your morphed character, => Do 2 things:
- File=> Save as and give it the name “Wendy” and put the Wendy.hxn file in the Wendy folder.
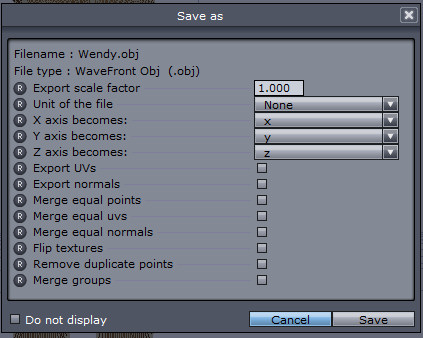
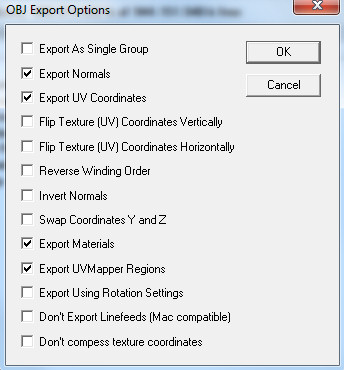
- Export the wavefront obj file as Wendy.obj, and “yes” let it overwrite the older one.
Leave everything unchecked in the popupwindow.
SCREENGRAB4
Poser 1, 2, 3, 4, 5, 7,
P8 and PPro2010, P9 and PP2012, P10 and PP2014 Game
Dev
"Do not drive
faster then your angel can fly"!
You can close Hexagon.
Open uvmapper free.
Load the Wendy.obj you just saved from Hexagon. => Wendy loads but has no UV’s.
Goto import uvdata, and select the original P8Alyson_HR.obj from the Wendy folder.
This P8Alyson_HR.obj becomes the donor for your Wendy.obj
And???
Doing this extra step is a control of the morphed Wendy.obj file.
A failsafe check that Wendy.obj will work in Poser and that you did not alter the mesh vertex count.
Save as Wendy.obj and let it overwrite the older Wendy.obj. => the groups and uvdata are now back J
SCREENGRAB5
Poser 1, 2, 3, 4, 5, 7,
P8 and PPro2010, P9 and PP2012, P10 and PP2014 Game
Dev
"Do not drive
faster then your angel can fly"!
And now??? The icing on the cake.
Open Poser; huh, Poser? Yes, Poser, J finally. LOL.
Goto your Wendy folder in your Library and load the Wendy.cr2
Voila, one fully working morphed character.
Lean and clean, no file size increase.
Finished.
Ah, you are not completely satisfied with your morph??????????
No problem the corrections are easy.
Leave Poser open as your reference screen (put it in wireframe mode to better see what the mesh does and what corrections to make.)
Open Hexagon
Import your Wendy.hxn => that is the morphed but group less Wendy.hxn
If you need them? You probably will have to flip the textures again, (Hex bug remember) Make your corrections in Hexagon using Posers wireframe screen as your guide.
Satisfied with your corrected result in Hexagon?
Same as above from Hexagon:
- Save as Wendy.hxn, and let it overwrite the older one.
- Export as wavefront obj file and let it overwrite the older Wendy.obj
Close Hexagon.
Close Poser that u used as reference screen to adapt your morph remember?
Open uvmapper free
Load the new corrected Wendy.obj;
Import uvdata from P8Alyson_HR.obj again, and save and overwrite Wendy.obj again.
Close uvmapperfree.
Open Poser, goto library and load the Wendy.cr2
The corrected Wendy will load.
Voila a simple way to make custom morphed characters.
No object delta data, the morphed character is as fresh as a young born.
Optional. And YES, this works too J
Wendy.obj will work as a full body morph on the original Alyson.
Load the original Alyson in Poser.
Goto figure, Load Full Body Morph
Load Wendy.obj as a full body morph for your standard Alyson.
File size WILL increase this time, but you have a morph dial in the body actor to morph between Alyson and the Wendy you made.
Known Problems???
You HAVE to remember that you are morphing…..
You are changing the shape of the object file.
You can NOT add or delete anything.
And you can not change the rigging from inside Hexagon this way….
You can NOT change the length of the arms, or legs, or any rigging, unless you KNOW how to change the rigging afterwards in Poser. In Hex, you can ONLY “morph” the object.
If for example you want to make LONG thighs and SHORT shins?
You can do that in Hexagon for the object file, but you will have to change the rigging in Poser afterwards. You have to adapt the length of the bones to the new mesh position.
The uvmap.
Check that you do not overdo it.
Moving points around does stretch or shrink the texture. Texture stretches where the poly’s become bigger and shrinks where poly’s get smaller.
**Chapter 2
**Partial full body morphs.
Procedure is exactly as above as for making a full body morph character.
You want to lower the breasts?
But the breasts are multiple groups; in the two collar groups, the chest group, and the abdomen group.
Work as above but pay attention to ONLY move poly’s that belong to those groups.
Export the full body morph from Hexagon as above.
Save as breast-lower.hxn
Export the obj as lower-breasts.obj
Got trough uvmapper free to get the uvdata back as above
And save as lower-breasts.obj
Open Poser
Load Alyson
Select Figure in the top row
Load Full Body Morph
And load lower-breasts.obj
Poser created a dial in ALL groups. Oh!
Now Goto the master dial “lower-breasts” in the body actors parameters palette
Click on the small arrow behind it
And click Delete
A pop up window will open
“Select morph parms to delete”
Uncheck the dials you want to keep.
Both collar groups, the chest, and the abdomen.
Done
You know have one “full body” master dial that ONLY controls the groups involved in lowering the breasts.
And all other, empty and unused dials, are deleted from the cr2
WHAT YOU CREATE THIS WAY IS FOR PERSONAL USE ONLY.
NOT FOR DISTRIBUTION IN ANY WAY FORM OR SHAPE.
Still questions or remarks?
Feel free to add or site mail.
And I will add chapters as needed.
Best regards, and Happy Posering
Tony
Poser 1, 2, 3, 4, 5, 7,
P8 and PPro2010, P9 and PP2012, P10 and PP2014 Game
Dev
"Do not drive
faster then your angel can fly"!
PS1; the pictures should be below the text.
Sorry for that.
PS2; this procedure allows all existing morphs to continue to work as before.
Unless you did "overkill" on your own morph.... :-)
PS3; for most figures the original base mesh can be found in the Geometries folder.
Tony
Poser 1, 2, 3, 4, 5, 7,
P8 and PPro2010, P9 and PP2012, P10 and PP2014 Game
Dev
"Do not drive
faster then your angel can fly"!
Content Advisory! This message contains nudity
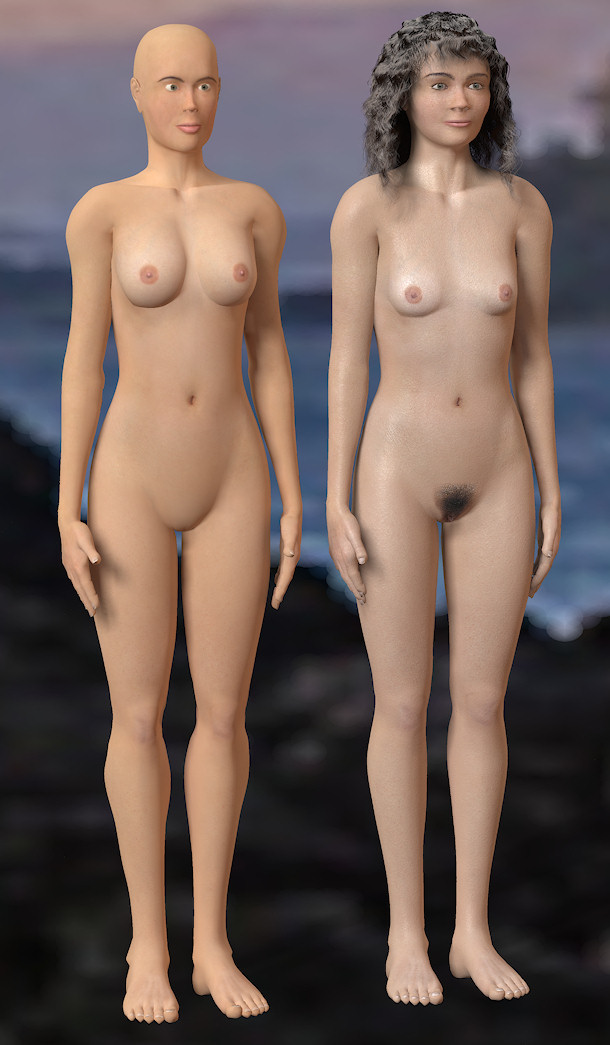
PoserPro figures are ugly by default, and see no use at al.
So I tried to make something acceptable out of them.
Except for the "add on" they have the same texture too.
Click to enlarge.
Poser 1, 2, 3, 4, 5, 7,
P8 and PPro2010, P9 and PP2012, P10 and PP2014 Game
Dev
"Do not drive
faster then your angel can fly"!
Content Advisory! This message contains nudity
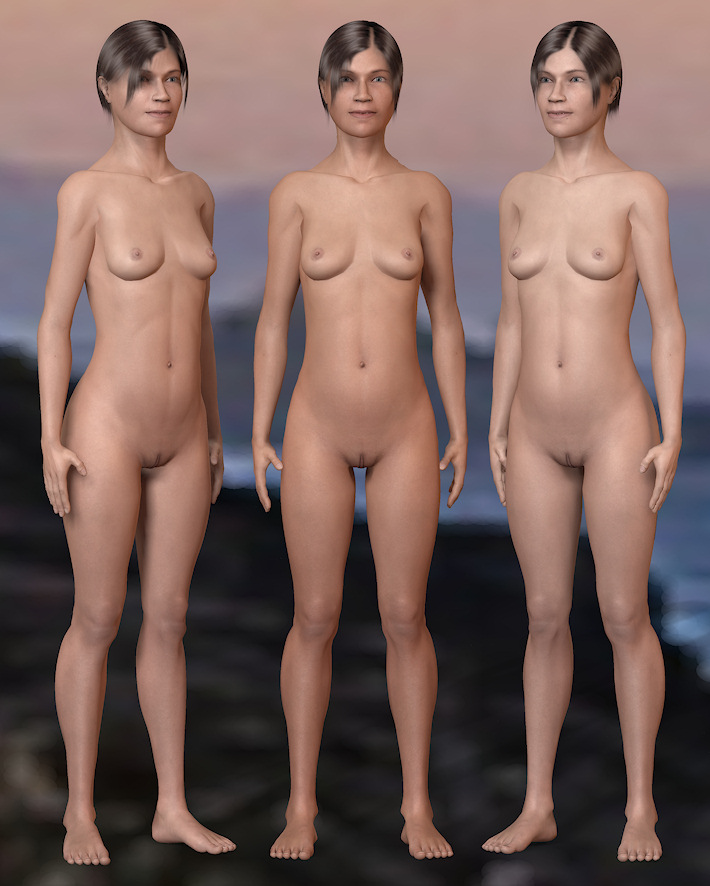
Default Alysons texture with some mat room work.
Best of greetings, Tony
Poser 1, 2, 3, 4, 5, 7,
P8 and PPro2010, P9 and PP2012, P10 and PP2014 Game
Dev
"Do not drive
faster then your angel can fly"!
Quote - WHY ! ! ! ! ! !
It has lots of advantages. You have ONE Grouped obj file to work and morph on.
Ready to Morph => Select your object in the right hand scene window.STOP
WARNING!!!!!!!!!!!!!!! DO NOTHING!!!!!!!!!
Take a paper and write down the numbers from the upper right hand window!!!!!!!!!!!!In Properties window See position?
When absolute is selected?
Write down these 3 numbers
For Alyson I got: 0.000 0.328 -0.006
When relative is selected all is at 0.000SCREENGRAB3
Good Stuff ... but I didn't get the point of this step, unless I missed something?
Goodmorning.
This is the same in ALL modeling applications.
You import a figure in a 3D space.
Every point (vertex) has a X,Y,and Z value.
When you moprh?
You take one vertex, one edge or one poly (or more of them if you select more of them at once) and you slide them to a new position.
If you select the whole figure by mistake?
You put the whole figure in a new position in 3D space.
This can lead to some very strange results afterwards.
Symmetry will give the strangest results too... as the middle of your figure is not centered in 3D any more...
Poser 1, 2, 3, 4, 5, 7,
P8 and PPro2010, P9 and PP2012, P10 and PP2014 Game
Dev
"Do not drive
faster then your angel can fly"!
It is a common mistake when you export one group from Poser to make a "head" morph for example.
They export the head from Poser as a morph target.
Open it in Hex or any other 3D app to morph.
And accidently move the "whole head" instead of just the poly's they want to morph.
When they go back to Poser with their "morphed head" they find it a yard out of position :-)
Strange results.... :-) :-)
Maintaining the center in 3D space is part of the "fail safe" in the above procedure.
Happy Posering and happy morphing.
Tony
Poser 1, 2, 3, 4, 5, 7,
P8 and PPro2010, P9 and PP2012, P10 and PP2014 Game
Dev
"Do not drive
faster then your angel can fly"!

Privacy Notice
This site uses cookies to deliver the best experience. Our own cookies make user accounts and other features possible. Third-party cookies are used to display relevant ads and to analyze how Renderosity is used. By using our site, you acknowledge that you have read and understood our Terms of Service, including our Cookie Policy and our Privacy Policy.

How to create a fail safe full body or partial body morph in Hexagon for PP2012 SR3What this is:
A failsafe workflow tutorial to create a failsafe full body morph for Poser figures in Hexagon. As of SR3, this is also a way to create partial full body morphs as SR3 allows to selectively delete unused and empty dials from imported full body morphs. This will be covered in Chapter2.
What this is NOT: A Hexagon tutorial. Hexagon has been free for a while and there are lots of hi-quality tutorials available for Hexagon.
The advantage of this workflow is that file size does NOT increase for a full body morphed character and allows the end user to create a full body custom character from a bare-base existing obj file.
It requires some preparation work but this preparation ensures the fail safe part, and brings the advantage that he/she does not overwrite any existing object or texture file.
I will use Alyson as my source in this tutorial.
What do you need ?
http://www.morphography.uk.vu/dlutility.html
The preparation:
So you want to make a personal morphed character?
In this tutorial we will call her “Wendy”.
Create a folder “Wendy” in your runtime.
Public/Documents/Poser Pro 2012 content/Runtime/Libraries/Characters/People/
Copy the following files in this Wendy folder;
IMPORTANT 1 !
Unzip the P8Alyson_HR.obj a second time to somewhere else on your HD.
Rename this to Wendy.obj and then move this Wendy.obj file in the Wendy folder.
Optional..
Put a copy of uvmapper free in the same folder.
Put a copy of cr2editor (or equivalent) in the same folder.
I like to keep things organised when working on a new figure/character.
It speeds up the process if you keep things close together.
IMPORTANT 2 !
Rename the Alyson.cr2 to Wendy.cr2
Edit the Wendy.cr2 using cr2editor (or equivalent) and change BOTH lines pointing to Alyson:P8Alyson_HR.obj to pointing to Wendy:Wendy.obj
Intermediate test. Told you we want to make this procedure fail safe.
Open Poser, and load your Wendy character from the library.
It should load without any problems and Use Alysons default textures.
We only changed the path to the object file in the cr2
Close Poser.
What you minimum should have to continue in the Wendy folder is;
A typical folder structure looks like this SCREENGAB1
Poser 1, 2, 3, 4, 5, 7, P8 and PPro2010, P9 and PP2012, P10 and PP2014 Game Dev
"Do not drive faster then your angel can fly"!