
Renderosity Forums / Carrara
Welcome to the Carrara Forum
Forum Coordinators: Kalypso, Anim8dtoon
Carrara F.A.Q (Last Updated: 2026 Sep 09 4:39 am)
Visit the Carrara Gallery here.

Subject: Anatomy of an Enterprise Render

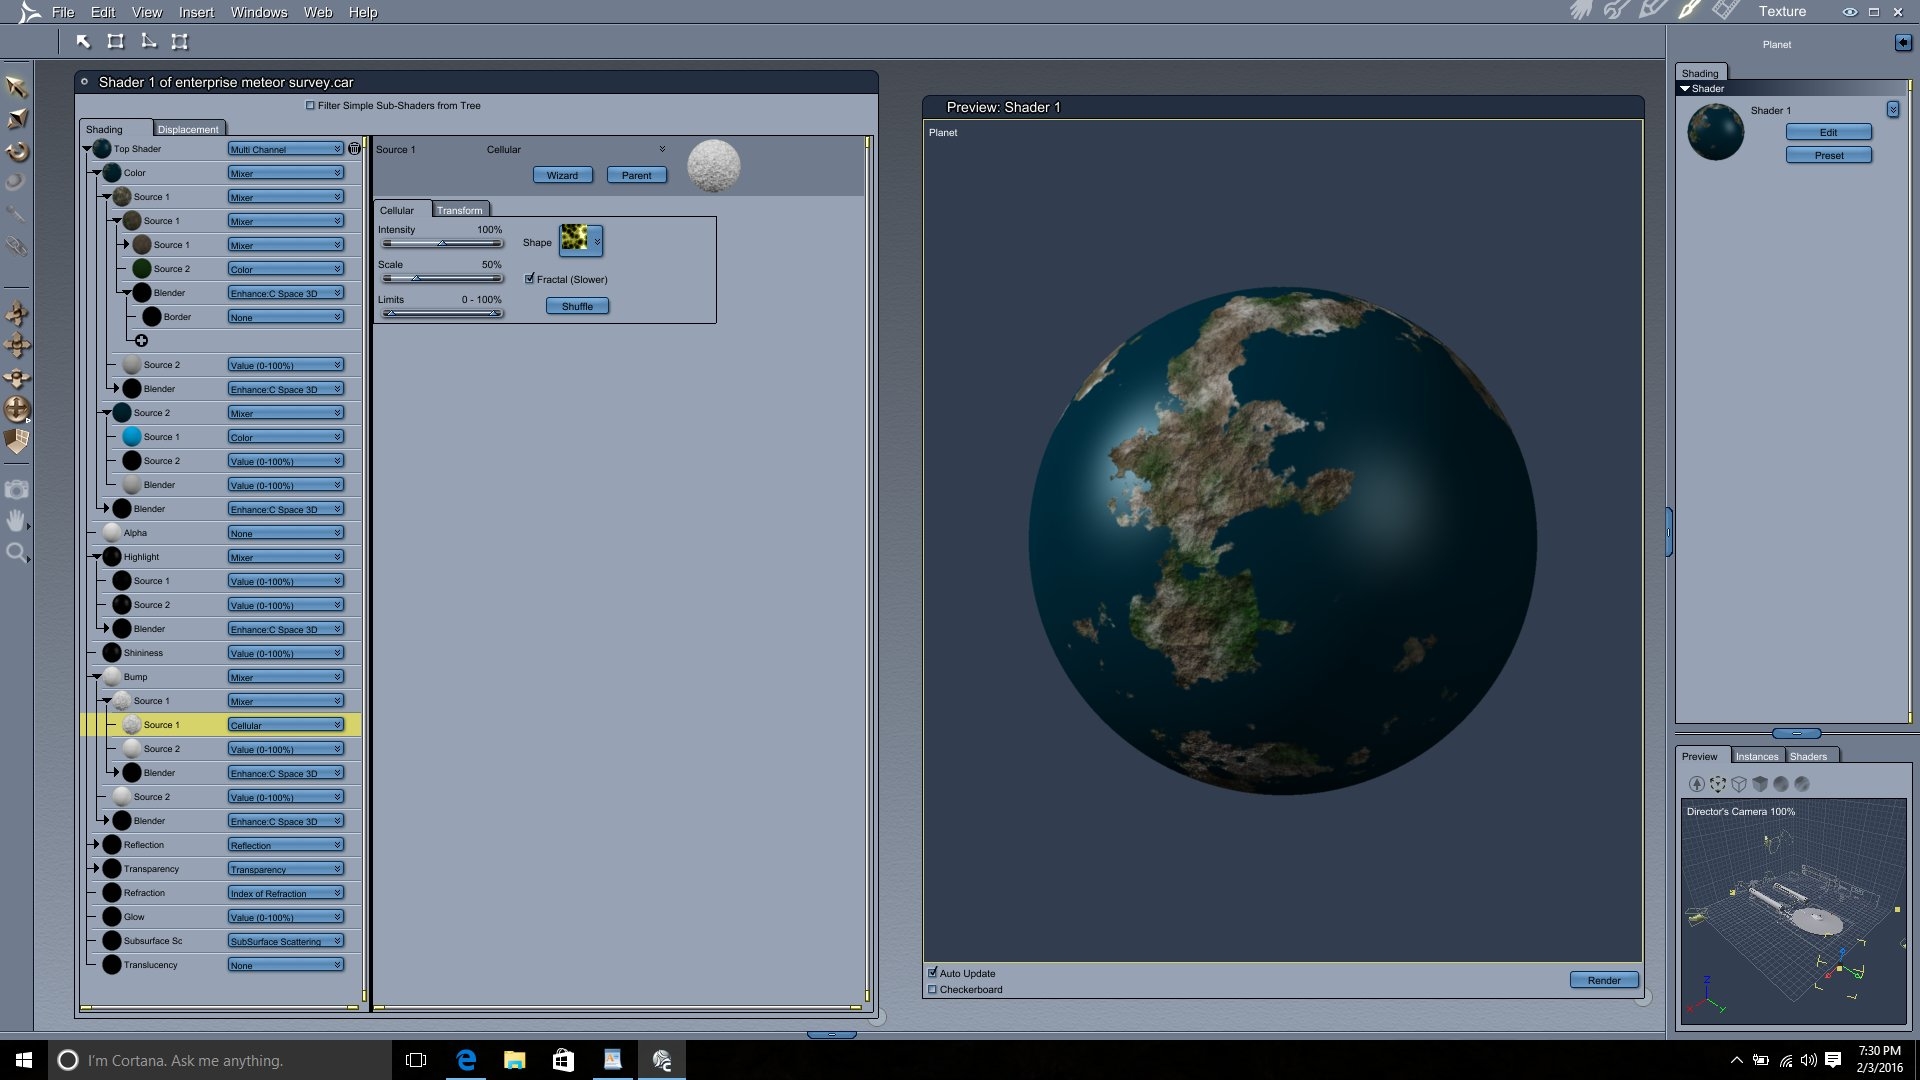
The first phase was to create the planet. Four spheres were used.
The first sphere is textured with the water and ground. I used Enhance C Space 3D planet function to create two regions in a mixer (one region for water, the other for ground). The water region is a basic color. The ground region utilized a mixture of Enhance C Space 3D terra and noise functions to create a mix of white, green, and brown colors. The highlight channel was modified using the same Enhance C Space 3D planet mixer for the ground and water so that the water highlights differently than the ground. A cellular function was applied in the bump channel for the ground.
-Kix
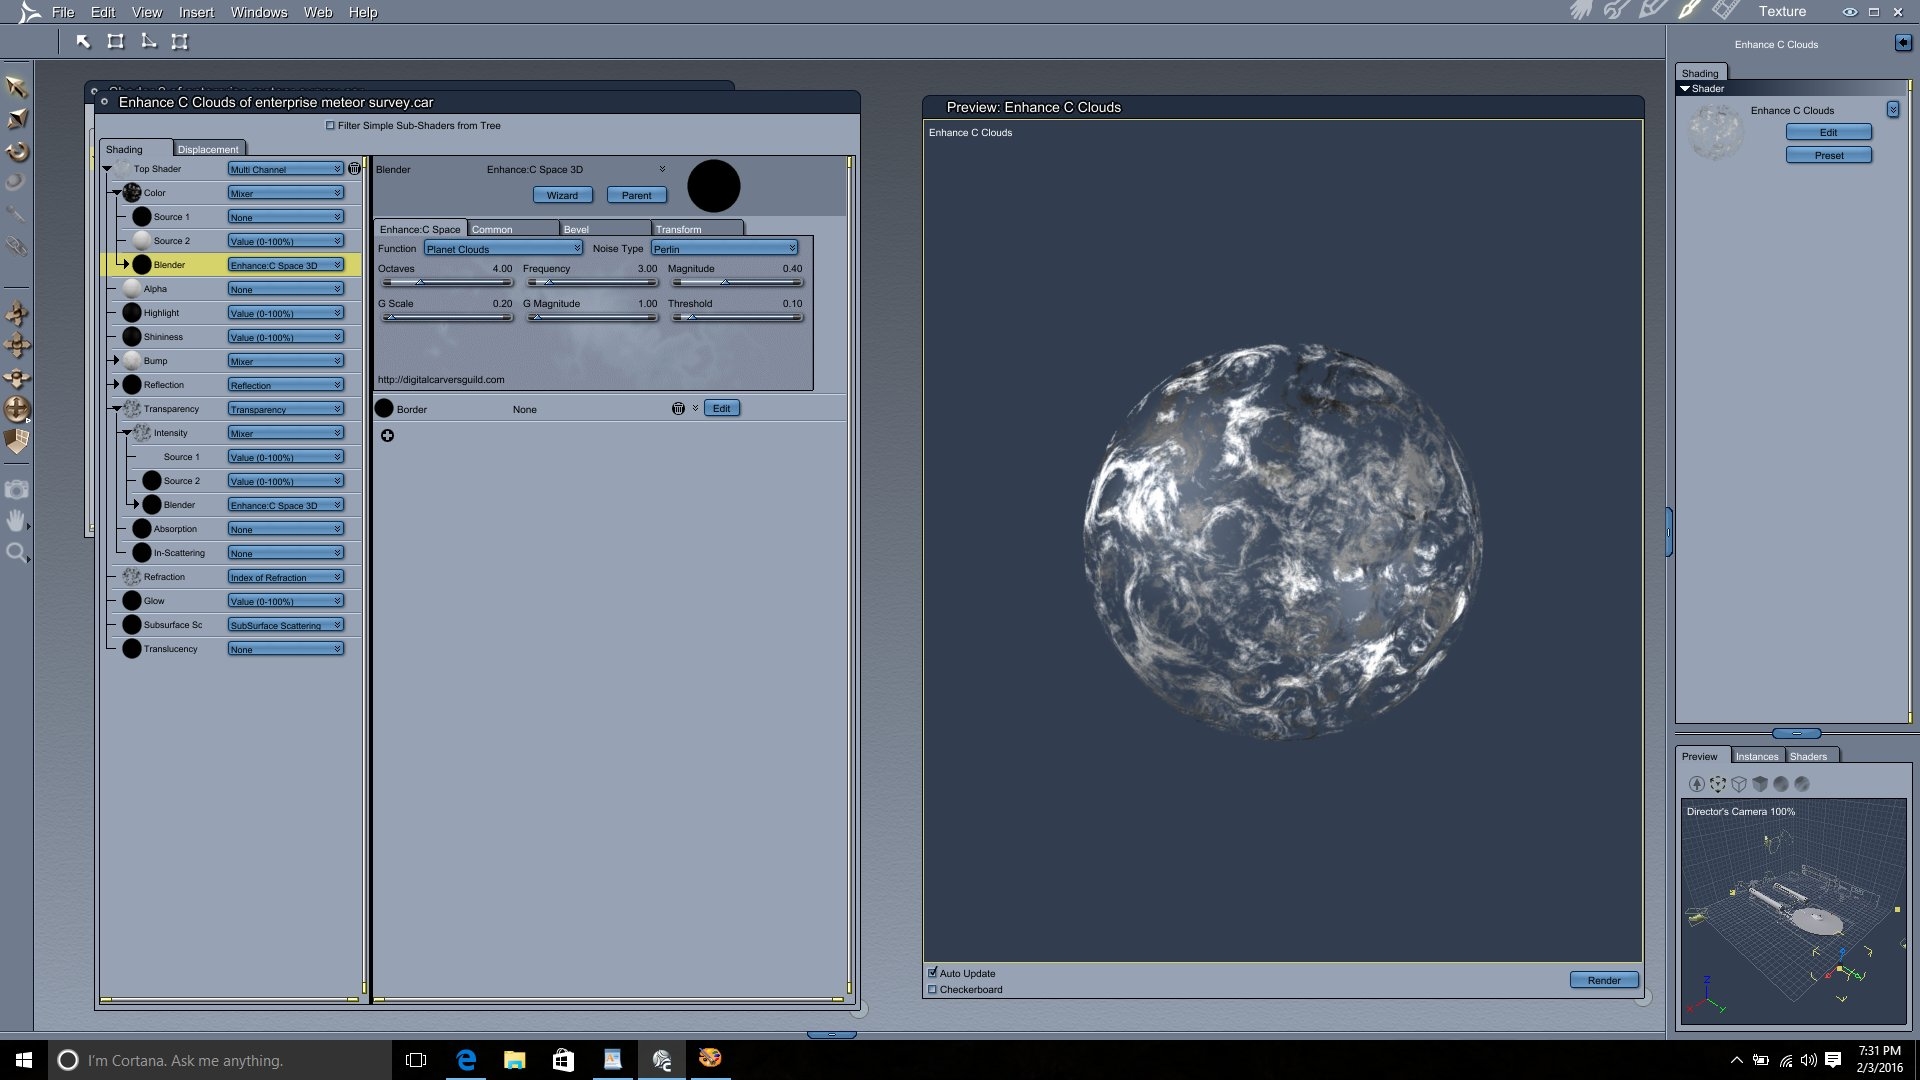
The second sphere (a little bigger than the first) uses Enhance C Space 3D Clouds. This function was used in the transparency channel as well. On a side note, I played with this a lot more afterwards and I have now added more surface bump to the clouds as well as establishing rendering parameters to get the cloud shadows to work better (not seen in the final render here).
-Kix
The third sphere (a little bigger than the second) is the atmospheric halo. For more information, there is a tutorial I built here at Renderosity which goes into it in depth (including a freebie model if you want it).
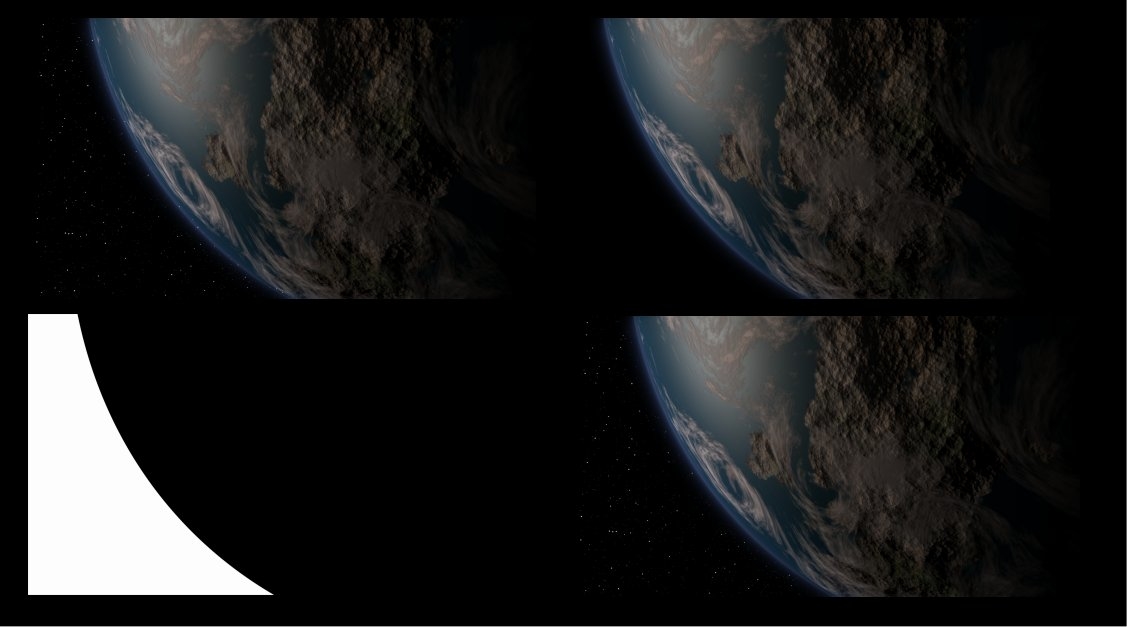
The fourth sphere isn't seen in the render. It is a little bit bigger than the first three spheres and is rendered separately as a mixing mask. It is completely black. The star field is an image I rendered using a model of little star planes on a sphere (another freebie model also available here at Rendo).
First, render the planet (ground, clouds, halo) with the starfield in the backdrop and lighting that I like. Next, render it again without the starfield. Next, change the backdrop to white, turn off all the lights, and render the mask sphere. Then, mix the first two renders together in a paint program that handles layers and masks using the black and white mask render. This will produce a phase 1 planetary backdrop where the stars don't show up in the atmospheric halo.
-Kix
For the second phase, I rendered the rocks.
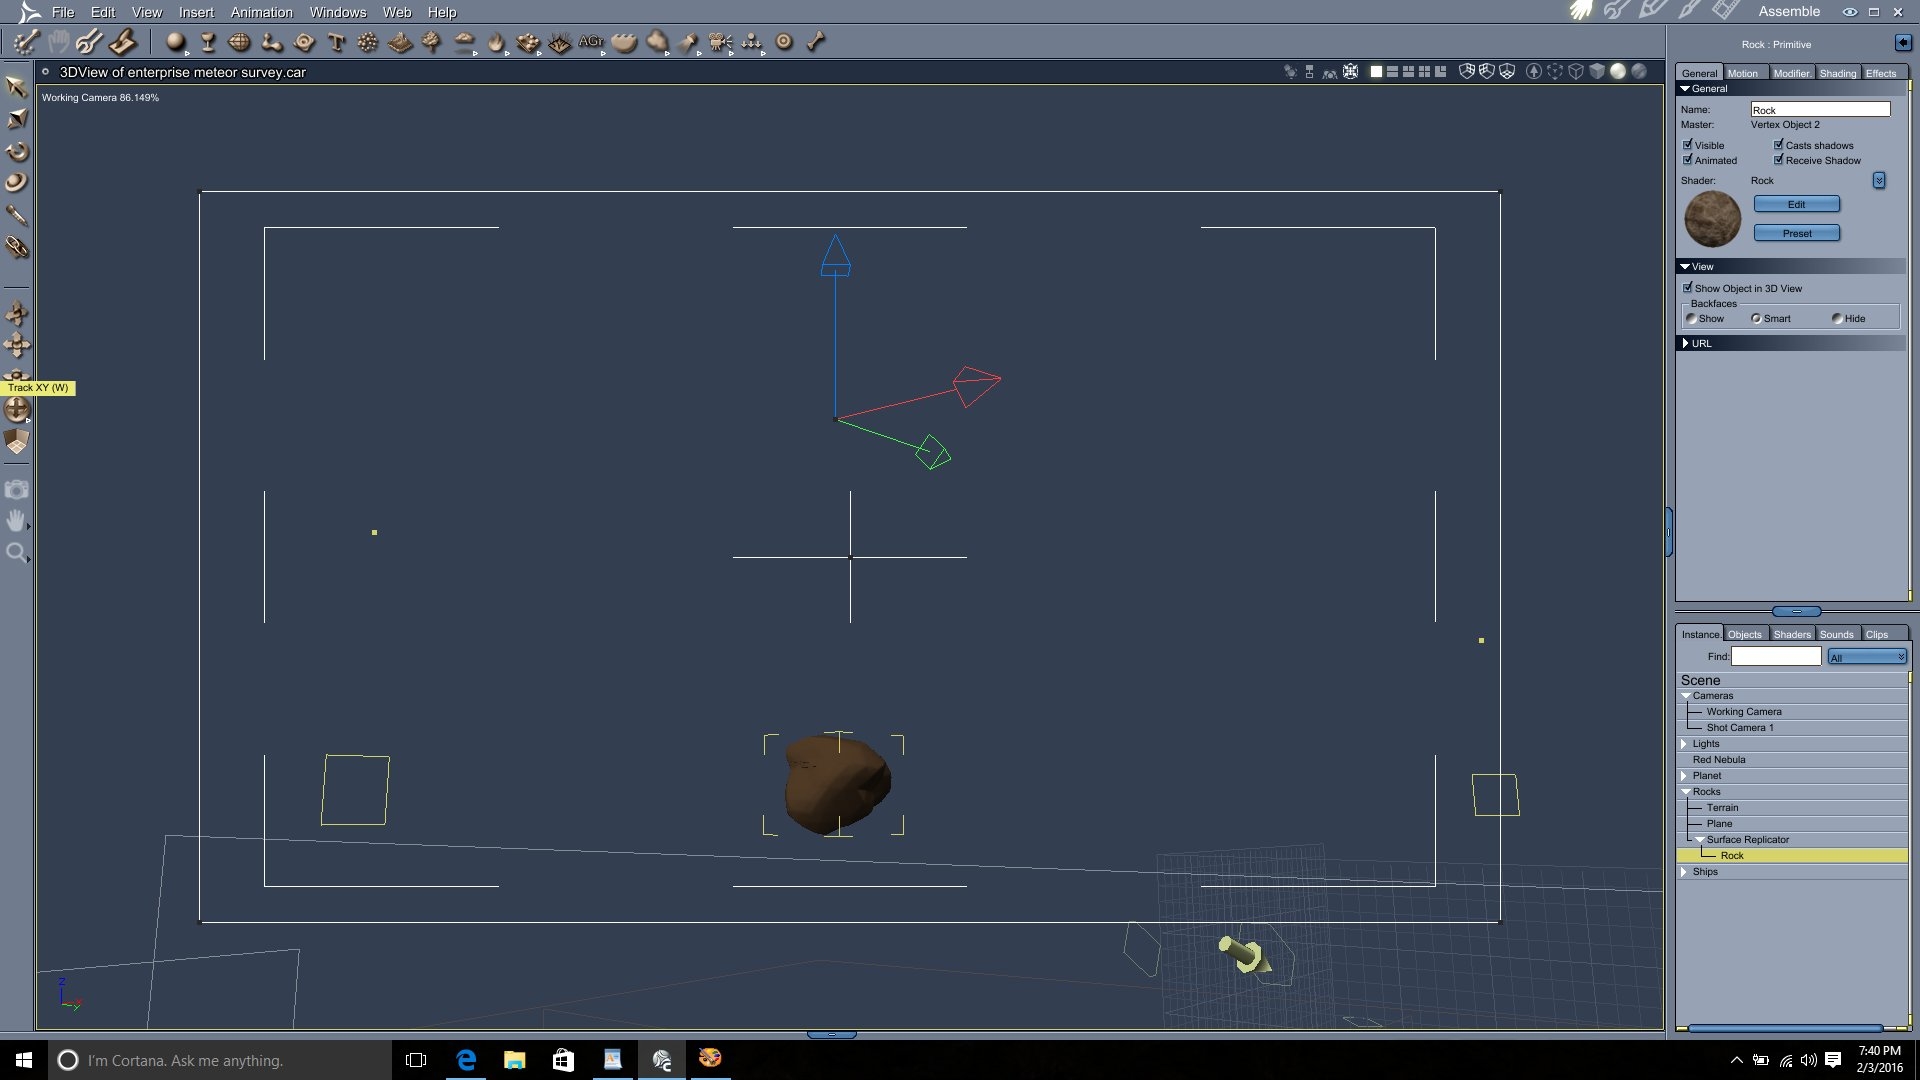
For the rocks trailing out in the back, I used a replicator. I put a plane into the scene, turned off its visibility and tossed in a rock I made for some other project. The plane is used as the replicating surface. I moved the hotpoint of the rock to a point somewhere outside of the rock and then dropped it into a replicator. In the replicator, I set the rotation of the rock to 360 degrees in all three axis with 300% random sizing. The replicator anchors the hotpoint to the replicating surface (not the center of the object). Having the hotpoint somewhere outside the object means that the random rotation and scaling will provide a mixed up "region" of objects versus a set of objects all stuck on the surface. In general, the smaller objects will be gobbed up closer to the replicator surface but for this exercise, it was just fine.
-Kix
For the big rocky foreground gizmo, I put in a terrain. I added a noise filter and a fractal function generator to get some interesting topography out of it. When I render it, I set the grid to maximum (8193 X 8193 render quality) but I DON’T save the file like that. When I save the file, I save it at minimum resolution. It's a little bit of a pain to remember to switch that around but it makes the file a lot easier to save and manage. Then I put an interesting mixture of brown cellular patterns in the color channel with another pretty crazy cellular bump mixture mess onto it and I got a rocky surface which I liked.
I rendered the rocks with two lights and some skylight. One light representing the sunlight and one light representing the planet backscatter (it's blue and dim). I put the planetary backdrop in when I rendered it. That produced the phase 2 backdrop.
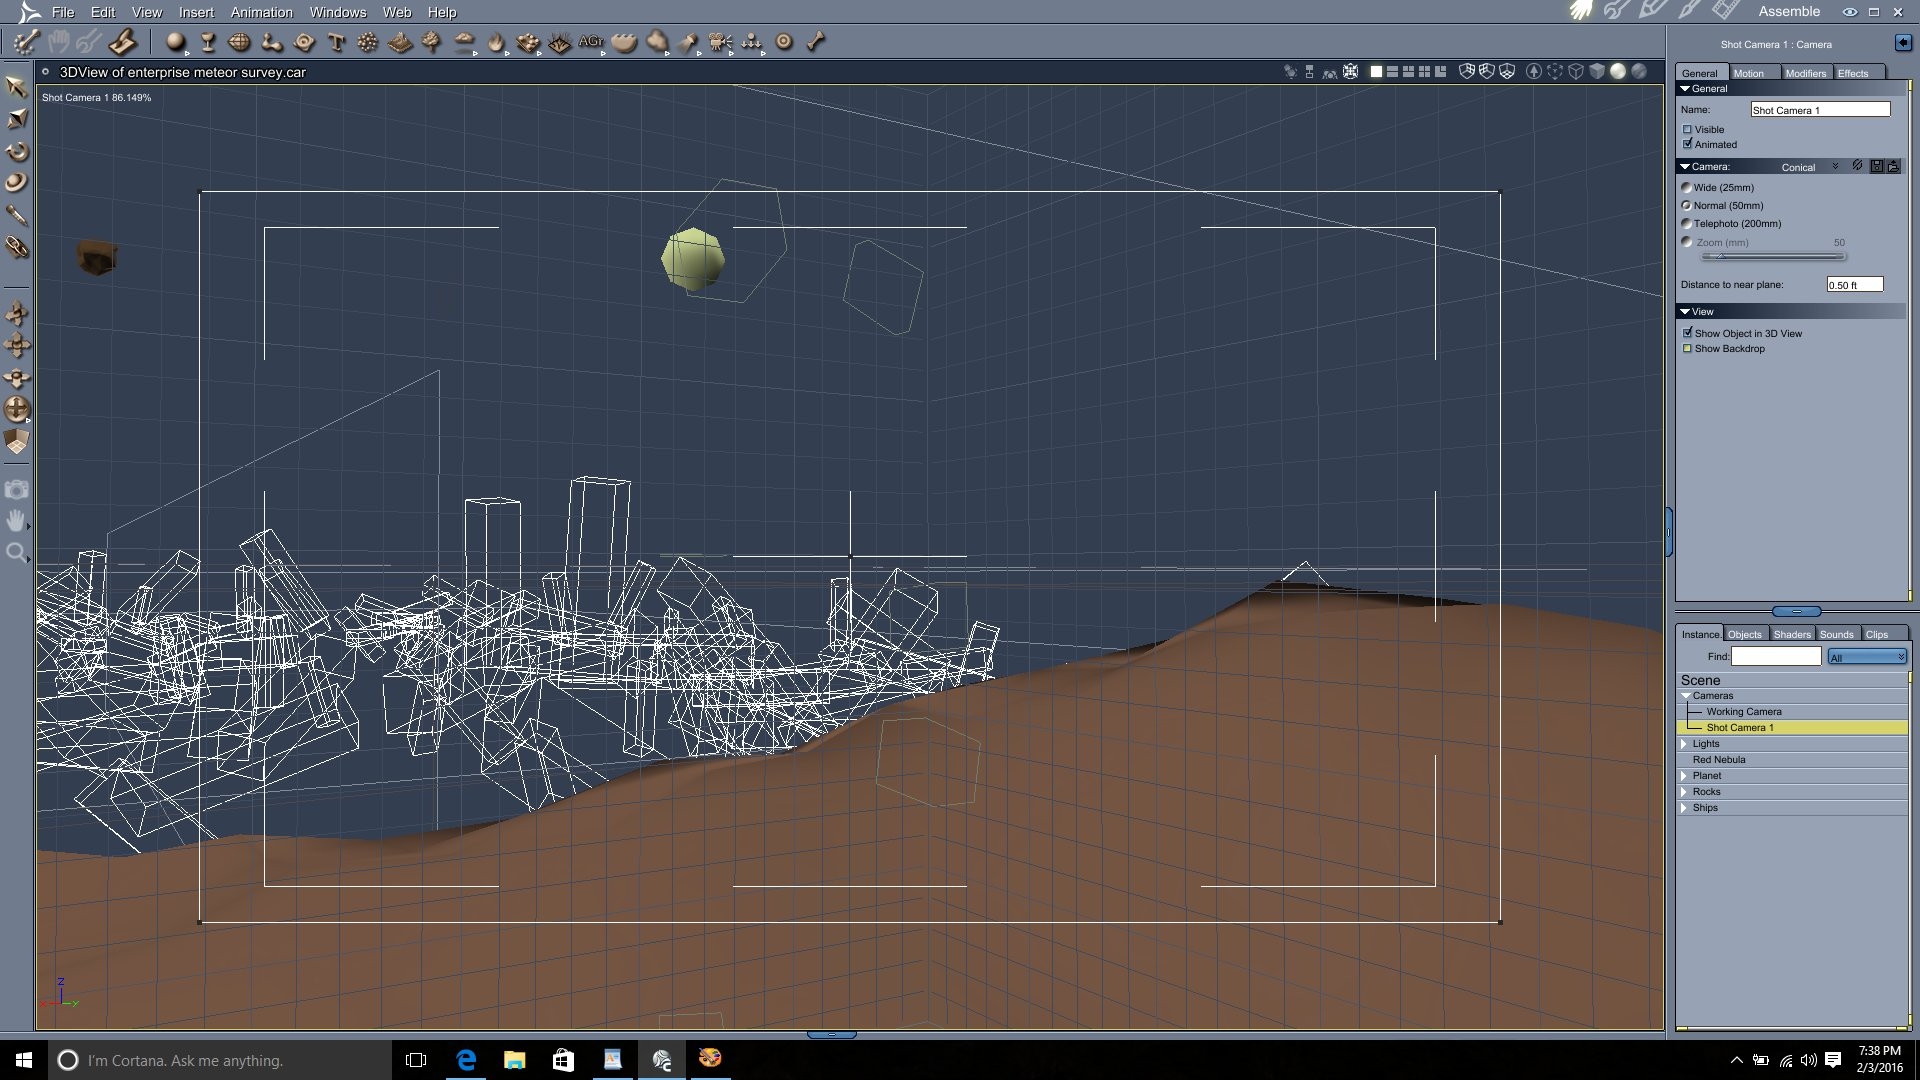
-Kix
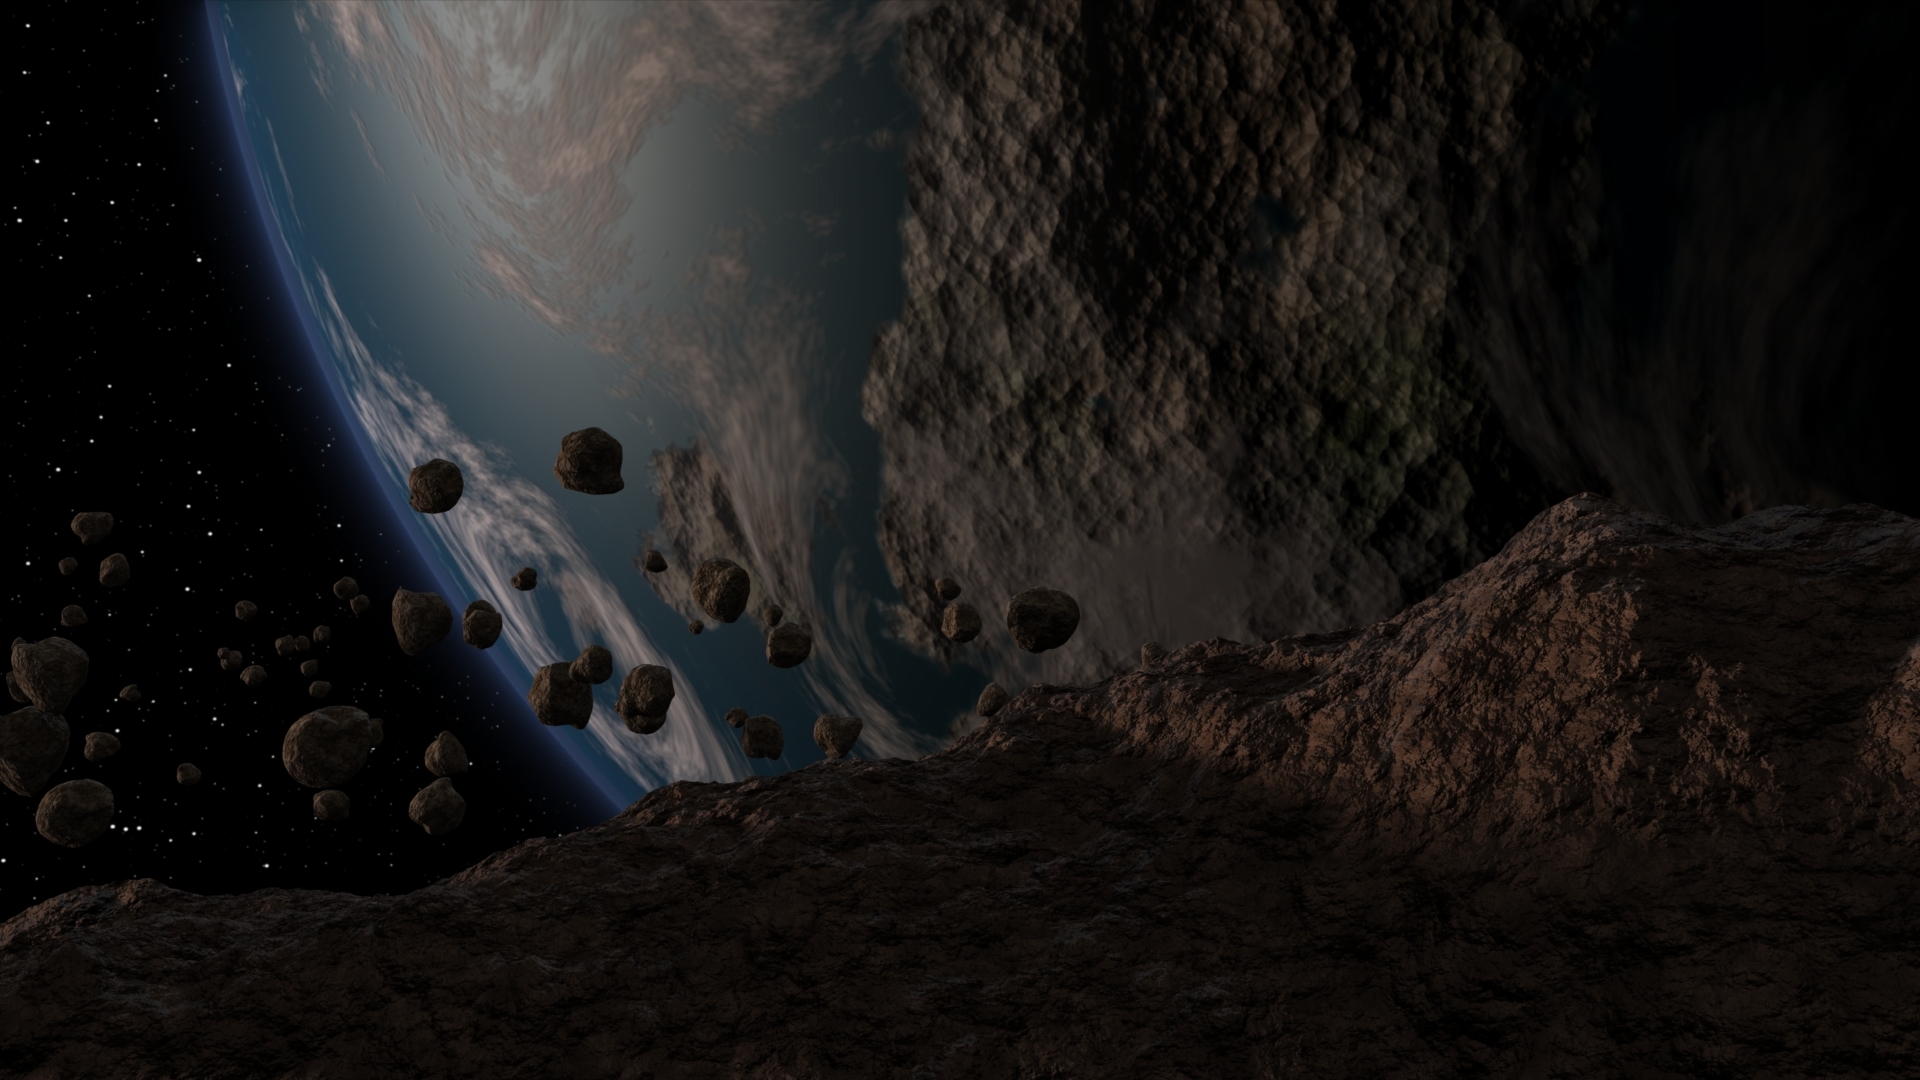
Then I rendered the ships with the phase 2 backdrop. The ships have three lights and a skylight (the same sunlight and backscatter light as used with the rocks but also a third orangish dim highlight opposite the sunlight). I also adjusted the skylight to something I liked. This produces a sort of standard three point lighting setup with some fill light. That's it.
-Kix


Privacy Notice
This site uses cookies to deliver the best experience. Our own cookies make user accounts and other features possible. Third-party cookies are used to display relevant ads and to analyze how Renderosity is used. By using our site, you acknowledge that you have read and understood our Terms of Service, including our Cookie Policy and our Privacy Policy.
I thought it might be interesting for people to see how I made the following render. One important thing to know is that there was essentially no modeling done for this render. The models of the Enterprise and shuttle were already completed. This render was achieved in three phases.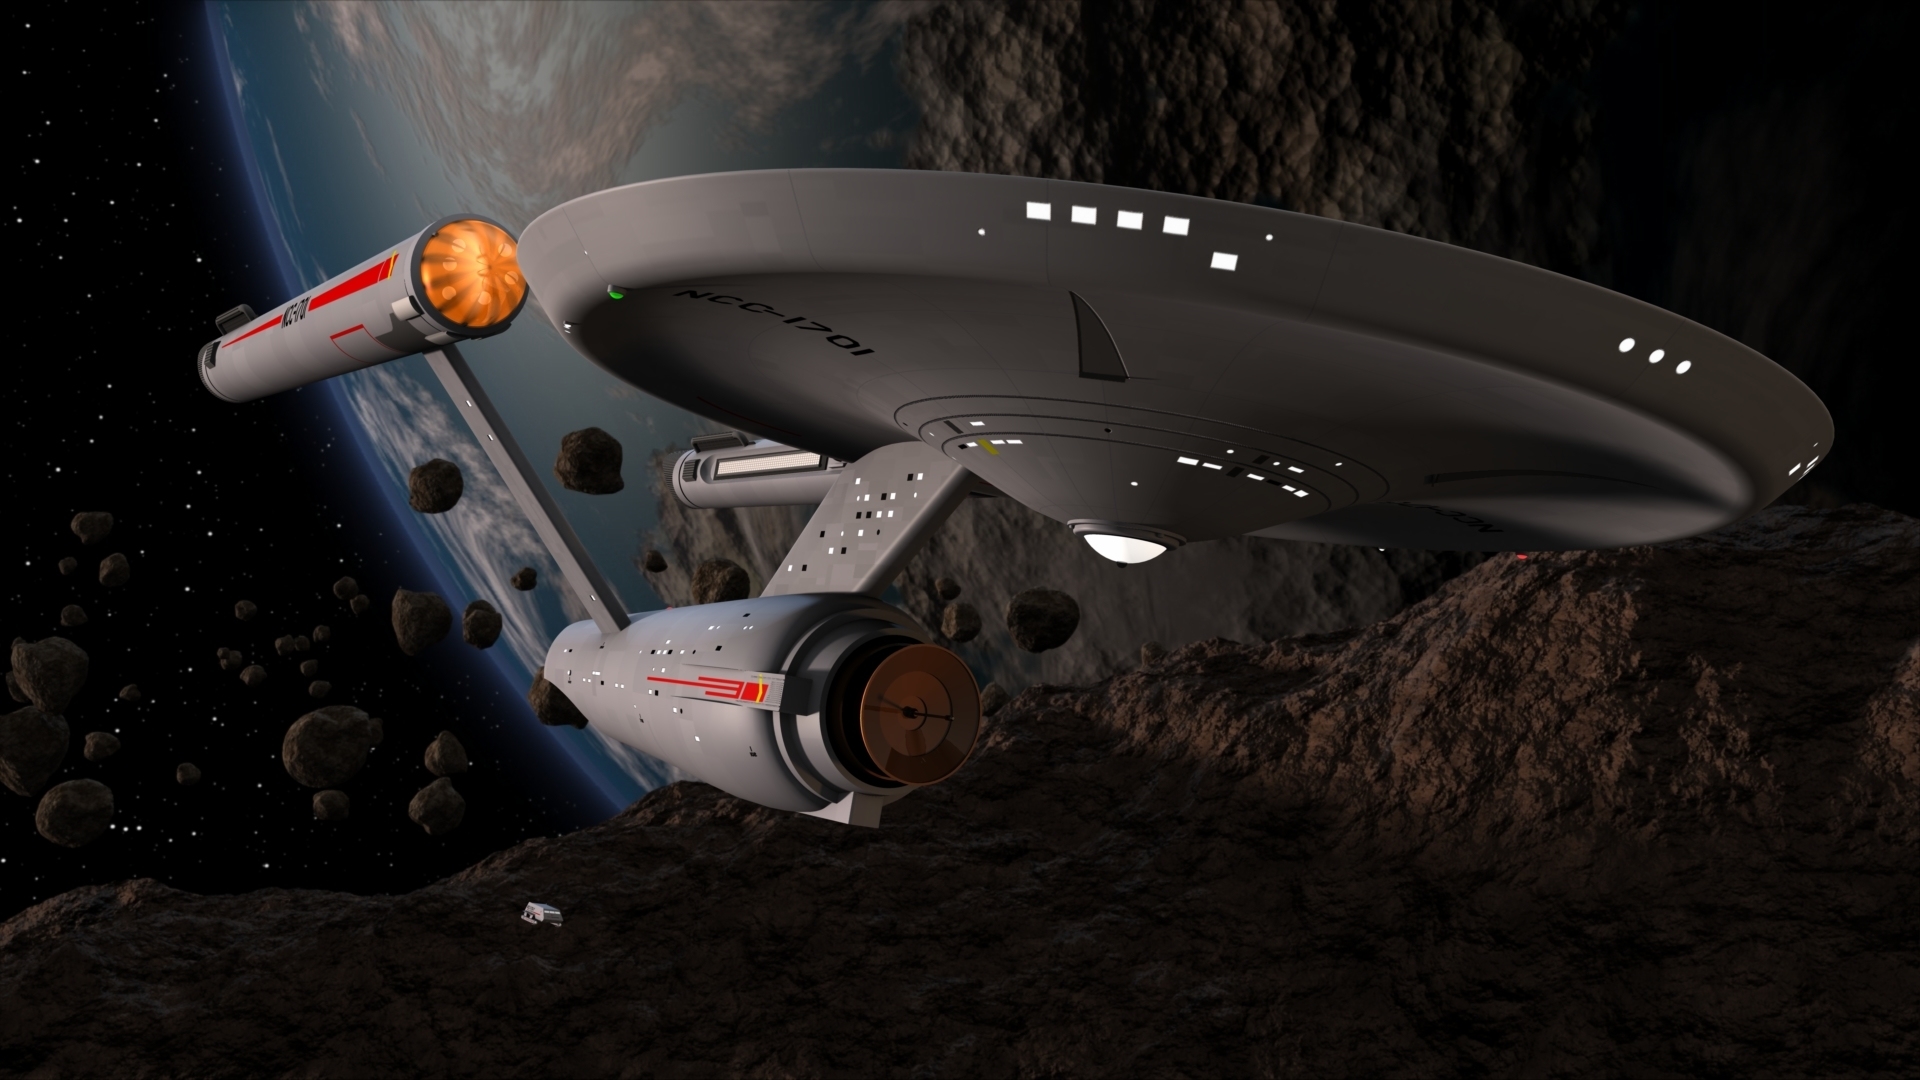
-Kix