















Twain by bigdadgib

Close
Hover over top left image to zoom.
Click anywhere to exit.
Members remain the original copyright holder in all their materials here at Renderosity. Use of any of their material inconsistent with the terms and conditions set forth is prohibited and is considered an infringement of the copyrights of the respective holders unless specially stated otherwise.
No AI - This artwork was created entirely by hand or with traditional digital tools.
Description
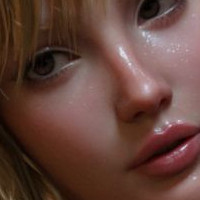
I complex render with three separate layers rendered at different times.
Thanks for your wonderful, inspiring and sometimes critical comments. All are welcomed.
Gib

Comments (19)
One of your best my friend...Fantastic !!!
nice shadow and focus. Gib, if you don't mind, could you speak more about your 3 layers and what you did with them. And also, if you don't mind, the armor, what-where? I need to dig up some armor and what I'm looking at looks interesting! Thanks, Piet
I agree with phfrancke about info! Great render(s)
Smooth skin, eye makeup and render. Nice background.
Fantastic work!
very strong and dominant portrait
Beautiful lighting, spot on distance blur, vibrant color. Top shelf image.
Thanks for asking about my render. I have a good lap-top I use here in my truck, but it has limits. It gets 'grumpy' when I try to assemble too many things into a single render. This render "Twain" has many items (sky, lights, castle parts, dynamic hair, high-res skin, high-res clothing, 1000 x 700 x 300 dpi settings with high object and shadow accuracy) that took a great toll on my little machine and I could not complete the task without a crash. So... I got the mental picture in my head of my scene. 1.) I set the camera angle. (I never changed it through these steps.) I set my lights (Luminace Arizona Sky Lights Daz3D...) and I set my atmosphere, Arizona Sky. 2.) I created my sky and rendered it, saved it as a BMP and saved the scene as 'base'. Then I closed everything. 3.) I reloaded my 'base' scene and used my rendered BMP sky as the backdrop, assembled the castle parts and rendered again, saved that render as a BMP and closed everything again. (When I close everything, it clears my memory and I can start fresh again) 4.) I open my 'base' scene again, which really is just a blank scene with lights. I load the rendered sky with castle BMP as my backdrop. All that is missing now is the model. (remember, I have not moved the camera yet. 5.) I load V4, give her the shader treatment, add the dynamic Venus Hair from Daz3D and put just the top on from Powerage's ZhaetheriaLegend Set found here on Renderosity. Then, I moved her in front of the camera. Finally, what I have is two renders combined for the backdrop and the model in front of it. The third and last render, I set the depth of field settings to 200% and focused on V4's sweet little nose. Photoshop helped me get the colors and lighting correct and I added the frame myself with FastStone Image Viewer. Hope that explained it... :) Gib
Beautifully done! Thanks for the explanation!!
Most Vivid and solid with excellent detail! William
great POV and nice depth of field. Lovely result, barring in mind your restraints!
Great work ! Thanks for your explanations, they may help beginners like me and people having not a powerful pc ...
superbe portrait!!
Great! Like especially how you blurred her hair! Looks extremly silky and natural!
Fantastic character and pov!
Excellent work!!!!!
Very good work!
cool character portrait!
Love the lighting on this!