Way too hot ! - Updated
by rajib
Content Advisory!
This artwork contains mature content: nudity.
View Anyway
Open full image in new tab
Zoom on image
Close
Hover over top left image to zoom.
Click anywhere to exit.
Members remain the original copyright holder in all their materials here at Renderosity. Use of any of their material inconsistent with the terms and conditions set forth is prohibited and is considered an infringement of the copyrights of the respective holders unless specially stated otherwise.
No AI - This artwork was created entirely by hand or with traditional digital tools.
Description
Hi There =) !
Thank you for the wonderful wonderful comments and favs and likes on my renders.
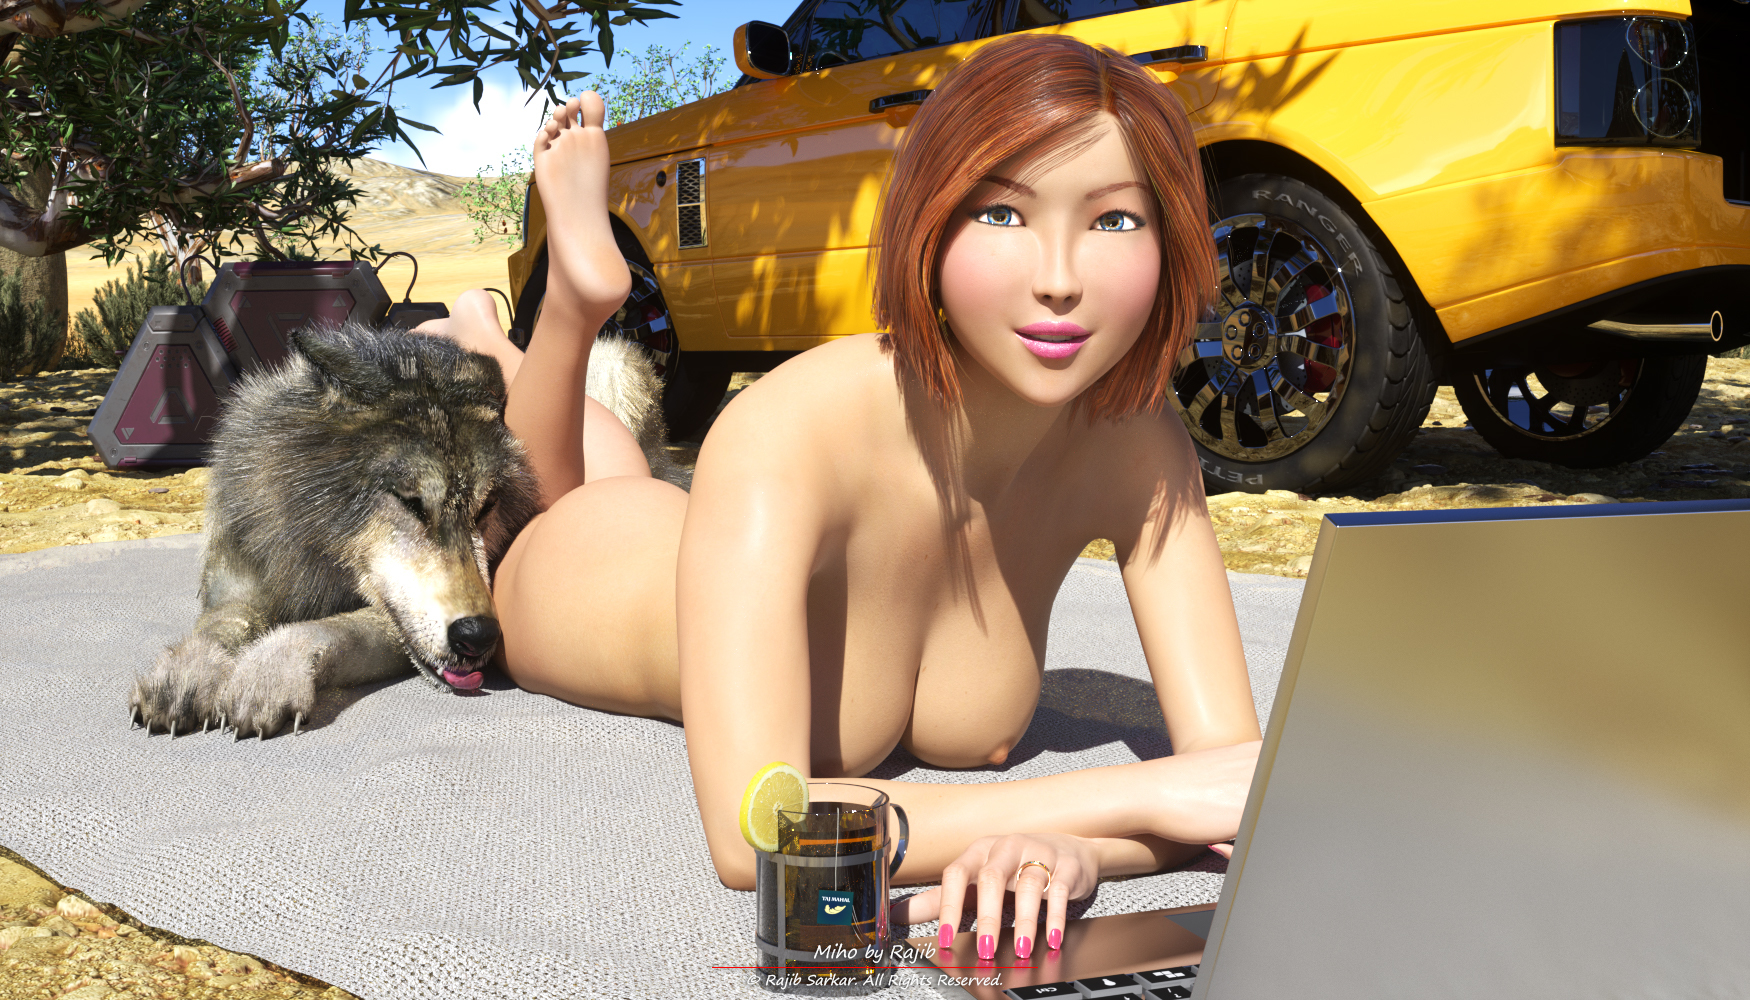
This one is another updated version of my earlier render. Though I think the earlier version was nice, it was a far simpler render and lacked the realism of this one. Also I wanted to bring Miho to the front and center of the focus in this render as I thought in the previous version she was placed a bit back from the camera. I have struggled with this render since Friday night. This by far is the longest render I have done and I had to restart it a couple of times after letting it render between 4 to 8 hours each time and then finding some issue with the render... And by mistake I interrupted the final render after it had already rendered for 7+ hours and it had another 2 to 3 hours to complete..... Aaaaaaaaaaaarrrrrrrrrggggghhhh !!!! :( . One of the reasons for the ultra long times was Miho's hair material and surprisingly not the wolf's close to a million hair strands which also had a specular material. So as I restarted the final render, I did so after changing Miho's hair material and it brought down the render time a little - 6 hours. Lesson learned, got to be careful with specular, translucent material that lets lights pass through it and has a scattering medium associated with it.... There is something I still don't like about the hair... Slight distortions at the lower end.... Issues is that this is a G2F hair and applying it on Miho (who is based on G3F) looks perfect until I turn Miho's head. They the lowers end distort as they seem to be stuck in the original place as the rest of the hair moves... Will see if I can do something about it in future renders...
This render I guess should be taken as the next visit to that place Miho had bought mentioned in the story for the original two render (Too hot, Way too hot)....
Story :
The wolf was with us this time. Miho had updated the tech and we were scanning underneath the earth again. This time the tech Miho had created was a bit mind boggling. The scan gave a actual colored picture of what was underneath the ground as though the ground was liquid and you could move anywhere in it and record 360 degree of it. It was beyond my understanding as to how she had done it but the result I was seeing was amazing and countless possible uses of this tech came to my mind.... While Miho was busy with the laptop monitoring the results and making tweaks to the program as needs, I was tending to the drones flying about doing the mapping....
It was another hot hot day... The wolf choose to take a nap right by Miho's legs under the hot sun even though Miho told him to go sleep under the tree shade. There was an unshakable bond between the two of them... Miho as usual had gotten out of her cloths and was soaking up the sun which always energized her.... and well I was admiring how beautiful she looked laying there on the rug engrossed with her work.... She looked at me looking at her and smiled....
About this render :
When I started on the render the main aim I had was to make Miho the front and center of the viewer's focus and also make this one more realistic compared to the original one. In the original render, the ground hardly had details and the rug was completely flat which was unnatural for the environment. So in this render I wanted the rug to look like a rug which was laid over uneven ground. To do that I had to do a lot of back and forth between Daz Studio and ZBrush. Also I want to make sure that the rug did not cut through Miho's and the wolf's body in an unnatural way so in ZBrush I pushed down all around the edges where the Miho's and the wolf's body and the rug intersected to give the correct impression of the body pressing down on the rug. Similarly I wanted to make sure the tea cup and the laptop appeared put on top of the rug and not cutting through it. Then there were poke throughs of the ground though the rug I had to take care of.
I changed Miho's pose a bit from the original render and then thought about where to add the wolf and what it would be doing. The thought of showing the wolf as sleeping by Miho's side came to mind and I posed the wolf accordingly. Stuck its tongue out to indicate the hot weather. I then changed Miho's left leg to lightly rest on top of the wolf's body. I also changed the position of the Ranger and changed it materials including adding a bit of dirt to its tires (though I think I can improve on it but need to wait for a feature that is being added to the Octane plugin in the next release). The sideways view and the textures make the Ranger look pretty real. I changed the ground material to a more realistic displacement based ground texture.I also created creases and bumps on the rug to give impression that there were stones / uneven ground underneath. I even created and added a bump map to the lemon and also created a transparency map for the rug by manipulating the saturation / gamma / contrast of the original texture using a color correction node in Octane. I also used a bit of spherical distortion to bring focus on Miho .
Finally I didn't really use DOF as I wanted to show the vastness of the barren environment around the place where Miho was.... I had made the landscape using 2 different landscape props....
I really like how this render looks.
Update 2017-04-16 :
As mentioned before I have removed the older original render. I am trying to redo all the renders to bring consistency to my gallery with the current and final version of Miho
Hope you all like the render !
Rendered in Daz Studio using the Octane Plugin. No post work done. Do click zoom if you want to see the details... Full size : 1750x1000.
My previous render - "Morning Coffee... - Updated"

Click the thumbnail to view it (Content Advisory : Contains nudity. Please do not click on it if such content offends you).
Enjoy =) !
Rajib



















Comments (39)
Indeed, lucky wolf. ;-)
Now that's hot, slick work
yes, hot and beautiful scene - excellent
DAAAAAAAAAANG!
Right now there's a puddle of molten plastic with little bits of electronics where my monitor used to be! But I'm sure Miho will buy me a new one..... She's just waaaay too hot! I'm sure the temperature there went up about 90%... I'm sure any ice in her tea is long gone by now!
What an awesome render, my friend!
It won't be the fault of the dog? (LOL) Nice job!!
Of course, of course :-). Love the tea cup. First class image!!!!!
She looks cool now! Excellent scene! Love your character and the wolf!
Very good render! Strong lighting and cute wolf! Lovely work!