






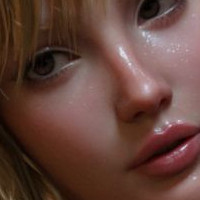










Pin_Up_(Tribute_To...)_(Lyna)_(Before/After) by aegipan

Close
Hover over top left image to zoom.
Click anywhere to exit.
Members remain the original copyright holder in all their materials here at Renderosity. Use of any of their material inconsistent with the terms and conditions set forth is prohibited and is considered an infringement of the copyrights of the respective holders unless specially stated otherwise.
No AI - This artwork was created entirely by hand or with traditional digital tools.
Description
How to break a myth ...
I've decided to post some "before/after" pictures.
So you can see how I add the "AEGIPAN's Touch" to pictures.
Here a simple one to begin with.
-Some colour correction were applied. ( I always shoot too red/yellow to enhance skin tones )
-Light enhancement ( contrast added - but as you can see the light is the SAME on original and final image ). It's important to understand how light works, and it's more important to set your lights correctly during the shoot)
Time of the postwork about 30 mins ( could be faster if my computer wasn't so old :o ) for the non-cropped version including disk savings )
I hope you will enjoy this sharing of techniques.
I would like to make a "real" step-by-step article, but again I always race against the clock but if some of you are interested, perhaps it will bring me some motivation. :o)
Peace.

Comments (22)
I'd like to see the step-by-step article when you get round to writing it. Nice work.
Ce serait effectivement très bien d'avoir un article du maître Aegipan dans la section "Tutorials" de RR... Joli travail David !
Anything that would help me in my photography skills is always appreciated. ^_^
Splendid techniques...bravissimo!:DDD.Hugsxx
Great work, would love to see the step-by-step!
well done CC
Great work mate. A step by step would be cool.
A wonderful model! A step by step tutorial will be great, please! :)
coooooool;)*****.
Very interested in a tutorial. We are a community of learners.
Great work and wonderful model. Thanks for sharing a few of your techniques.
To be honest with you, I am not sure that I don't prefer the original image with the reddish skin. What I would have done is to add a little bit of level adjustment and increase contrast a little. I think the skin of the finished image looks plastic and a little unnatural, almost like something you would get from a poser render. The skin just does not look right. Just my humble opinion.
Fantastic work as always I like both pictures and would love to see the full step by step.
Beautiful! & thanks for the lesson.. I need help in learning how light works....
I vote for Tutorial..S
Thanks for this ,its great to see the before and after.I think the adjusted photo is great for the models body ,but to hard on the face.
Nice work!
Amazing!
excellent.. A detailed tutorial would be great to see.. *******now for pictures.. Great job.. I like them both actually.. I really like the skin tones on the left pic but the white backgrounds more on the right picture.. But what if you took the lovely lady from the left and put her on the background from the one on the right..
Love them both.Excellent.
a top work !!!!
great pics, i like them both