
MatCreator opened this issue on Nov 06, 2006 · 32 posts
MatCreator posted Mon, 06 November 2006 at 7:09 PM
Hello all, hope things are going well for you...
Ive been going thru the galleries here, and was hoping if you guys could help me with something thats been bothering me for far too long. Im trying to mimic the lighting style produced in images like this: *** be forewarned, artistic nudity ***
http://www.renderosity.com/mod/gallery/index.php?image_id=1305024
http://www.renderosity.com/mod/gallery/index.php?image_id=1322607
http://www.renderosity.com/mod/gallery/index.php?image_id=1322562
http://www.renderosity.com/mod/gallery/index.php?image_id=1321308
http://www.renderosity.com/mod/gallery/index.php?image_id=1321423
http://www.renderosity.com/mod/gallery/index.php?image_id=1320394
in Carrara... If someone could point me in the right direction, link me to a tutorial, suggest settings that should be used, Id be most appreciative. I really like the "look" (if that makes any sense) of the images, but dont know where to begin. Ive tried global illuminition in Poser 5, gi arrays in Bryce, and even the gloabal illumination feature in C5Pro itself, but just cant produce the desired result...
I have even been playing w/ the new IBL feature of Bryce 6, but again, nothing..... Ive been having nice results using a new take on light arrays in Bryce, but its nothing in comparison to the "look" of those images listed...
Any help in any shape form or fashion is greatly welcomed.
There are 3 kinds of people in the
world. Those that can count, and those that can't..

bwtr posted Mon, 06 November 2006 at 8:03 PM
In the Carrara Browser/Scenes, there a lot of lighting set ups. Set those up into Carrara, remove the objects if included, and then add your item into the scene!
Huge learning experience as you work through those potential exercises--especially when you can also make HUGE adjustments to all those preset items in the scene!
Now I have give you a couple of months learning experiences to persue!
bwtr

nomuse posted Mon, 06 November 2006 at 8:13 PM
Just had interesting experience of attending a lecture-demonstration by a famed portrait photographer. The set-up used was...two lights. Umbrellas, or soft boxes (read, soft shadows), and featureless backdrops. In one case she substituted a bounce sheet for one of the soft boxes. I can't say I've figured out how to make lush but realistic lighting in Carrara. But I have been doing quite a lot with very few lights. GI (aka indirect lighting reflection in the scene), and Sky Dome both do marvels in getting a smooth coverage across surfaces and softening the shadows. If you haven't already tried this, try some light-lab work; create a test scene, and work with one light at a time to see what that light is doing. Try distant lights, ambience, spots with soft shadows, shape lights, Anything Glows panels (I've used a large Anything Glow panel as a light source several times), Sky Dome, HDRI, et al.
bwtr posted Tue, 07 November 2006 at 1:00 AM
Carrara is HUGELY good. Most of us will take a lifetime to learn all it's capabilities--and thats just Version5!
bwtr

Hoofdcommissaris posted Tue, 07 November 2006 at 2:05 AM
It looks like most of your examples use Global Illumination, Indirect Light, and probably HDRI images. A good part of the 'look' is the mimicing of real world light with these techniques. So it looks more like an overcast day than a light setup that produces (multiple) harsh shadows. I think going through the presets, test rendering them, put stuff in them or change settings will give you a feel for the basics. Render times will rise, but all for a more interesting look! If you have the time, it will be a good time, experimenting with this kind of lighting.

ShawnDriscoll posted Tue, 07 November 2006 at 4:28 AM
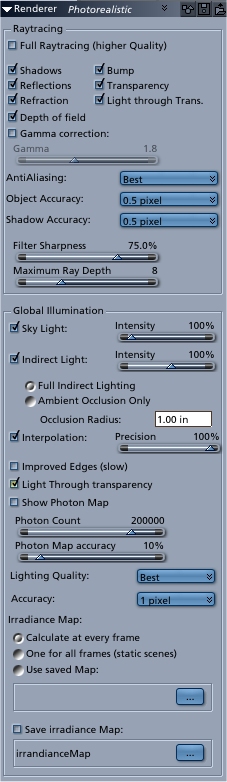
MatCreator posted Wed, 08 November 2006 at 10:11 AM
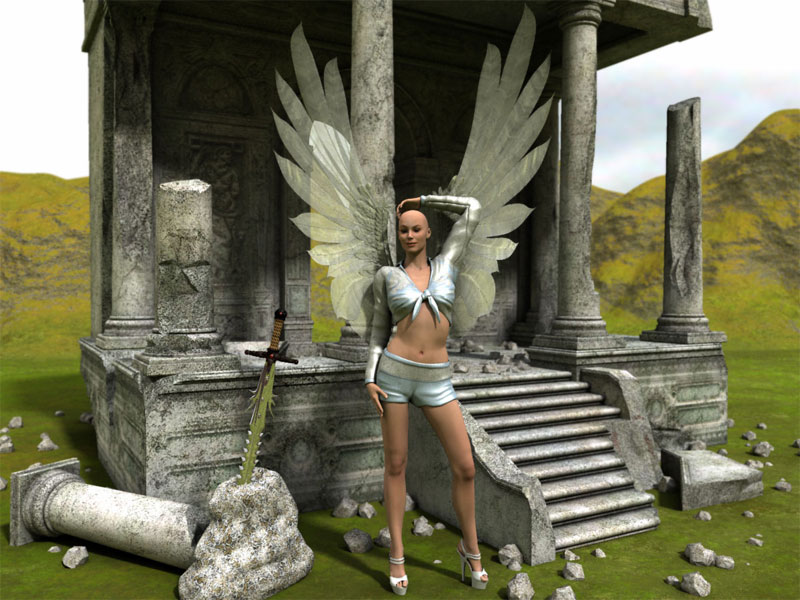
this 1st image came out the "best", but it raises many questions... on my 1st attempt, i was advised to not use ANY lights. this produced a rather dark image, but the "quality" seemed to be right. however, i didnt understand why lighting was needed, as i was under the impression all light came from the hdri file...
more on its way.............................
There are 3 kinds of people in the
world. Those that can count, and those that can't..
MatCreator posted Wed, 08 November 2006 at 10:14 AM
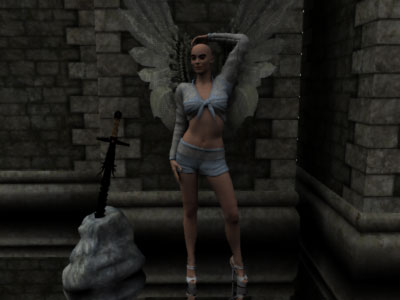
There are 3 kinds of people in the
world. Those that can count, and those that can't..
MatCreator posted Wed, 08 November 2006 at 10:19 AM
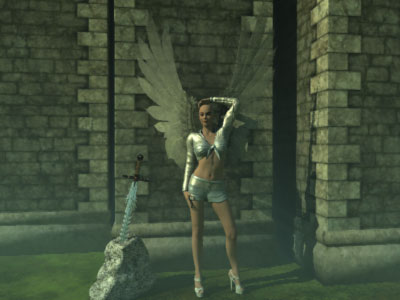
is it a rule of thumb that no type of atmosphere should be used?!? sky, real sky, cloudy fog, or the rest of those?!? i was lucky that the 1st hides the background, and the best so far the hdr file has a background somewhat built into it if that makes sense...
so just the sun, the real sky, and an hdri set up (the coronet file w/ all props deleted and poser scene imported, no lights)...
There are 3 kinds of people in the
world. Those that can count, and those that can't..
MatCreator posted Wed, 08 November 2006 at 10:26 AM
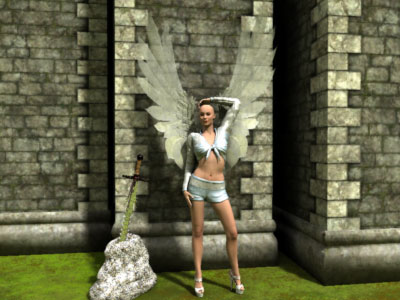
now for some reason, it looks "different" from the 1st attempt, and only 1 distant light was added. is there a special way to set lights?!?
concluding, i was not "as" impressed w/ the render as i want to be, just didnt strike me as what i was going for 100%.
it really is alot more than just adding things to one of the included hdri scenes and hitting render. i have another scene going now, and this one was seriously in need of light adjustments. it was an open environment exterior hdri scene (the same coronet file) but for some reason, the figure refuses to take to the lighting, either the hdri or the other lights............ ill post when it finishes, but im more confused than when i started actually, LOL!!!!!!!!!!!!
still, thanks guys, all and any help is truly appreciated!
There are 3 kinds of people in the
world. Those that can count, and those that can't..

MarkBremmer posted Wed, 08 November 2006 at 10:49 AM
Hi MatCreator, For just a basic HDRI render, if it comes out too dark, simply try boosting the intensity of the HDRI with the sliders first - either in the Render Room or in the Assembly room and re-render. Just don't do it it both :-D Lighting...it takes almost as long to light a scene well as it does to create it in the first place. And that's not unusual - even in the pro world. In fact, at the 3D production houses, lighting scenes is actually a separate job - just like modeling, rigging or animating is. So, when you're doing everything, it simply takes awhile. Mark
MatCreator posted Wed, 08 November 2006 at 11:13 AM
Ah, as a Brycer, I know all to well the woes of lighting as its own seperate science :P
Honestly, I am so sick of light arrays, LOL!!!
But you answered my question... I wanted to know if darkness was adjusted through actual lighting or the hdri/render settings, thanks...
In the words of the governor:
"I'll be back"...
There are 3 kinds of people in the
world. Those that can count, and those that can't..
ShawnDriscoll posted Wed, 08 November 2006 at 11:17 AM
Not all HDRI files are created equal. Some are brighter than others. If I have a dim HDRI, I'll sometimes change the Skylight value from 100% to 400% in the render settings.
If you are using a realistic sky for your background instead of an HDRI file, make sure your Sun is positioned properly in the sky for better lighting of your scene. NOTE: the angle of the Sun will determine the color of the lighting for your scene because the clouds will alter the lights color. Red skys are normal when the Sun is positioned low. I like to soften the shadows of any Sun or distant lighting I use to 1500.00 inches.
If your scene is still too dark, brighten your sky color in the Realistic Sky editor.
MatCreator posted Wed, 08 November 2006 at 1:37 PM
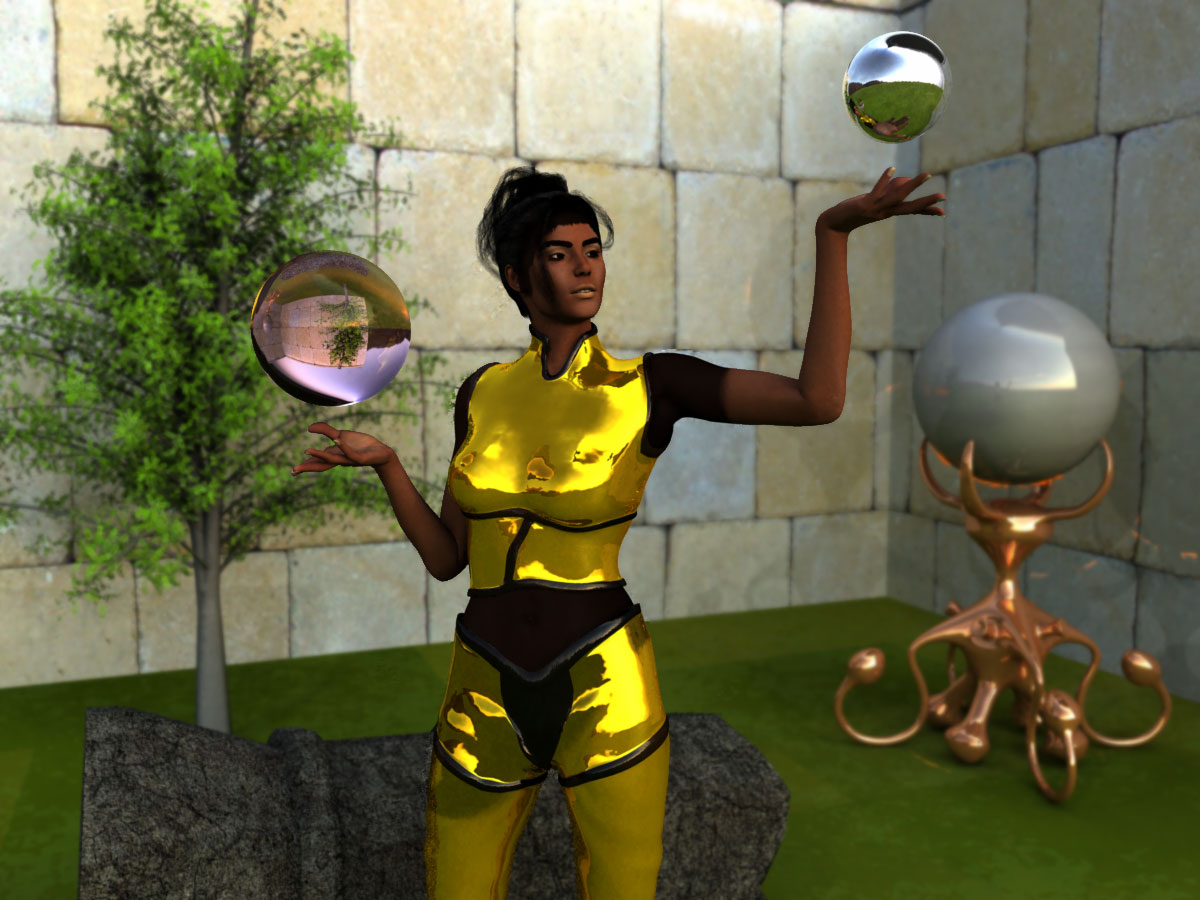
This image here is the one that was too dark... I added 3 bulbs: 1 in front of her at 6% intensity, 1 at her right at 4%, and one at her left at 4% as well, approx twice her height over her (Im guess? I should post a screen cap eh?), a sun which loads in the center at 25% intensity, and a distant light close to the camera at 10%. Mind, you, these are approximates...
Anyway, I used the default scene set up, no changes, save for the scene elements... I had to turn on the skylight, which was off, but other than that, here it is...
Closer, much closer to what I want/expect...
Im too tired for anymore today, lol, please post any advice or suggestions so I can incorporate that knowledge into my next render...
Again, I thank you all :)
Peace!
There are 3 kinds of people in the
world. Those that can count, and those that can't..
nomuse posted Wed, 08 November 2006 at 2:01 PM
I think you may be multiplying your lights too early. I used several lights in most of my renders, but the basic lighting scheme I get done with very, very few items. Think of this as two separate areas; first, you are trying to light the entire scene. For that, use very, very few lights (I've lit a scene with nothing but sky dome) and tweak the settings. GI, and soft shadows, can be a great help in getting smooth coverage and a pleasing basic light. ON TOP of that comes "specials"; little spots that liven up the pic. This might be just to bring a little more focus on a character's face, or it might be to add a little light coming from some object in the scene (a candle, monitor, whatever). I tend to run GI at values from 60% (more of a fill) to 140% (more of an independent light). In one pic I did the skylight was masked off by scenery and treated as the "key" light in the scene, with bounce of that scenery treated as the "fill" light for that scene. Skylight, I've found often needs to be cranked to 200% or more...but then, I love the look of a cloudy or overcast sky. (A note on terminology; I am a theatrical lighting designer and I tend to think in those terms -- and use terms from that field -- when I do lighting in 3d. Also, as a theater lighting person I tend to think in terms of the story-telling potential of the light; that it is responsible for describing much about the scene from time of day to mood. And it perhaps goes without saying that I default to the dramatic!) A last thought that might be intriguing to you. My last render, I rendered one light at a time and comped the results in PhotoShop (using G-buffers for control). It saved a lot of the usual time in tweak-render-tweak-render, moving it to PhotoShop where tweaking the relative levels was much, much faster.
ShawnDriscoll posted Wed, 08 November 2006 at 6:26 PM
I forgot to mention that lighting seems to work better (more real) if the objects you are rendering are actual size. Meaning a woman who is supposed to be 5'6" in a scene is actually resized to 66" tall after importing her. If she is 0.5" tall, the lighting may not look all that great on her. And also, turn off the fog in the realistic sky editor so it's not so hazy in your scenes and blocking your lighting.
MatCreator posted Thu, 09 November 2006 at 3:25 AM
Wow, thats useful info no mattter what jam youre in. Im not used to having to worry about real world units or measurements in my other programs...
Thanks for that....
And so Im taking you CAN add atmosphere to HDRI scenes, just to be careful that atmosphere doesnt interfere w/ the lighting?!? ((Which is pretty much impossible, as atmosphere will always interact w/ the lighting right?!?))
There are 3 kinds of people in the
world. Those that can count, and those that can't..
ShawnDriscoll posted Thu, 09 November 2006 at 8:32 PM
I haven't tried an HDRI background with a Realistic Sky atmosphere. I guess behind the clouds would be the HDRI image? Too wild. Try it.
MarkBremmer posted Thu, 09 November 2006 at 9:02 PM
It's a very cool "bonus" of Carrara. :D
MatCreator posted Fri, 10 November 2006 at 6:36 AM
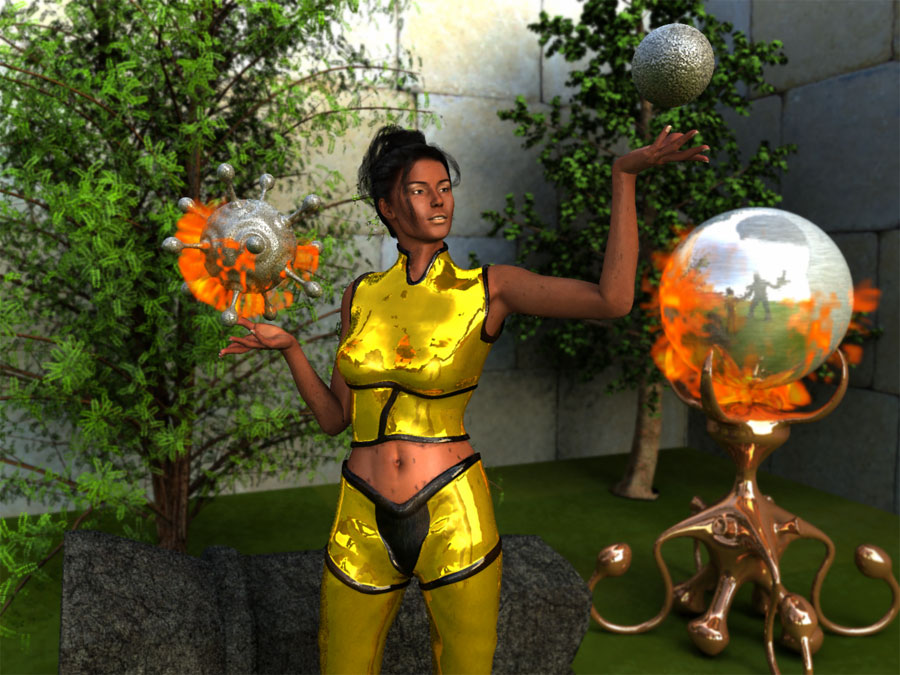
Really sorry to be such a pita, but you guys are the best set of victi.... I mean help :)
Wanted to show my latest render, this time, I used 1 spot light for the character, and excluded all other objects. It casts no shadows, w/ a medium intensity of 65%.
Disregard the flaws in the image, Im only practicing :P
Anway, there is a serious difference in the render quality from an image using a light source and 1 thats not... Ive been comparing smaller thumbs, and even at a small size the images "look" can be easily detected. Also, I am finding that the actual hdr thats being used makes serious impact on the final render. It shows up on the reflections, and becomes like a ghost in the background (I just didnt notice before :P). I DONT like it when a light is used. Something changes to the "look", and thats the whole point of this...
Anyway, this image, I got those blotches on here skin, Im understanding now to turn interpolation OFF... Close, but no cigar :(
Back to the lab................................
There are 3 kinds of people in the
world. Those that can count, and those that can't..
nomuse posted Fri, 10 November 2006 at 1:22 PM
I have to say...you are asking for trouble trying to light the image presented. A dark-skinned character in a shiny reflective yellow outfit? As a lighting designer, I shudder at the difficulties imposed by that. (Of course right now I'm trying to light another one of those shows where the thoughtful set designer gave me bright yellow walls. Sigh. Well, at least it isn't white.)
MatCreator posted Fri, 10 November 2006 at 3:52 PM
You have to admit nomuse, that the light was/is necessary, judging from the 1st pic of that character... I really wish I didnt have to use lights, its a serious arbitration from the goal of hdri, changes the "look" dramatically...
Actually, I "found out" that the lighting culprit is indeed the actual image of the hdri. If you look closely, you can see the image reflected off the sphere. Its as tho its an "unfinished clip", and even at the top of it it seems to have been "cut off"... I did go around and download about 100 or so hdri, LOL, but that will take time to go thru them all. Still, the lighting from the hdri is only coming from 1 direction (it seems? from the top right going in that direction (down to bottom left?)) and not going all around...
More to come... I know were cramming alot of info in this 1 little thread, I couldnt expect to cover all the ground, but guys, Ive come a long way in such a short period of time, thanks for all the help :)
There are 3 kinds of people in the
world. Those that can count, and those that can't..
nomuse posted Fri, 10 November 2006 at 4:03 PM
Um... by "light" I mean the sum total of all adjustments you make to bring out the specific look you are after; including lights, HDRI maps, skydome, render settings, et al. As a theatrical lighting designer, the problem I see with an outfit like the one you are using, is that it draws attention away from the face. It is tough to find ways that bring out the face but don't make the bright yellow even more distracting. Among the theatrical techniques I use are; lavender tints on lights (which mute colors), spots directly on to the face, use of hair light and side light to help isolate the figure from the background and frame the face. In the 3d world, you also have some other possibilities; including even creating a special "punch" light that is set to only "see" the character and ignore the rest of the scene. Simpler options are to make the skin tones lighter or add some glow to them to help them stand out, and muting the colors and blurring the reflections on the outfit.
ShawnDriscoll posted Fri, 10 November 2006 at 4:33 PM
Quote - Anway, there is a serious difference in the render quality from an image using a light source and 1 thats not...
I always say that lighting makes up 50% of your final scene. The other 50% is the shaders you use on your objects. Shaders can be light-friendly or not at times. They can help light bounce around in your scene (sometimes too much though), or they can impair its use in a scene. Your scenes can only become amazing when a balance is achieved between your lights and shaders.
MatCreator posted Fri, 10 November 2006 at 4:59 PM
I think I do ok :)
Seems to me, at least from all this so far, is that there is lighting, and then there is lighting an hdri scene... I cant really pin down the lightsource, and its not as easy to manipulate compared to "just lighting a scene"... Alot of finagaling to be done w/ the hdri map that Im not accustomed to.
Thats why Im here :)
There are 3 kinds of people in the
world. Those that can count, and those that can't..
ShawnDriscoll posted Fri, 10 November 2006 at 8:22 PM
There is a program called hdrshop (I think) that lets you view your HDRI files so you at leasts know where the brightest spots on it are so you can place it around your scene for better lighting/shadowing in your renders. If I use HDRI, I add just one distant light if I don't have one already. The distant light (set at around 50-75% brightness) will add some nice highlights to your scene and strengthen your shadows. Set your light's shadows to soft if shadows become to harsh.
MatCreator posted Sat, 11 November 2006 at 3:50 AM
I actually tried moving the hdri "around" but wasnt able to get it where I needed it to be for full effect. Im positive that the lights are taking away from the deired "look"... I did set it to flip horizontally, and when I did do that, the enitre scene became too dark. I set to tile and as seamless, still not getting the light right.
Outside of flipping and tiling, how else can we better manipulate the hdr to fit/light our scene?!?
There are 3 kinds of people in the
world. Those that can count, and those that can't..
MatCreator posted Sat, 11 November 2006 at 7:56 AM
Attached Link: http://www.renderosity.com/mod/gallery/index.php?image_id=1325605
Ok guys, 1 finally worth posting...First off, a huge thanks to all of you, your help was great :) I learned alot, and learned I have a lot to learn :P But I should be "ok" for now I suppose... Manipulating HDRI's seems to be the next thing I need to get into (not really changing the hdri maps, rather the settings of them).
For this set up, I used TWO distant lights, each was set up at the sake position of the camera, and made to point at each character individually. The lights also exclude all other objects, and again, no shadows on them... Still, 65% intensity as last time... I turned the photon count up to 200,000 as shonner suggested, and UNCHECKED interpolate...
As I moved scene elements around a bit, I can see that the light is stronger in the back, coming in from the top right (see the shadows of the stones/rubble?!?) It also gets stronger as it goes to the right, thats visible from the wall that was moved back behind the temple and extends past the camera.
I dont have a prolem w/ the contrast of the character and her clothes, Im fine w/ it as is...
Ok guys... I have your names and addresses, phone numbers and ss#'s if I need anything from you...
LOL :P
Peace and cheese grease fellas!
Thanks!
There are 3 kinds of people in the
world. Those that can count, and those that can't..
nomuse posted Sat, 11 November 2006 at 2:36 PM
Not bad at all. I'd still, for dramatic reasons, put a light to the (viewer's) left and behind the figures, to fill in and define that edge and add some interest to it...and to help them "pop" from the background. But it sounds as if you are getting comfortable with lighting in Carrara now.
ShawnDriscoll posted Sat, 11 November 2006 at 6:39 PM
Looks like a powerful third light is in the scene off to the right. Or that part of the scene is not as immune to light as the rest of the scene is.
MatCreator posted Sun, 12 November 2006 at 5:10 AM
Attached Link: HDRI Image
Third light nope... thats what i didnt get. Mind you, this is the hdri scene included w/ C5, so that hdri map is the one that loads w/ the scene...Anyway gang, I was finally able to achieve the "LQQK" and Im very pleased :)
I took a plain scene, loaded a regular figure, and started testing different hdri maps... Actually, I was using SmashMouths, and just found 1 that worked well, lighting the scene from all angles evenly and smoothly. I then remembered the bit about scaling... VERY IMPORTANT!!! The figure loaded in at around 6 inches... I changed my preferences to feet, and rescaled the character to "real world dimensions"... Note *** NOTHING *** loads in at the right size, LOL!!! which I see now will be a serious pita for future composing, but hey... Anyway, I noticed how the backgrounds of the hdri maps would "fit" better to the scene... A street scene in the background looked light my character was in a street. Pretty cool, lol. Still, I hate it :P Popped in my own backdrop, and took it from there. NO LIGHTS :) None. I did boost up the intensity of the hdri map, but thats it...
Outside of my having left on the depth of field option (I use it as a preview "thang"), I think the image came out pretty good, and am re-rendering to fix the few errors.
Again, thanks guys, much appreciated :)
There are 3 kinds of people in the
world. Those that can count, and those that can't..
MatCreator posted Sun, 24 May 2009 at 2:35 PM