Welcome to the Poser - OFFICIAL Forum
Forum Coordinators: RedPhantom
Poser - OFFICIAL F.A.Q (Last Updated: 2024 Apr 24 9:07 am)

Subject: Attempt at reducing Koz hair speculars in P6

- 1
- 2


You surely reduced it, but I still clearly see the painted highlights in your test shots. I tried this a while back as well. I also tried manipulating the texture itself in photoshop.
In all my results, like you, it was still possible to see the painted highlight. Its just TOO STRONG to get rid of.
I finally concluded that, MAYBE, another 20-30 hours in the shader room could get it better, but that it would take less time to just make a brand new texture for it, from scratch. When I tried, of course, the results were crap.
I know we can't look a gift horse in the mouth, but I wish Koz would make a texture without the white stripes. I'm sure he could do it in an hour, from his original textures.
I've stopped using Koz hair because I spend HOURS getting the skin and lights as good as I can and then have the Koz hair just ruin the whole effect of realism. The only option is to design your lights to match the hair.
Sigh.
Renderosity forum reply notifications are wonky. If I read a follow-up in a thread, but I don't myself reply, then notifications no longer happen AT ALL on that thread. So if I seem to be ignoring a question, that's why. (Updated September 23, 2019)


 **
**
My aspiration: to make a decent Poser Render I'm an Oldie, a goldie, but not a miracle worker :-)

Hey Jeremy,
This is what I came up with.
-The peach color rids us of grey
-Noise simulates cuticle. Adds details, and lowers contrast.
- Decrease value and texture strength the soften contrast while keeping detail.
hope that helps,
-Anton
Hey, I did that image too. hehe. I was just going to go look for the one you posted. witht he red and yellow. Thansk Shiela!
Jeremy that math fuction in my post can control contrast and brightness. Great thing about the material room is the many different ways you can do things.
AKmaterialroombookmark
-Anton, creator of Apollo Maximus
"Conviction without truth is denial; Denial in the
face of truth is concealment."
bm
My aspiration: to make a decent Poser Render I'm an Oldie, a goldie, but not a miracle worker :-)
Related threads including this one.
Normalizing Highlights with nodes
http://market.renderosity.com/mod/forumpro/showthread.php?thread_id=2643355&page=1
Making Black Hair a new color with nodes
http://market.renderosity.com/mod/forumpro/showthread.php?message_id=2385752
Changing Yuki's red hair into Brown with nodes
http://market.renderosity.com/mod/forumpro/showthread.php?message_id=2384534
-Anton, creator of Apollo Maximus
"Conviction without truth is denial; Denial in the
face of truth is concealment."
Thanks Anton! I started playing with this since noticing a face_off image where the speculars on the hair didn't match his lighting. I'm just a bit more familiar with the color ramp node than the hsv node. Unfortunately, the settings I posted with the hair node somehow affect the transparency. I have no idea how since the two were not remotely connected.
Anton, do your settings work with blonde hair as well?

Just wondering...
Most (if not all) of the tutorials I've seen for creating trans-mapped hair seem to start from creating a texture in Photoshop/PSP/whatever to define the strands, then adding highlights and transparency later.
If any of these merchants/freebie providers (Koz is a freebie provider, and for that alone I admire him, not to mention the quality of his work, which is excellent) still have the intermediate (strands only) stage available, then they could be VERY useful (assuming they were grey-scale)
1: Almost any colour could be applied to them.
2: The grey-scale could be utilised as a slight bump/displacement map to give the hair some depth (to alleviate the "helmet" effect).
3: Then specular should start to show some effect (showing up where relevant...).
- In P5/6, the shader nodes could use this map in a lot of ways...
My "Just Wondering" does of course rely on the possibility that the various providers still have these intermediate bitmaps and whether they would be willing to share them...
If they're not available, maybe there's a niche market there? From someone who knows WTF they're doing (as opposed to myself)...
Cheers,
Diolma
Hair should be done now through greyscales or blondes. But it sounds radical and scary to some. But with nodes you can make any hair texture greyscale.
I did blondes for Wild and Messy (WAM) and all the colores were off one texture. I loved it .
Your reasoning is sound. Getting it to be embraced though... still 2 years laer and it isn't happening.
-Anton, creator of Apollo Maximus
"Conviction without truth is denial; Denial in the
face of truth is concealment."

If you are very familiar with Koz's Long Hair Evolution, you should easily be able to see that the highlights have moved considerably. These renders were done with two lights, one front and high, the other from the left and low.
All the different colors were produced by changing only 3 parameters in an HSV node and occasionally a bias or gain value in my shader tree.
I'd give you the adjusted texture but that's not legal. But I can post how I did it and you can reproduce it yourself. Then you'll need my shader tree. Let me know if anybody wants more info.
Renderosity forum reply notifications are wonky. If I read a follow-up in a thread, but I don't myself reply, then notifications no longer happen AT ALL on that thread. So if I seem to be ignoring a question, that's why. (Updated September 23, 2019)
Preparing Long Hair Evolution
Make sure you have Kozaburo's Long Hair Evolution installed.
I found the textures in runtimetexturesKozaburo.
Bring the file long_evo_platina_tx.jpg into photoshop. We want this one because it will be easiest to remove the highlights from a lighter hair color than a dark one.
The background on this texture never shows up in the render, but it will unfortunately influence the following steps so we need to adjust it.
- Choose menu item Select/Color Range to bring up the dialog box that lets us select pixels of a given color range.
- In the Color Range dialog, set the Fuzziness to 20. (Other textures may need more fuzziness. For example, short bob needed around 40+)
- Click on the dark ground background in the picture to select that color. Don't click on the hair.
- Press OK to Dismiss the Color Range dialog
- Leaving the selection active, convert the image to gray scale by the menu item Image/Mode/Grayscale
- In the color picker palette, enter 25% - this should load a light gray into your tool.
- Hit Alt-Delete to fill the background with this light gray color.
- Clear your selection region by hitting Ctrl-D.
- Choose menu item Filter/Other/High Pass...
- In the High Pass dialog, enter a Radius of 15.
- Click OK on the High Pass dialog. The highlights are now gone.
- Choose menu item Image/Adjust/Levels...
- You should see a black peak in the middle of the Levels dialog. Press Auto to strengthen the contrast. If the lower bound is not tight with the group, move it up manually.
- Dismiss the Levels dialog by hitting OK.
- I prefer less grainy textures so I usually shrink the texture here. Select menu item Image/Image Size...
- Make sure "Constrain Proportions" is checked.
- Make sure "Resample Image: Bicubic" is checked.
- Enter a width of 1024. The height should adjust to 954 automatically.
- Dismiss the Image Size dialog by hitting OK.
- Use File/SaveAs to store this image in the same directory, but under the name long_evo_generic.jpg. Use Quality 10.
That's it!
You now have a texture from which we can make an infinite number of colors in the material room.
Renderosity forum reply notifications are wonky. If I read a follow-up in a thread, but I don't myself reply, then notifications no longer happen AT ALL on that thread. So if I seem to be ignoring a question, that's why. (Updated September 23, 2019)

Here's my shader tree. I used Anisotropic to get the broad, off-axis highlights characteristic of hair. I also used a specular node for straight-on highlights. You can adjust these to your liking and to match your light strength. The bias node next to the anisotropic node is strengthing the off-axis highlights. Raising the value increases the strength.
The Gain node under the clay controls how grainy the hair looks. Values around .1 give smooth, fine hair. Values around .2 to .3 give rougher, thicker hair.
The second value on the Add node (under the HSV node) can introduce more variation in the hair color. I used that to produce the rich Red hair with gold frosting.
Here are settings to use with this shader tree. (I tried to post a table but it doesn't work.)
Key: ColorName, Hue, Saturation, Value, and Special Settings
Auburn .8 .7 1
Black 1 .6 .2
Blonde 1 .6 1.3
Brown1 .8 1 .7
Brown2 .8 .8 .6
Brown3 .8 .9 .5
Brown4 .8 .9 .3
Copper .6 .9 1.3
Dirty Blonde .8 .7 1.1
Gray 1 .2 .8
Platinum Blonde 1 .4 1.4
Red .6 1 1.3 Set Adder under HSV to V1=.9, V2=.6
Silver 1 0 1.2
Strawberry Blonde 1 .9 1.3
Ultra Black 1 1 .1 Set the HSV Color to RGB=0,80,149 White 1 .2 1.6
Renderosity forum reply notifications are wonky. If I read a follow-up in a thread, but I don't myself reply, then notifications no longer happen AT ALL on that thread. So if I seem to be ignoring a question, that's why. (Updated September 23, 2019)


Diolma,
I'm no PSP expert but I think this is what you'd do.
- Use the "Magic Wand" tool to select the brown background.
- Menu item Image/Greyscale
- On the Materials tool, click the rainbow tab and choose grey 201,201,201
- Use the Flood Fill tool and click on the dark gray background - turns light gray.
- Ctrl-D to clear selection
- Choose menu item Effects/Edge Effects/High Pass...
- Enter a Radius of 15 pixels, hit OK
- Choose menu item Adjust/Brightness and Contrast/Levels
- Change the Input levels to around 97, 1, 160 , hit OK
- Choose menu item Image/Resize
- Switch to Pixels and enter 1024 in the width, hit OK
- Save it
Pretty much the same steps as for Photoshop, just different tools and menu item names.
Renderosity forum reply notifications are wonky. If I read a follow-up in a thread, but I don't myself reply, then notifications no longer happen AT ALL on that thread. So if I seem to be ignoring a question, that's why. (Updated September 23, 2019)

"Hair should be done now through greyscales or blondes. But it sounds radical and scary to some. But with nodes you can make any hair texture greyscale."
Hair "should" be done exactly the way each user preferrs. This has nothing to do with being scared or obstinacy like you so arrogantly assume, but different personal workflows and efficiency.
There are many ways leading to Rome, and some are actually faster than others.
Many thanks for the tutorial to delete the highlights in Photoshop, bagginsbill.
Worked like a charm.
But instead of wasting my time tweaking a gazillion nodes and waiting for FireSnail to finish a Render, I instead spent 1 minute turning the grayscale into a proper blonde texture in IrfanView , which does IMO a better job doing such simple things than PS. ;-)
stahlratte (LoTech is my middle name)

THANKS ALOT! PapaBlueMarlin, and bagginsbill! As you can see I too have been playin' around with the colour ramp technique before got P6: 
 I'm sorry they're old test renders, and soon I'll have something to shoot for! I always look forward to your tuts Bagginsbill! BTW, did I mention I LOVE redheads?
Quote - baggins, did you use the same color for each of those settings?
Yep - same color. It is the basic tone and works for any color human hair. I use the Hue and Saturation numbers to shift it around the color space.
Takezo - your "test" renders already look really good. Cool effects.
Renderosity forum reply notifications are wonky. If I read a follow-up in a thread, but I don't myself reply, then notifications no longer happen AT ALL on that thread. So if I seem to be ignoring a question, that's why. (Updated September 23, 2019)
Quote - > Quote - Takezo - your "test" renders already look really good. Cool effects.
Terribly sorry for the delayed "RE",But THANKS! I also love your new editions in your gallery! That was my first discovery of blinn! This was also my attempts to curtail the blasted "Highlights" found in most trans-mapped hair. Don't get me started on highlighted eyes,and skin tex!) ..The only problem with my earlier work, is that there's some graphical conflict where the transparancies clash with the regular text.. I'm still working on my skin mats as well...I've went through 20-30 revisions...I haven't even been uploading anything in my gallery, 'cause I'm so addicted to that blasted node-room! ;)
Is it just me, or does BB's Koz solution seem to lose the transparency that gives more realistic strands (as in Stahlratte's kid)? The multi-color Jessi picture looks to me like a woman wearing a shawl that's been razored into strips and silkscreened to look like hair. No disrespect to miracle workers, but is there something missing from the solution?
M
No it's not just you. However, the problem isn't what you think it is. The transparency has not been modified. The wierdness you see is because, having removed the painted-on highlights, the shader is calculating accurate highlights for the real light position and the geometry of the mesh. Unfortunately, the mesh really isn't done in a way that the strips lay along the same angle where they overlap. The strips are kind of bowed out, so as you go from one strip to the next, the angle changes a lot. You don't notice this with Koz's shader, because he painted the speculars and has the specular calculation turned off.
Which was the whole point of the exercise - how to get rid of the fixed, immovable, unrealistic painted on speculars and replace with real dynamic speculars.
The calculation of specular reflection, which is very sensitive to the angle of the surface, is producing very different results from one strip to the next in the same area because of the rounded shape and overall angles of the strips.
So it's not that great a solution I guess. Since I posted this, I've become much more capable with the shader nodes, and I tried a few devious tricks to get around the problem. But I can't find a way to make the anisotropic specular stop lighting the strips so glaringly. I can do it with the regular specular node, but it doesn't look hair reflections. The anisotropic shader node specifically simulates the broad blurry specular reflections produced by finely grooved surfaces. Without it, the reflections look like plastic reflections, not hair.
I suppose you could load the mesh into a modeling tool and flatten the strips so they aren't so round any more. That would fix the problem.
Renderosity forum reply notifications are wonky. If I read a follow-up in a thread, but I don't myself reply, then notifications no longer happen AT ALL on that thread. So if I seem to be ignoring a question, that's why. (Updated September 23, 2019)
Quote - Here's my shader tree. I used Anisotropic to get the broad, off-axis highlights characteristic of hair. I also used a specular node for straight-on highlights. You can adjust these to your liking and to match your light strength. The bias node next to the anisotropic node is strengthing the off-axis highlights. Raising the value increases the strength.
The Gain node under the clay controls how grainy the hair looks. Values around .1 give smooth, fine hair. Values around .2 to .3 give rougher, thicker hair.
The second value on the Add node (under the HSV node) can introduce more variation in the hair color. I used that to produce the rich Red hair with gold frosting.
Here are settings to use with this shader tree. (I tried to post a table but it doesn't work.)
Key: ColorName, Hue, Saturation, Value, and Special Settings
Auburn .8 .7 1
Black 1 .6 .2
Blonde 1 .6 1.3
Brown1 .8 1 .7
Brown2 .8 .8 .6
Brown3 .8 .9 .5
Brown4 .8 .9 .3
Copper .6 .9 1.3
Dirty Blonde .8 .7 1.1
Gray 1 .2 .8
Platinum Blonde 1 .4 1.4
Red .6 1 1.3 Set Adder under HSV to V1=.9, V2=.6
Silver 1 0 1.2
Strawberry Blonde 1 .9 1.3
Ultra Black 1 1 .1 Set the HSV Color to RGB=0,80,149 White 1 .2 1.6
modeled my hair in blender. it is not trans mapped. but just a prop basicly.
can i use those settings or is this only for transparency?
how could i use those settigns in the gammma correction shader? just copy the specular settings?
thanks
Quote - Preparing Long Hair Evolution Make sure you have Kozaburo's Long Hair Evolution installed.
I found the textures in runtimetexturesKozaburo.
Bring the file long_evo_platina_tx.jpg into photoshop. We want this one because it will be easiest to remove the highlights from a lighter hair color than a dark one.
The background on this texture never shows up in the render, but it will unfortunately influence the following steps so we need to adjust it.
- Choose menu item Select/Color Range to bring up the dialog box that lets us select pixels of a given color range.
- In the Color Range dialog, set the Fuzziness to 20. (Other textures may need more fuzziness. For example, short bob needed around 40+)
- Click on the dark ground background in the picture to select that color. Don't click on the hair.
- Press OK to Dismiss the Color Range dialog
- Leaving the selection active, convert the image to gray scale by the menu item Image/Mode/Grayscale
- In the color picker palette, enter 25% - this should load a light gray into your tool.
- Hit Alt-Delete to fill the background with this light gray color.
- Clear your selection region by hitting Ctrl-D.
- Choose menu item Filter/Other/High Pass...
- In the High Pass dialog, enter a Radius of 15.
- Click OK on the High Pass dialog. The highlights are now gone.
- Choose menu item Image/Adjust/Levels...
- You should see a black peak in the middle of the Levels dialog. Press Auto to strengthen the contrast. If the lower bound is not tight with the group, move it up manually.
- Dismiss the Levels dialog by hitting OK.
- I prefer less grainy textures so I usually shrink the texture here. Select menu item Image/Image Size...
- Make sure "Constrain Proportions" is checked.
- Make sure "Resample Image: Bicubic" is checked.
- Enter a width of 1024. The height should adjust to 954 automatically.
- Dismiss the Image Size dialog by hitting OK.
- Use File/SaveAs to store this image in the same directory, but under the name long_evo_generic.jpg. Use Quality 10.
That's it!
You now have a texture from which we can make an infinite number of colors in the material room.
i just wanted to post the high pass filter. and then i see that you already explained it.
http://unsharpmasked.com/blog/2008/08/photoshop-high-pass-filter-removing-wrinkles-in-fabric-part-2/
also very good for skin.
Quote - modeled my hair in blender. it is not trans mapped. but just a prop basicly.
can i use those settings or is this only for transparency?how could i use those settigns in the gammma correction shader? just copy the specular settings?
thanks
Transmapping doesn't change the nature of a material. It is just a trick to make a polygon shape into another shape by "removing" some of it with the transparency channel.
So of course you can use those settings (or any shader) on any sort of prop. It doesn't matter if the prop has the final shape already in the mesh or you further cut it up with transparency later in the shader.
As for gamma, insert a gamma anti-correction between the HSV and the Clay. (Raise to the Power 2.2) Then insert a gamma correction between the Color_Math:Add and the Alternate_Diffuse input. (Raise to the Power 1/2.2).
Renderosity forum reply notifications are wonky. If I read a follow-up in a thread, but I don't myself reply, then notifications no longer happen AT ALL on that thread. So if I seem to be ignoring a question, that's why. (Updated September 23, 2019)


Is this correct? There is no such thing as a "gamma" node. You're renaming a math_function node as "gamma" then adding 1 or 2.2.
And if that's the case, is a Gamma "anti-correction" subtracting the same amount?
I assumed yes and followed these steps but the results make the hair loose it's assigned color.
Could you show us the updated set-up with gamma correction?


Gamma correction isn't "Addition" its exponentiation (i.e. raise to the power for the non-mathmatical).
The function you want is "Pow" and the following node inputs/values :-
GC: Input1 <- the colour you want to correct.
Input2 <- 2.2
AntiGC: Input1 <- the colour you want to correct.
Input2 <- 1 / 2.2 (use a Math_Function node set to "Divide" with Input2 set to 2.2)
Make sure that you use "Color_Math" nodes for (Anti)GC calculations on colours ("Math_Function" nodes will change to greyscale, which probably isn't what you want).
This is all great information, but I'm one of those non-mathematical persons you refer to above.
I know how to find a "pow" node but not what to do with it after I find it.
Your above sample shows input2 <- 2.2 which I can only interpret as meaning to put the value of 2.2 in the input2 of my Pow node. However, that node does not accept numerical values.
Any chance of "seeing" the set-up in action? I understand it better when it's visual.
You use a Math:Add(2.2, 0) to make the number 2.2 and plug it into a color.
You use a Math:Div(1, 2.2) to make the number 1/2.2 and plug it into a color.
Renderosity forum reply notifications are wonky. If I read a follow-up in a thread, but I don't myself reply, then notifications no longer happen AT ALL on that thread. So if I seem to be ignoring a question, that's why. (Updated September 23, 2019)
Well that cleared it up :-o
Although I know how to add, subtract, divide and multiply, translating these functions into the Poser Material Room is still a little beyond my reach.
Here's how I interpret your instructions:
Okay I need to use a Color_math node in order to keep the color, but the values only accept colors and not numbers.
And that's as far as I get. I have no idea how to assign "numbers" to them.
If you guys don't want to give the answer away because you think I'm smart enough to figure it out for myself then I've got bad news for you: although I am a smart person, my brain does not work in the "brainiac" mode that your's does.
Once the instructions are spelled out to me or if I see it visually then I can reverse-technology and make sense of it. I don't have enough knowledge about all the nodes and their functions in order to think my way through this puzzle from the beginning.
Yet.
But thanks for trying anyway.
Quote - If you guys don't want to give the answer away because you think I'm smart enough to figure it out for myself then I've got bad news for you: although I am a smart person, my brain does not work in the "brainiac" mode that your's does.
OK But I'm on vacation in Paris and it cost me $12,000 to be here and I'm not spending time making pictures for you guys on my vacation. :-)
Somebody else knows how, I'm sure.
I'm saying that when a node wants a color, but you need a number, use a Math:Add node as if it were a simple number and plug it into the color where you need that number.
Renderosity forum reply notifications are wonky. If I read a follow-up in a thread, but I don't myself reply, then notifications no longer happen AT ALL on that thread. So if I seem to be ignoring a question, that's why. (Updated September 23, 2019)

Playing with Tequila hair. I'm embarrassed to show you the shader at this point because it's sure to be worked on some more... as with everything I do, I keep finding little, irritating issues. But, so far, at least the anisotropic is working... that highlighting is from scene lights. You'd laugh if you saw the colourMap... it's absolute rubbish: vertically motion blurred and heavily unsharp-masked noise. But it gave me what I needed... straight lines:
Oh, and everything has been gamma-corrected: skin, outfit... and I'm working on the hair.
Told you I'd be embarrassed to show you the shader for a reason. That's ONE reason.
Monterey/Mint21.x/Win10 - Blender3.x - PP11.3(cm) - Musescore3.6.2
Wir sind gewohnt, daß die Menschen verhöhnen was sie nicht verstehen
[it is clear that humans have contempt for that which they do not understand]
- 1
- 2
Privacy Notice
This site uses cookies to deliver the best experience. Our own cookies make user accounts and other features possible. Third-party cookies are used to display relevant ads and to analyze how Renderosity is used. By using our site, you acknowledge that you have read and understood our Terms of Service, including our Cookie Policy and our Privacy Policy.

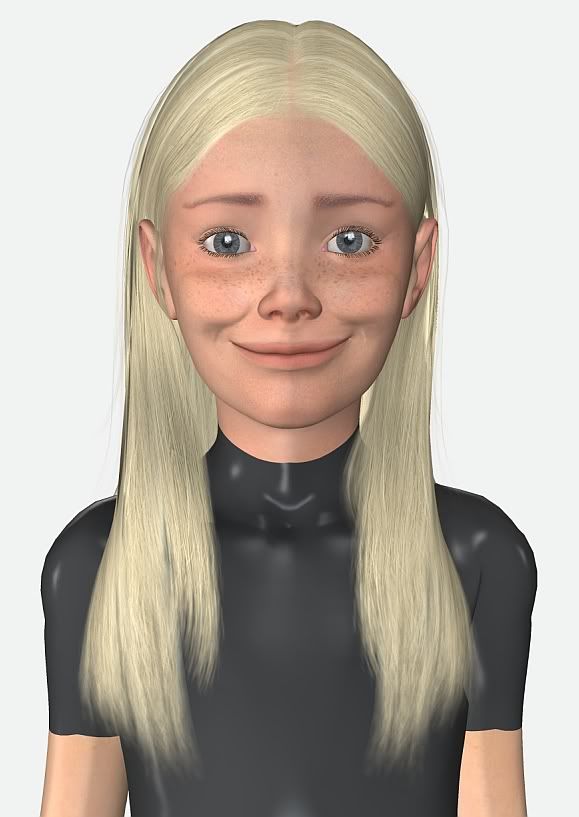
I've been toying with the idea of being able to change the speculars on Kozaburo's hair so that they respond the light in the scene and not look as painted. To accomplish this I played with the color ramp node.Here's the original brown hair is above...