
midinick opened this issue on Jul 23, 2026 · 3 posts
midinick posted Thu, 23 July 2026 at 4:13 AM
Hi everyone,
the freebie is finally online! 😊 ODF's Skin Shader for Poser 12, 13 & 14
The idea for this package started after ODF shared his Skin Shader here in the forum. Since I've been using it myself for quite some time and really like it, I asked him if I could package it as a freebie for the community. He kindly gave me permission.
Everyone is, of course, welcome to continue developing the shader and share their improvements with the community. I think it would be amazing if this eventually grew into a real community project with even more variations than we already have. Wouldn't that be cool? 😊
During the project, hborre not only adapted the original shader for Poser 12 and Poser 14, but also created a completely enhanced version using Compound Nodes. I'd like to thank him once again for all the time and effort he put into it. It's truly amazing what he created! 😊
My own contribution was putting the package together, creating the documentation and help images, and getting everything ready for release.
I thought I'd write a short post explaining the different material variants and sharing a few tips on how I use them.
Each version contains three different material presets.
• Skin with Voronoi
This version uses a Voronoi pattern to create subtle skin detail. Personally, I think it gives a very natural look, especially on the face and torso.
• Skin with Bump Map
This version uses a traditional bump map. Simply replace the included placeholder bump map with your own in the Material Room.
• Skin without Bump Map
If you don't have a bump map—or simply don't want to use one—this version automatically generates the bump effect from your diffuse texture.
I already showed some comparison renders in the Gallery, but I wanted to briefly explain which variants I used.
For my renders I used:
I personally prefer the Bump Map version for the lips, although I reduced the bump strength slightly so they wouldn't appear too rough or dry.
ODF's Original Shader
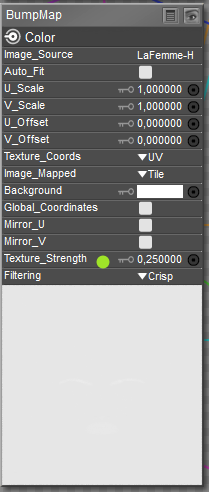
Simply reduce the strength of the bump texture to your liking.
hborre's Enhanced Shader
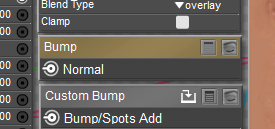
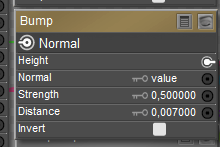
Open the "Bump" node and reduce the Strength value until you're happy with the result.
Default = 1
ODF's Original Shader
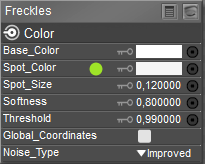
In the Freckles or Moles node, simply change the lower color to pure white.
The node is surprisingly sensitive. Even a very light gray—which still looks almost white to the eye—will already produce visible freckles or moles. 😊
hborre's Enhanced Shader
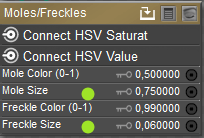
It's even easier here. Just set the Size value in the corresponding node to 0, and the freckles or moles will disappear completely.
Poser 13 and 14 only
I think most of the fun comes from simply experimenting and seeing what the different settings do. 😊
I just wanted to share a few small tips to help you get started.
I'm still learning myself and certainly don't know what every single node does, so if questions come up, I hope the community can help out. Together we'll probably figure it out. 😄
Have fun with the shader! 😊
Disclaimer: My English is held together with coffee, good intentions... and ChatGPT. 😄
I originally wrote this post in German and used ChatGPT to translate it. If anything sounds a little odd, feel free to ask!