Danny_G opened this issue on Oct 04, 2015 · 5 posts
Danny_G posted Sun, 04 October 2015 at 7:11 PM
Forum has been very quiet lately I thought I might share a quick tip on downloading and using Digital Elevation Data in Terragen 3. In this tutorial I will be using the Pro version of Terragen, the Enhanced DEM format support functionality I will be using is available in all versions of v3 including the free version, that said you might see some additional options in my screen shots that you do not have if you are using creative or the free version just disregard them.
First step: Find a location you want to work with. Google Earth is a great way to explore potential areas. Perhaps its an area you recently visited or want to visit. There are many sites on the web that have free data, many of which are located in our Terragen Faqs page here in the forums https://www.renderosity.com/mod/forumpro/?forum_id=12398&show_faq For this bit I will be using USGS Viewer site as there's no account required, the resolution is very good and its free http://viewer.nationalmap.gov/viewer/ Once you chose a location you can either search the map using the coordinates (Lat/Long) or by simply searching using a area for example Grand Canyon, for this example I chose a section of Wyoming USA. Been to Wyoming very beautiful area full of vast valleys and great peaks and mountains, perfect for TG ;))
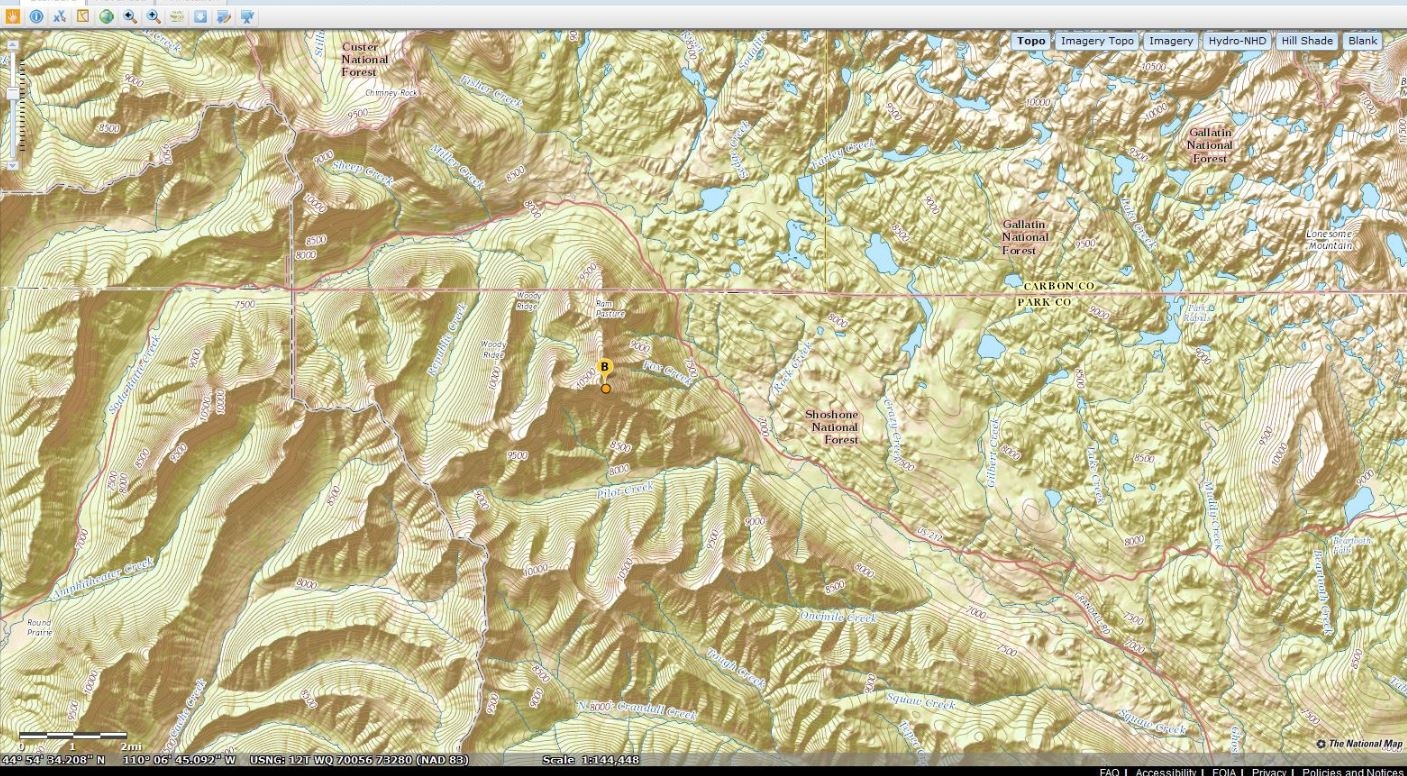
Next I am going to use the download by bounding box tool to select the area I would like to download


You will then be prompted a variety of downloadable data. I am selecting Elevation Data products which will show me only Elevation data. For users using The Geo-Map referencing this is where you would select your overlays. That will be covered in another tutorial at a later date
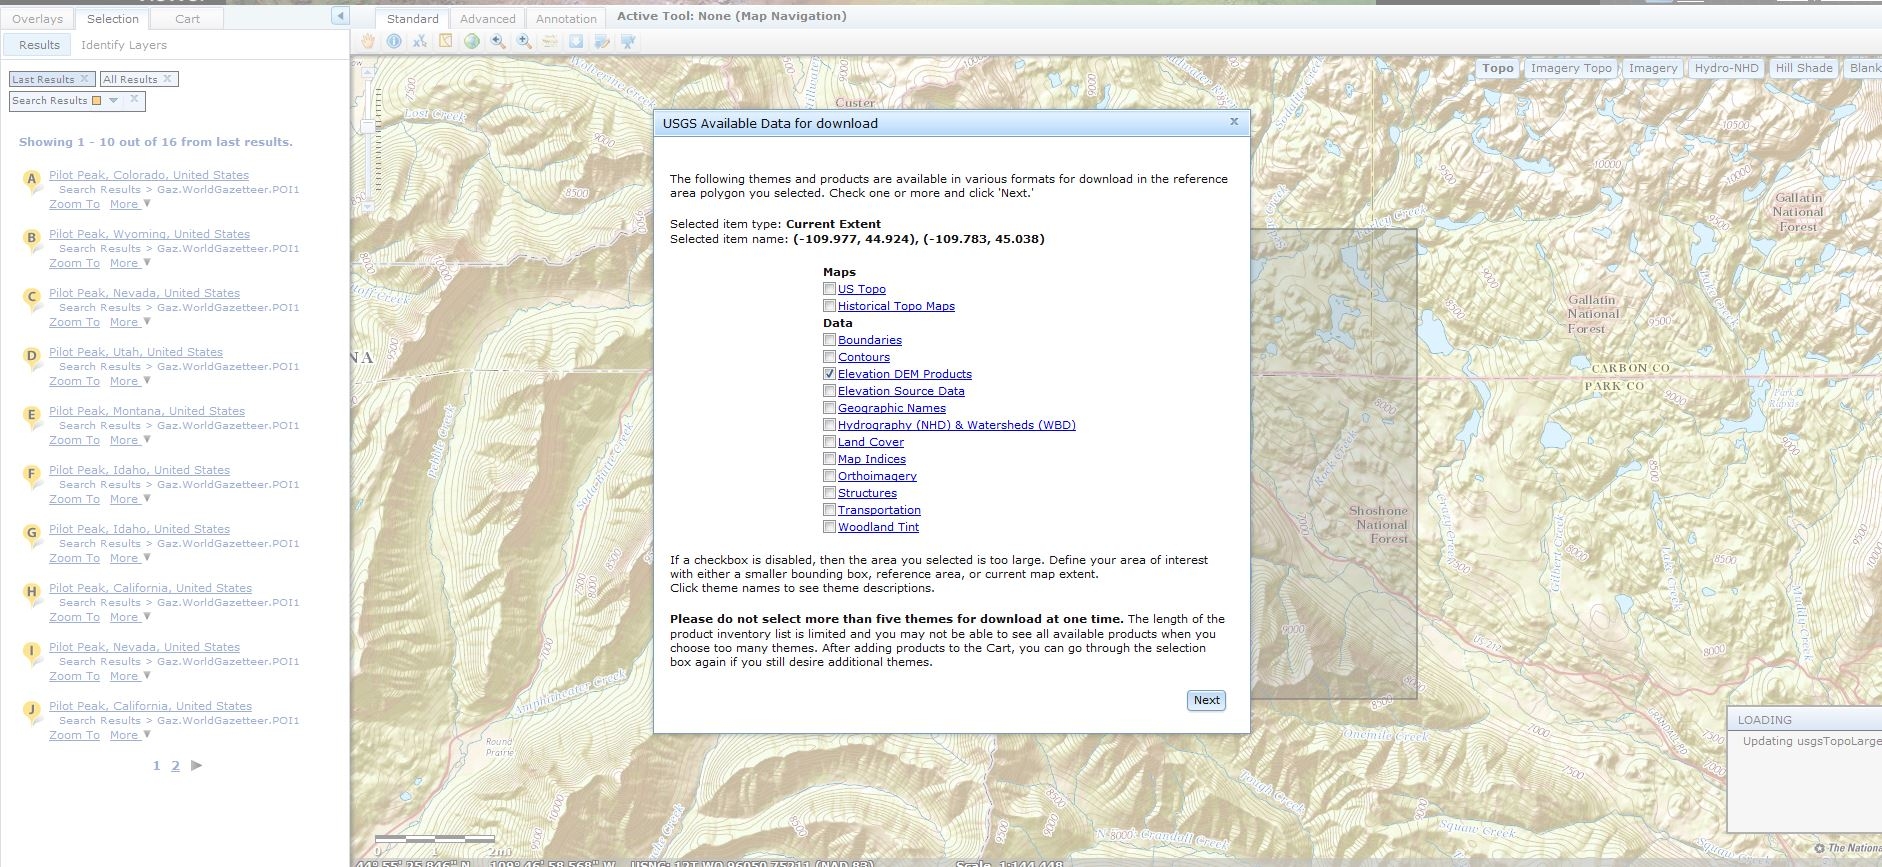
Hit next than Select Checkout, You will then be required to enter a valid email address to receive your download links. Receiving your links takes a few mins. Once you get your email its pretty straight forward click the link and download the data's zip file.
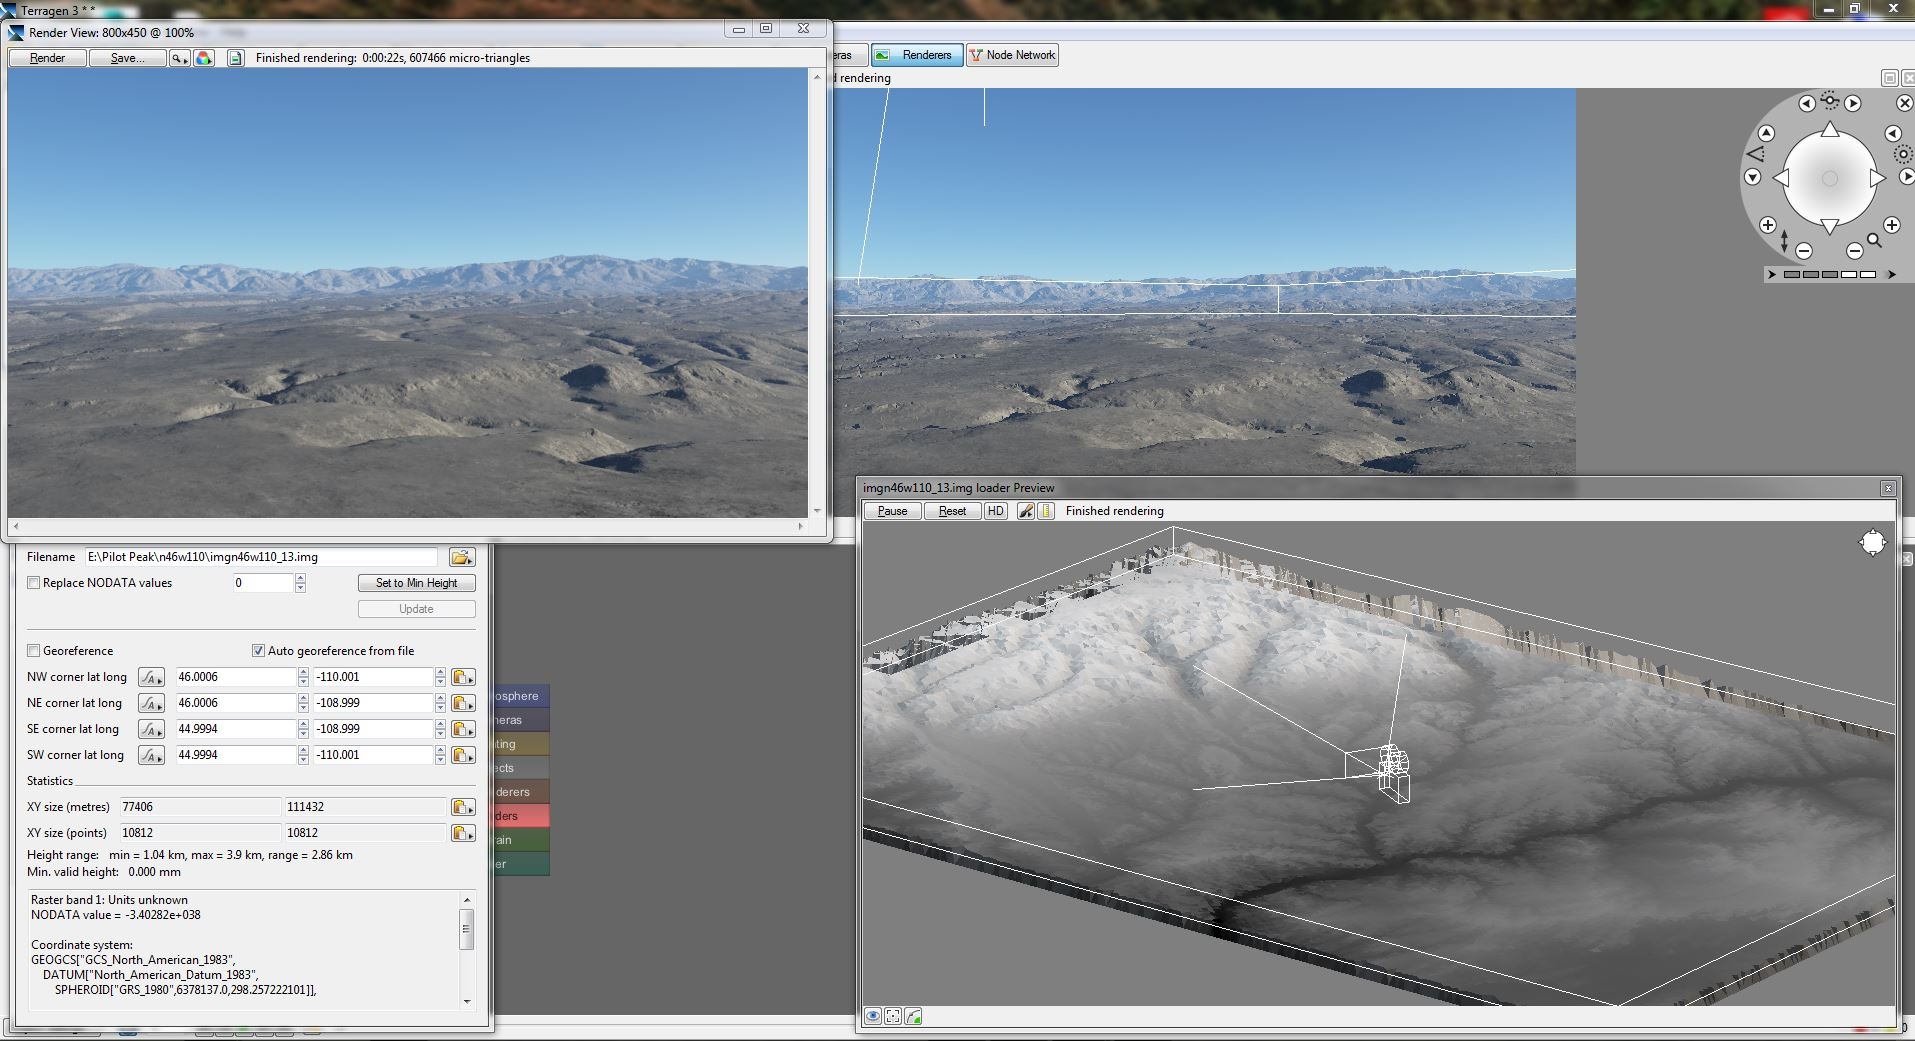
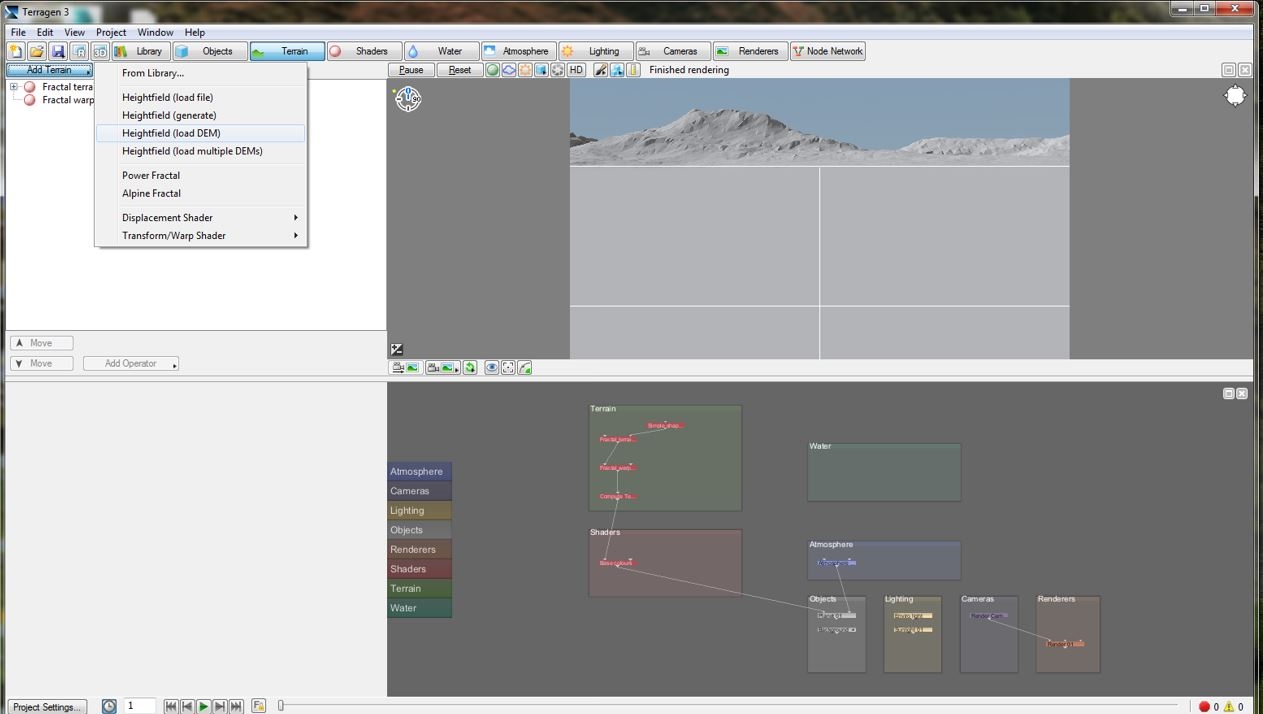
Open up Terragen, go to the Terrain tab and Load dem
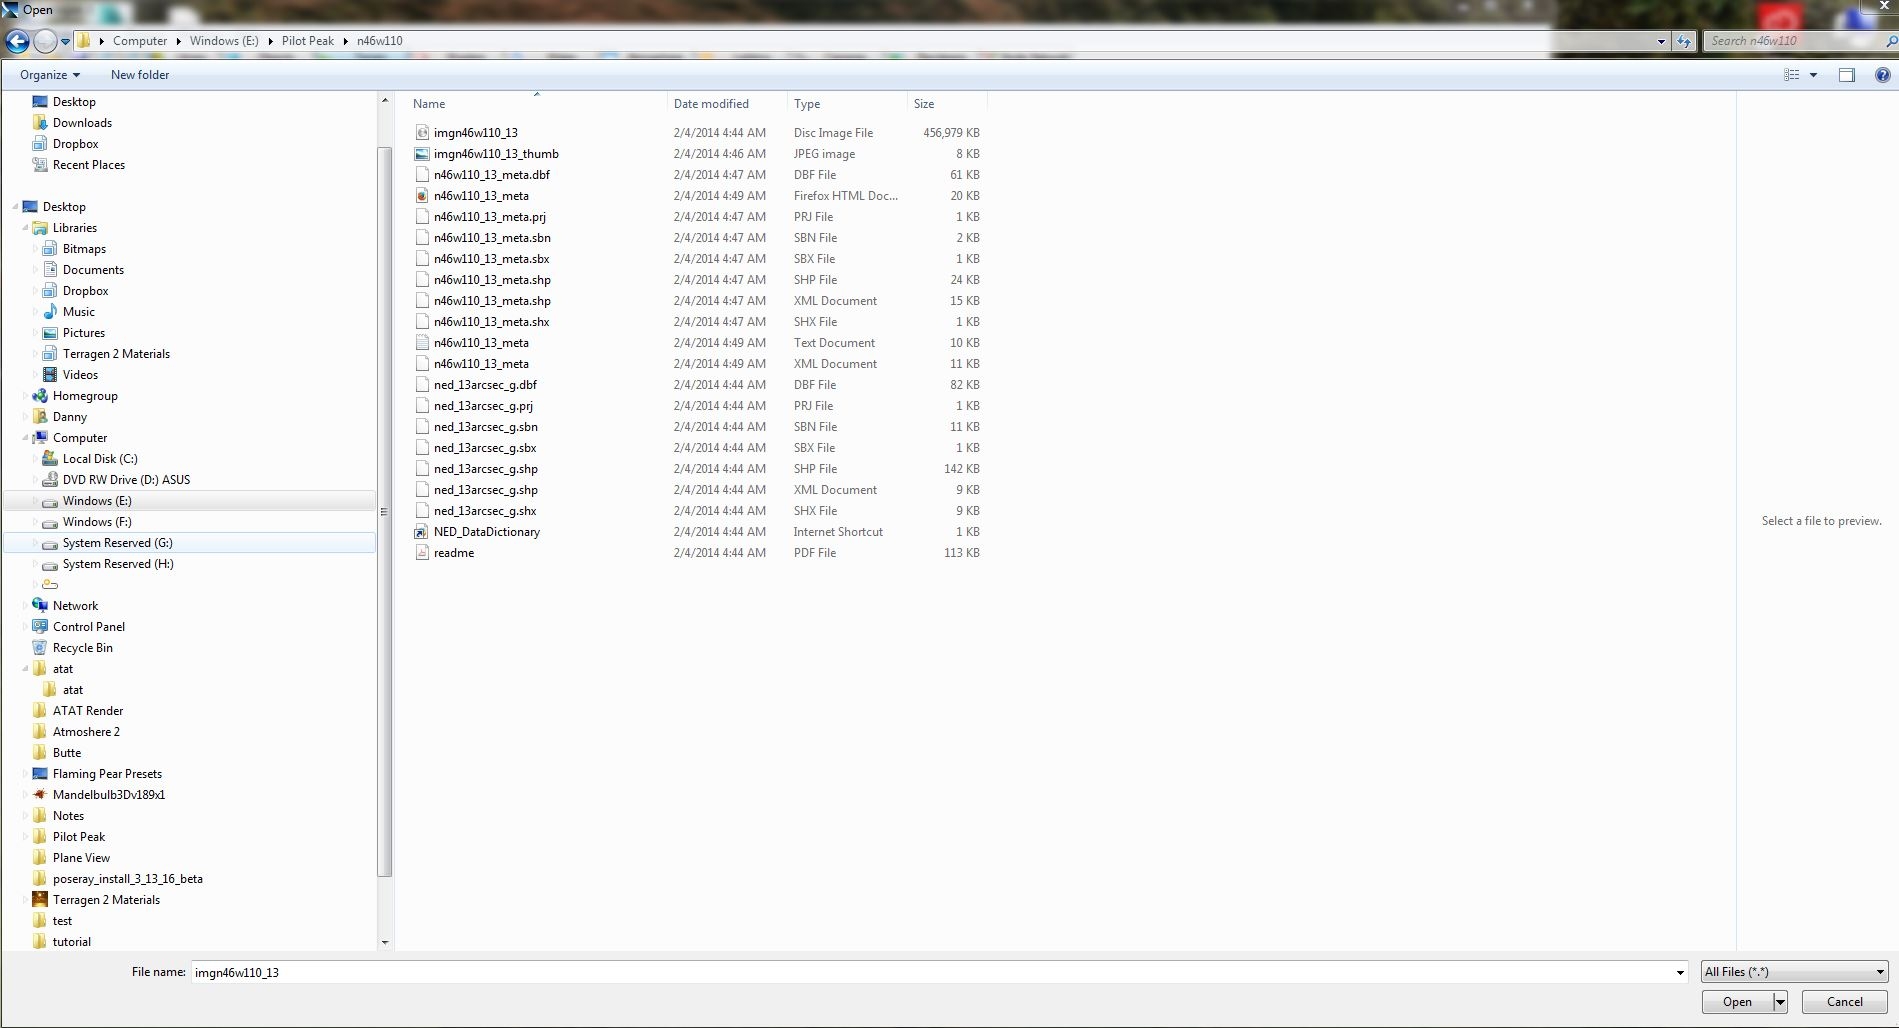
Navigate to your downloaded content and load the dem. This particular dem is in img format. You can disregard all the other meta data files.
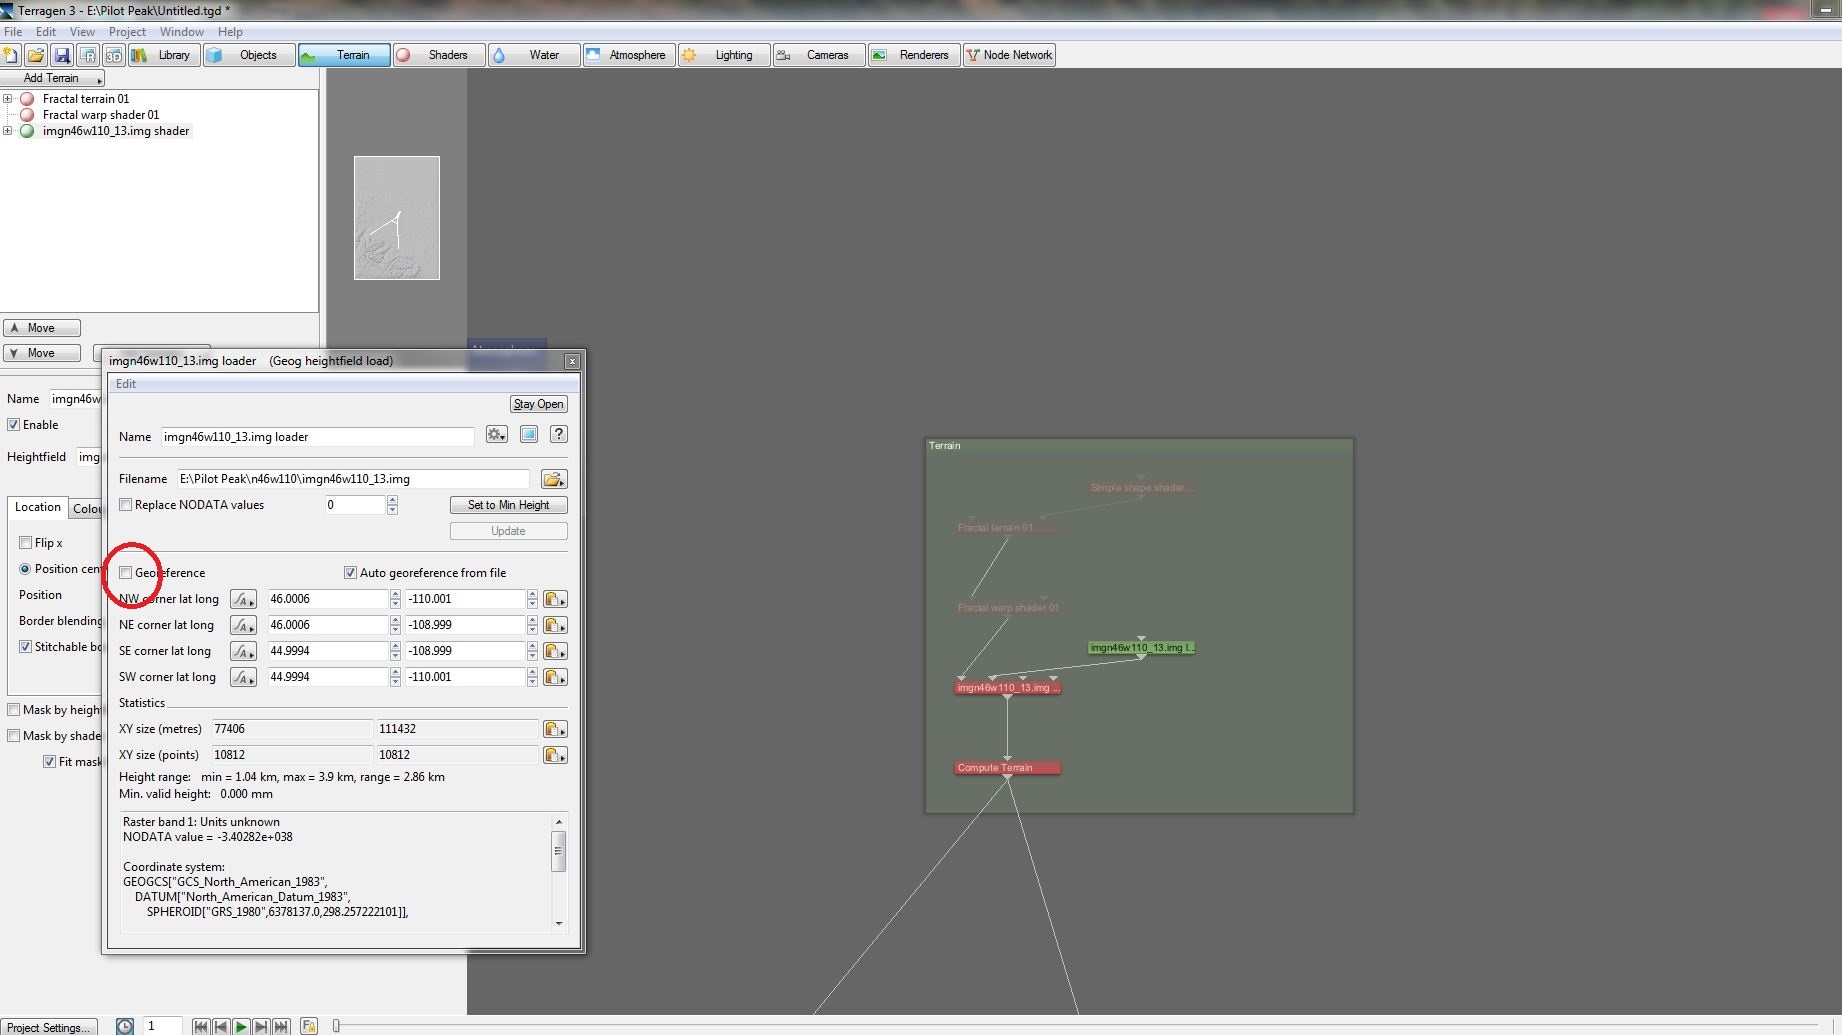
Ok depending on the version you are using you may or may not be able to see the terrain in the 3d preview. If you cannot that's because TG has Geo Referencing set by default, this means it will place your terrain on the actual Lat and Long coordinates on your global model. To work with Geo Referencing "on" you will need to navigate to your terrain, just Right click on the 3d preview Go to "Center on object or Shader" than select the terrain files name. Your camera will than be moved to the area where your terrain sits on your global model. This is necessary when working with multiple data sets or Geo-Image Mapping. For this mini tutorial I will just uncheck GeoReferencing and the terrain will be placed in front of the default cameras position as any other loaded height field data.
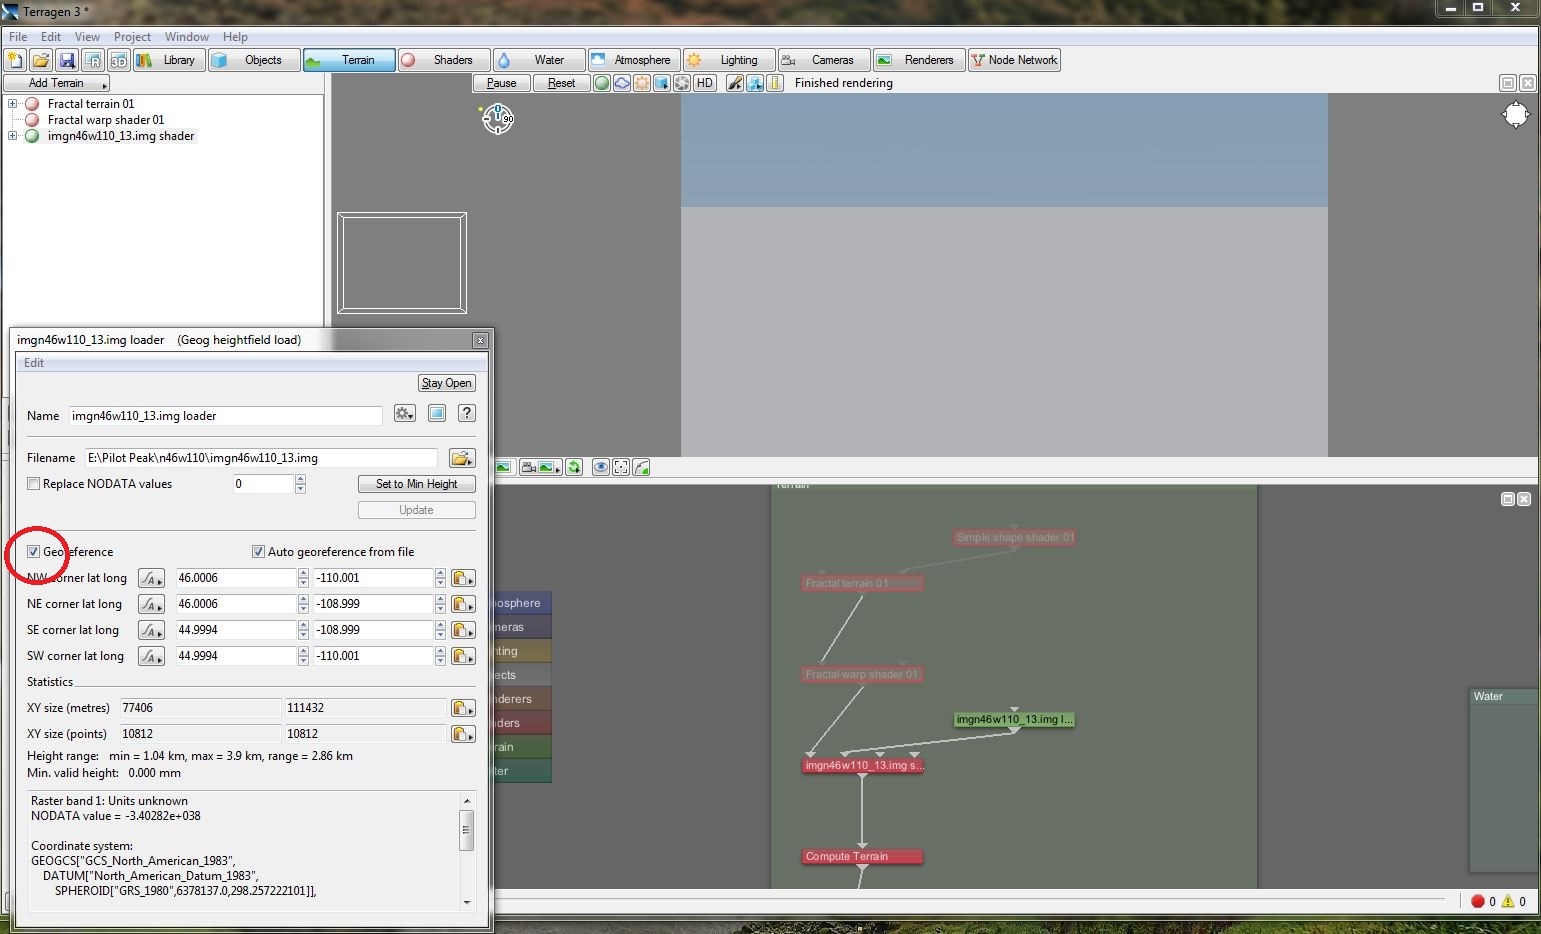
Unchecked
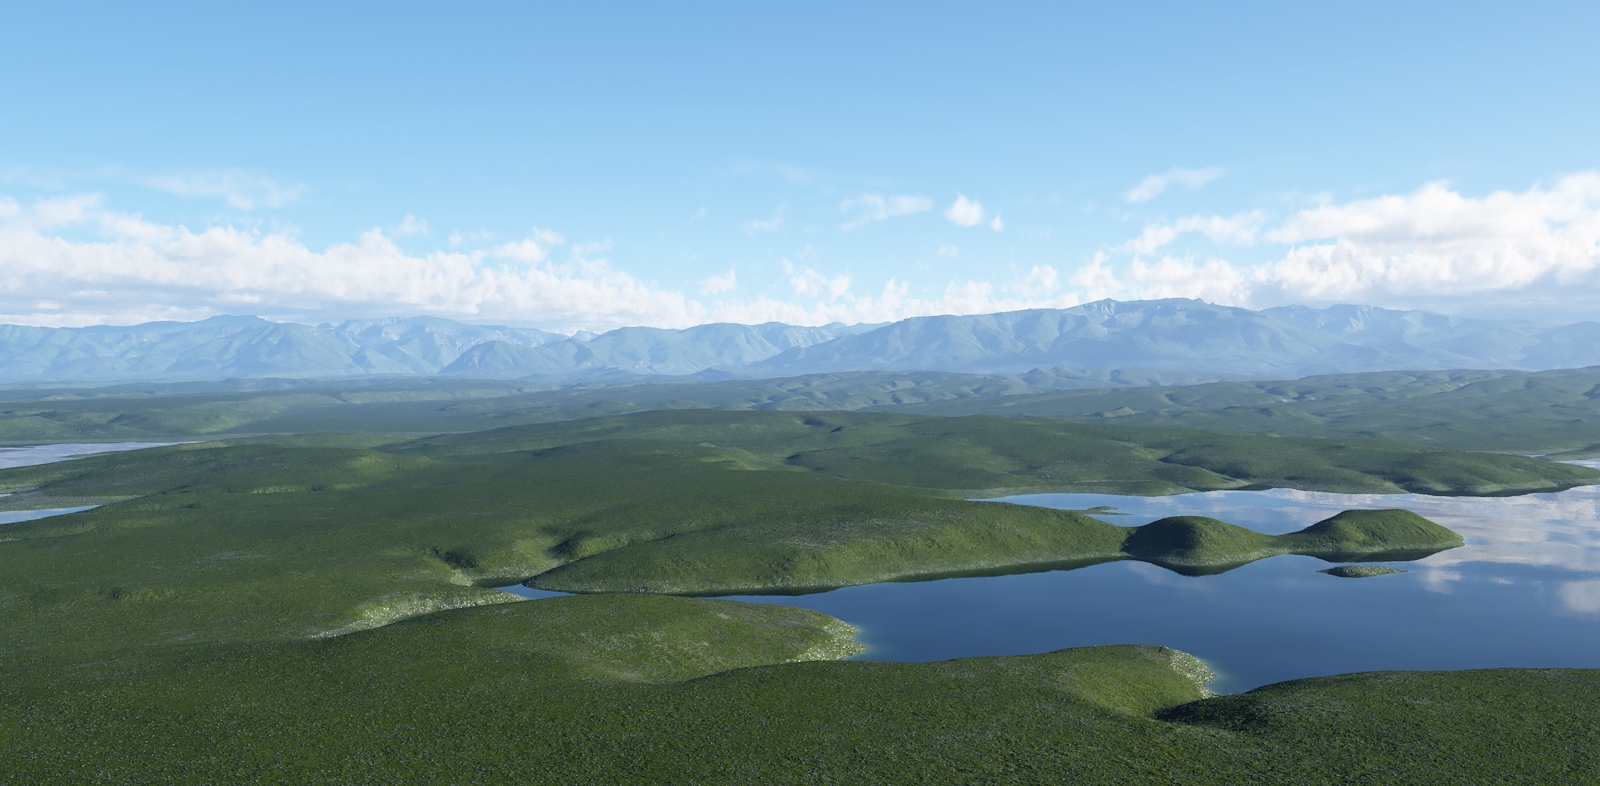
Ok, now you are able to start getting set-up and rendering.
Danny_Gordon
New World Digital Art
Danny_G posted Sun, 04 October 2015 at 7:13 PM
Danny_G posted Sun, 04 October 2015 at 7:16 PM

AndyWelder posted Mon, 05 October 2015 at 6:10 AM
Wow, quite a tutorial! Bookmarked for future reference. Thank you very much, Danny!
AndyWelder
Groetjes uit Eindhoven!
Send
IM::Send
Email

ladylake posted Mon, 05 October 2015 at 9:19 AM
Thanks, will try this when I finish a render I have going.