
Kixum opened this issue on Dec 19, 2010 · 17 posts
Kixum posted Sun, 19 December 2010 at 4:09 AM
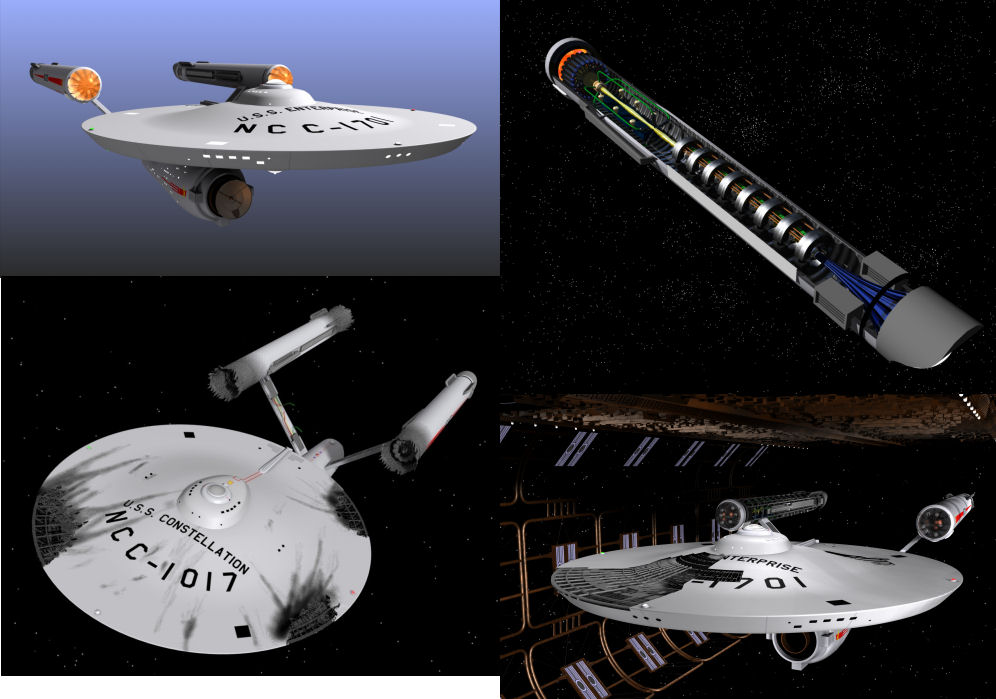
Day 1.
(Primary assembly of parts).
This day was pretty straightforward as I had to collect several components from other projects into this one.
The first thing to do was to go and find the latest version of the Enterprise that I have. This was a little more of a trick than I had realized as I have updated several versions in different files. Eventually though I compiled the latest version and copied it into a separate file for manipulation.
Then I pulled up an old model I made for the engine internals. This was done a long time ago and had some raydream components.
I got rid of the outer casing I originally built for that model and constructed a whole new outer frame and ribs resulting in what we see in the final render. I learned in this process when comparing to my latest model that I do have a small taper in the engine case which I had thought I had missed. The real model (meaning the actual real model of the Enterprise in the Smithsonian) has more tapered engines than mine but I'm glad I do include that detail (albeit too subtle). The engine case was built in Amapi and I left that program in the US in storage on accident when I moved to Japan so I can't fix it now. I really regret it too because the secondary hull was also made in Amapi and I'd really like to do some major work on it. Carrara can't handle it and I'm really skeptical that Hexagon can deal with what I want. Maybe, we'll see, I'm a big chicken when it comes to learning Hexagon (why I don't know since I paid for it and all).
Then I went to my Constellation model and collected all the ribbing and internals I built for the primary hull copied them into the Enterprise model. The Constellation stuff was textured to look burned and damaged so I fixed all that to look nice.
Then I brought all that stuff together. I copied the primary hull mesh which is a spline object, converted it to a vertex object and removed several panels. Then I copied this new starship model into a new file with my new drydock model and that was the first day (took about six hours or so which included a lot of test rendering and model updating and organization).
-Kix
Kixum posted Sun, 19 December 2010 at 4:11 AM
I also changed some of the smaller parts on the drydock model as I thought some of the original stuff was a shade silly (yeah, I know, I built that model only four days ago and I'm not happy with it!). Fooled around with the blue panels some but I'm still not happy.
Re-textured the starship primary hull completely and re-did all that paneling. The original thing I did with the paneling was just too much so it needed work. In addition, I did some manipulation of the internal decking and dialed it. Adjusted the lights a lot by adding some additional target helpers and spread them out some. I also adjusted their angles and falloffs a LOT. I built a frame for the starboard engine pylon and added conduits to the pylon internals.
-Kix
Kixum posted Sun, 19 December 2010 at 4:11 AM
-Kix
Kixum posted Sun, 19 December 2010 at 4:12 AM
Day 3
The model and render is really coming together now it's time to get into the details and get done! I have a deadline for this render which is December 22nd. December 23rd starts my Christmas break and I have a recent tradition to uphold. For the last two years I have devoted my Christmas break to some big Carrara project. Millenium Falcon - 2008. Snowspeeder and At-At scene - 2009. This year will be a new Star Destroyer model! Anyway, I have to get this thing done by then (can't cut into the schedule for crying out loud!, this is a SERIOUS hobby!, how else am I going to get stuff done?).
So I started a list of things to finish. Here's what I did on day 3.
-Kix
Kixum posted Sun, 19 December 2010 at 4:13 AM
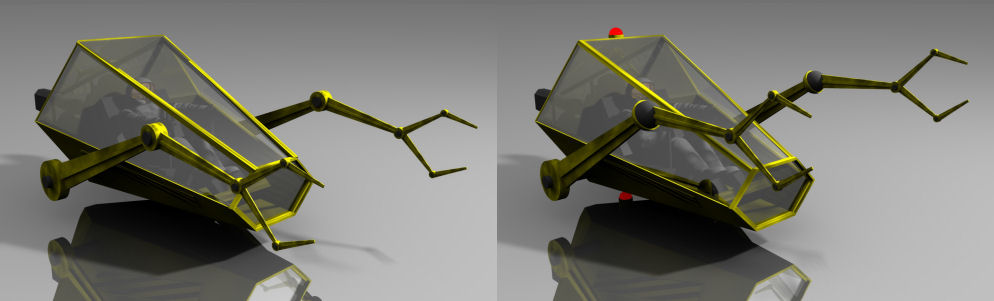
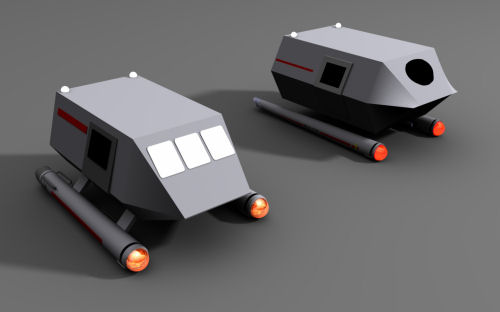
Review the checklist.
In addition, this whole beast is lit using only spotlights and one distant light (and now some bitty little bulb lights in the primary hull and I'll put in some beensy little blue lights for the welders). The point is that there is no GI in this thing so far. I kind of like it. The lighting in space would be sort of harsh and I think I have enough lights to fill in cracks and crevices so I think I'm just going to leave it as is and no GI (weird since I haven't rendered a final image without GI in about 4,000 years).
-Kix
Kixum posted Sun, 19 December 2010 at 4:15 AM
Day 5
Review the Checklist
-Kix
Kixum posted Sun, 19 December 2010 at 4:18 AM
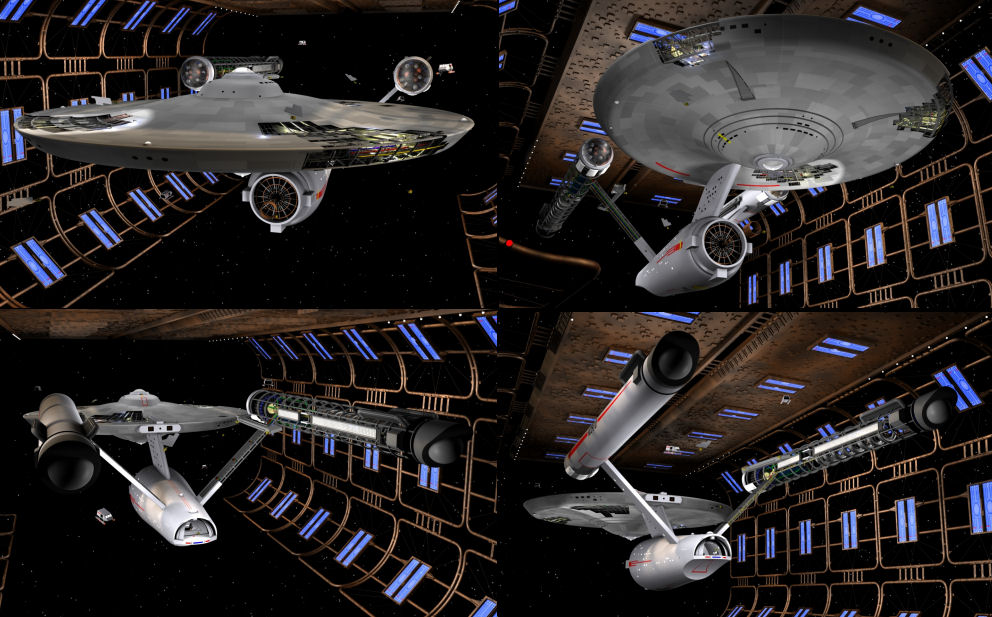
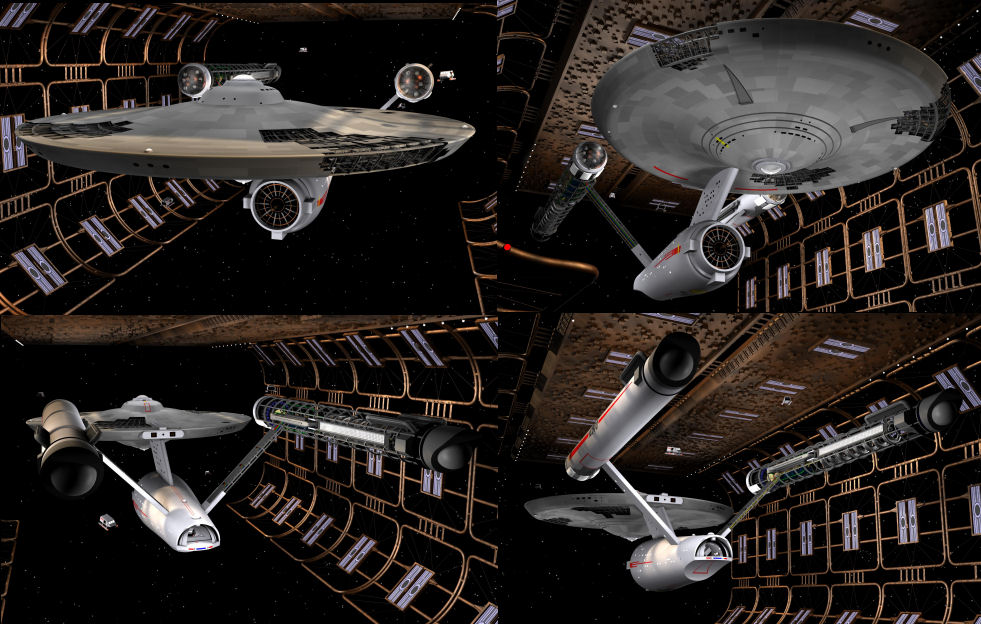
So I finished up all this stuff and ended up with what I'm thinking is really close to final. I started new renders yesterday which are 6000 pixels wide. They're taking about 10 hours each so it's going to be a little while before we have results.
The collection of images you see here are different points of view for the final image. Came out fun!
-Kix

GKDantas posted Sun, 19 December 2010 at 6:27 AM
Great tutorial, if you want can you post it at CarraraLounge.com please?
Follow me at euQfiz Digital

Klebnor posted Sun, 19 December 2010 at 3:31 PM
Man, great work, Kixum.
Klebnor
Lotus 123 ~ S-Render ~ OS/2 WARP ~ IBM 8088 / 4.77 Mhz ~ Hercules Ultima graphics, Hitachi 10 MB HDD, 64K RAM, 12 in diagonal CRT Monitor (16 colors / 60 Hz refresh rate), 240 Watt PS, Dual 1.44 MB Floppies, 2 button mouse input device. Beige horizontal case. I don't display my unit.

ShawnDriscoll posted Mon, 20 December 2010 at 4:50 AM
If you did the Polygon version of Amapi (not the NURBS version) then Hexagon is a cakewalk to use. But you've probably been told this over the years already.

Plutom posted Mon, 20 December 2010 at 9:47 AM
Kixum, I agree with Klebnor, outstanding detailing. Everything in the scene is superb. Jan
Kixum posted Mon, 20 December 2010 at 5:15 PM
No doubt that using the vertex side of Amapi is essentially what Hexagon became. However, my focus for Amapi was completely nurbs and that's what I was modeling in.
Nurbs works for my tiny brain. That's why I'm such a HUGE spline modeler in C. The spline modeler is almost a nurbs modeler.
-Kix
ShawnDriscoll posted Mon, 20 December 2010 at 9:33 PM
Ok. I'm building a train right now using NURBS in Amapi Pro. It was the only way I could get the shapes I needed. Moi is helping me out with some of the fillets. I have ViaCAD Pro 6 for NURBS, but its interface is all wack. Amapi's is way better.
But yah, Hexagon's polygon method would be kinda foreign.
Kixum posted Tue, 21 December 2010 at 1:18 AM
There's a really aggravating reality when modeling something that's real (or something that everybody super duper recognizes).
It's the fact that you have to get the dang thing correct down to some pretty severe details. Another perfect example is to model a real car. There are a LOT of curves and shapes in a car and people know them in their heads. Another way to say it is that people can look at a model and know if it's right or not. They may not know what exactly is wrong with it but they know it's not right.
I don't think you can use a poly modeler to get really good results for objects which have components where the curves are important. Details for fillets or chamfers and straight parts cutting into curved parts need to be done really well for a good model.
I think nurbs can serve those purposes easier than poly modeling. I'm not saying poly can't do stuff but I think nurbs can do curvy or complex shapes easier. It's really clear when I finished up the secondary hull on this model. I told Amapi how tight I wanted the mesh and it provided me a product which had gobs of detail where things changed angles a lot and less detail where it didn't and bang, perfect!
You can do that in poly but you have to work at it harder to get it to look good. Plus I just cannot figure out how to draw nice even clean smooth profiles in Hex for curves and such (can it even do that?). It seems like you have to put in vertices for every single thing. I haven't tried it yet so I'm really overstepping my bounds here. Someday, I'll dig into it. Bottom line, I don't know how to draw a nice smooth even curve in Hex and have the surface flow out of it like you can in the spline modeler or like you can in Amapi.
Need more vertices? Just up the settings and whap, it's all taken care of and you didn't have to manage the mesh at all. That's beauty to me! Expressing a model in terms of surfaces rather than mesh is far more dynamic for my modeling thinking process. It's truly a personal limitation for me which is aggravating.
-Kix
ShawnDriscoll posted Tue, 21 December 2010 at 1:33 AM
Hexagon does not allow for the super accurate line profiles as Amapi does. SubD modeling is a matter of hitting the smooth button until things are smooth. In Amapi, a curve is always going to be curve they way you want it. Plus Amapi has the much better snapping of points and lines.
No boolean is worth using in Hexagon.
As far as modeling something in Hexagon that people won't say does not look right... Don't try to model a well known car or person the first time to you use the program. Model an unknown person or car. I have to use Amapi Pro if I'm modeling something everyone has seen a million times.
Some people can do exact modeling with SubD. They take a hit in poly count though. The positive is that they can then add dings to their model using modo or ZBrush by painting them in, since the model is hi-res enough.

drawbridgep posted Tue, 21 December 2010 at 7:57 AM
Quote - There's a really aggravating reality when modeling something that's real (or something that everybody super duper recognizes).
It's the fact that you have to get the dang thing correct down to some pretty severe details.
I'm hearing you on that one. Which is why I do a lot of "In the style of" Gives you a little more room to play with.
This is a great image. I like the one looking at the ship from below. Gives a real sense of size.
Kixum posted Tue, 21 December 2010 at 8:58 AM
I learned a whole bunch of other stuff for this render.
This image has 7,646 objects, 122 shaders, and 49 lights. Now 2000 of those objects are the blocks in the ceiling of drydock so I don't think those really count. That means that I beat 5,646 objects into this image. The details of the image show and that makes it one of the better images I've rendered.
I've been watching the orignal star trek show while working on all this stuff and the new version of the show which they released a few years ago shows off the Enterprise from below quite a bit. I think they do this for a couple of reasons.
1.) I agree with you that it makes the ship look big (coolness).
2.) There's more shapes and angles and stuff to see from that angle.
3.) It's a view point that we never saw in the original show because of the way the model was mounted limiting the camera angles. So I think the CG guys for the re-worked show wanted to make sure that angle got the attention it deserves.
4.) I've rendered this model (and the many incarnations of it) about a zillion times and I've always thought this view from the back and below gave the model the best sense of size and depth (don't know why but that's how it seems).
I'm already working on my next version of the model (posted an image of it in the 3D Modeling forum). I'm kind of getting tired of always wanting the model to be finished so I think I'm just going to beat it into submission and do everything to it that I can while I'm stranded here without Amapi.
The ultimate would be to actually cut out the holes for the windows and model the internals but there's absolutely no way I would even consider that without Amapi.
Two more days and I'm going to be fully engaged on the Star Destroyer so the Enterprise will have to go back in the box for a little while.
-Kix