
riko200 opened this issue on Nov 28, 2005 · 5 posts
riko200 posted Mon, 28 November 2005 at 9:48 AM
Just installed version 4 and am trying to work my way around. Have discovered nothing I do in the spline object tool works. Or rather that should be shows. When I open it in the assemble room it is just an empty box with the x,y,z handles. Have followed the tour instructions religiously and still nothing. The metaball and the vertex seem to work all right, just the spline. Anyone have any suggestions Please?
sailor_ed posted Mon, 28 November 2005 at 1:13 PM
Try to do something really simple: Start a new empty scene. In the assemble room select the spline tool and click somewhere in the scene. The spline room should open. Click on the button with the square on it and drag a square on the vertical "drawing plane". You should get a rectangular object. Now go back to the assemble room. You should see the rectangular object where you originally clicked. If it doesn't work, post a screen shot of your assemble room and your spline room.
riko200 posted Tue, 29 November 2005 at 8:06 AM
Thanks for the info. The vertical 'drawing plane' works fine, it is the left plane I can't get to show up. The vertical plane seems to leave me with only soildly filled objects. According to the instructions, as I understand them, it is the left hand plane you have to use for making open objects. Don't really understand why this is happening, aggg. And I haven't really started playing with metaballs!
sailor_ed posted Tue, 29 November 2005 at 8:54 PM
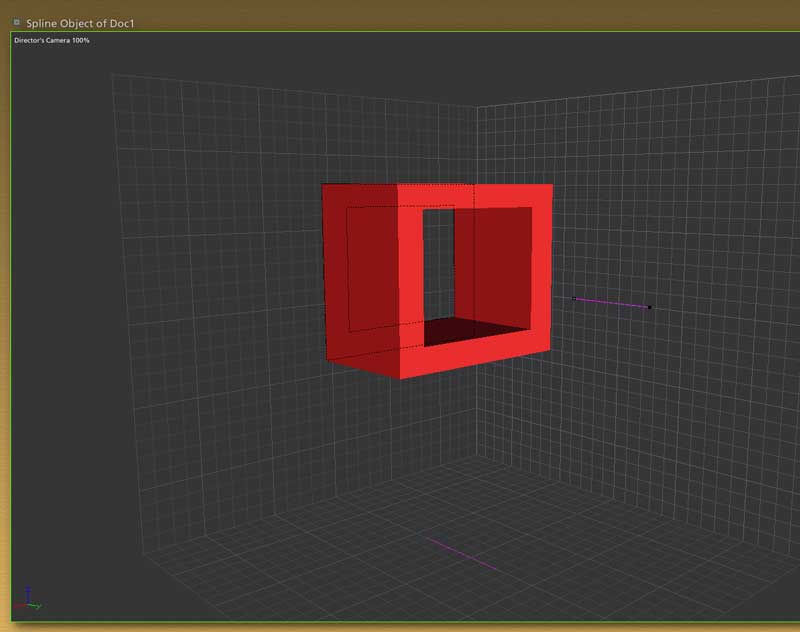
As for metaballs...leave them for later! ;-)

sparrownightmare posted Sat, 03 December 2005 at 9:42 AM
Another way to do it is with the pen point tool. It looks like a the tip of an old fasioned fountain pen and sits next to the node modify/add/subtract tools. Using the left drawing plane, use this tool and click at every point you need to to define the outside area of the desired shape. Make sure you click back on the first point you created to complete the shape. After that deselect all these nodes with the selection arrow tool. Now grab the pen tool again and define the interior hollow area you wish to have, just like you did the exterior. Afterwards do a CTRL-A to select all of the nodes in the object, go up to the arrange tab at the top and from that drop down menu select combine as compound. I use this procedure extensively on my models since I hate the vertex modeler and I can do most of my objects this way. You can even define parts of the object to be hollow or not, which is very useful for some onjects like goblets and cups for example. You simply create new cross sections and dont put in the interior points. Good luck.