
Sydney_Andrews opened this issue on Dec 02, 2003 · 39 posts
Sydney_Andrews posted Tue, 02 December 2003 at 9:23 PM
Welcome to the Poser 4 to Carrara 3 tutorial. The following steps are what I use when rendering a Poser scene in Carrara. Word on the net is that there is a plug in development to handle this sort of operation, but until then, I will do it this way. Im sure there are other ways of reaching the same goal, some use the grouper tool, but I have had a rather unsuccessful attempt at it. Others do not. If that seems to work for you, by all means, go for it. When setting up your scene, remember where your texture files are, you will need to reference them later. So here we go.
Sydney_Andrews posted Tue, 02 December 2003 at 9:24 PM

Sydney_Andrews posted Tue, 02 December 2003 at 9:24 PM

Sydney_Andrews posted Tue, 02 December 2003 at 9:24 PM

Sydney_Andrews posted Tue, 02 December 2003 at 9:25 PM
Fig 04 Select a location for you Obj file and give it a name. Remember where you save it.
Sydney_Andrews posted Tue, 02 December 2003 at 9:25 PM

Sydney_Andrews posted Tue, 02 December 2003 at 9:26 PM

Sydney_Andrews posted Tue, 02 December 2003 at 9:26 PM

Sydney_Andrews posted Tue, 02 December 2003 at 9:27 PM

Sydney_Andrews posted Tue, 02 December 2003 at 9:27 PM

Sydney_Andrews posted Tue, 02 December 2003 at 9:28 PM

Sydney_Andrews posted Tue, 02 December 2003 at 9:28 PM

Sydney_Andrews posted Tue, 02 December 2003 at 9:29 PM

Sydney_Andrews posted Tue, 02 December 2003 at 9:29 PM

Sydney_Andrews posted Tue, 02 December 2003 at 9:30 PM

Sydney_Andrews posted Tue, 02 December 2003 at 9:31 PM

Sydney_Andrews posted Tue, 02 December 2003 at 9:31 PM

Sydney_Andrews posted Tue, 02 December 2003 at 9:32 PM

Sydney_Andrews posted Tue, 02 December 2003 at 9:32 PM

Sydney_Andrews posted Tue, 02 December 2003 at 9:33 PM

Sydney_Andrews posted Tue, 02 December 2003 at 9:33 PM

Sydney_Andrews posted Tue, 02 December 2003 at 9:33 PM


mateo_sancarlos posted Tue, 02 December 2003 at 10:21 PM
I think you did a great job on this. Your method for the upper-eyebrow material is one option, but you might also consider using the head texture as a transparency map.
Sydney_Andrews posted Tue, 02 December 2003 at 10:41 PM
Yes, there are other options, Ill try that one. Thanks. Just a note that "Fig 16" is incorrect. In the picture, I should be editing the "UpperEyebrow" and not "eyebrow" as shown in the picture. Thanks again, E
PAGZone posted Wed, 03 December 2003 at 3:53 PM
This is great and would make an excellent tutorial for the Carrara section, here on Renderosity and possibly for the Carrara Back Room. Excellent job. This makes it tons easier then other tuts I have read on the subject. Most of the others use grouper, which is not available on the Mac. Your tutorial is Mac friendly too! Thank You! regards, Paul

GabrielK posted Thu, 04 December 2003 at 8:16 PM
Cool. I'd normally point people to the tutorial at castironflamingo but this one is easier to follow and won't confuse people w/o Grouper. :)

Graviton posted Mon, 08 December 2003 at 3:46 AM
Thanks, This makes it all nice & simple, running Grouper on a Mac in virtual PC is a pain in the virtual A**. Because of the Macs handy Print-to-PDF feature I have saved this as PDF. Cheers, Grav.
Anytime I see something screech across a room and latch onto someone's neck, and the guy screams and tries to get it off, I have to laugh, because what is that thing?

agiel posted Mon, 08 December 2003 at 10:24 PM
Attached Link: http://www.renderosity.com/viewed.ez?galleryid=555043&Start=1&Artist=agiel&ByArtist=Yes
Nice tutorial to follow. I followed the same approach to make this picture (see the link), although I did not know about the tutorial beforehand. I picked up a couple of tricks here that I will surely apply next time. Thanks
mateo_sancarlos posted Tue, 09 December 2003 at 7:37 PM
Nice work, agiel. I see you used the upper eyebrow transmap, too.
biggert posted Fri, 12 December 2003 at 11:30 AM
thanks Echo! that looks a lot easier than my current technique using grouper. thanks again!! =) this tut is going under my bookmarked pages
InfoCentral posted Sat, 20 December 2003 at 7:15 PM
Thanks to my handy Adobe Acrobat 6 Pro I was able to simply save your tutorial using the standard print to PDF printer. Thanks, I'll have to give this a try.

RAMWorks posted Fri, 02 June 2006 at 3:06 PM
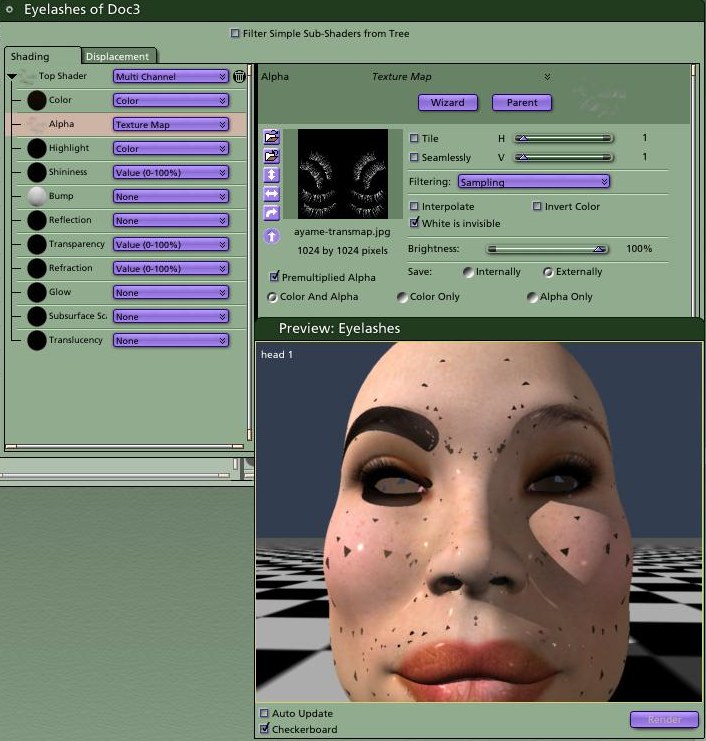
I have trouble getting the meshes eyebrows to become invisible as the eyebrows are painted onto the texture already!!
HELP??
Thanks much
Richard ;-)~
---Wolff On The Prowl---
RAMWorks posted Fri, 02 June 2006 at 3:08 PM
A screen shot for the eyebrows was not done but this is just showing what my layout looks like in the Edit room and I really would love to know what I need to do to make the eyebrows that are part of V3 invisible so the texture map mapped to the main face mesh can show through properly!
Thanks again
Richard ;-)~
---Wolff On The Prowl---
RAMWorks posted Sat, 03 June 2006 at 12:56 AM
Thanks
Richard ;-)~
---Wolff On The Prowl---

perfectude posted Sat, 03 June 2006 at 1:52 AM
Thank you this is very helpfull even out of poser..
"Luck comes and goes...Knowledge Stays Forever!"
Jennifer
Sydney_Andrews posted Sat, 03 June 2006 at 2:32 AM
RAMWorks posted Sat, 03 June 2006 at 1:10 PM
There are so many settings. Not sure what you need to see??
Raytracing
(unchecked)
Full Raytracing
Gamma Correction
(checked)
Shadows
Reflections
Refraction
Depth of Field
Bump
Transparency
Light through Trans
I have 3 lights in the scene, I have only one of them checked for shadows and have Soft Shadows checked in the Effects tab set to Fast
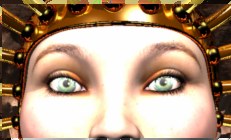
Let me know if there are any other settings you need in order to get this as optimized as possible. I don't mind a slow render if it's for the full on render but the "spot" render is really taking allot of time as I think it works off of the current settings for full rendering. It took about 10 minutes to get that little screen capture I posted!
Richard ;-)~
---Wolff On The Prowl---
Sydney_Andrews posted Sun, 04 June 2006 at 1:49 AM
Soft shadows will slow the render down. I never turn them on until I actually render. When you want to do a spot render, i would turn the settings down (soft shadows, GI, AO and such). E
RAMWorks posted Sun, 04 June 2006 at 2:10 AM
Thanks so much for the tips!! :-)
All the best
Richard ;-)~
---Wolff On The Prowl---